The master bathroom… I have never been known to be a procrastinator, nor am I known to shy away from a challenge, however our master bathroom seems to be an exception to both character traits. Our master bathroom is the last untouched room in our home. Reason being, it is a HUGE undertaking not to mention it is a big investment! It took us nearly 5 years and the help from The Home Depot to light that fire!
Now that it’s done, I can’t believe it took me this long to take the plunge, the end reward is WELL worth the effort.
While I am so excited to show the finally reveal allow me to take you through a brief review of the steps we took in order to achieve our dream bathroom.
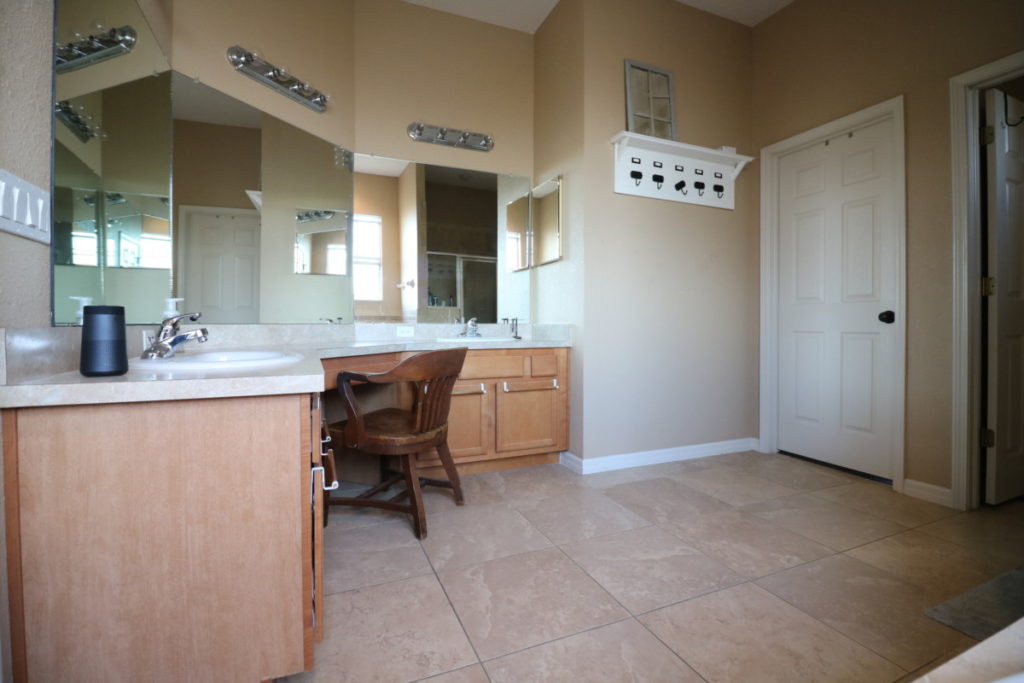
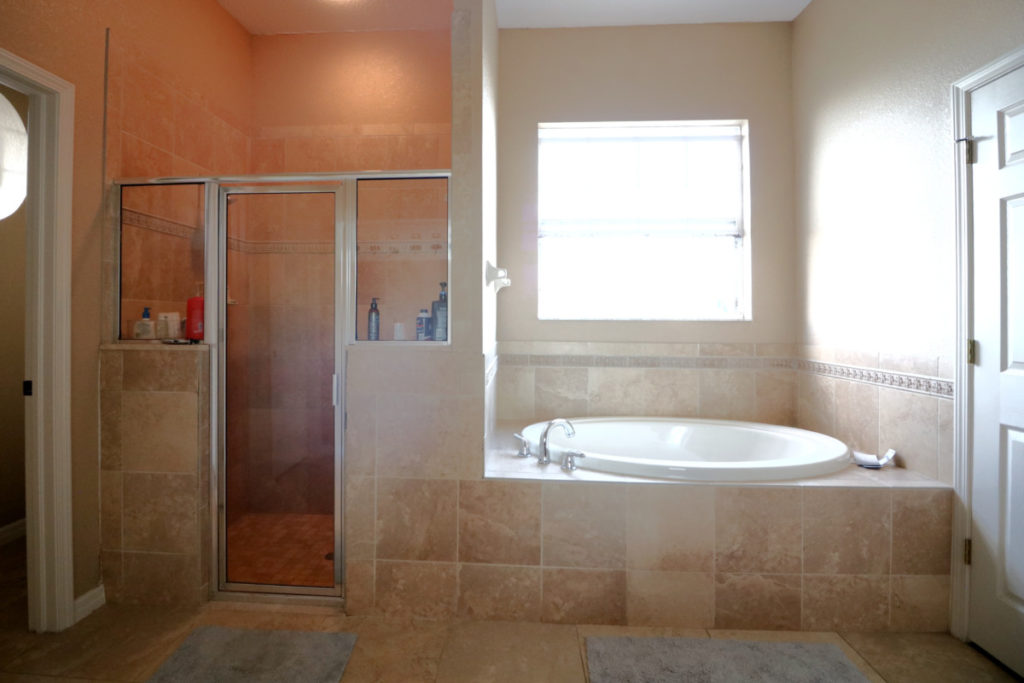
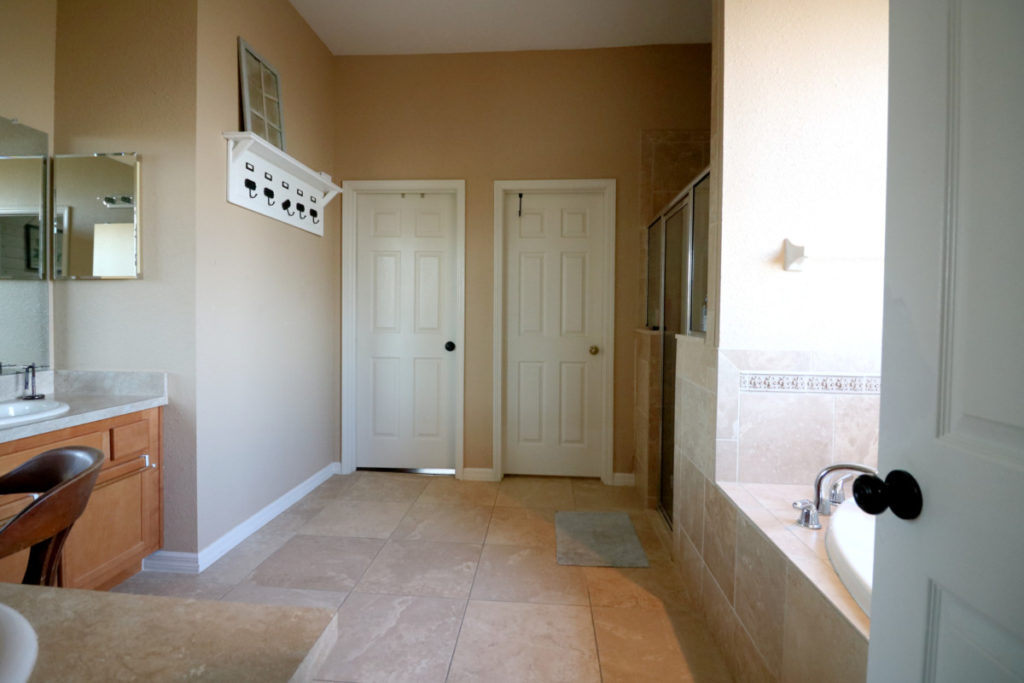
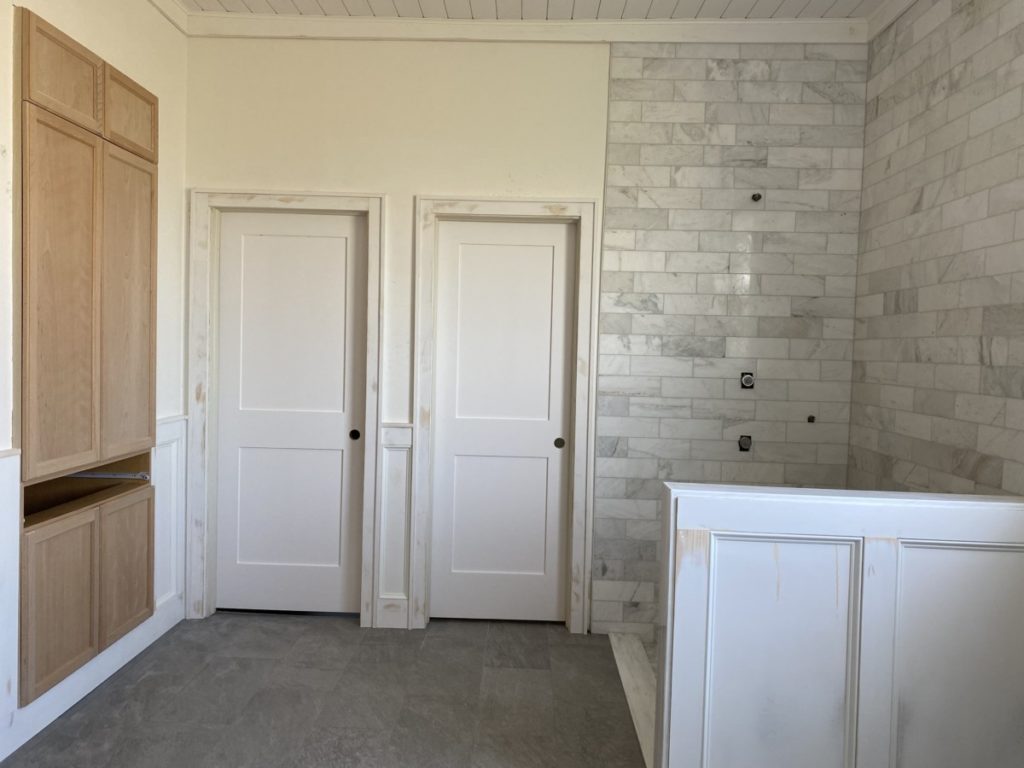
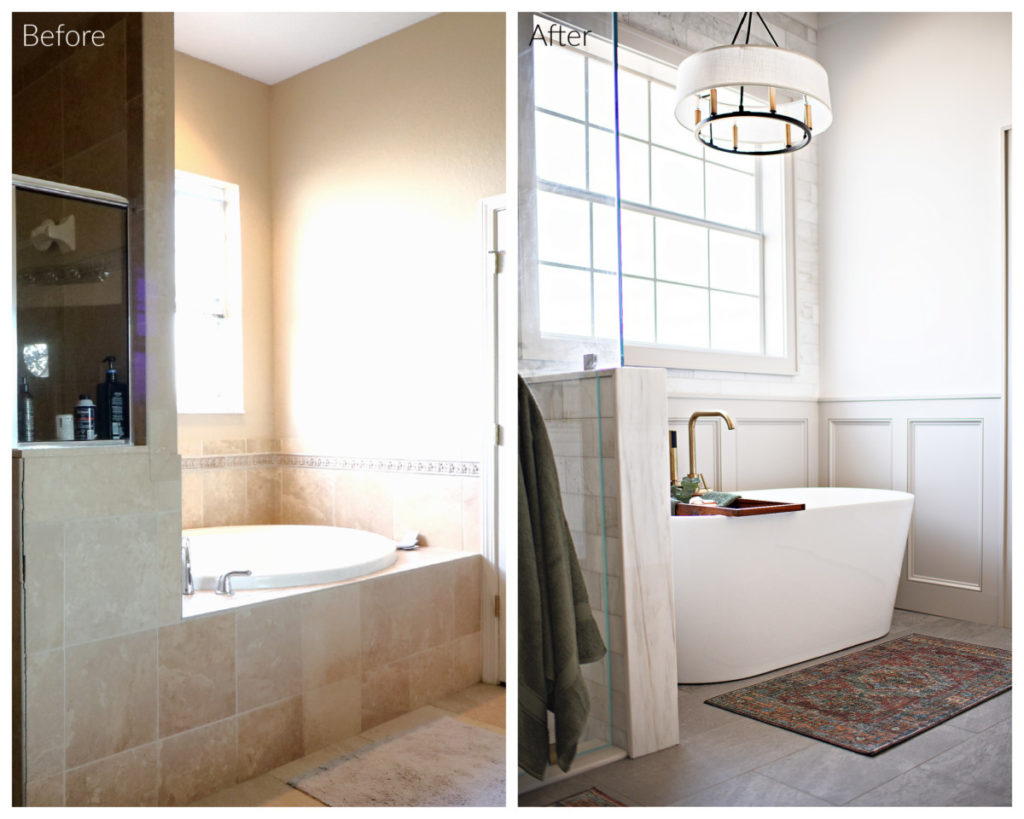
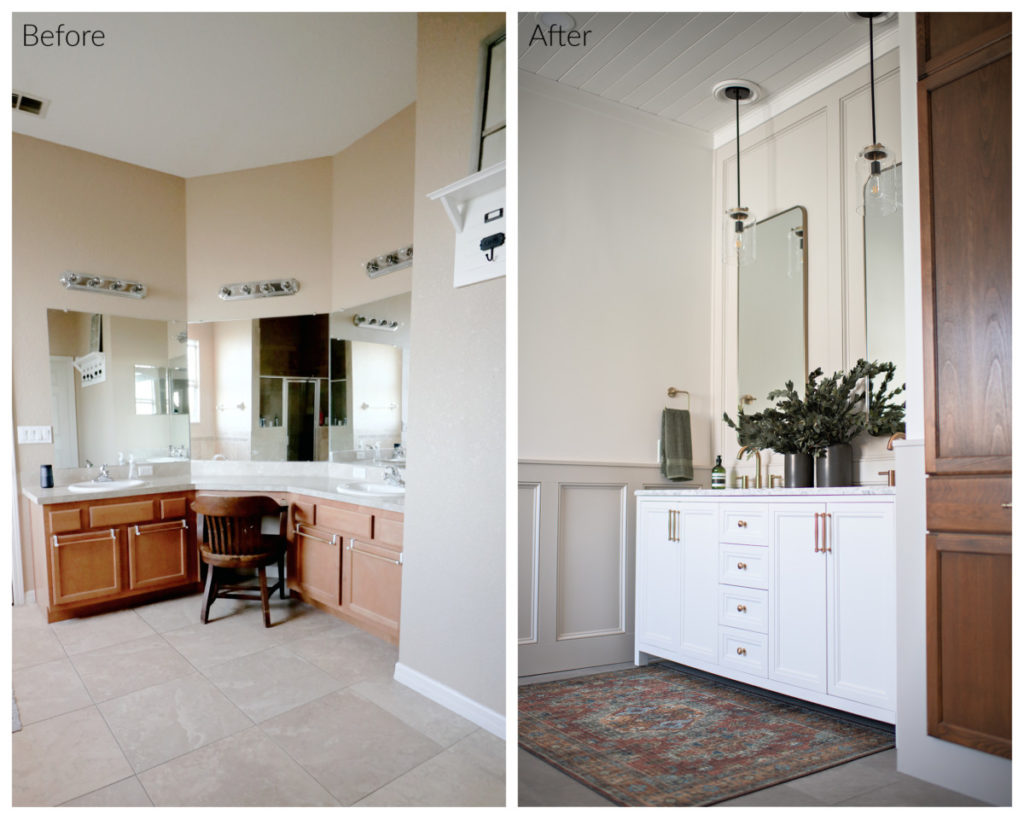
Our master bathroom actually did have some great qualities. I cannot complain about the square footage or the high ceilings. They definitely were huge advantages when designing the space. However, that is the extent of the “pros” (in my opinion). While there was plenty of space, the layout was not great, and it actually left some square footage on the table when they installed a corner unit vanity. The shower and tub were in good locations, but the wall dividing the shower created a very cave like feeling and closed off the room. While the tub was “okay”, I have always dreamed of a freestanding tub. With the many changes I wanted to make we decided the best approach was to gut the bathroom and start from the ground up. So that is just what we did!
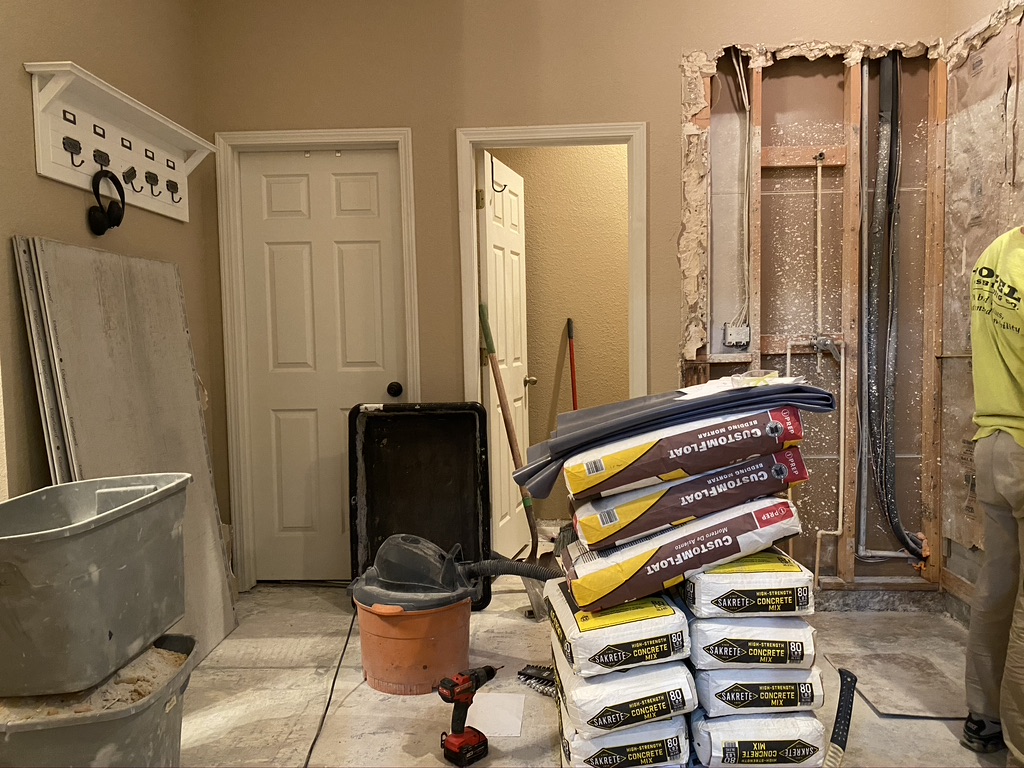
Demo
I think as a general consensus taking the first step in a major project is always the hardest. You pass that point of no return and you are committed. That can be a seriously scary thing. Whether your doubts are in your abilities or possibly in your tool supply… to that I say: “Where there is a will there is a way.”
There are plenty of resources out there to help supplement your “know-how”. There are so many professional resources that walk you through each step! Home Depot actually has a ton of online “How-to-Guides” by the pro’s! You can check out their library of resources here.
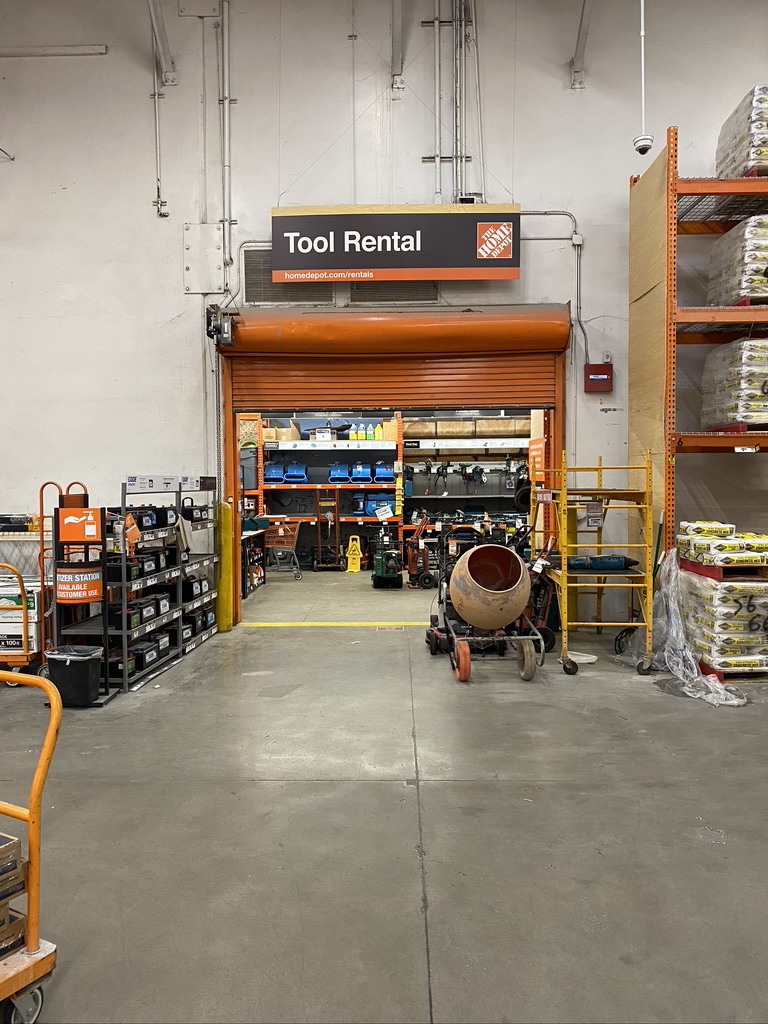
But that brings us to the more tangible limitations…tools. AGAIN, The Home Depot has got you covered! Obviously, The Home Depot is your one -stop-shop for all this tools, but what if you are aren’t ready to invest in some of the larger tools, or possibly don’t have the space to store larger tools? The Home Depot has the answer. Did you know that you can RENT tools in-store?
You can check out all the amazing options here: The Home Depot Tool Rental
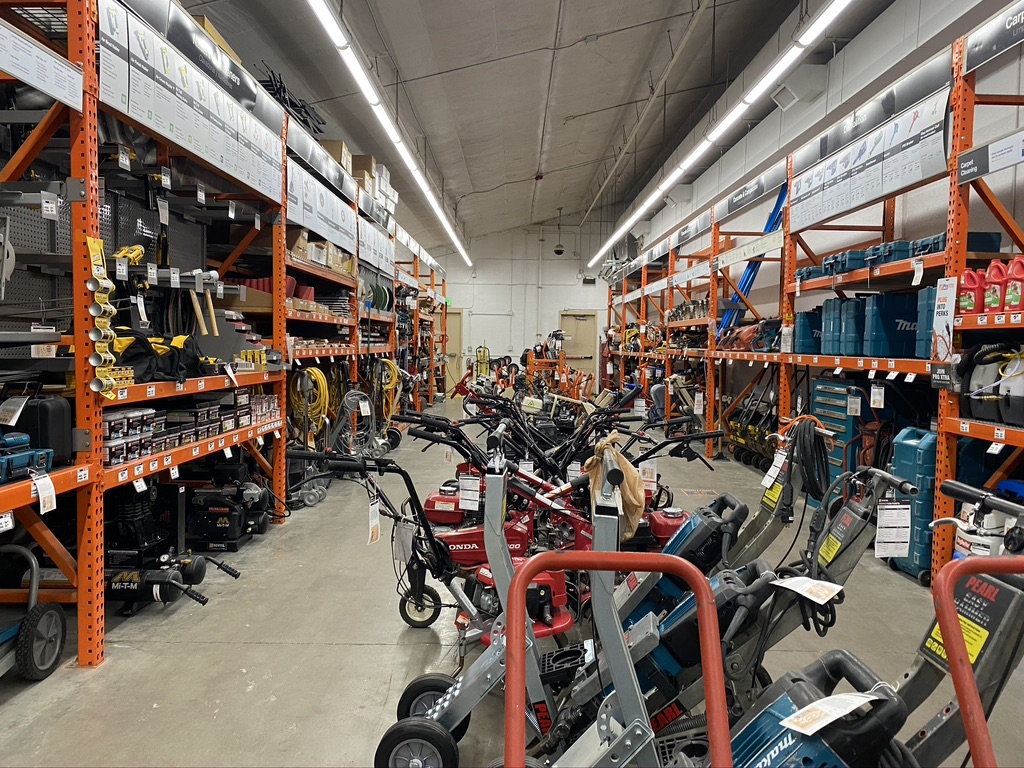
If this picture of all those readily available tools doesn’t make your heart happy, then you might be denying your inner DIY loving heart. Just saying.
The demo part of this process definitely required bringing in some scarcely used tools which would be a great opportunity to rent instead of buy. Just a thought.
Drywall Ceiling
After the demo was complete and we were down to ground zero, it was time to start rebuilding. For us the most logical place to start was by repairing all the walls.
We wanted to start with a fresh, blank canvas. So, we repaired and, in some cases, replaced the dry wall that was removed during the demo process. It was at this point that we also added Durarock to the shower.

It was amazing how much more opened the room felt once we had the dry wall replaced and skim coated all the surfaces to remove the texture.
At this point we actually. Deviated away from our original plan. The original plan did not include a planked ceiling, but the heart wants what the heart wants. We postponed our timeline and tackled adding nickel gap board to the ceiling.
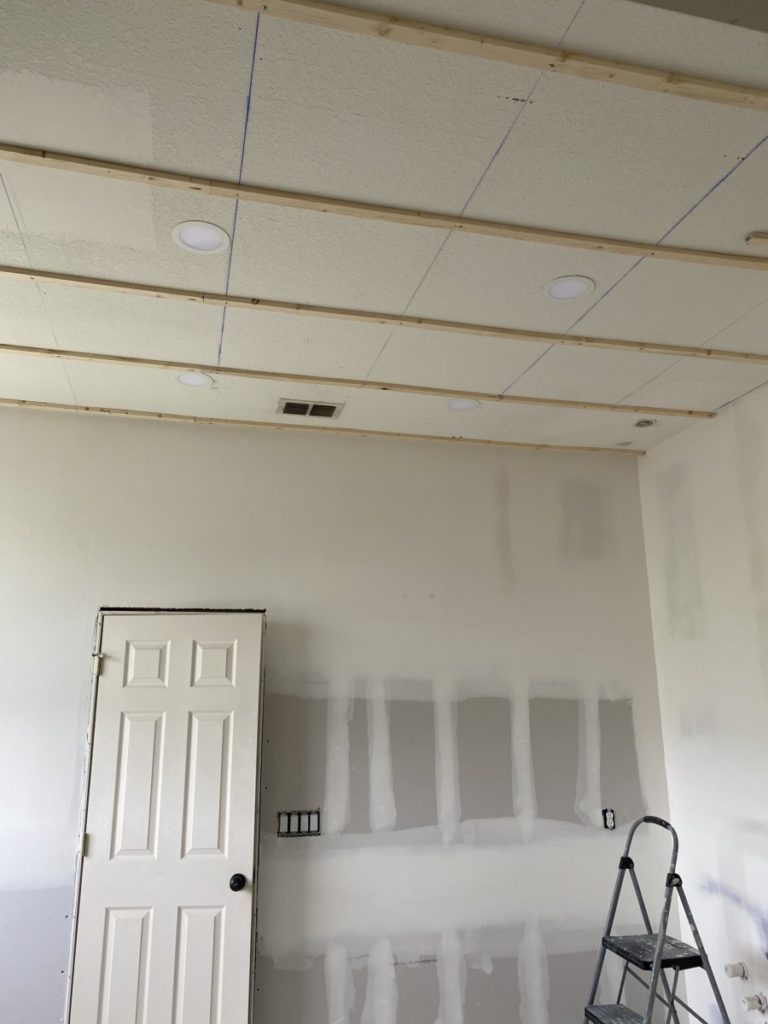
It was a fairly quick project. The majority of the time was actually allotted to installing the fir stripping that we attach to the rafters that we would then attach our nickel gap boards to (running perpendicularly).
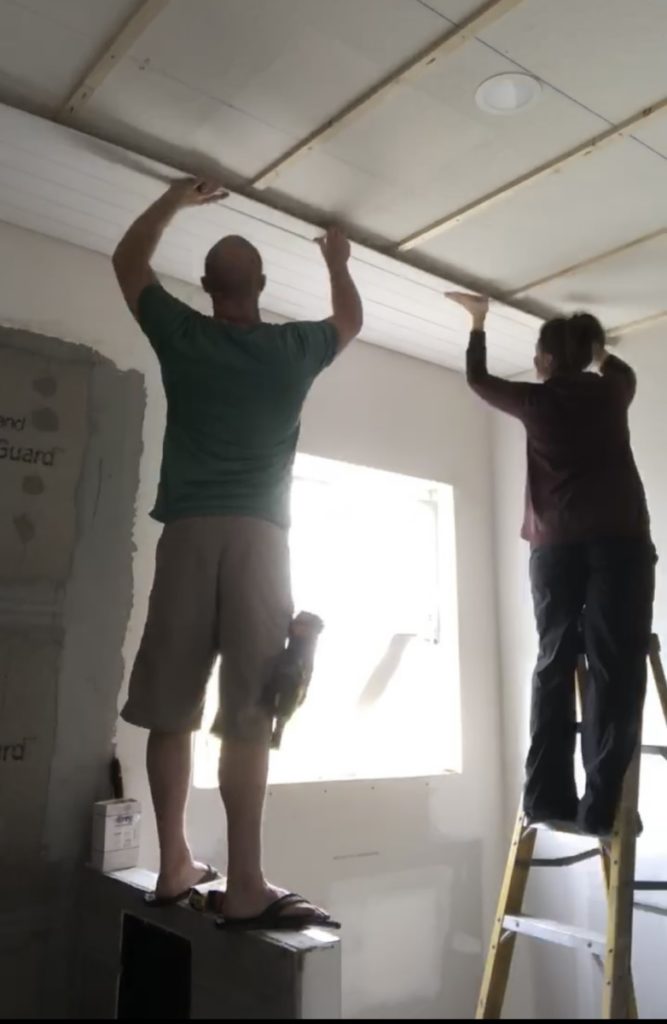
We used these Nickel Gap Shiplap Boardand I am very pleased with their quality, and they look beautiful with a paint finish.
Shower and Floor Prep
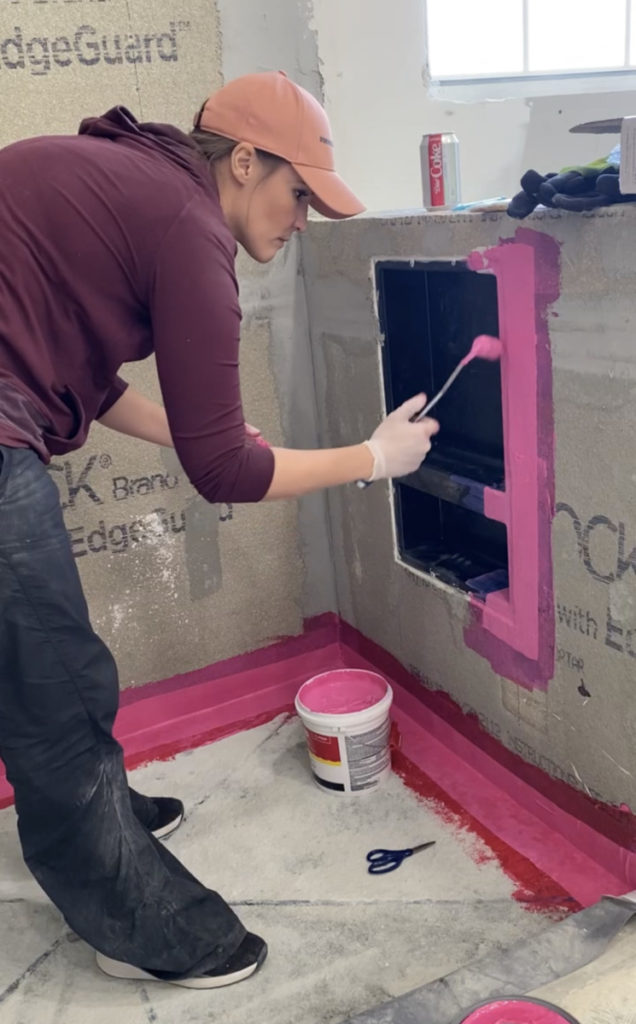
In the past all of my tile jobs have been limited to backsplashes and floors. It was always in a decorative capacity. When it came to tiling for practicality it was a whole new beast. After watching many online tutorials we were able to figure out grading the shower pan and waterproofing the walls.
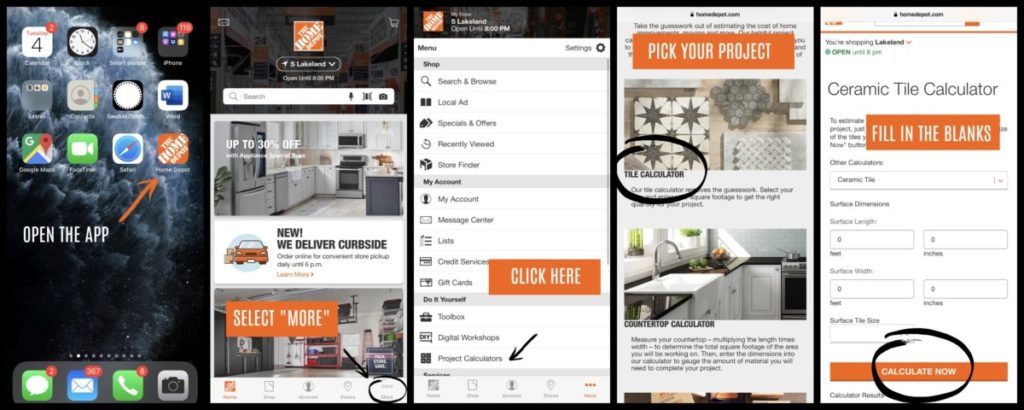
Once all the walls were prepped it was time to get the tile. Again, if you are new to DIY something like selecting tile and calculating how much you will need can be overwhelming. The Home Depot is here to help. Did you know that they have project calculators? The “Project Calculator” is an awesome little feature that allows you to plug in your space dimensions, the type and size of the material you are using (in this case tile) and the feature will calculate home much tile you will need for your specific project. The project calculator is not limited to just tile, it has options for calculating materials for a plethora of projects.
After agonizing over my tile selections, I finally was able to select my colors. (There were seriously so many great options, I had a hard time narrowing it down!)
Ultimately, I went with Bianco Dolomite or the shower wall tile, Bianco Dolomite Hexagon for the shower floor and FLOOR TILE.
If you have been around awhile, you are well aware that I very rarely ever hire out help especially if the project is in my wheelhouse. Well this time my sanity won out. We ended up hiring help with the tiling portion of this project. I pride myself in doing everything myself, but this is one decision I do not regret! If you are looking for more information on tiling make sure you check out The Home Depot’s “How-To Tile a Shower” for more information.

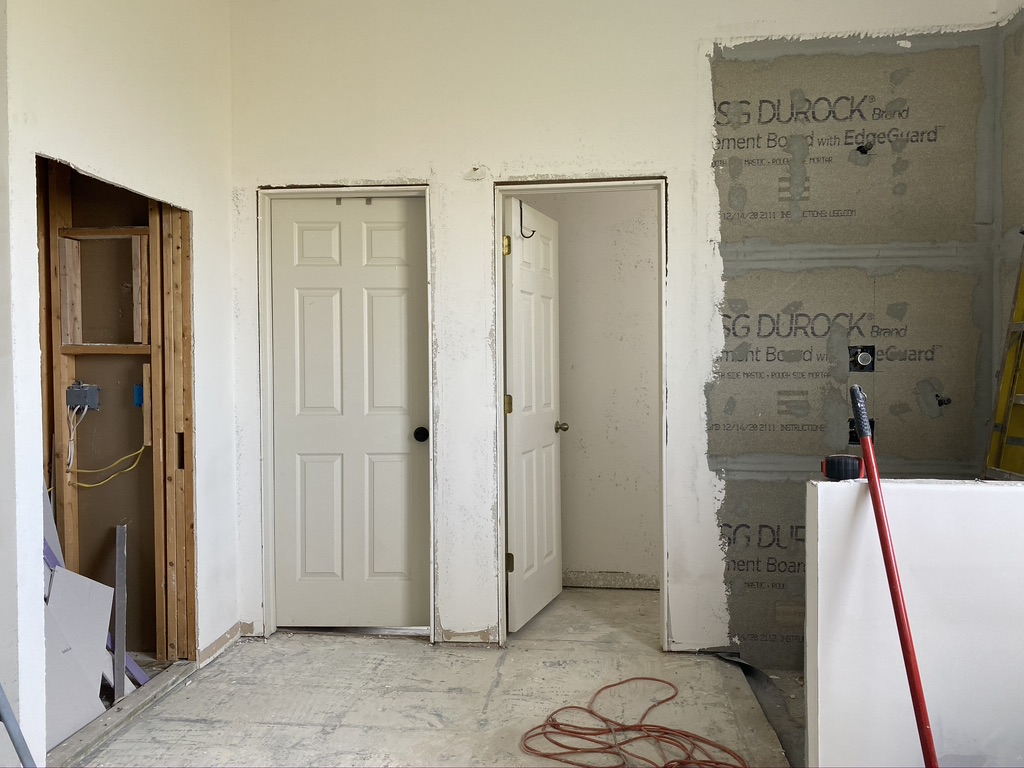
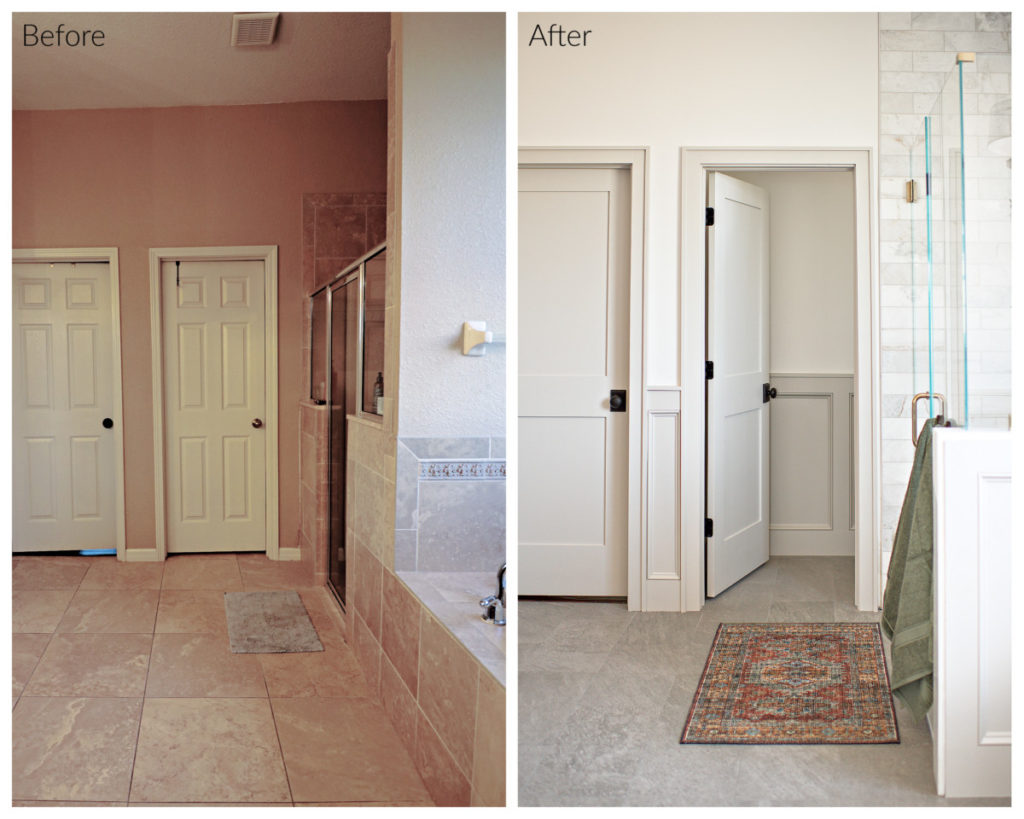
Doors
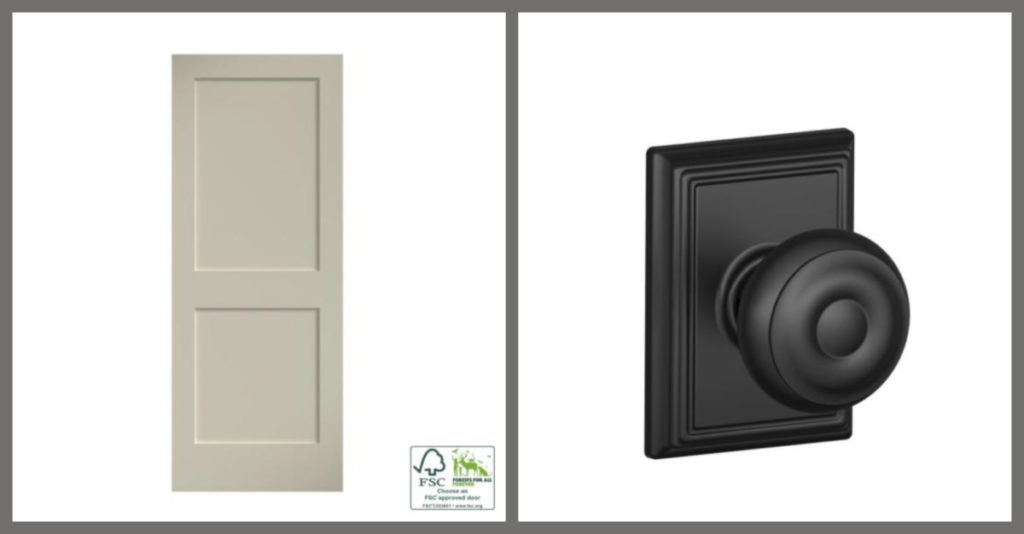
Our home came with very basic builder grade doors, they weren’t bad but they weren’t great. I believe at this point in the project I was at the “If you give a mouse a cookie” phase. I had already gutted the entire bathroom and created my dream bathroom, why stop short? I went ALL in, and man am I glad I did. The doors actually became a focal point and carry the color up the wall. Oddly enough the doors are one of my favorite parts of the room.
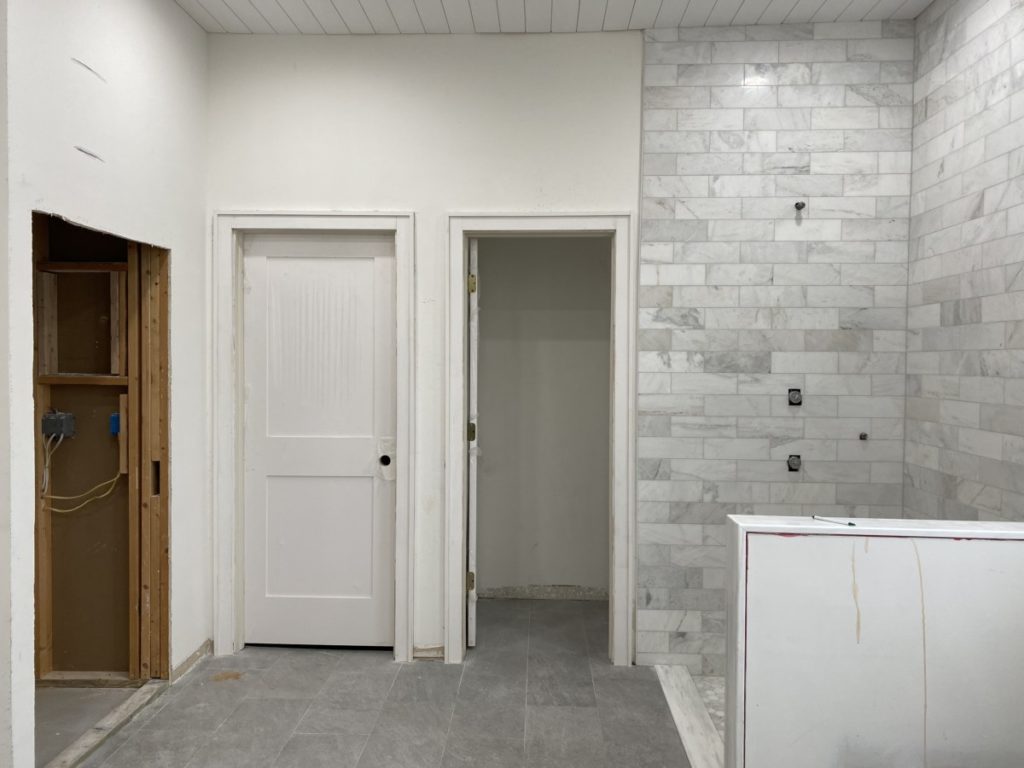
I selected a simple Two Panel Door that was beautiful! (No fake wood grain on this beauty!) I also realized how much a door knob could add to the look of a door! I found these Schlage Aged Bronze Door Knob.
Install Storage
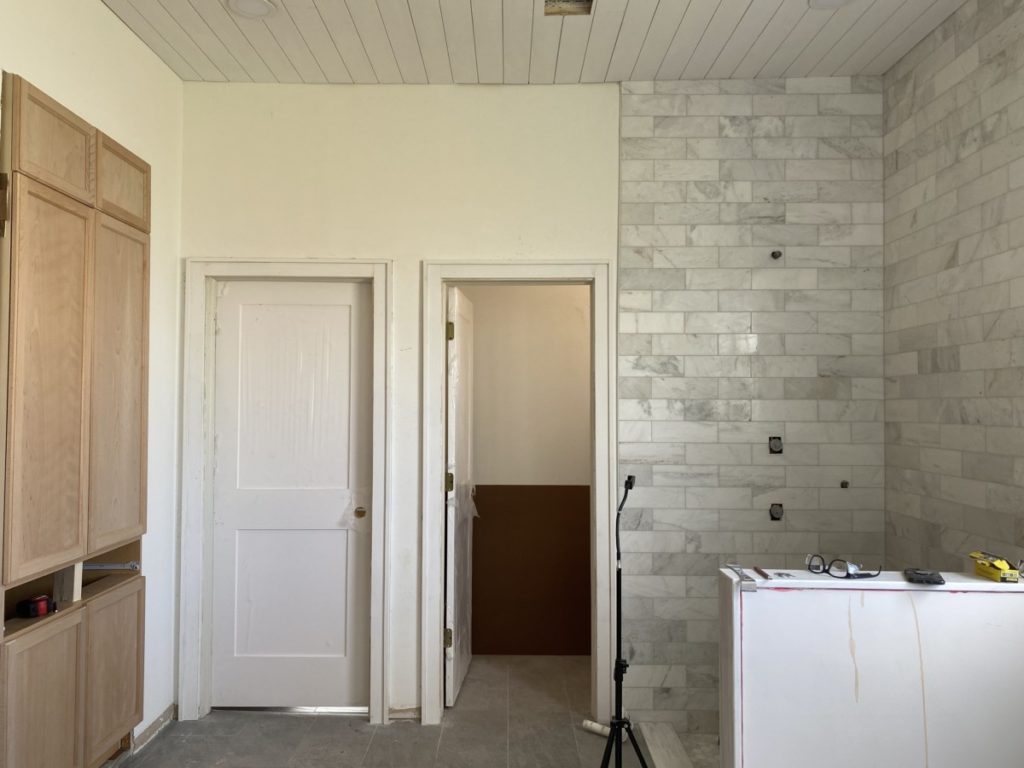
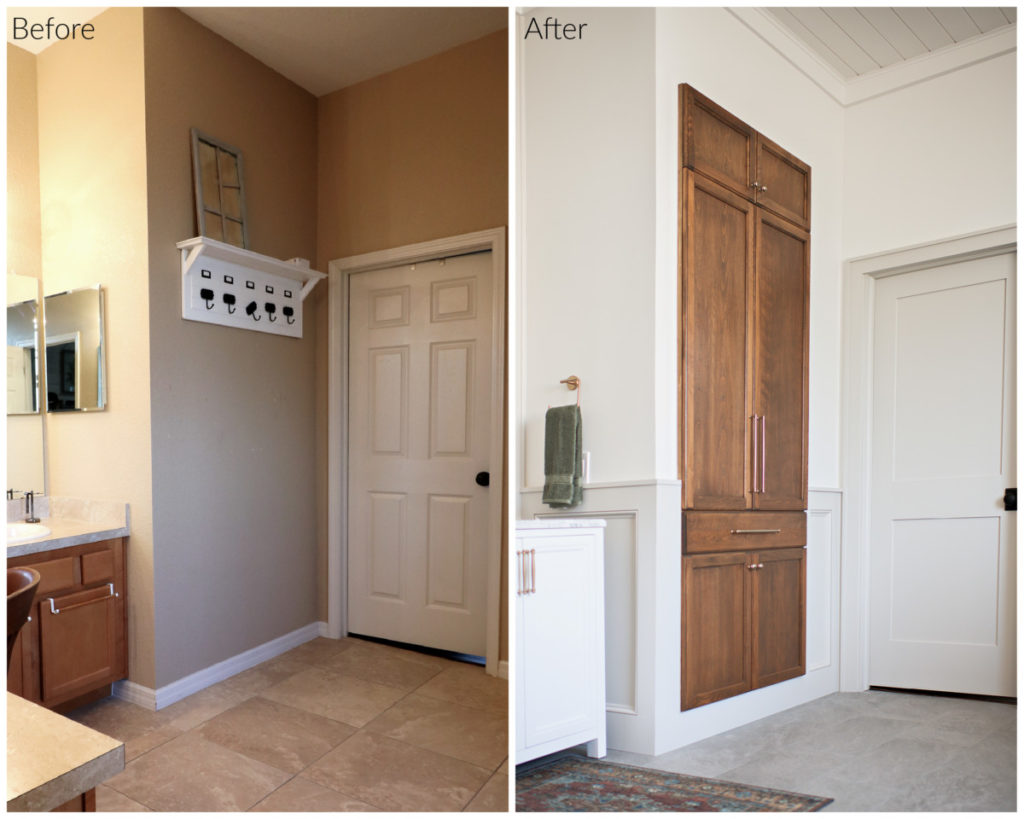
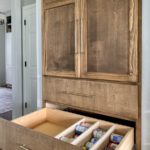
The bathroom was really coming together at this point, but I still had a few tricks up my sleeve. While the bathroom was quite large it was desperately lacking storage space. Luckily for me, the bathroom wall also shared a wall with our hall linen closet. So, I pulled a switcha–roo. I opened up the back side of the cabinet (that shared a wall with the bathroom) and closed off the original access (removing the door and adding drywall etc.)
By opening up this space to the bathroom instead of the hall it gave me room to add a linen closet and TONS of character.
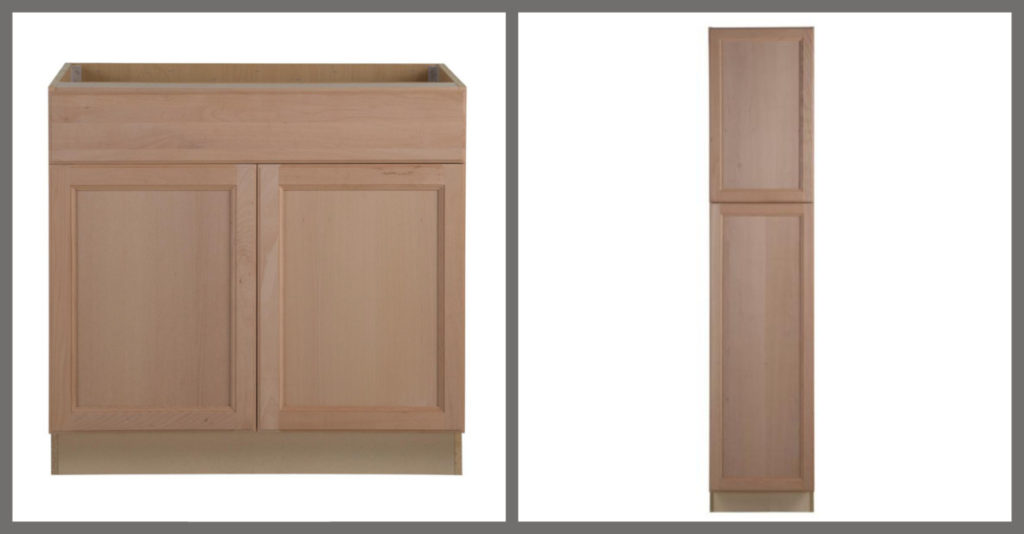
If you have been following along you KNOW I have a love for built ins. I recently built a Custom Pantry that I created specifically to fit in a empty wall cavity. Shortly before that I created a custom Built-In Storage Armoire using two pre-made pantry cabinets. Well for the bathroom linen closet I took a page out of both tutorials and combined both ideas. I used several different pre-made cabinets to create one MEGA linen
Linen Closet
Install Trim Work
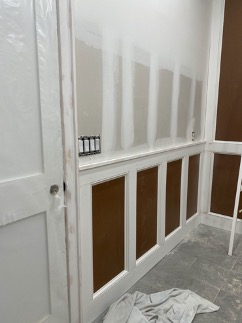
We are in the home stretch now! As much as I wanted to slap some paint on this sucker and call it good… I knew I wanted the classic elegance of wainscoting.
I don’t know about you but something as simple as trim work can totally elevate the space!
If you want to add trim to your space, you can check out either of these two tutorials.
I am always amazed at how much trim can add to any space. Here are the materials I prefer to use when trimming a room.
Trim Work Materials:
- Nickel Gap Shiplap Board (Ceiling)
- 1”x 3” Finger Joint Board (Door Casing)
- 1”x 4” Finger Joint Board (Vertical and Horizontal Wainscoting)
- 1” x 6” Finger Joint Board (Baseboards)
- 1”x 8” Finger Joint Board (Interior Window Trim)
- Hardboard Panel MDF (Back of Wainscoting)
- 8’ Base Cap Molding (Interior Wainscoting)
- Two Panel Door
Prep and Paint
When it comes to painting, I am always torn on the painting method I want to take. I am normally really anxious to get going, so rolling really calls to me. However, I am always so much happier with the final product when I use a sprayer. I feel like both methods take about the same amount of time; the difference is when spraying you spend the majority of that time prepping rather than painting.
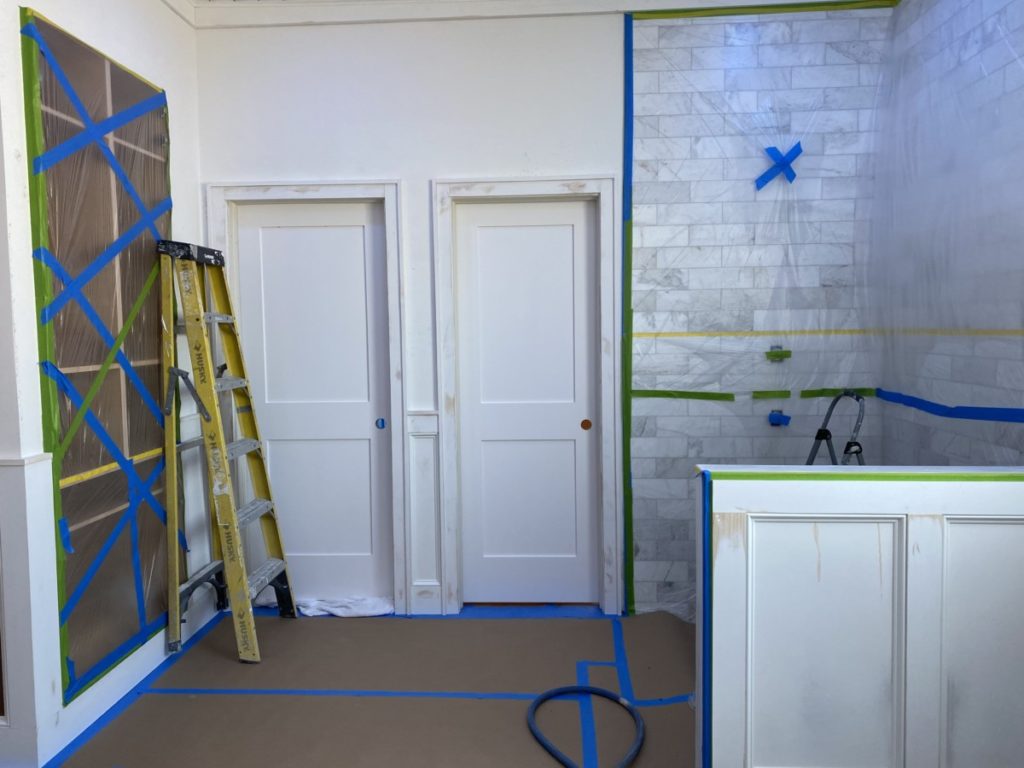
I wasn’t going to cut corners on this bathroom, so I rolled up my sleeves and pulled out the painter’s tape, painters’ plastic, and paper. I needed to cover anything that would not be painted.
Once everything was prepped, I got to work spraying. When spraying I use the Fuji Spray Semi-Pro Sprayer. OR, if you aren’t ready to invest in a sprayer you can always rent one from The Home Depot.
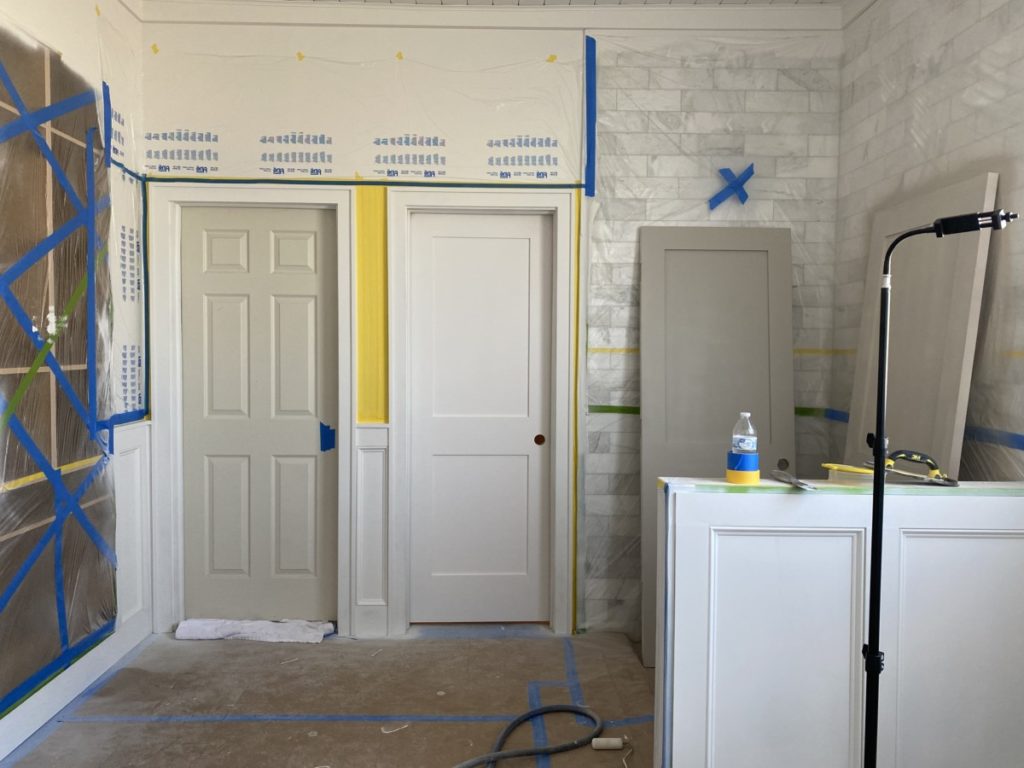
- Wall Color- Snowbound
- Trim/Wainscoting- Agreeable Gray
Install Fixtures
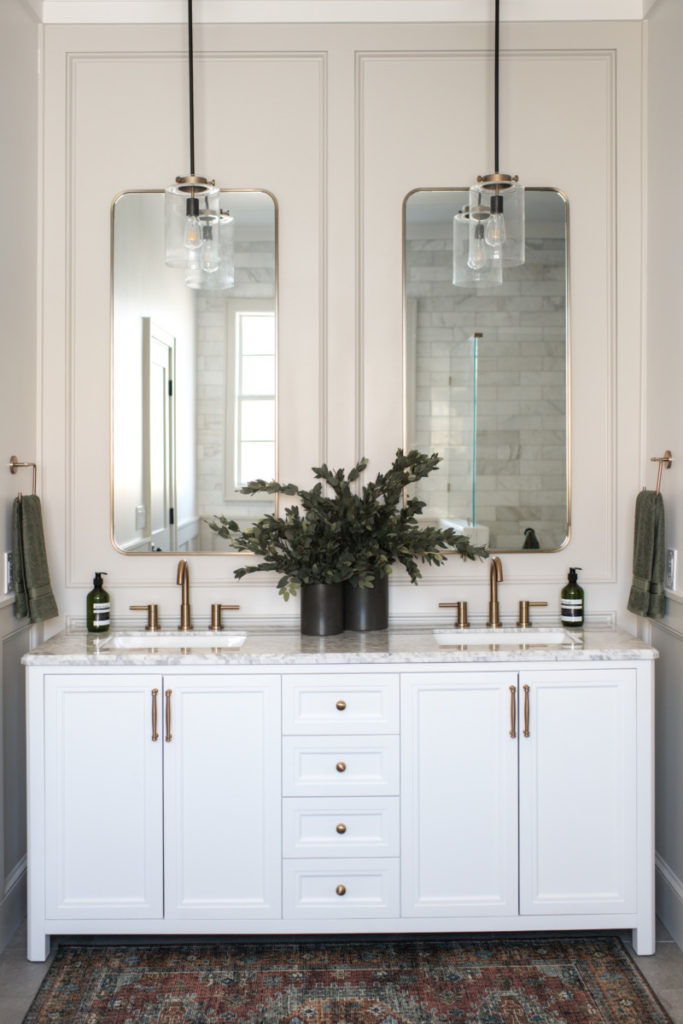
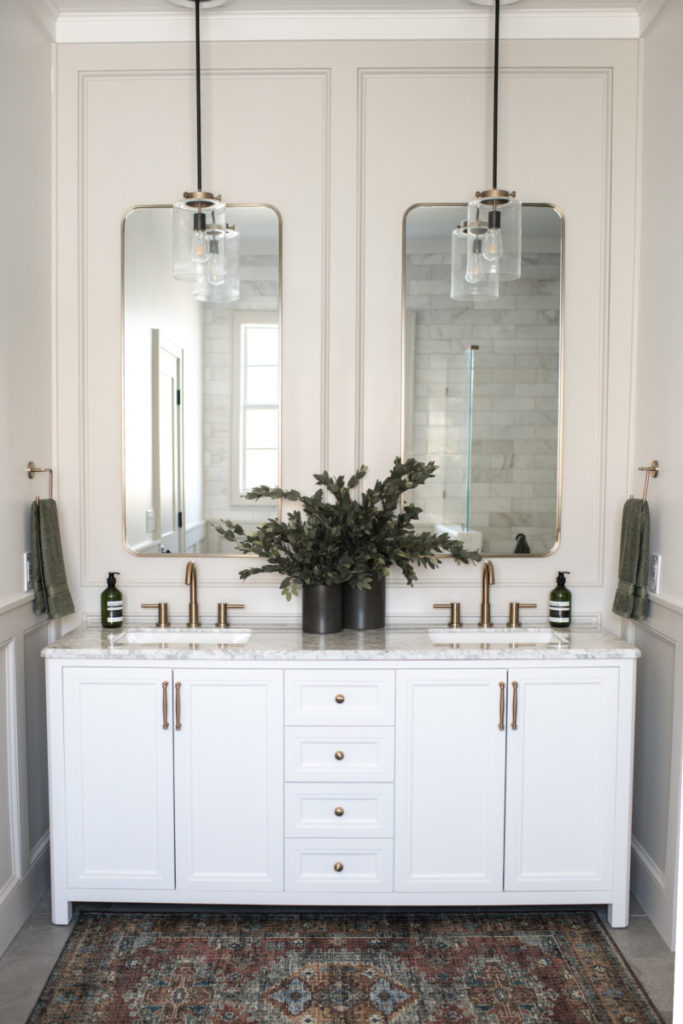
Vanity Area
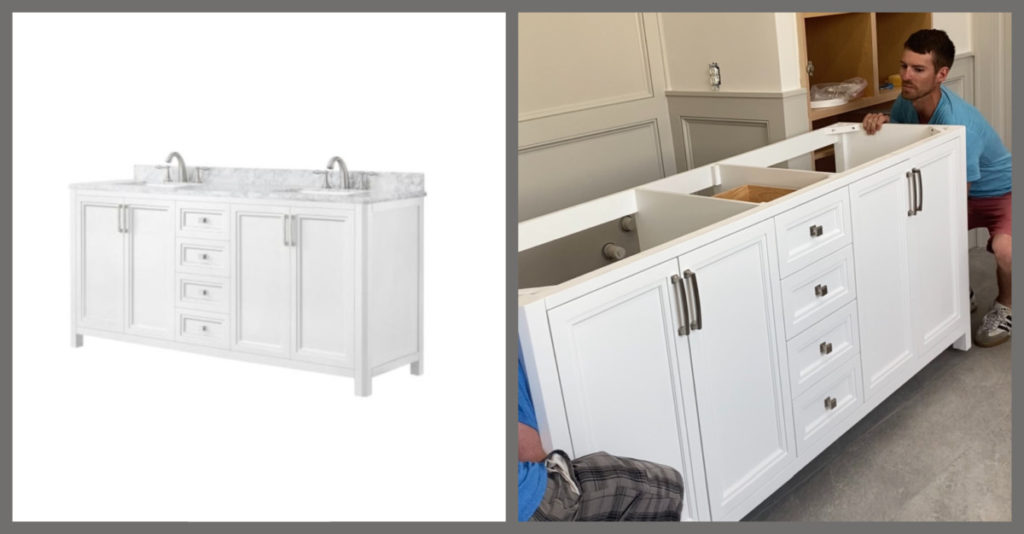
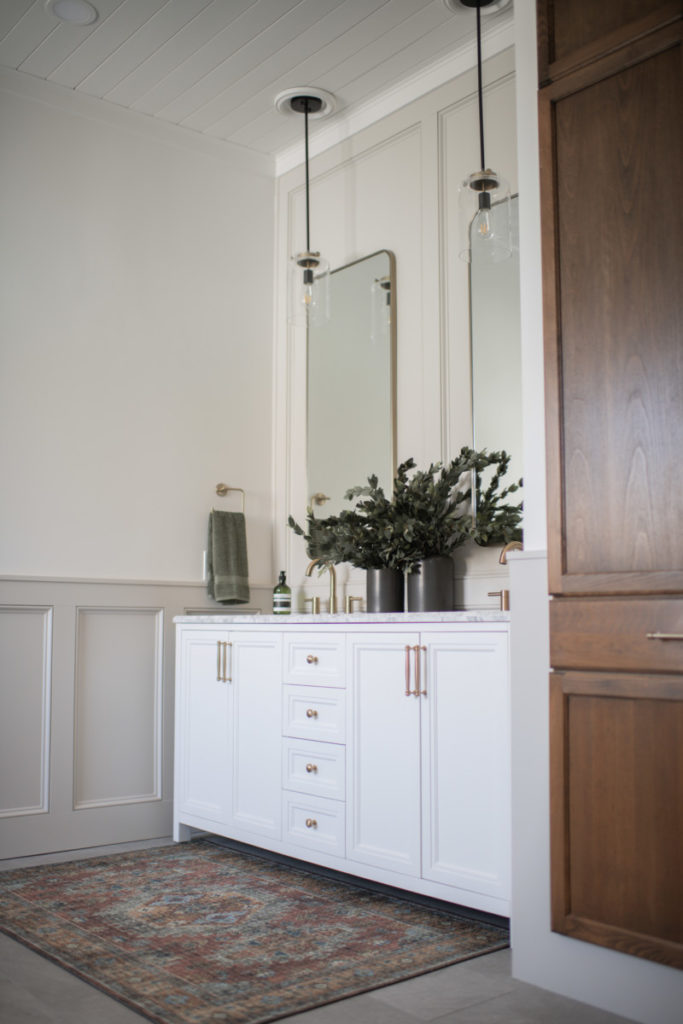
This is the best part of the project, when you start to bring in all the major pieces and you start to really see the space come together. When selecting a vanity, it was important to me to have a nice countertop and have plenty of storage space. I went back and forth on quite a few different colored options but decided on something simple. If I ever want to change the look of the bathroom it is much easier to do if I have a blank canvas. Plus, the linen closet/armoire was going to be a nice warm wood tone, and I didn’t want to have to compete with it (color wise).
I selected the Home Decorators Collection Double Vanity and I love it.
I paired the vanity with a gorgeous 48” Glass Warehouse Brass Vanity Mirror/. If you have been around a little while you might recognize it from my Powder Bathroom Makeover. (I used the 36” version in the powder room.) I found that Delta faucets in their “Champagne” color collections paired best with my color palette.

The finishing touch for this space was the Home Decorator’s Collection Mini Pendant. They were the perfect size, they hung at the right height, and you couldn’t beat their price, however I needed something in brass and black. No fear, this is a DIY blog, is it not? If you have never spray painted a light fixture, no worries I have got you covered. Quite literally one of my very first blog posts covered this very topic!
Vanity Area Products:
- Glass Warehouse Vanity Mirrors
- Home Decorators Double Vanity
- Delta Trisnic Widespread Mount
- Vanity Hardware (5 1/8” pulls)
- Vanity Hardware (Knobs)
- Vanity Light Fixture Pendant (I spray painted mine.)
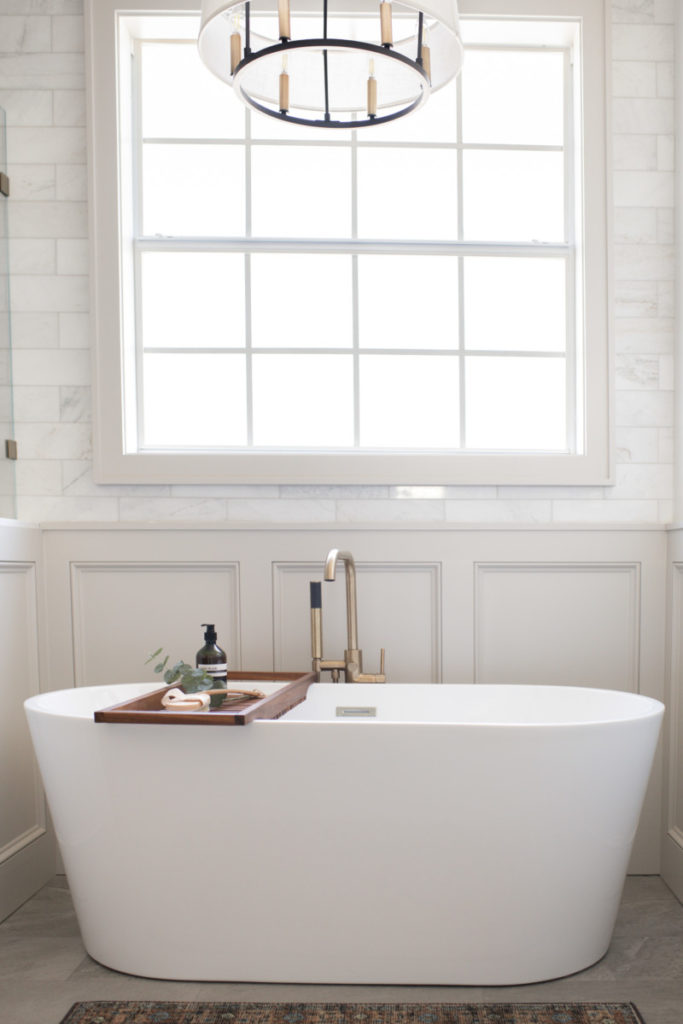
Tub Area
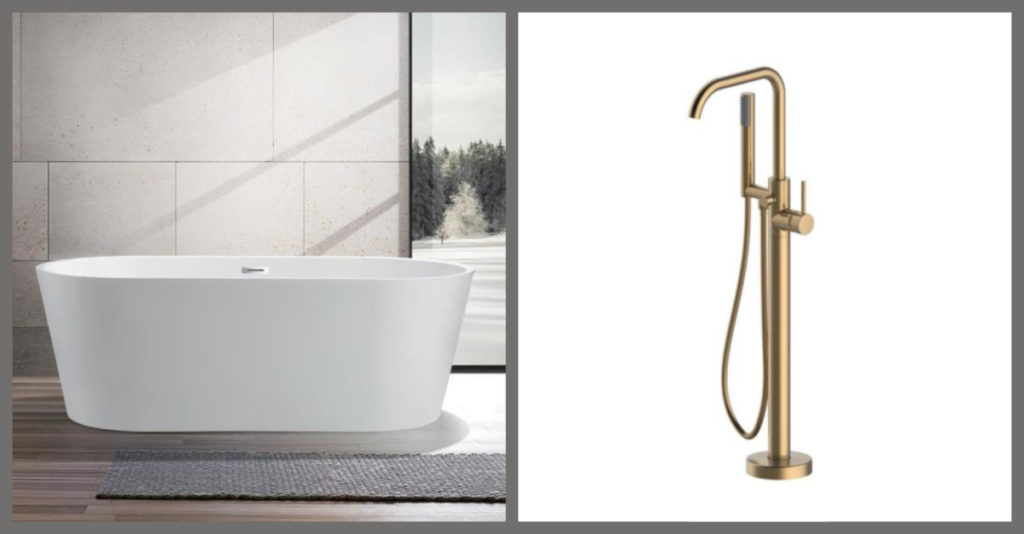
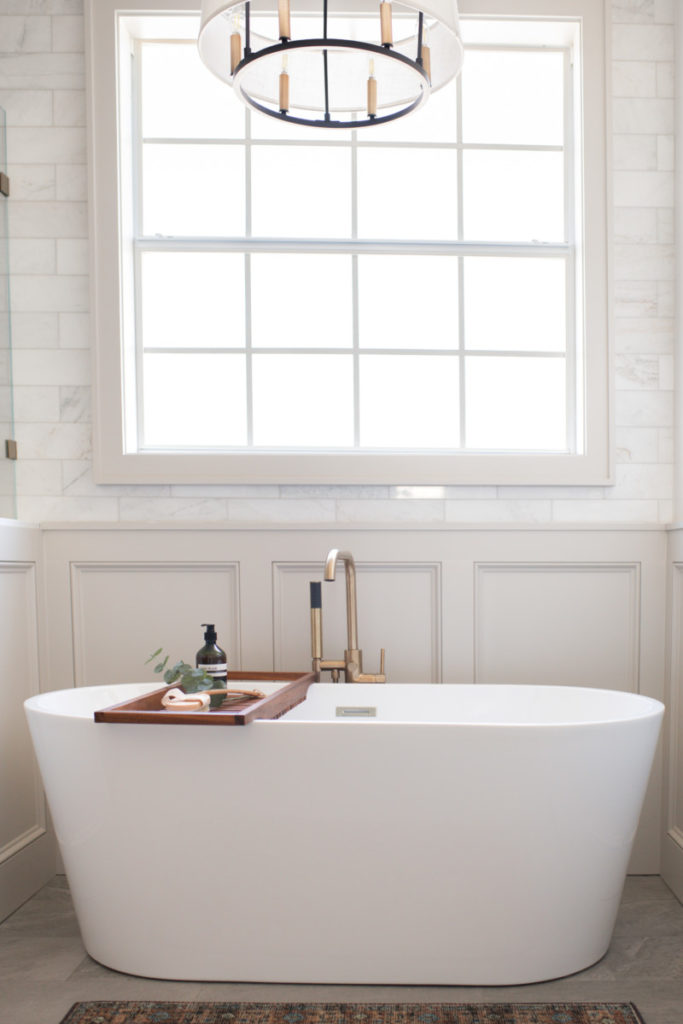
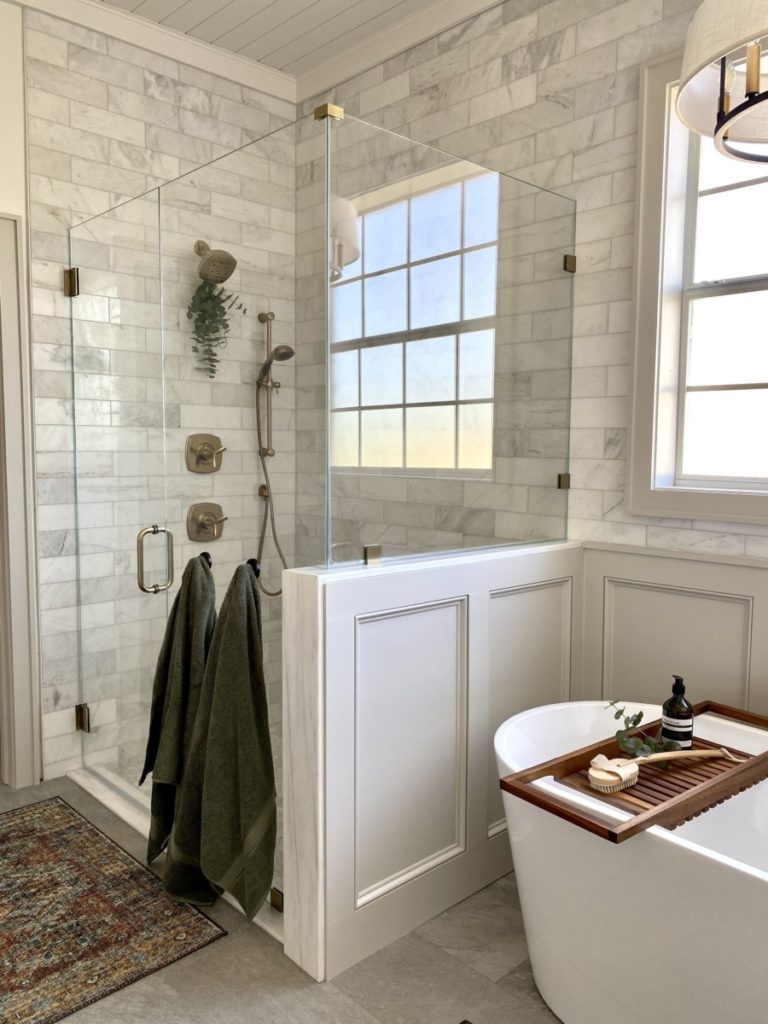
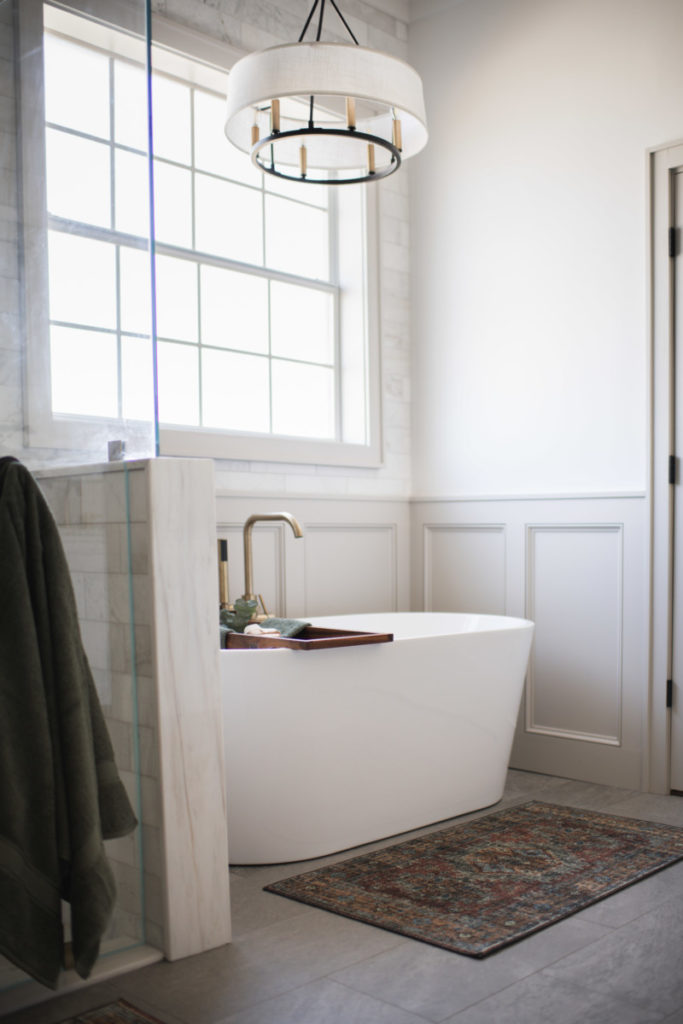
Which brings us to the tub area. Words do not quite describe how excited I was for this particular area. I have never found soaking in a tub very relaxing, probably because I would sit and stare at my surroundings and think of all the potential the space had. NOW the space has met its potential and I can sit and soak it in… in my freestanding tub with a brass faucet. 🙂
When selecting my tub it was more than just aesthetics I had to consider. There were logistics to be considered, namely the size! My space allotted for the tub was not huge, so I needed to find a tub to fit those dimensions. After looking at a ton of options I landed on the Vanity Art Bordeux Tub. Naturally with an elegant looking freestanding tub, I needed to freestanding tub filler to match. I found that the Jacuzzi Contento Tub Filler was the best bang for my buck and a very close match to the tone of brass I had throughout the rest of the bathroom.
I finished off the area with the Progress Lighting Linen Shade Chandelier. If it looks familiar, that’s probably because it is! I loved this fixture so much in my Office Makeover that I decided to use it in the bathroom as well.
Tub Area Products:
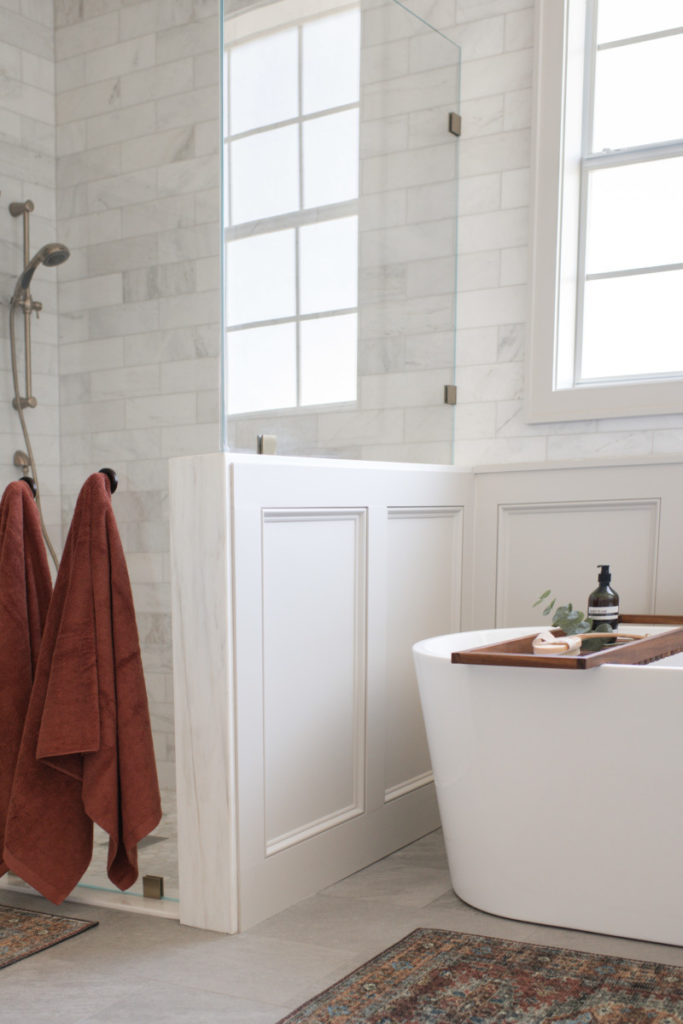
Shower Area
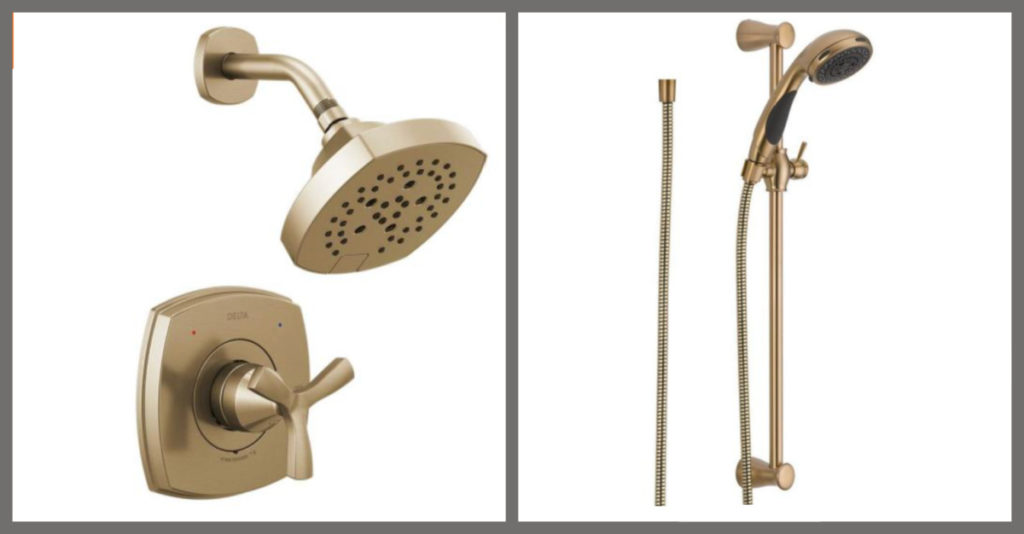
Ready to wrap this project up? ME TOO! The last area I needed to tackle was the shower. Long before we ever started the bathroom makeover, we dreamed of having two shower heads in a bigger shower. Well, try as we might we just couldn’t configure any way to make it work. We exhausted a lot of options but ultimately decided it wasn’t in the cards.
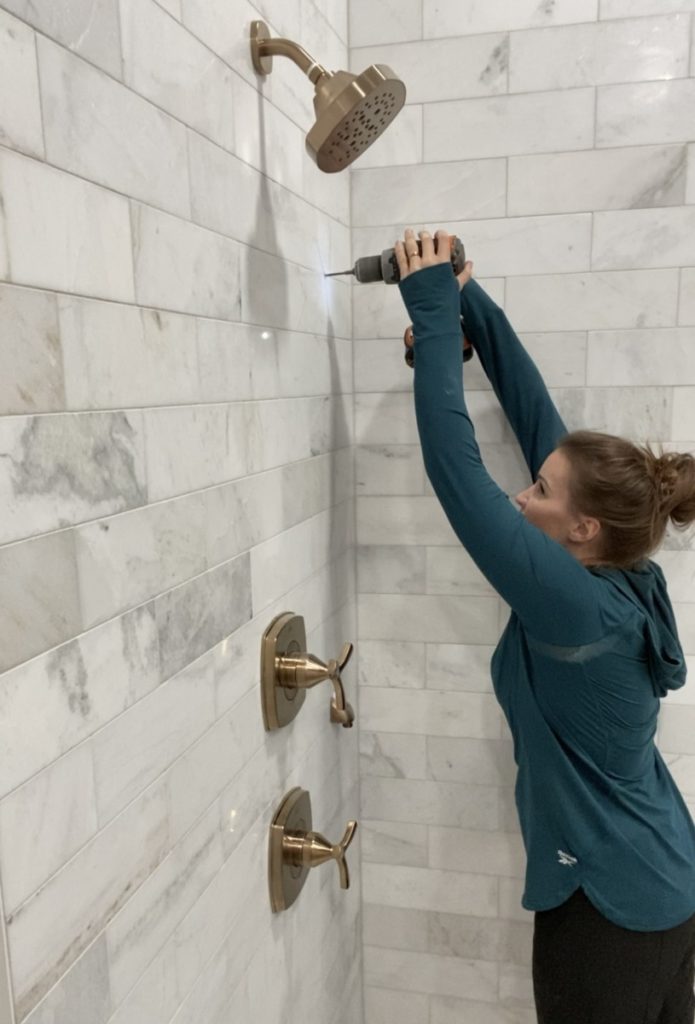
But wait, I might not have been able to swing two full size shower heads, but a handheld option might be just the ticket! PLUS, I am really digging the look of the sliding bar in the shower, so everything works out. I have two shower heads per se, and it looks like a million bucks.
I used the Delta Stryke Shower Head and Valve(s) and the Delta Slide Bar Hand Shower.
As I was doing my research for glass shower enclosures, I realized I had to have my class custom fit. After doing a little inquiring I found that some Home Depot locations do work with specialist that can custom cut glass. Check with your local Home Depot to see if that location offers those services.
In Review
Are you ready to see how this whole space came together?
Drumroll please…I give you my Master Bathroom Makeover!

I will admit that a bathroom remodel is not for the faint of heart, but IT IS doable! I personally have put off this project for years because of the intimidation factor. I didn’t exactly know what I was doing. However, I did not let that stop me from trying!
I looked to other colleagues for advice, scrolled through all the professional tutorials The Home Depotwebsite had to offer, and called in reinforcements when I needed it. Sometimes extra help comes in the forms of professionals and sometimes it just means more tools than what you have access too. If that is one of your hurdles, cross it off of your excuse list. The Home Depot is a great resource for tool rental, professional tutorials, AND they can even help with your custom projects with help of their material calculators.
No matter the skillset or the toolbox you can improve your home if you have will to make it happen!
Sources:
Tub Area Products:
Vanity Area Products:
- Glass Warehouse Vanity Mirrors
- Home Decorators Double Vanity
- Delta Trisnic Widespread Mount
- Vanity Hardware (5 1/8” pulls)
- Vanity Hardware (Knobs)
- Vanity Light Fixture Pendant (I spray painted mine.)
Linen Closet Products:
Trim Work Products:
- Nickel Gap Shiplap Board (Ceiling)
- 1”x 3” Finger Joint Board
- 1”x 4” Finger Joint Board
- 1” x 6” Finger Joint Board
- 1”x 8” Finger Joint Board
- Hardboard Panel MDF
- 8’ Base Cap Molding
- Two Panel Door
- Schlage Aged Bronze Door Knob
Tile Products:
- Bianco Dolomite Tile (Shower Wall)
- Bianco Dolomite Hexagon (Shower Floor)
- FLOORING


tunning and such an inspiration …..your talents are amazing I love your tub caddy was that a diy or if purchased would you mind sharing where you got it from. Many thanks
What a beautiful transformation! Love it!
Love it! So beautiful and what a transformation! Like you, I had never tiled a shower before (actually, I had never tiled vertically….only floors, and limited experience at that), but I (gulp) dove in and, after watching a TON of videos & doing research, I tackled gutting and completely re-doing the tile surround (including the copper plumbing) in my hall bath. Including a tiled niche!
Had to be done to sell the house, and since I was on a very tight budget (post-divorce), this was the biggest cost savings to do it myself. Turned out AMAZING, but what a pain! I would probably gladly pay someone to do this work if I ever re-do another bath!
Do you mind losing the counter space on your vanity? You went from a wide double vanity with the corner section to a much narrower double vanity. What fills that space now? I didn’t see photos of that part of the wall.
This looks beautiful! I’m beginning my own master bath re-do…and am picking tile. What floor tile did you choose? It looks like a light gray, it really works with the shower tile.
So beautiful! Curious as to the size of your shower??? We’re going to be redoing a bathroom and the current shower feels tight. Yours looks roomy without being ridiculous in size! We have plenty of space, but some of the renovations I see online or even more so on tv just seem like a waste.