*This post is sponsored by the great folks over at DAP and it does contain affiliate links.


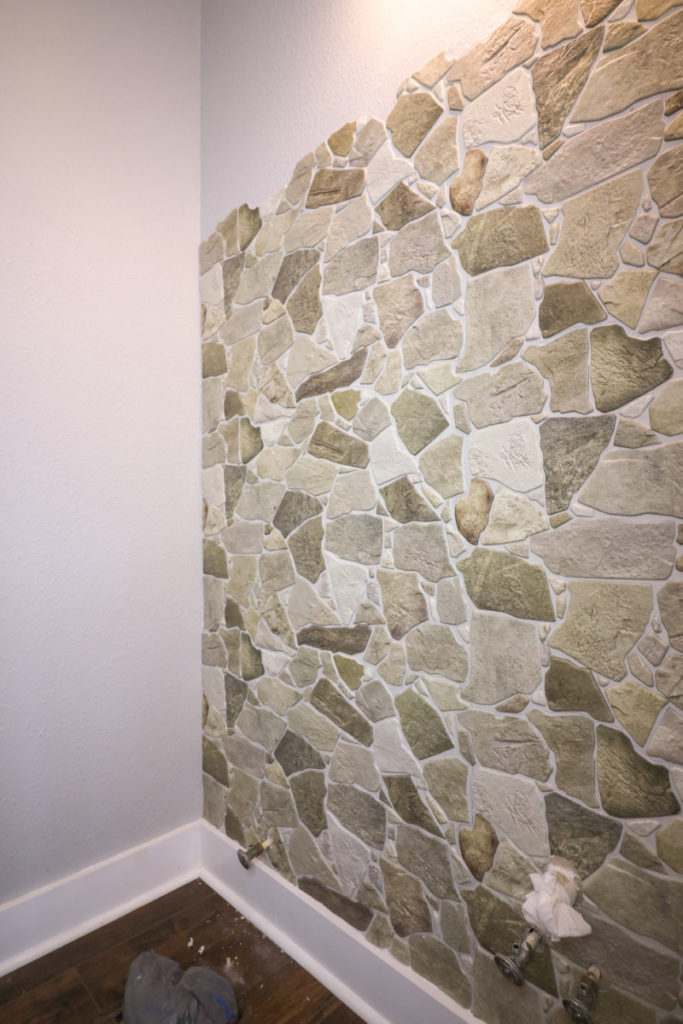
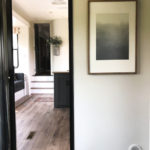
Is this not the most beautiful accent wall you have ever seen ? Would you believe that it is made out of faux stone panels and I knocked it out in one day!?
| Tools Suggested | Materials Used |
| Tape Measure | Faux Stone Panels |
| Utility Knife | DAP ALEX caulk or DAP DYNAGRIP |
| Straight Edge | Alex Plus Spackling |
| Caulk Gun | Terry Wash Cloth |
| Putty Knife | |
| Staple Gun (Optional) | |
| Grout Bag |
I am not exaggerating when I say that anyone can do this! This is a very entry level DIY that looks so realistic it is insane. Another bonus? It requires very few tools and the panels are very easy to work with!
Prepping Panels

I think the trickiest part putting up the first row. I wanted the rock ledge to meet fleshly with my baseboards. The edge of these panels follows the outline of the stones. When cutting the straight edge make sure you cut all of your first row with the same dimension. They are designed to be butted up to each other and create a seamless look.

The cutting process is very simply. I map out my dimensions and used a sharpie to draw them onto the panel. Using a straight edge and a utility knife knife I cut out the desired dimensions. It usually only took me one pass with my utility blade, but if you encounter a stubborn segment, simply bend and snap along the scored line.

Adhering Panels
When applying the tiles, you are going to want to cut and then apply the panels one at a time. When doing this project I found that using DAP caulk work famously. Another option would be using a product like DAP DYNAGRIP. I have loved using this product for heavy duty projects like this SHIPLAP project. DYNAGRIP has a nearly instant hold that is adjustable.

These panels are very lightweight so I opted for a caulk that would be a strong hold but still feasibly removable should I ever opt to remove the stone.

Using a caulk gun apply DAP caulk to the back of the panels. I used the raised grout lines as a guide for applying the caulk. By doing this it ensured even adhesion without wasting caulk.

Once a the ALEX Caulk or DYNAGRIP adhesive is applied the panel can be applied to the wall. The panel will very easily stay put! If you are using DYNAGRIP this thing won’t be going anywhere and will be adjustable but will take some pressure to move it. Using caulk it will stay put but can easily be moved around until the caulk begins to set.

Due to the nature of this project I decided to tack the panel in place in one or two places on the panel. While the caulk or DYNAGRIP will easily hold the panels on the wall, I didn’t want them to shift whatsoever when I was butting the next panel up to the joint.

Like I said, work with one panel at a time. Cut to the desired locations, apply caulk or DYNAGRIP, tack in place, then repeat with the next panel.
Applying “Grout” (Spackle)
Once the panels are installed it is time to give these faux stones some character! If you recall forever ago, I created a I German smear brick wall using faux brick panels. It has held up amazingly and is a beautiful feature in our home. When I found these panels I knew exactly what to do with them, I would take a note out of my old playbook and use ALEX PLUS Spackle to achieve a faux over-grouted look.
Something to consider, spackle in and of itself is not intended to be used as a grout. I am aware. However,I have never actually seen anyone ever try to over-grout plastic wall panels . I am in unchartered territory. However, this is what I DO KNOW. I have used DAP ALEX PLUS spackle for many projects and have been amazed with it.
It has excellent adhesion, does not sink or shrink, and is extremely durable. THIS IS EXACTLY the attributes I needed for this project. I needed a product that would adhere to the surface of the panel and would not shrink as it dried. (In this case, if the product were to shrink it would pull itself away from the panel and may not stick the way I needed it to.) It also is extremely durable. These panels are made of a flimsy plastic. If you press on them, they do give a little. I needed a product that would be durable and not crack and chip if the panel was flexed.

While spackle is not specifically made for this application, it was a no brainer that I trusted ALEX PLUS to be my absolute best bet… and I was right! After quite a few flex, and scratch tests this product is holding up like a charm.

When I first started this project I was totally winging it, by the 10th panel I had my technique down to a science. The easiest way to apply the spackle was to fill a grout bag with ALEX PLUS spacke. I suggest working in sections no bigger than 2’x2′. Pipe a liberal amount of the “grout” into the joint lines between the stones.

Once a section of the stone had the spackle piped into the joints, I troweled over the spackle using a small putty knife. I used the putty knife to push the spackle completely into he joints while also spreading the excess spackle over the surrounding stones. Part of the appeal of an over-grouted stone is that is fairly low contrast and the “grout” unifies to the stones and creates a softer feel. I tried to mimic this look using the spackle.

After using a putty knife to spread out the spackle, I wanted to create some depth to the crevices.. BY definition sparkle is suppose to fill holes and create a smooth surface, so I needed to run my finger along the joints in order to create a very gentle curve to the grout line.

After the cracks are smoothed out, we are ready for the finishing touch! Using a damp terry cloth rag, I gently dabbed along the spackle to create a uniform texture. I also dabbed some of the excess spackle onto the surrounding stone. It gave it a very natural look that helped blend the contrast between the different color stones.
Just look at that finish! Can you believe that this was just a flimsy plastic panel? With just a little bit of elbow grease and creativity they now look like an old-world/tuscan villa!? However you want to catergorize this look, I just know that it is beautiful and it gave our small powder room the “wow factor”! Mission complete.
Thanks so much for following along, and a big shout out to sponsors like DAP that allow me to keep creating content so that I can share it with great folks like you!
Take Luck,
Corey


I am in love!!! Amazing and I will for sure be using this product in my next (farm) house…moving in a couple of months. Can’t believe how realistic it looks with the “improvements” you made. Thank you for the great tutorial & product feature!
This is absolutely Gorgeous!! I am amazed at how realistic this looks. I am so upset I didn’t see this a month ago as I just shiplapped our bathroom. I just may have to find a different feature wall in our home to do this on, I am so in love with it.
Thank you for sharing this, you did an amazing job!!
I’m so impressed with this! You did a terrific job! I might like to try this, but I didn’t see any source for the faux stone panels in your post. Will you please let me know where you got them?
Awesome job, so beautiful!!
Beautiful! Can you please where we can find these panels?