DIY Trestle Entry Table – *This post is sponsored by DAP*
Hey all! This was hands down the funnest build I have done for the blog thus far. Why? Because I got to team up with one of my builder blogger besties to design and build it! It all started with an innocent trip she was taking with her family to Orlando… well once we discovered we would be within driving distance of each other, we started conspiring. It was unanimously decided we simply could not get together and not build SOMETHING! So we teamed up with the great folks at DAP to create this entry table that I desperately needed to stage the 70’s Ranch Entry! 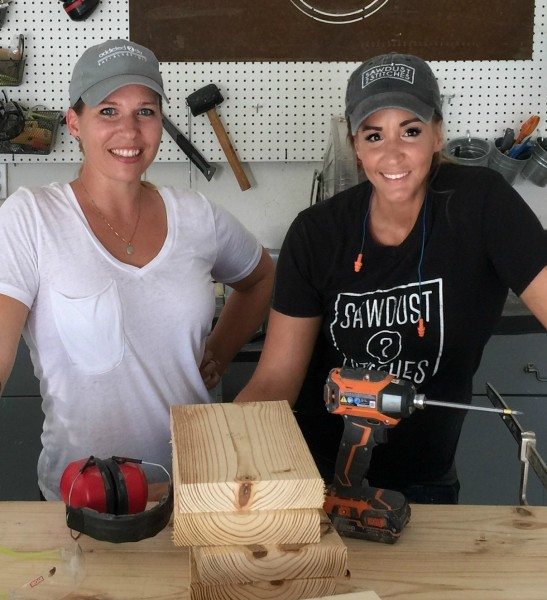
So here is how it’s going to work, Katie from Addicted 2 DIY has the printable build plans available here. You can also follow along here for more tips and tricks for this build.
So let’s get started!
DIY Trestle Entry Table – The Base (Reference Step 1-3 here)
We started at the bottom and worked our way up! We decided to give it a beefy base so we doubled up 2 x 8 boards, and gave them chamfered edges to add character. (See tutorial step 1 for dimensions.)
Once the feet were assembled we were ready to add our stretcher (Board that spans between the two legs). We used two pocket holes on the under side of the stretcher and secured it to the (bottom of the top board) 2x 8. Repeat on both sides.
DIY Trestle Entry Table – The Legs (Reference Steps 4-6 here)
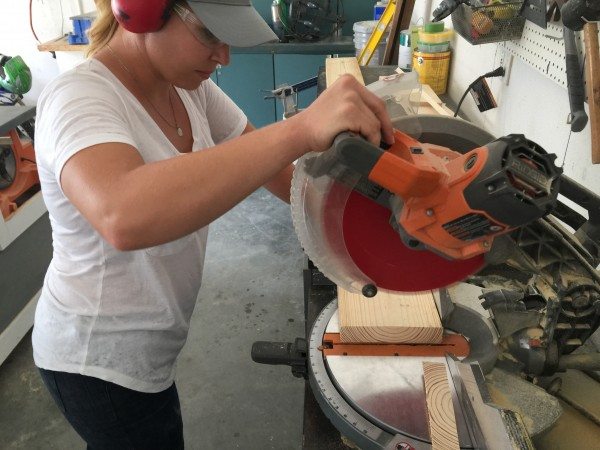
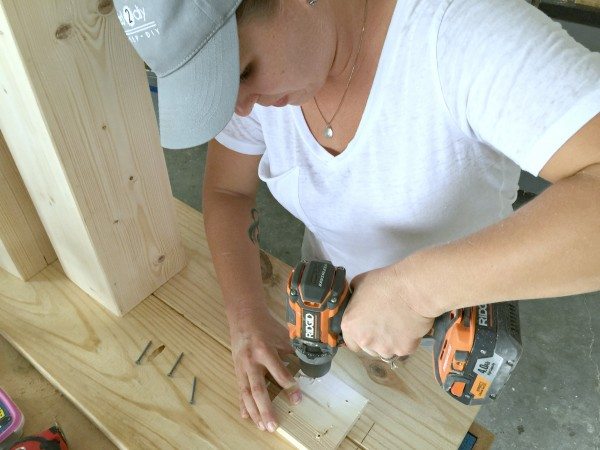
We wanted this table to have some BEEFY legs! Most lumber stores don’t carry what we needed, so we decided to DIY it! Here is what we did.
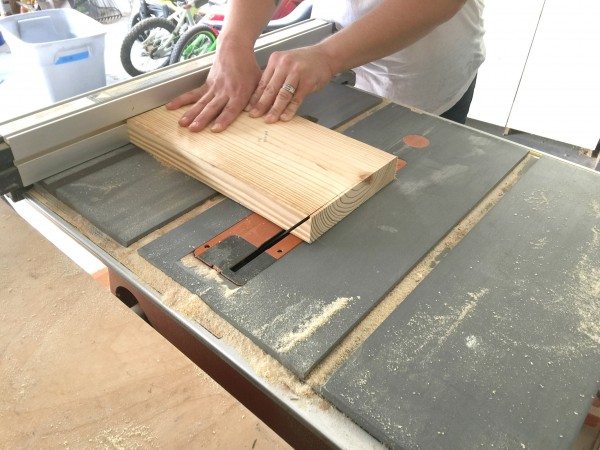
We set our table saw blade at 45 degrees, and set up the fence to maintain as much of the width as possible. Essentially we wanted to cut our 1×6 boards so that they all were uniform and had 45 degree angles one both long sides of the board. (See tutorial for cut dimensions.) 
Next we were ready to assemble! The assembly of these can be a little tricky, so we took a few extra precautions to make sure these legs came out perfect!
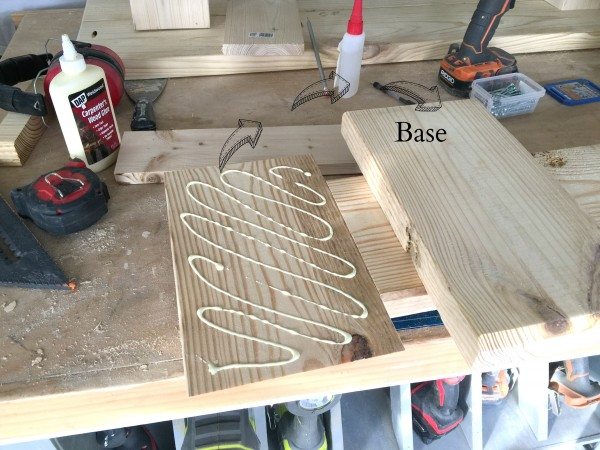
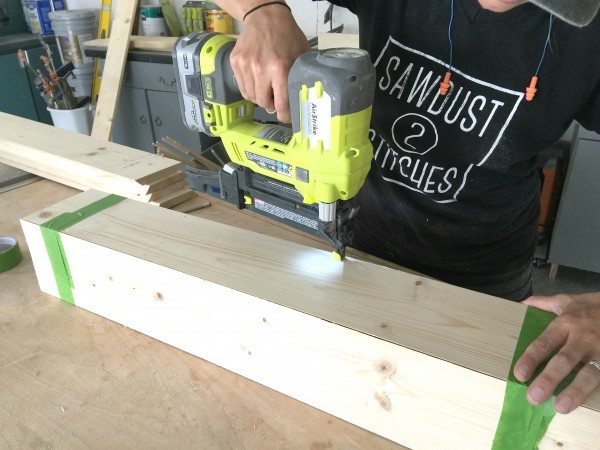
First we applied DAP Carpenter’s Wood Glue along the edges in a serpentine pattern. Next we added small dabs of Rapid Fuse in the hills and valleys of the wood glue. Why? I’ll tell you why! When putting something like this together it can be tricky to get it to stay in place long term while the glue sets. The Rapid Fuse glue, does just what it claims. It fuses the surfaces together rapidly. For loss of better words, it is essentially a super glue for wood. By using the Rapid Fuse with the Carpenter’s Wood Glue, it will form an immediate bond that will make the project workable within minutes and will hold joints together while the wood glue sets.
We are so cool, we even got some video footage of us doing our thang! Check out how we assembled the legs.
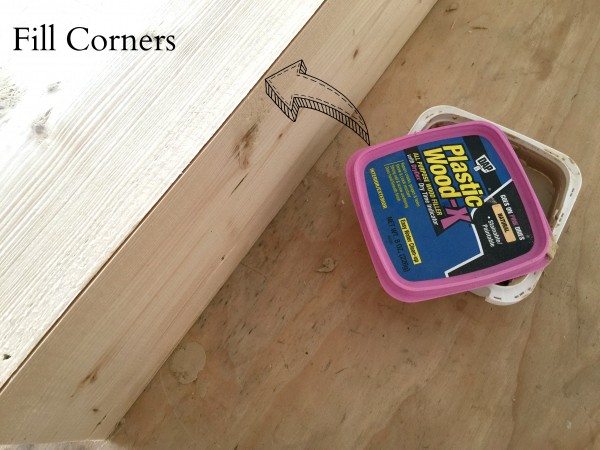
Due to the nature of wood, it isn’t always perfectly straight, so often times you will find discrepancies. That is where Plastic Wood comes in! As you can see in the image below some of our joints had a slight gap. Seeing as this is supposed to appear as a solid beam, that simply would not do! So we used spackle knifes and filled the corners with Dap Plastic Wood . This stuff sands like a dream and is stainable too, Booyah!
 Once the Plastic Wood was completely dry, we used a sander to give the legs a nice smooth finish.

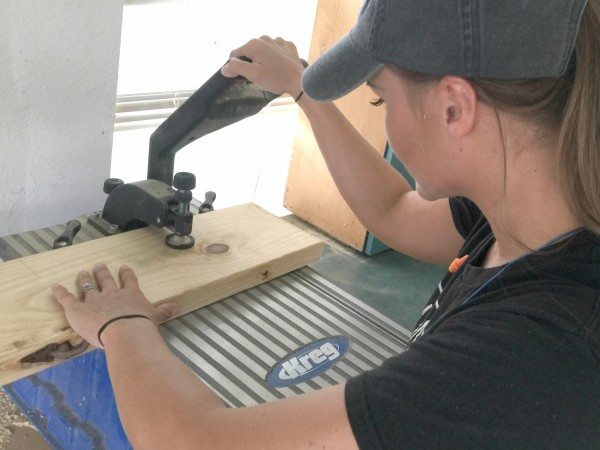
DIY Trestle Entry Table -The Top (Reference Step 8)
Next Katie cut our top boards. Again, we used 2×8 boards to create a nice chunky look.
 The top would require us joining two boards together, to do that we used pocket holes.
 We wanted this to be a nice tight joint so we used our glue up technique again. First I applied Carpenter’s Wood Glue in a serpentine pattern.
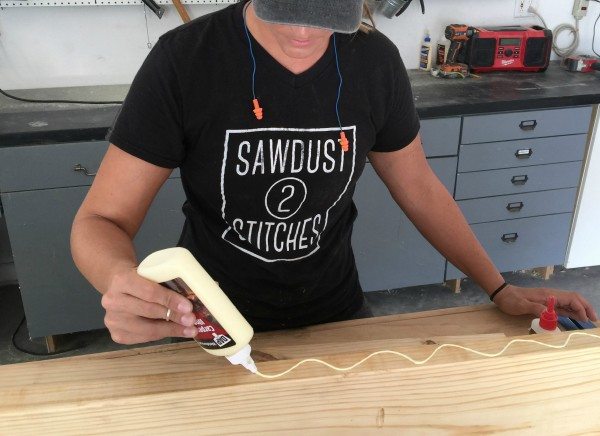
After applying the Carpenter’s Wood Glue, I added small dabs of Rapid Fuse.  Lastly, I secured the boards with 2 1/2″ pocket screws.
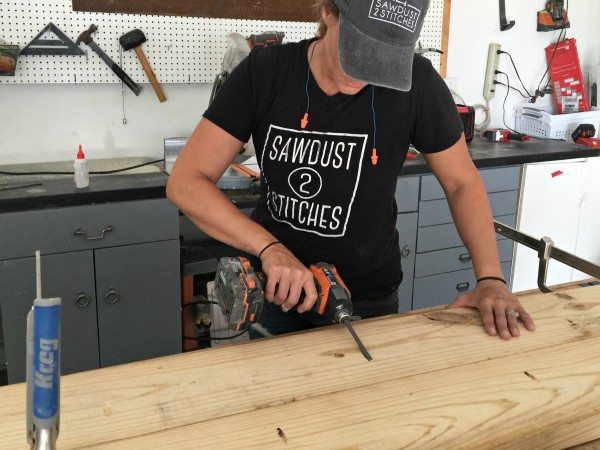
DIY Trestle Entry Table – Assembly
(See tutorial for placement and dimensions)
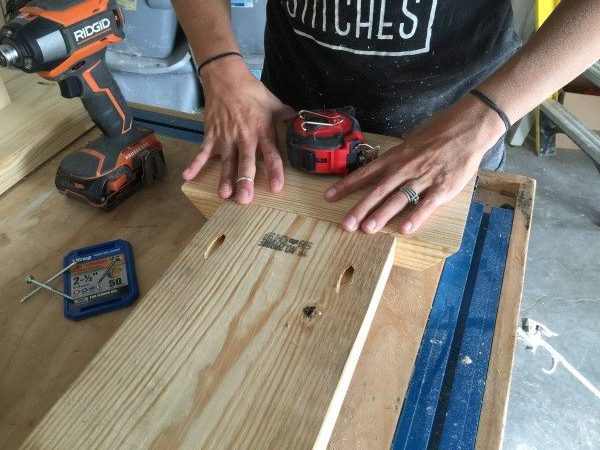
Next, Katie secured our blocks to the underside of the table, as well as the top of the base/feet. These blocks will fit snuggly under/in the hollow part of the legs.
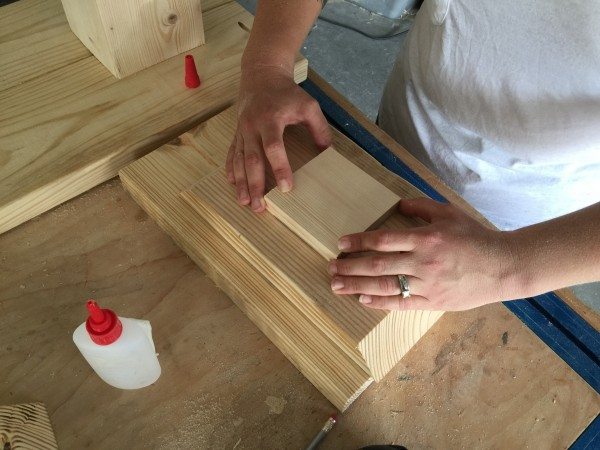 Once you have the blocks in place, dry fit them to ensure you have a good fit. After you have confirmed a good fit go ahead and apply Carpenter’s Wood Glue to the bottom and insides of the table leg , and then use 1 1/4″ finish nails to secure. (Make sure that the nails are driven through the leg and into the blocks.)
 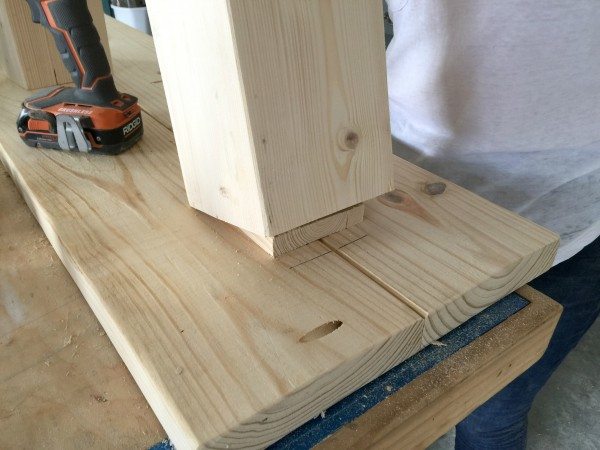 At last we were ready to apply our paint and/or stain. We opted for “Golden Oak” stain by Minwax.
  Phew! Yes, we designed the table, shopped for the supplies, built said table, and then stained it all in ONE day. But wait there is more! We even got a little crazy and staged it together!
 Us DIY bloggers are our own breed of crazy, and we dig it!
 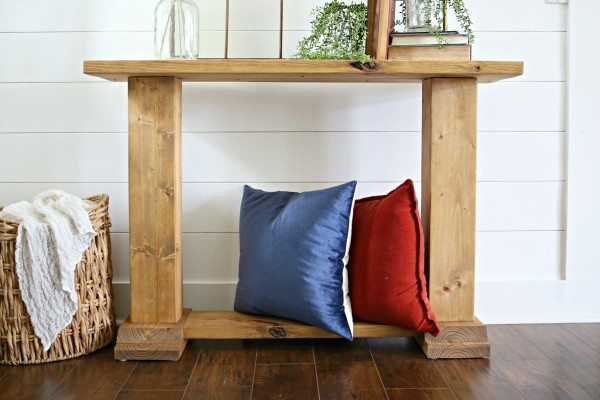 Isn’t it just yummy!!?
 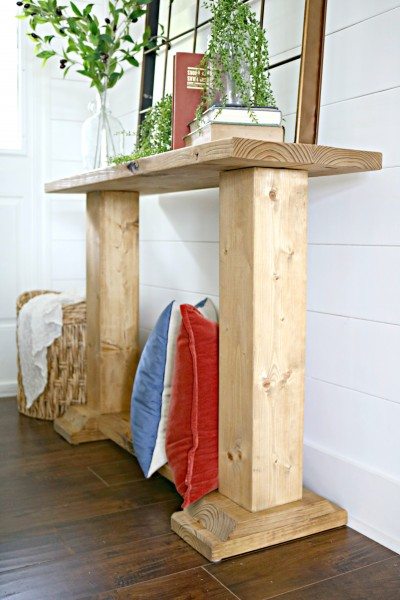 I would later take it over to my friends home and use it as part of the Entry Makeover. I loved the way Katie and I styled it so much that I duplicated the style in colors that would work in the new space. I just love everything about it!
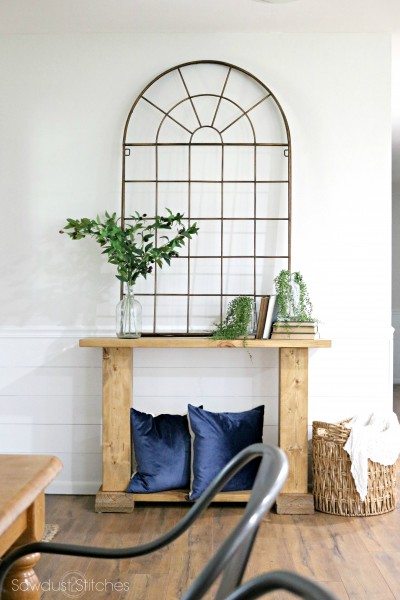
 As you might have seen in previous posts,
 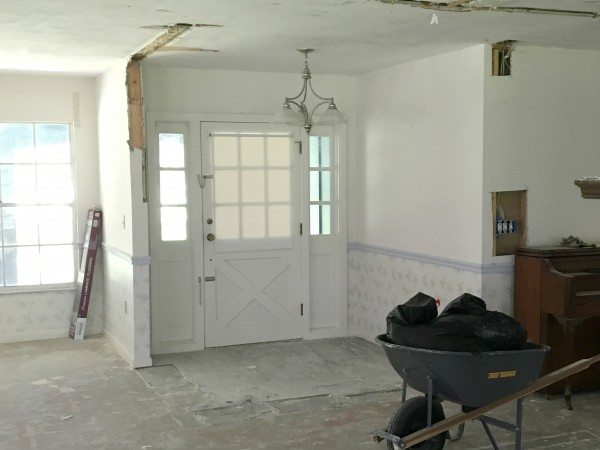 If you have been reading along, you know that we decided to cover up all the existing wallpaper with
 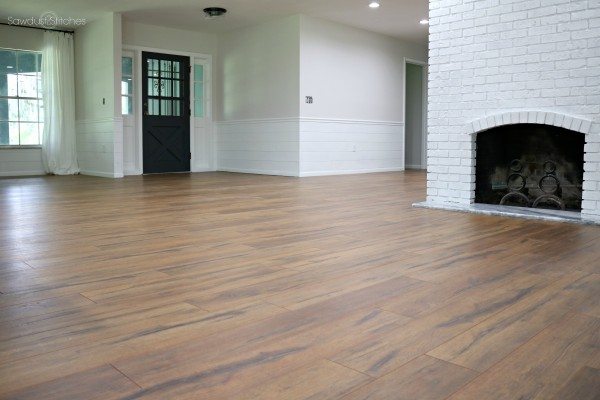 TA-DA! Here it is, in all of it’s staged glory! Isn’t it so much more inviting!?
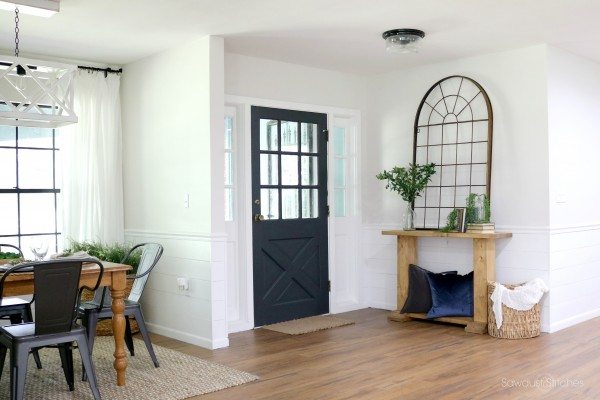
 My friend Katie (
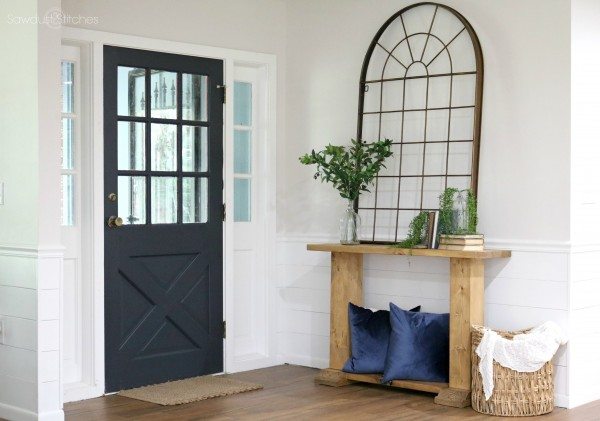
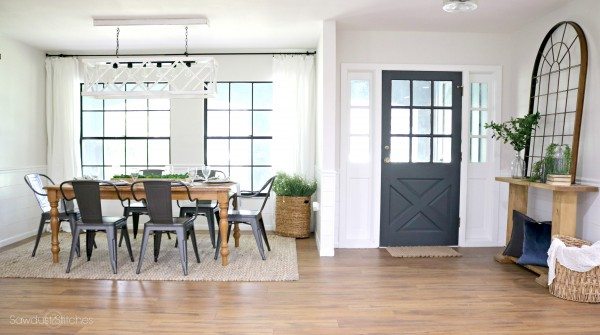
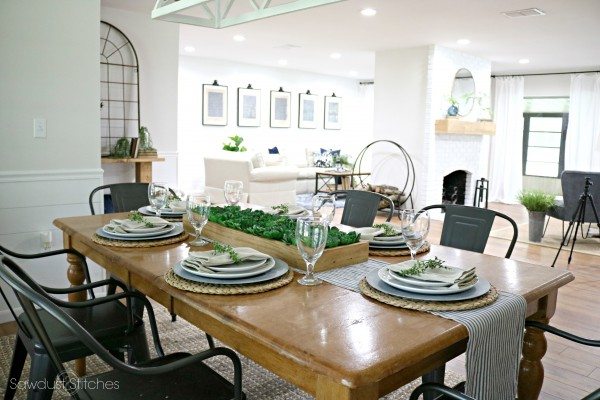
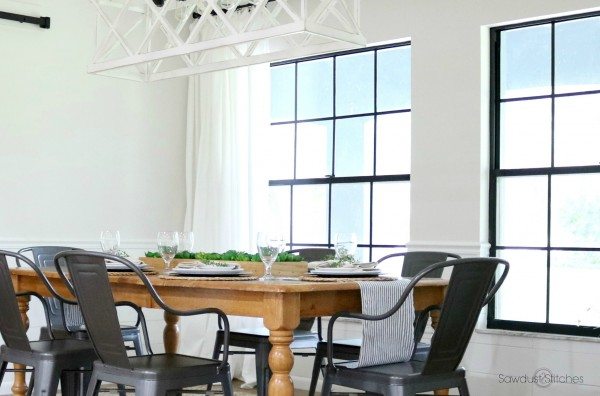
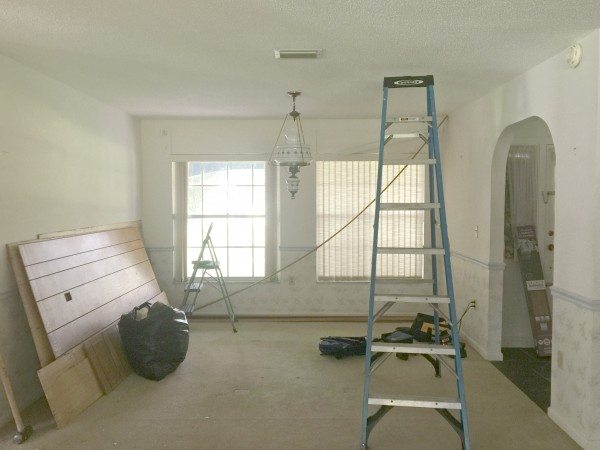 However, this is the space that came together in my mind the quickest. Once we established the general feel we wanted to create in the home, the dining room just fell into place. Below you can see my original style board.
 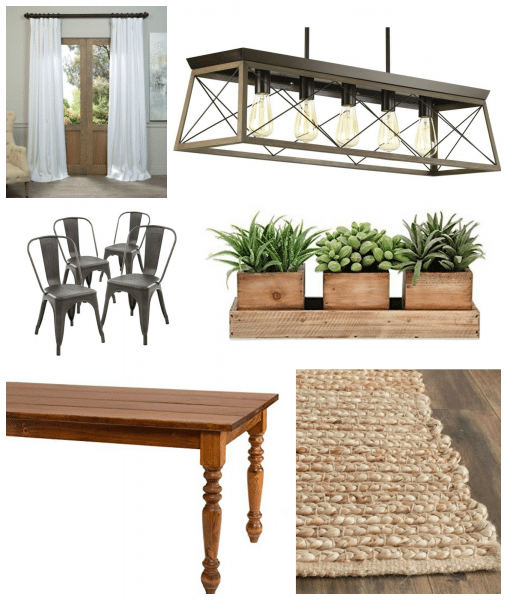 We wanted a nice open feel, so we tore out all unnecessary walls.
  We then added ship lap
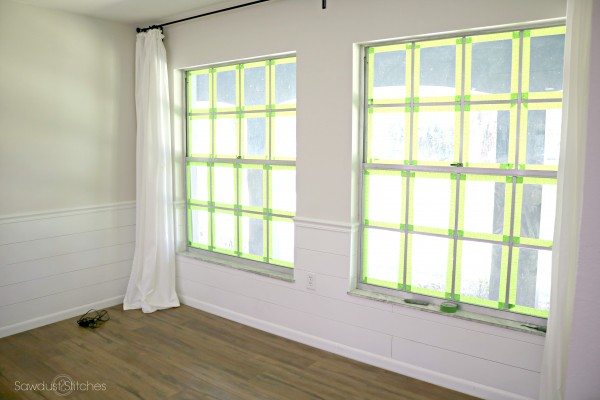
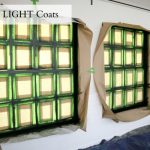
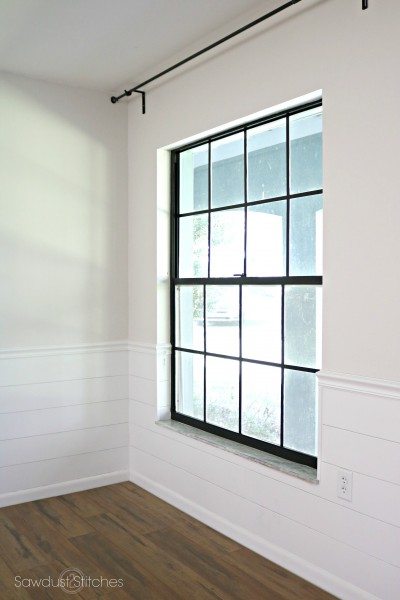
 The space was really coming together seamlessly, but it needed a little oomph. So what did we do? We spray painted the window panes of course, and we don’t regret it! If you are interested to know more about this awesome tutorial you can check out
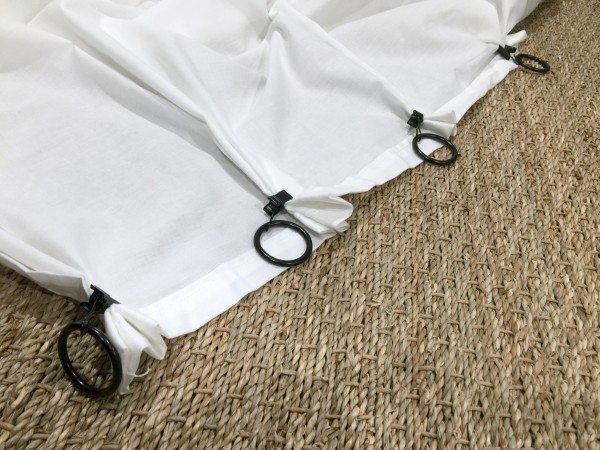
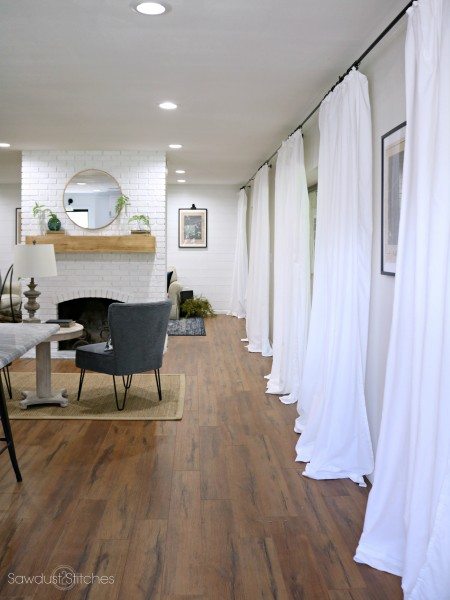
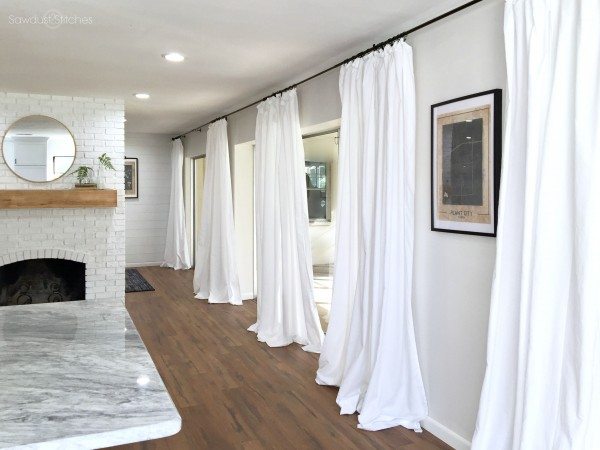
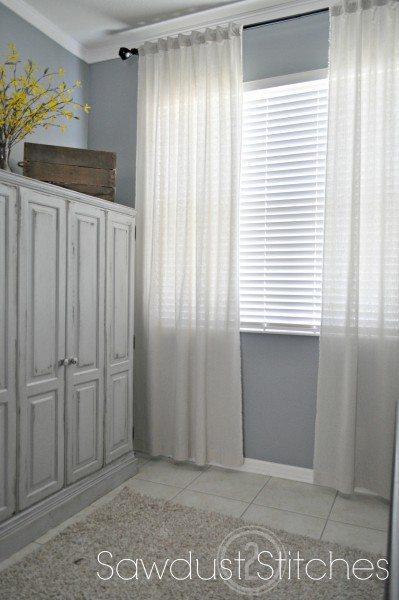
 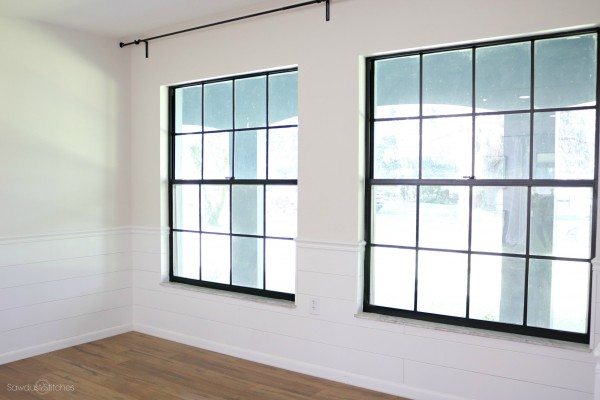 Next we added some billowy curtains. Would you believe these curtains are ONLY $5 a piece! Yup! You can see the
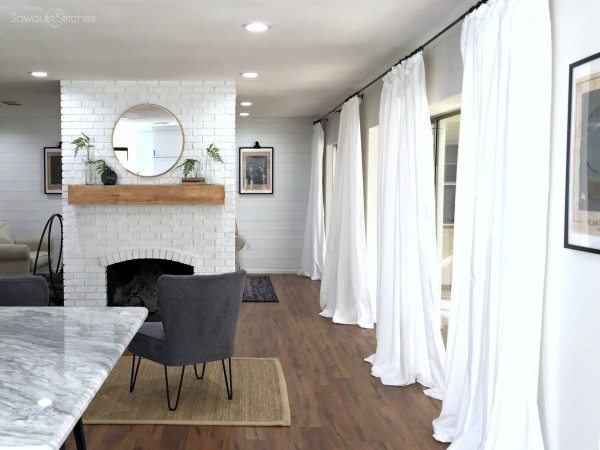
 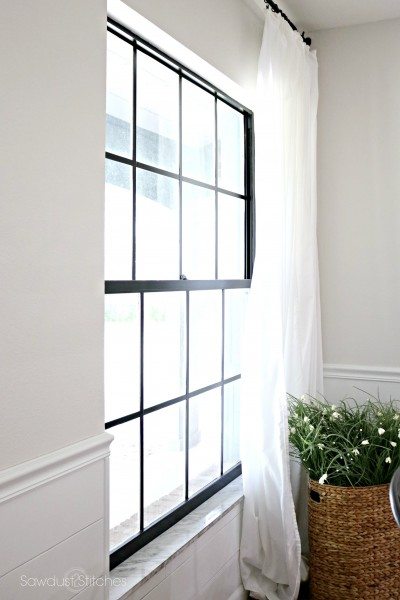 Alright, without further ado. I give you our masterpiece. The DINING ROOM!!!!
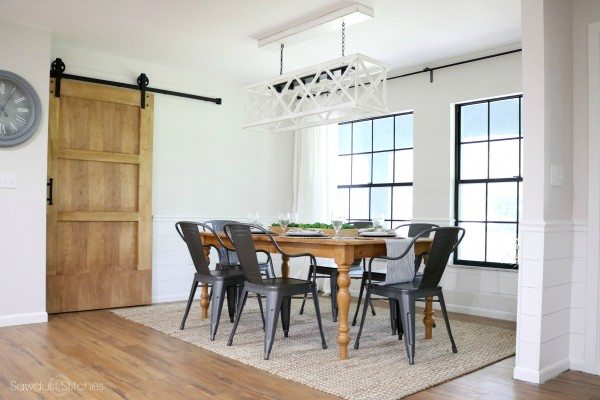 The light fixture is one of my favorite pieces. I actually made this piece two years ago but never ended up using it in my home. When we designed this space, I knew exactly where my light fixture belonged! This was a very intricate build, but I do plan to publish build plans at some point.
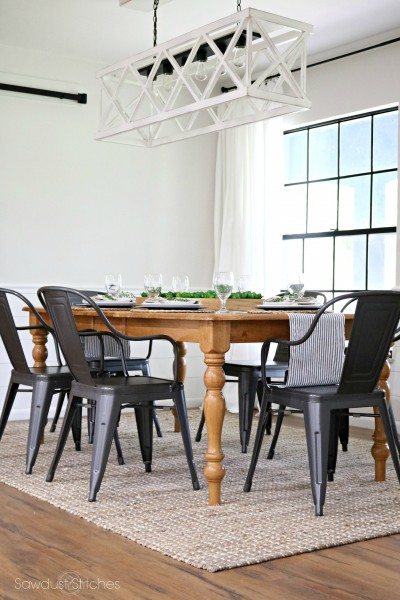

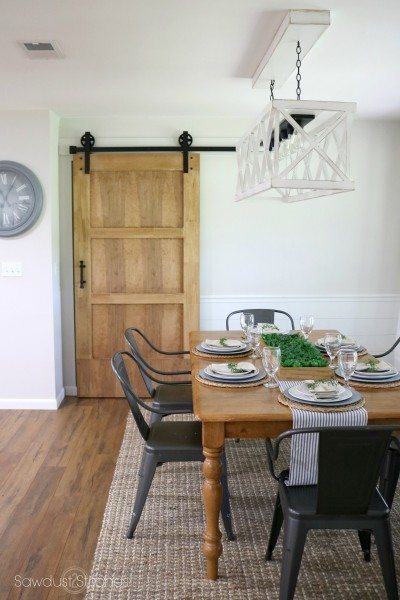

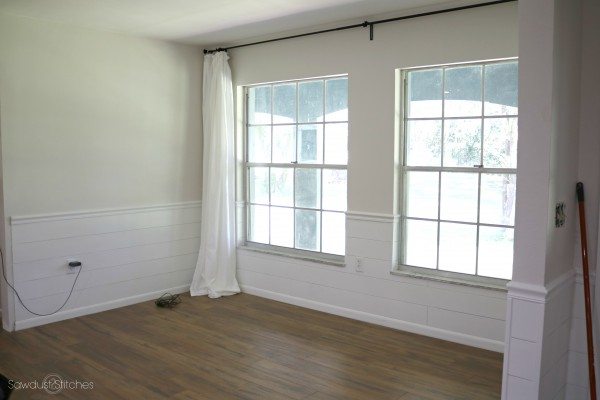 As you can see these windows weren’t horrible, but they definitely weren’t great. Originally, we just planned on covering them up with the curtains in hopes of making them less visible. However, as my design plans for this space slowly fell into place I realized this room NEEDED black window frames! (You may have noticed the
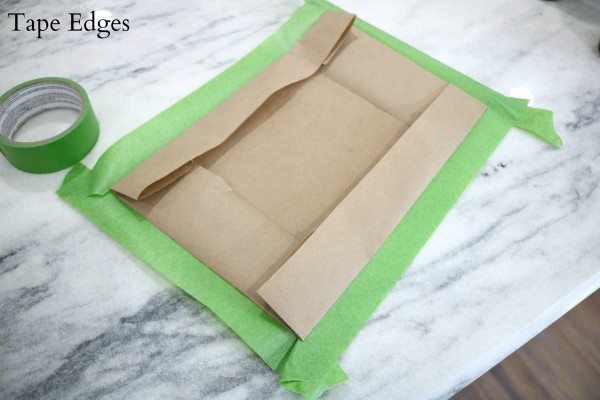
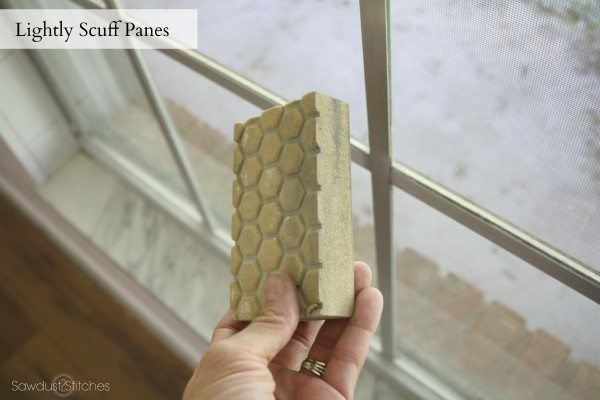 Step 2. Tape it Up!
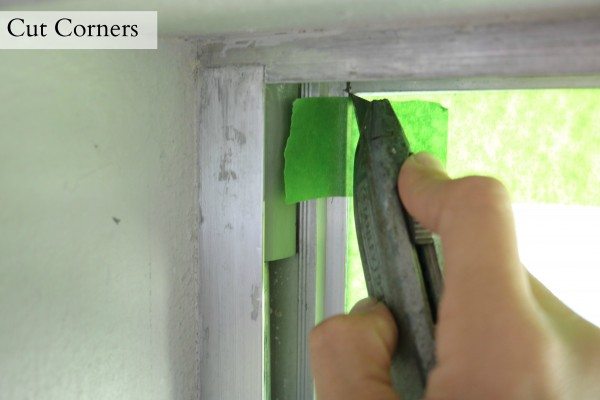
 Step 3. Cover Glass
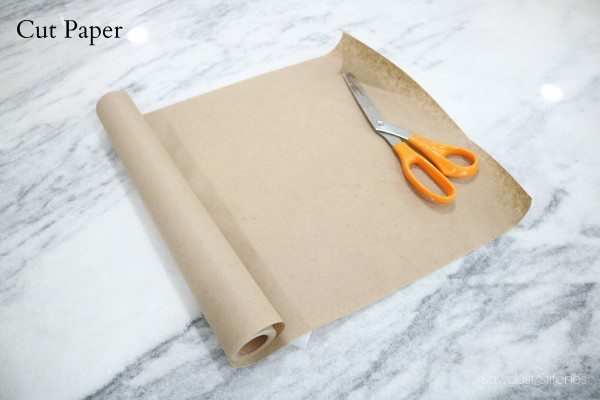
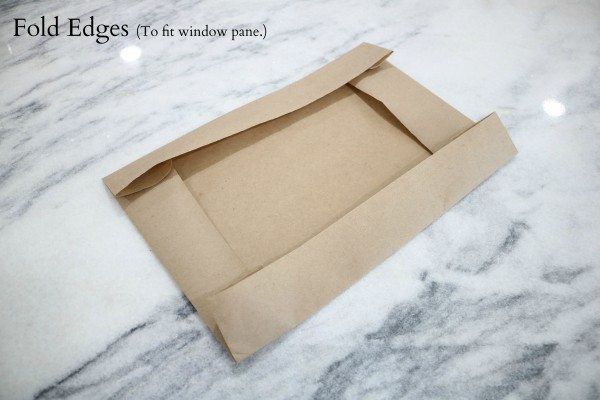
 Step 4: Protect Area
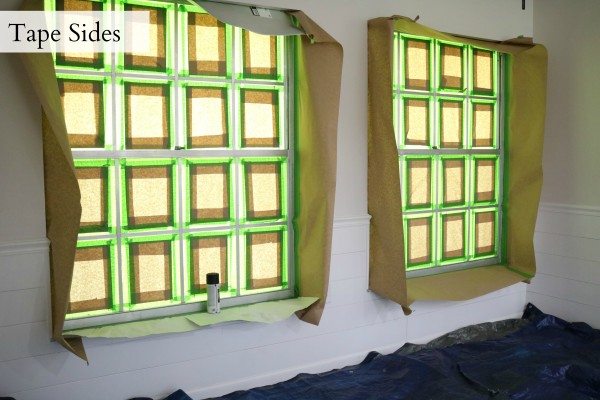
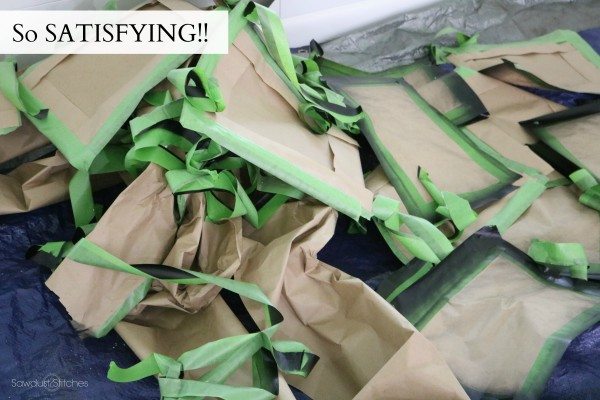
 Step 6. Remove Tape
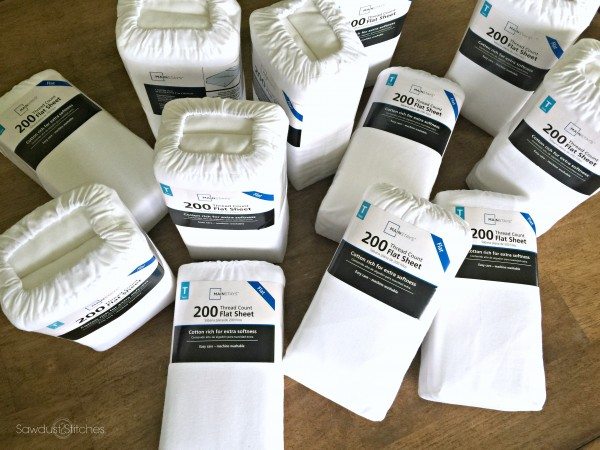 Here is what I did. I made a trip to every single Walmart in the surrounding area and bought every single twin size FLAT sheet available. Unfortunately, you cannot order these online, so you will need track them down.
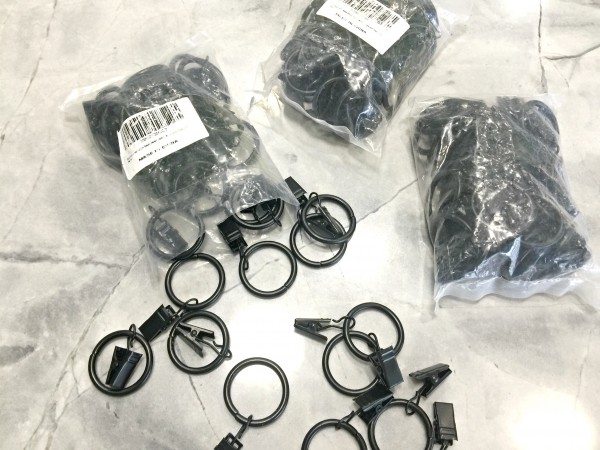

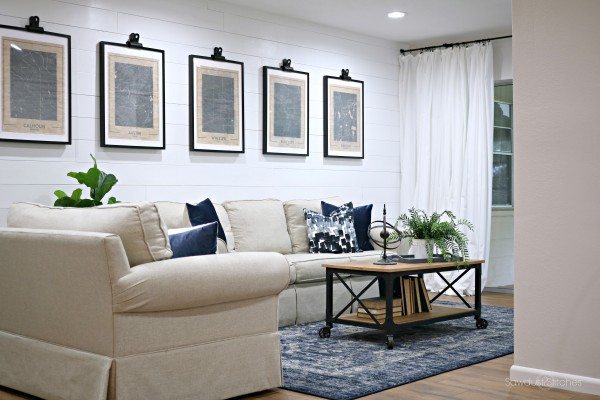

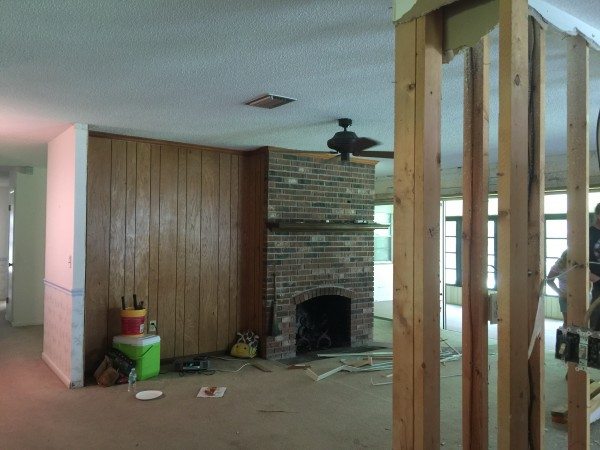
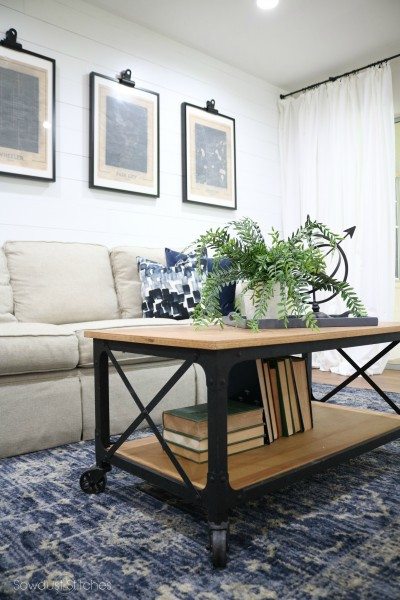
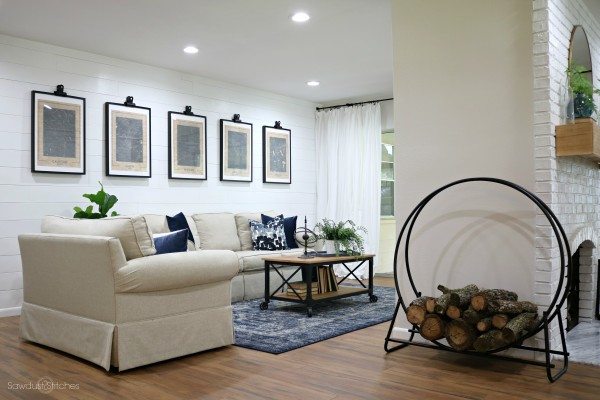
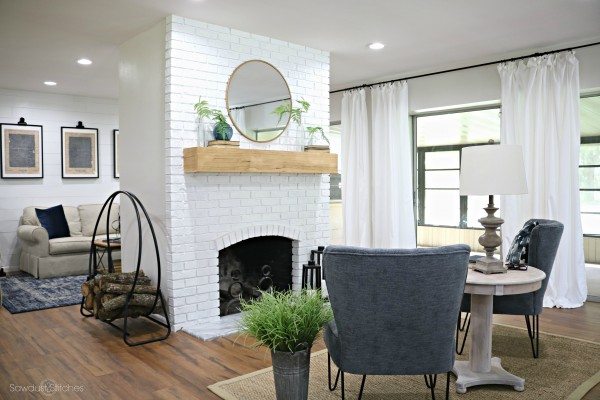
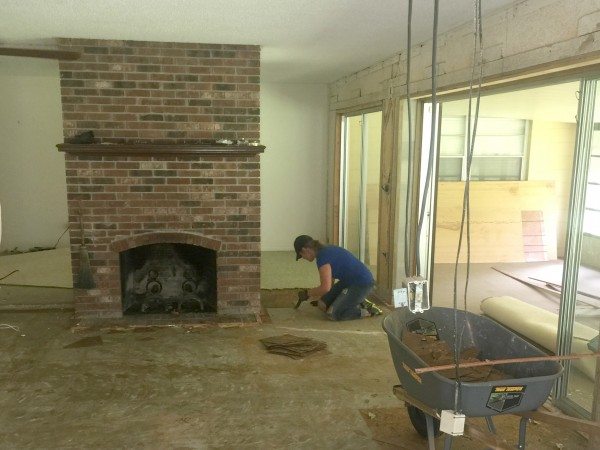 If you have been following along you know that we covered up all the wallpaper, and created an accent wall using faux shiplap.
  Next up. Floors! By adding continuous wood laminate floors through out the entire living space it created a gorgeous open concept space. We used a wood laminate and this stuff rocks!
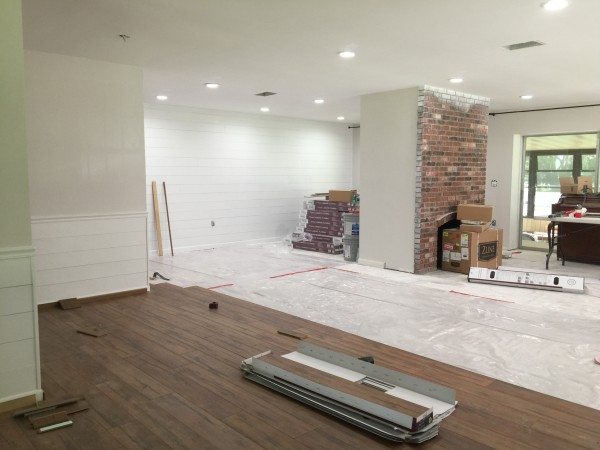 Alright without further ado, I give you the 70’s Ranch Family Room/Sitting room makeover!
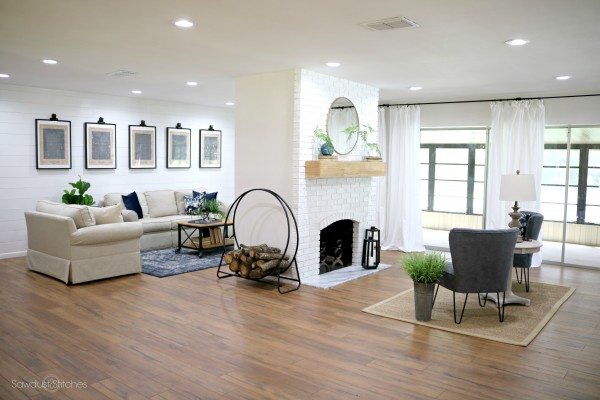

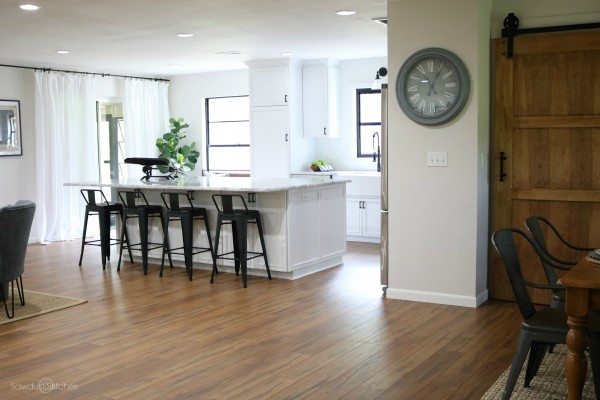
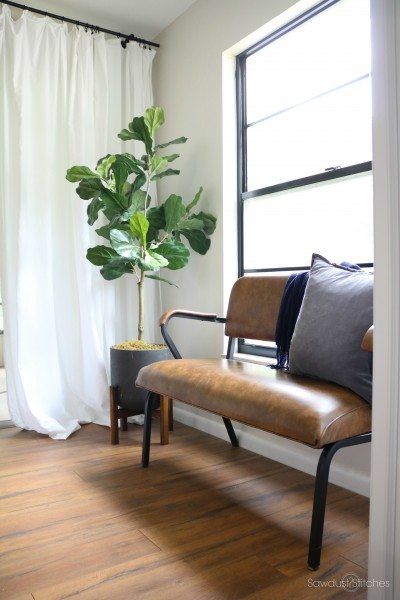
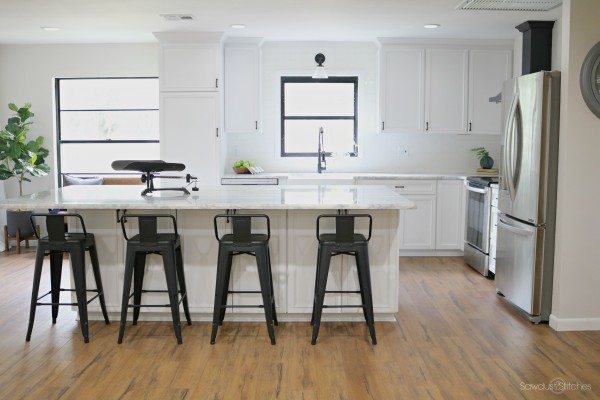
 Here is the view from the kitchen looking into the living room. P.S. If you haven’t seen the kitchen makeover yet, you are missing out my friend

