• Blog
  • About
  • Press
  • Privacy

Let’s be social!

  • Skip to primary navigation
  • Skip to main content
  • Skip to primary sidebar
  • Skip to footer
Sawdust 2 Stitches

Sawdust 2 Stitches

  • Tutorials
    • Around the House
    • Organization
    • Wall Decor
    • Sewing
  • Makeovers
    • R.V.
    • Room Makeover
    • Furniture Makeover
    • Decor Makeover
  • Build Plans
    • Small Builds
    • Wall Decor
    • Dresser
    • Tables
    • Seating
    • Shelving
    • Hidden Compartment
  • Seasonal
    • Summer
    • Spring
    • Fall
    • Winter
  • Home Tours
    • First Home
    • Current Home
    • 70’s Ranch Home
  • Workshop

Blog

Fall Home Tour

September 5, 2017

Hey all!  Can I tell you how much I use to love fall!?  I would be the first in line to buy hot chocolate when it was seasonally  released at Starbucks. I would start wearing  my tall boots long before the weather required it.  I would attend football games, even though I hate watching sports. (GASP!  I know, I know.)  I would start running outdoors, and would actually make dinners, because soup was a favorite of mine… Then we moved to Florida.  Don’t get me wrong, I love living here, but I have realized I have to decorate  a little early, and candles are ESSENTIAL to get me fired up for the seasons. (See what I did there?)

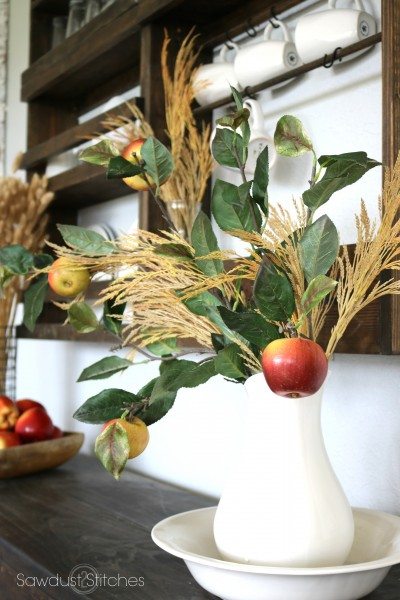
So I lit up an apple scented Yankee Candle, and started decorating! Apple has always been my go to favorite scent for the fall, so as I was seeking inspiration for my  fall decor, it seemed like an excellent idea! Inspired almost.  So I veered from the typical pumpkin scheme, and tried something new, and  I have got to say I love it!

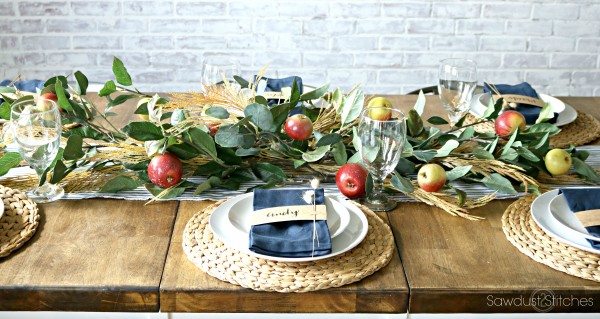
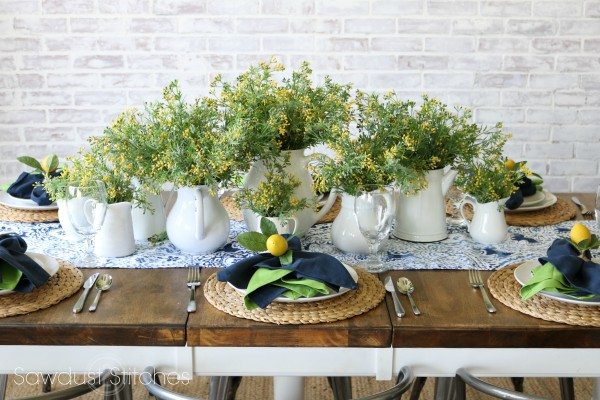
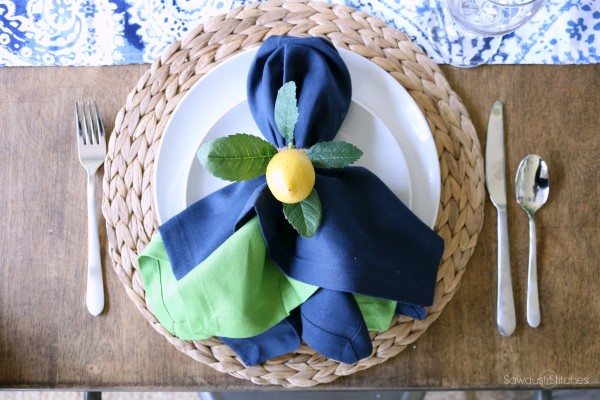
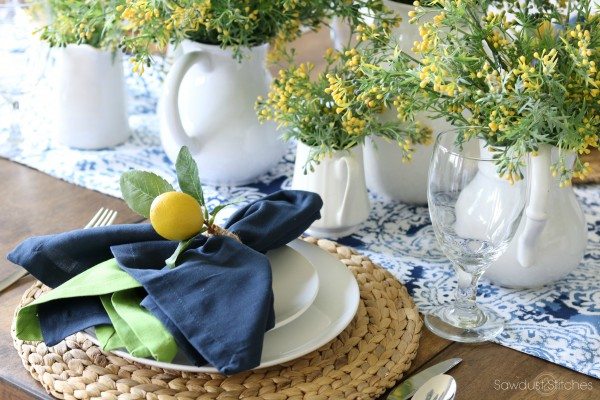
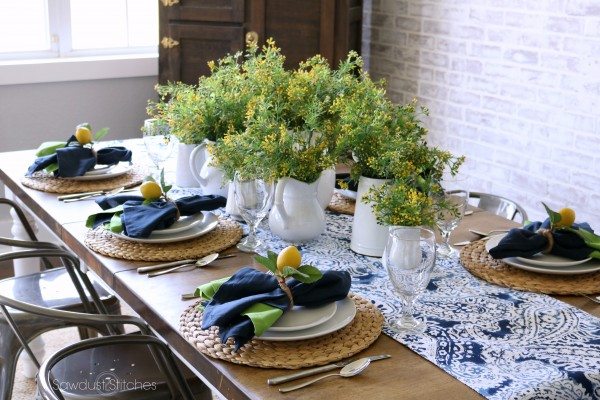
I decided to use apples paired with wheat, and eucalyptus for my table scape.  I am not going to lie, this may be a new favorite combo! I was a little unprepared to decorate my table this year. So grabbed a piece of cardstock and made myself some napkin rings/place cards.  I simply wrote out the names, and added two small slits to slide in a few sprigs!  Easy enough. (And as cheap as you can get!)
   

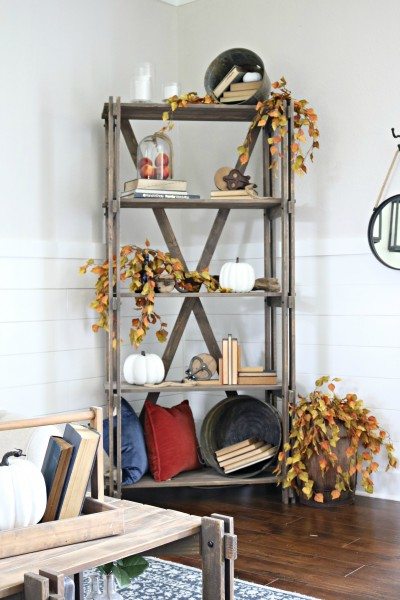
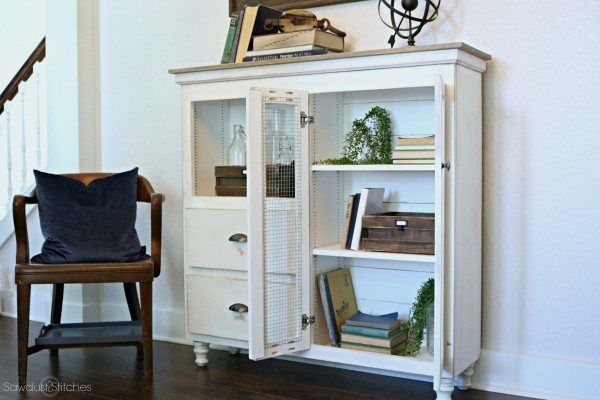
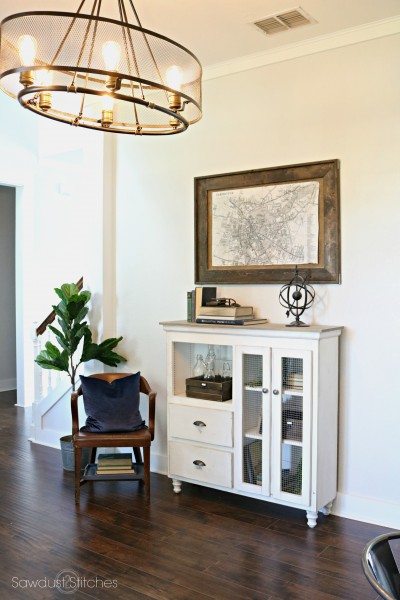
For the family room, I didn’t have to add much,  just  a few pops of orange and burnt red, and it completely changed the feel of the room. I cannot say it enough, I love using pop colors for the seasons!

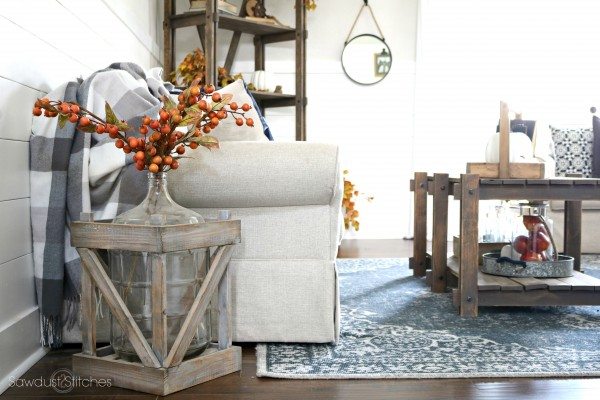
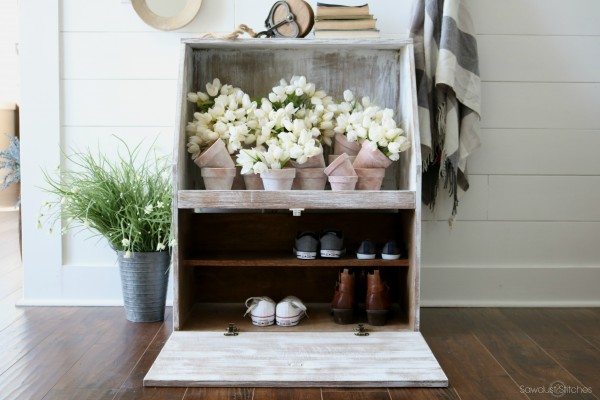
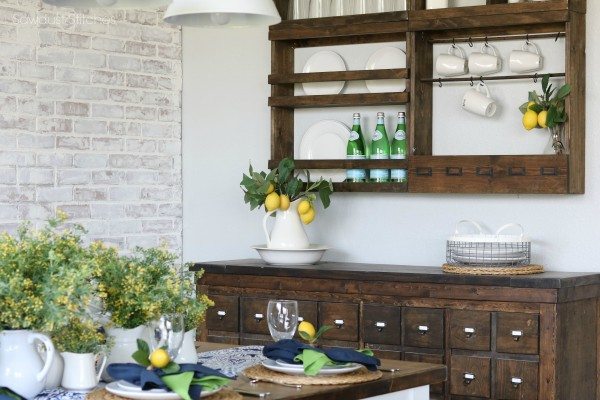
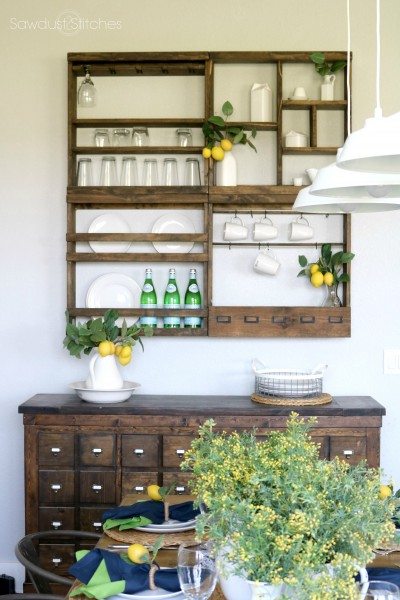
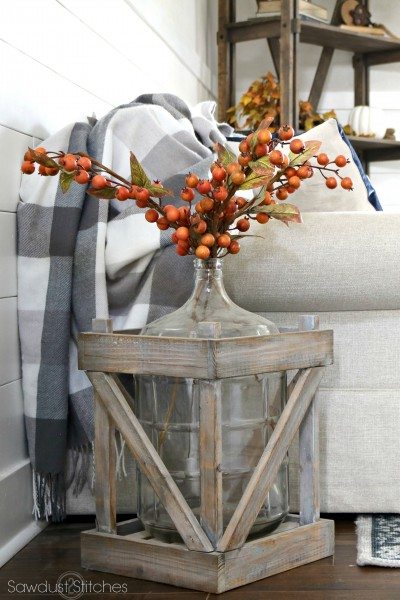
 This crated  jug  has become one of my all time favorite ways to update the room from season to season. If you are interested in making your own,  you can get all the details here.    
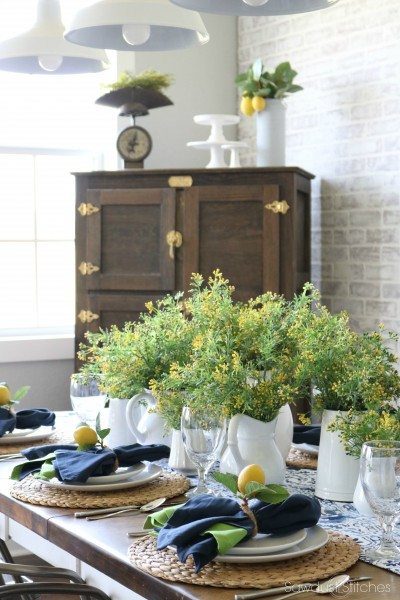
Small tidbit:  I actually  bought all my fall stems at the end of the season sale last year.  I was a little giddy when I was going through  my fall decor, and discovered the new stems that  had completely  forgotten about.  Isn’t that the best!?  I think I had picked them all up at 80% off.  Can’t complain about that!

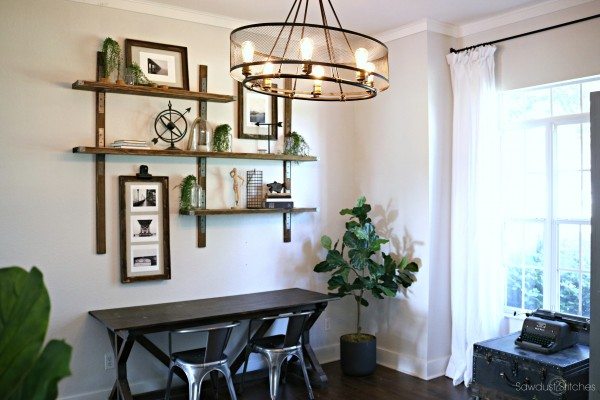
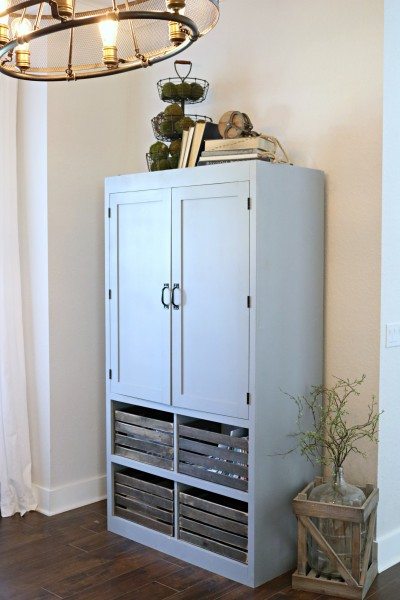
Also if you are interested in building the shelf or the coffee table you can get all the details and build plans here:

Coffee Table

Shelf 

 Well there you have it folks,  my fall decor for this season! I may not be entirely on board for fall yet, but I am already brainstorming Christmas decor for this coming winter, and it is going to be good!  You will want to stay tuned.

Take Luck,

 Corey  

Home Office Makeover

August 28, 2017

This post is sponsored by The Home Depot. All opinions and product selections are my own.

Holy GOODNESS!  Am I the only one that gets every room about 91% completed, and then just give up?  I am guilty of this on so many occasions!  Thankfully I have wonderful sponsors like The Home Depot, and FEIT Lighting to give me nudges of encouragement! Today I am more than excited to officially  share my completed home office!

This room has  slowly made a huge transformation over the past year.   Here is a quick reminder to jog your memory.  Obviously, a lot of work has been done.  But it was still missing something…  It needed a light fixture with character!  I wanted it to have the industrial look I crave, while still having  hint of the vintage vibe. 

I had briefly searched, and had no immediate luck, so I quickly gave up and left  the room at 91% and moved on to the next. Well, that all changed when I fell head over heals for this beauty: Mayfield Park Collection Oval Chandelier

 It was everything I never knew I always needed!  It obviously  had that great industrial look character… but when  I paired it with the FEIT  Vintage  Style Light Bulbs ?! This thing sang it’s own hosanna. Seriously,  check out how amazing these bulbs are!  That  filament is gorgeous, AND would you ever guess they are LED?  That’s right, they are LED with a vintage ambient glow. 

There are few things in life that bring me quite as much satisfaction as walking by a completely finished room!   It has been a year in the making but we made it old friend.

In case you missed some of the projects that led up to this rooms completion here are  a few of the DIY projects you can make on your own!

Simpson Strong-Tie Shelving 

 Dated Cabinet Makeover

Free Standing Crate Organizer  

Muslin Curtains 

 I am amazed and ecstatic that one small change like a light fixture can completely transform a room! Now that this room is OFFICIALLY  done,  I am off to finish up the master bedroom.  Make sure you stay tuned,  because it is gonna be good!

Take Luck,

 Corey

I acknowledge that The Home Depot is partnering with me to participate in this FEIT ELECTRIC Program (the “Program”). As a part of the Program, I am receiving compensation in the form of products and services, for the purpose of promoting The Home Depot. All expressed opinions and experiences are my own words. My post complies with the Word Of Mouth Marketing Association (WOMMA) Ethics Code and applicable Federal Trade Commission guidelines.

Antique Boot Box with Shoe Storage

August 2, 2017

Hey there sports fans!  After a small  hiatus from blogging I am back and I am stoked to share with you what I have been working on in the shop!  The great folks over at Build Something.com reached out and they were interested to see what I could build using only one sheet of plywood… Challenge Accepted!

You better believe I built this awesome antique box with just ONE sheet of plywood! Plus, *spoiler alert* it has hidden storage!


*This post contains affiliate links. To read my full disclosure policy, please click here.

So here is the deal, Kreg just  released another new product that will help streamline the building process!  It is called the Accu-Cut Circular Saw Track Guide . Much like the Kreg Rip-Cut Precision Circular Saw Edge Guide, it works on a track system that now allows the user to cut long angles!  It has a grip pad base that is slip resistant.  It can also  be used in conjunction with the Rip-Cut to cut down large panels! Nice huh?

So, to kick off the  release of the Accu-Cut, Kreg is holding a One Sheet Contest.  Anyone  can submit a project  for a chance to win some amazing prizes!  Seriously,  check out some of these prizes!

The rules are simple,  you can only  use one sheet of plywood,/MDF,/particle board. You can include veneer banding and hardware, but that’s it! The contest runs until September 30th! So put on your thinking caps and start building, because this is going to be awesome!

So how do you enter?  Easy. You can submit a project by uploading your project images to Kreg or posting on Instagram using the hashtag #KregOneSheetContest!

Alright, now I  want to brag just a little about my one sheet project…

I recall visiting my grandparents home when I was young; they had an adorable antique box that always looked beautiful and was carefully  curated with gorgeous flowing flora.  (My sister would be so proud, I just used the word “flora”.  Also, FYI I was recently educated that this style of antique box is often referred to as a “boot box”.)  I digress… I will be the first to admit I have the blackest of  thumbs.  I don’t want to brag, but I have yet to meet a plant that I cannot kill. So while the vegetation was pointless endeavor,  I figured I had a real shot at making my own spin on an antique “boot box”.  Whilst designing said “boot box “, I decided it was missing a certain something… (No, not just real flowers.) It NEEDED something… it needed hidden storage! Obviously. There is just  something about form and function aligning perfectly that makes my heart skip a beat…  Screw the real plants, with hidden shoe storage I will be happy camper, crappy silk flowers and all!


So do you want to build your own Antique Boot Box turned hidden storage?  Heck yes you do !  You can head over to BuildSomething.com for all the build details!

BUILD PLANS HERE

Thanks so much for tuning in and reading!   I can’t wait to see what projects you come up with. Feel free to tag my on Instagram. I would love to see your creations!

 Take Luck,

 Corey

Mini School Room

July 5, 2017

At Home School Room 

 *This post is sponsored by Home Depot.*

Can you believe it is already JULY??!!   I can’t!  It feels like school  just got out, yet here we are half way through summer break!   This summer my kids have been on a reading and “book making” kick.  They will sit and write, and illustrate “comic books” for hours on end.  I LOVE IT!  So I decided to get an early  jump on back to school, and give them a little area that they could use to create their written masterpieces, and would soon serve as a great homework station.

So, I started looking for some inspiration. I knew I wanted a small work space, preferably  with storage. Storage is always a big factor for me!  I don’t like seeing the clutter. I want to be able to hide it when it is not in use. So I started looking around and found everything I needed online!  Yeah you heard right,  I got all the pieces I needed on HomeDepot.com!  They  carry so much more than just lumber, they  have 1000’s of different furniture and decor pieces online!

Let me show you what I found…

I have 2 kiddos, and wanted them to both be able to have their own work space, but take up minimal amount of space.  This Kids Unfinished Wood  Storage Table  and set of  Kids Unfinished Wood Chairs  were just the ticket!

I love that they come unfinished,  to allow  me to personalize it to my space and include my kids preferences. One is a die hard blue fan, the other green. They are boys after my own heart and I was more than happy to accommodate their requests.  With a quick coat of paint and some staining these little sets were PERFECT for our space.

Another favorite feature ?  They have built in storage!


I  knew I also wanted to incorporate lockers for storage somehow.   I LOVE   Lockers , they are so cute and SO functional! I looked at HomeDepot.com… Yup!   I found some adorable lockers on their website!  Can you believe it?   SO I ordered two!  They come in a couple of fun colors, but red was my favorite!

These are adorable as is, but you know me.  I can’t leave well enough alone, and  I wanted to add a fun little twist. I decided to make them look like built-ins!  By incorporating a simple build it takes these lockers to the next level and also gives additional storage! (Build Plans Available HERE! )

This space was ALMOST complete… it just needed a few finishing touches.   That’s when I found these fun school room inspired decorations.  I found a Caged Wall Clock  and a Dry Erase Calendar !

Honestly, all these items are simply adorable as is…  but if you WANT  a small DIY project this is the perfect  way to add a little bit of your own personal style to! 

        Well, there you have it folks. My kids now have a cute area that will serve several purposes.  It’s a great little area for them to create, as well as a cute homework station, with plenty of  storage for book bags, lunchboxes,  jackets, etc… #winning!
Thanks so much for following along.

Take Luck,

Corey

*The Home Depot provided me with product and compensation. The opinions I have shared about the products are my own.*

Summer Lemon Tablescape

June 28, 2017

I do not know how time keeps getting away from me!  I kid you not, I had this tablescape  planned, executed, and photographed MONTHS ago!  Yet here I sit at 1 a.m.  trying to get them published.  However,  after going through all that hard work, I hope you guys don’t mind that I am a little late to the “Summer” home decor party.   

It all started when I went to visit my  awesome sister in Seattle. Per the norm,  we set aside one night of sister shopping.  That’s when I came across these lemons!  Ask anyone, “I could make it for less “, OFTEN  comes out my mouth quietly enough that the store associates won’t hear me and ask for all  the free catalogs back.  BUT THESE LEMONS!  They were the perfect color, and I just needed them. So I splurged and bought the Pottery Barn Lemon Sprigs, and I am not going to lie, I do NOT regret it one bit.

On that same trip I was able to score these awesome napkins!  They were sold in sets of 6 for $10 at World Market.(P.S.  They come in all sorts of fun colors.)   So I grabbed a pack of navy and green.  ( I am a huge sucker for green and navy… obviously)  That was all the inspiration I needed!  I got home and started playing around with my new finds!…3 months later and here we are.   


This wall mounted display rack is one of my favorite pieces of kitchen decor!  Would you believe it is a DIY?  I have full build plans for all 4 pieces. (Yup!  They separate!)  You can get all the details here.  

Source List :

  • Lemon Napkin Rings= Pottery Barn $5.50 a piece
  • Lemon Sprigs= Pottery Barn $10.50 a piece (cluster of three)
  • Napkins= World Market  $10 for a set of 6
  • Yellow Flowers = Southern Hospitality  (local)
  • Plates = Ikea
  • Flatware= HomeGoods
  • Plate Chargers= Ikea

 Thanks so much for stopping by and reading.

Take Luck,

 Corey


Exterior Home Makeover

June 21, 2017

Don’t get me wrong.  I LOVE our home. It is beautiful and I feel so blessed every time I pull into our driveway.  However, that doesn’t necessarily  mean I wouldn’t like to make a few changes…  Over the past year I have worked non-stop to  renovate the interior of the house to make it match my style and make it OUR home.  Now it is  finally time to  tackle the exterior of our home and make it reflect our style as well.  Again,  don’t get me wrong, I love our home,  but it was seriously  the color of a tanned tone band-aid.   ( I don’t feel like this picture truly  captures the band-aid tone…  see next  image.)

Home Exterior Makeover

…  there we go,  see that color ?  Band-Aid. What’s remarkable to me is that this home was a short sale, and the bank had JUST  painted it THAT color.   I know, I know,  it’s not the worst color out there,  but seriously the bank thought “yup,  that’s a good color!”  I digress.   I wanted to change the color but that task seemed so overwhelming!

I dreaded picking  a color, because then it would mean it was time to paint.  I put this off for a year;  just dreading the prospect of tackling such a HUGE project. If only I could go back in time and smack some sense into myself.  You guys, this thing was done in  2.5 days ! Seriously, between  my husband,  myself ,  and the help of  my HomeRight Power-Flo Pro 2800  we finished the entire house in just one long weekend!

It is through  great companies like HomeRight and affiliate links that I can continue to provide all these tutorials at zero additional cost to my readers! So a big thank you to them!  (More info. available here.)

Homeright Logo2

Want to know what is funny ?  The MOST  stressful part of this entire project was picking my paint color!  I kid you not, I think I ended up purchasing 15 different color samples that I tried out on the outside of the house.  The neighbors must have thought we were crazy  because our house was slowly starting to look like a patch work quilt.  After months (Yes, months)  I finally  narrowed it down to these final four colors. 

After MUCH deliberation I decided on Sherwin Williams “Cityscape”  (bottom left color).  Can I tell you how much anxiety I had going to the paint store and committing to a TON of paint?!  I knew I liked the color,  but I still had an underlying fear my house would look a little like a concrete bunker.  I took the leap and pulled the trigger.  If you are wondering, we went through approximately 20 gallons of Sherwin Williams “Cityscape”, and  about 7 gallons of their “Ultra White” to cover all of the fascia, soffit,  trim, and gutters.

Seeing as our house was recently painted before we purchased,  we didn’t need to worry about removing old paint, or a lot of built up residue. The most prep work it required was pressure washing the exterior,  with a focus on the soffit.  We rented a lift for the weekend, which was hands down a great investment if you have a two story home and a fairly  steep pitched roof.  We just rigged our pressure washer to the lift and got the whole thing washed down in an evening.

The next morning we woke up and got to work!  The first day we  tackled the all of the trim and the soffit.   In most cases this isn’t really  necessary, but  our trim was all a light tan color, and that simply would not do!

I honestly  thought this would be the hardest part of the whole process,  but it was a piece of cake!  My husband (Andrew) would hold a Spray Shield (A piece of thin metal approx. 10″ x 3′  with a handle) above my head and rest it on the edge of the shingles, this protected  the roof from any over-spray.  Once  it was sprayed we would shift down and do it all over again.

In case you are wondering,  we put the 5 gallon bucket on the lift with us, and then zip-tied the HomeRight Power-Flo Pro 2800 to the lift as well; this way the 5 gallon bucket of paint, and the sprayer were always with us.

It actually  didn’t take as long as I expected,  however we did go through a lot more white paint than we had planned on.  In order to trim out the house we went through approximately 7 gallons of white paint, but it was WELL worth it!  Honestly, I was SHOCKED at how much of a difference it made! It made the entire house look brighter!  

 The next day was our long day, but Andrew and I had a system down, and we just buckled down and got it done!  Again, one person would hold  the painters blade protecting the  windows, soffit, trim, etc… from any gray over-spray. (Very minimal over-spray but if you want a crisp line,  you will need to utilize some sort of straight edge.)  Progress! 

Seriously, look at the speed and coverage from the Power-Flo 2800!?

Just look at it!  Isn’t it 1000x better!?  I am in love !

 And here is the back.  I LOVE,  the color, and now I want to put energy into making the rest of the outside fabulous!  I definitely see a patio makeover and some shutter accents in my homes’ near future!   

  I have always loved HomeRight Products, but the Power-Flo is now my absolute FAVORITE!  It made a task that could have taken weeks, only  take days!  The coverage was flawless, AND  effortless. So, do you have a large project you are afraid to tackle? Make sure you enter to win the HomeRight Power-Flo Pro 2800  below!  It is honestly worth it’s weight in gold, so even if you don’t win, they are a fairly inexpensive investment in your sanity!

a Rafflecopter giveaway

  • previous
  • Page 1
  • Interim pages omitted …
  • Page 16
  • Page 17
  • Page 18
  • Page 19
  • Page 20
  • Interim pages omitted …
  • Page 47
  • next

Primary Sidebar

  • Facebook
  • Instagram
  • Pinterest
  • Twitter
  • YouTube
IMG_9167 (1).jpg fd
DIY & Design

Meet Corey

Hi everyone, my name is Corey, and I have a problem. I can’t leave well enough alone… The best therapy usually involves a variety of power tools. So, in the few “spare” moments I am not entertaining my two beautiful, rambunctious, boys, I can typically be found hunched over a sewing machine and/or covered in sawdust. All in the efforts to create a perfect balance of aesthetics and practicality in our home.
read more

Join our mailing list!

DIY & design ideas - right in your inbox!

Featured

Stair Tread Makeover

Categories

  • 70's Ranch Home
  • Around the House
  • Build Plans
  • Crafts
  • Current Home
  • Decor Makeovers
  • Dresser
  • Exterior
  • Fall
  • First Home
  • Furniture Makeover
  • Hidden Compartment
  • Kitchen
  • Lighting
  • Makovers
  • Master Closet
  • Organization
  • R.V.
  • Room Makeovers
  • Seasonal
  • Seating
  • Sewing
  • Shelving
  • Small Builds
  • Smart Home
  • Spring
  • Summer
  • Tables
  • Tablescape
  • Tutorials
  • Uncategorized
  • Wall Art
  • Wall Decor
  • Winter
  • Workshop

Footer

Contact Me: Corey@Sawdust2Stitches.com

Latest ‘Grams

Follow on Instagram
2020 © Your Blog Name
theme by soleilflare
Enter your name and email and get the weekly newsletter... it's FREE!
Your information will *never* be shared or sold to a 3rd party.