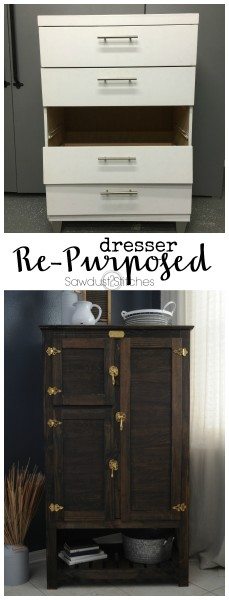
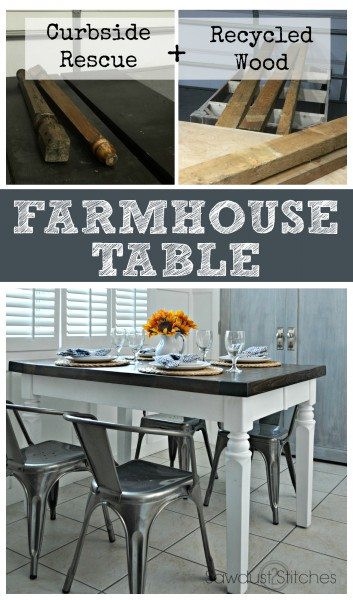
Hey all! I am particularly excited about today’s post. First reason being, it involved all free materials! There is something about the challenge of taking a roadside rescue, and turning it into something beautiful and functional… It just gets me pumped! Second reason? I found a new paint sprayer that I am in LOVE with. It made short order of this project, and what is even better? You have a chance to WIN one of these time saving champs! Make sure you enter at the bottom of the post!
That being said, I am excited to partner up with HomeRight on this sponsored project, it is through great companies like HomeRight and affiliate links that I can continue to provide all these tutorials at zero additional cost to my readers! So a big thank you to them! (More info. available here.)
So let’s dive in, shall we? I was out hitting some garage sales a few weeks ago, that’s when I saw “it”. Peaking out behind a car I saw some turned table legs just laying on the ground! I jumped out of the car and sure enough it was a full table, taken apart leaning against a tree. There was a nice gentleman staring at me like I was crazy ( I basically jumped out of the car while it was still in motion) Through brief conversation, he said it was free… haha. If he thought I was crazy before, I left little room to wonder with the level of enthusiasm I showed as I collected the pieces to the table. Honestly, I think I may have embarrassed my friend who was with me.
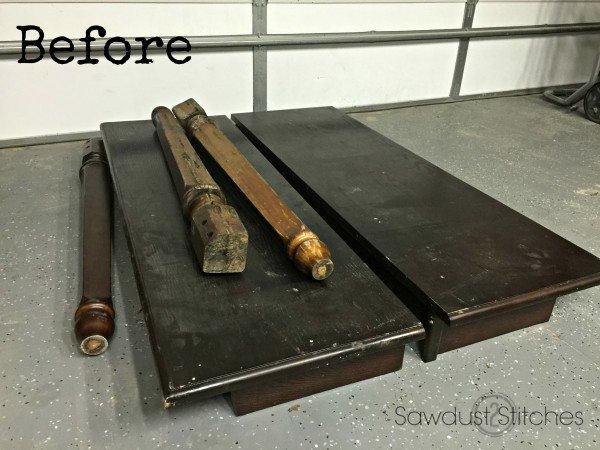
Moving on. I got it home and assessed the damage. It was definitely in rough shape, but it wasn’t anything some wood filler, tools, and bit of paint couldn’t fix!
The Base:
This table was a pub height table, and was capable of expanding, but the leaf was missing). Which was fine, I planned on making my own top. For the legs, I was going to need to shorten them. I cut off the bottom end, so that I would be able to use the existing top hardware. I just cut it off with a miter saw.

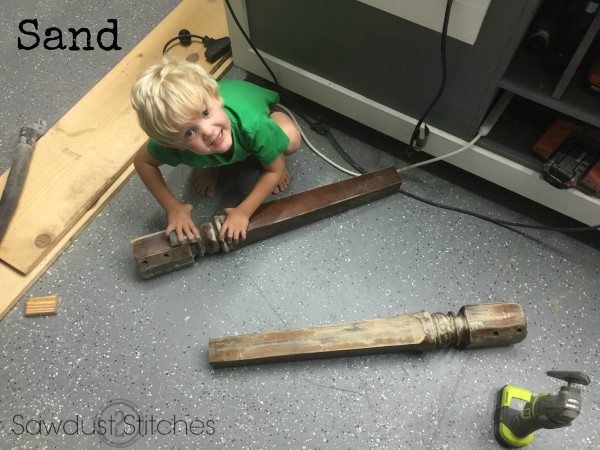
After the legs were cut down, I started the sanding process. (Plus, I had a little help… ) It was at this point that I filled all the cracks (from water damage) with wood filler. Then I sanded them until all evidence of a cracks were gone. I knew I was going to be painting the legs, so I did NOT need to sand until I got to bare wood. I simply needed to scuff up the surface enough that is was smooth and “dull” so that the primer could properly adhere.
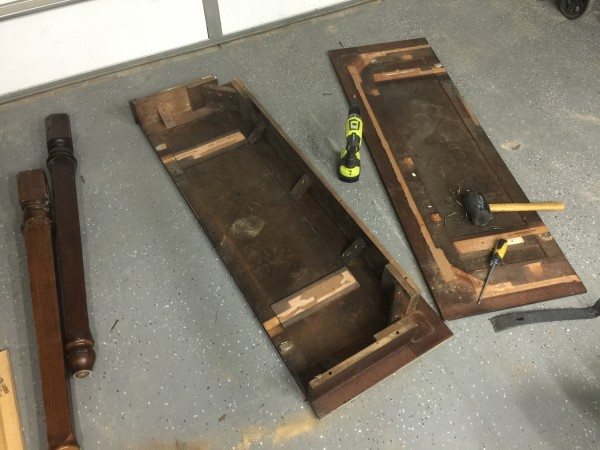
Next I removed all the aprons and hardware from the underside of the tabletop. I wanted to be able to use the aprons and corner supports. Once I had removed them, I reassembled the base of the table, and added a few 2×4’s for support.
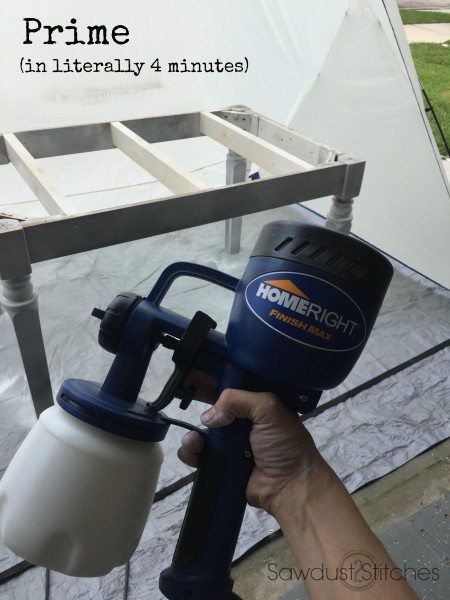
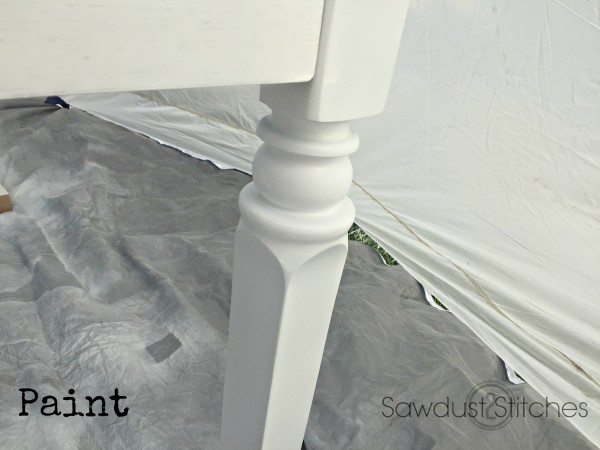
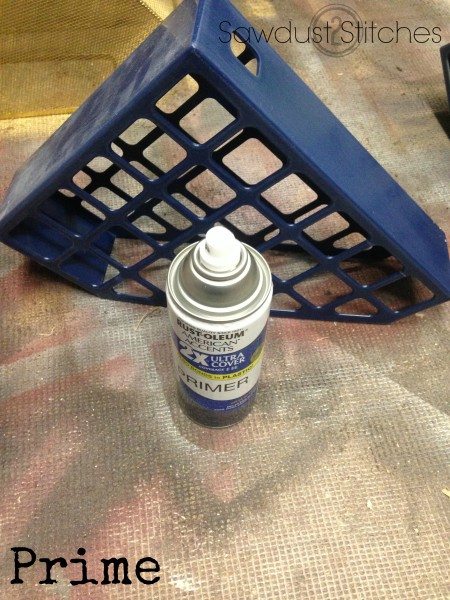
Once assembled you are ready to prime! I usually dread priming, it just one of those unsatisfying, necessary steps. Well, this was my first attempt using primer in my HomeRight Finish Max Sprayer![]() and it was a breeze. I just used a standard Primer.
and it was a breeze. I just used a standard Primer.
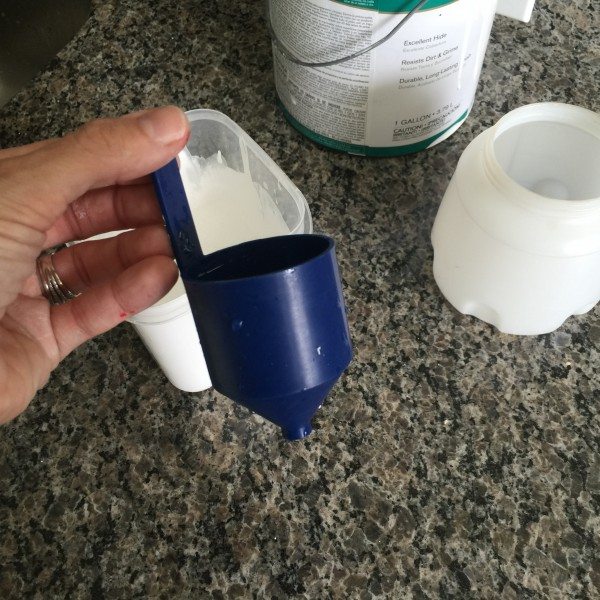
When using a sprayer you just need to make sure your paint is the right consistency. They give you this handy little “viscosity cup” that helps you get your primer to the right consistency by merely adding water.
Do you realize by merely adding water to ANY paint color you can create your very own spray paint ??! =MIND BLOWN
Moving on, once you have loaded up your sprayer, you simply plug in and start spraying! (You heard right, you do NOT need to hook it up to an air compressor, Hallelujah!)

When spraying the primer, do so just as you would spray paint. Light, multiple coats, as opposed to one heavy layer.
 Once the primer dries, I like to go over the entire surface with a very fine grit sandpaper, or steel wool. Wipe down with a damp cloth and allow to dry before applying paint.
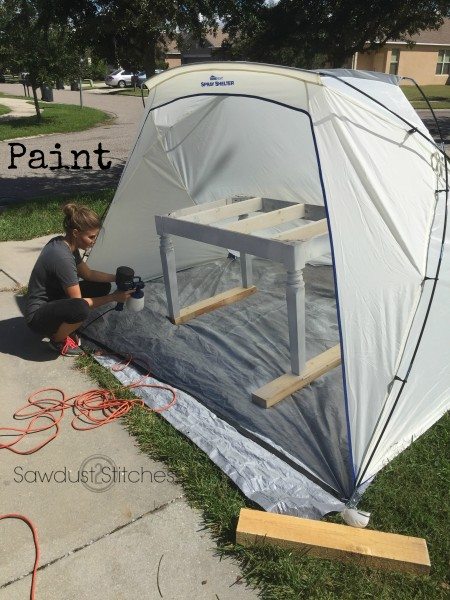
(Again, prep your paint for the sprayer.) The coverage is pretty awesome, and I did one light coat, and was pretty much done.
Not a single brushstroke! Love it, and I completed the top coat in about 10 mins. Serious.
That is a wrap on the table legs… on to the table top!
The Table Top:
I was digging my recycled base, and wanted to keeping rolling with that idea. Lucky for me my Husband found these super beefy boards that were in really ROUGH condition. They were PERFECT! I ended up turning my garage into a lumber mill for the day, and spent some time running them through the planer, and even made use of a my table saw to get them up to par! However, it was all worth it, they turned out beautiful.

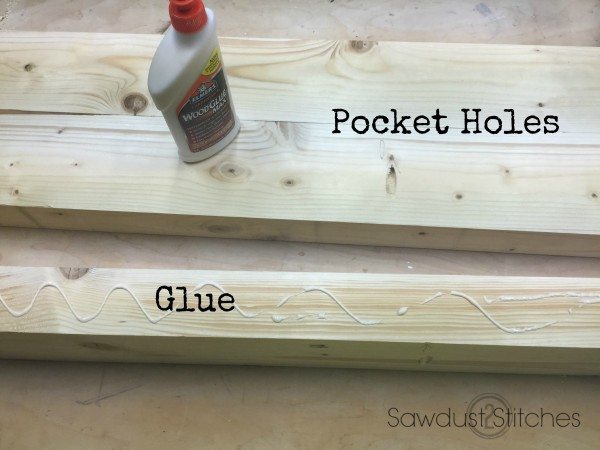
In order to make the top, I drilled pocket holes on the underside of the boards. Pocket holes are a great way to join boards together without having visible holes. Fastening it together is normally enough to hold it, but seeing as this would be a kitchen table, I wanted to seal all the gaps, so I added a little bit of wood glue to the sides before securing with pocket hole screws.
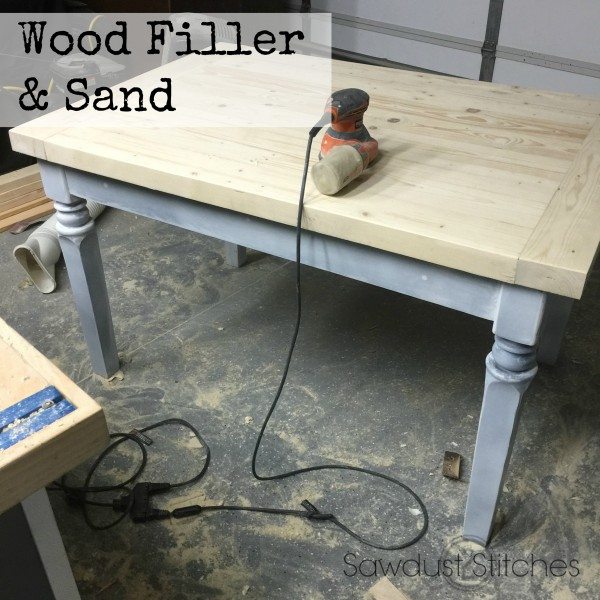
Once I had my slab assembled, I filled any remaining cracks with wood filler and sanded the crap out of it. (FYI make sure if you use an oribtal sander, you follow up with a finish sander or hand sand in the direction of the wood grain. (This will prevent it from looking like a UFO landed on your stained table top.) Once the slab is sanded you are ready for stain and poly!
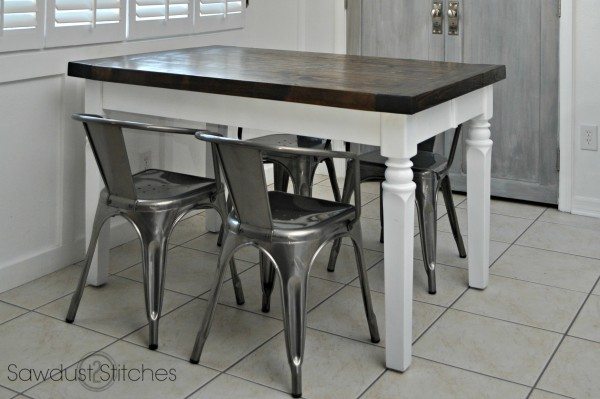
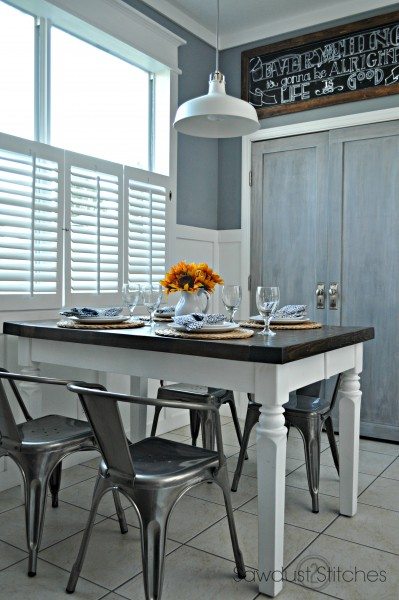
Can I just tell you how much I love this traditional farmhouse table coupled with a more industrial style chair? The best part? The table was FREE all recycled materials and leftover supplies! Score!
Ok, now for the even better part… free stuff for you! Make sure you follow the instructions below to enter into the drawing for the
Enter here for your chance to WIN a HomeRight Finish Max Sprayer!
Take Luck,
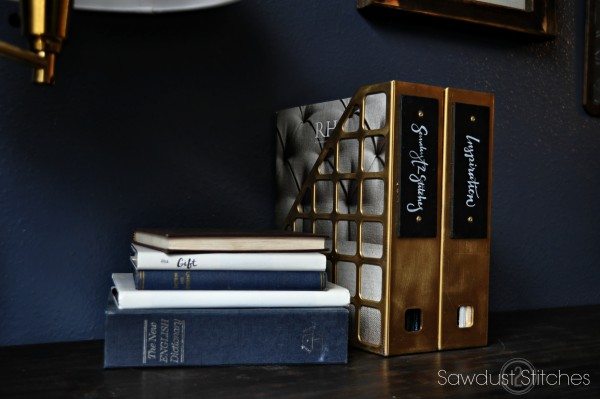
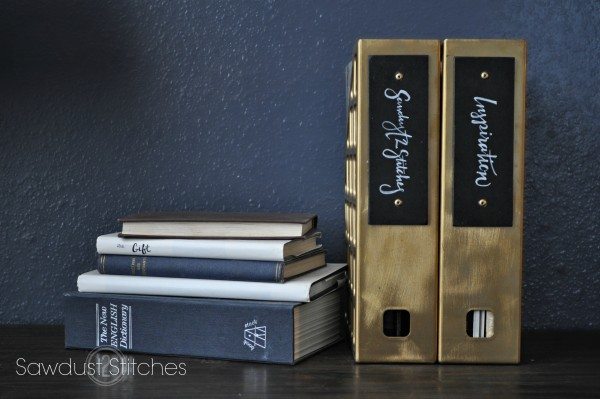
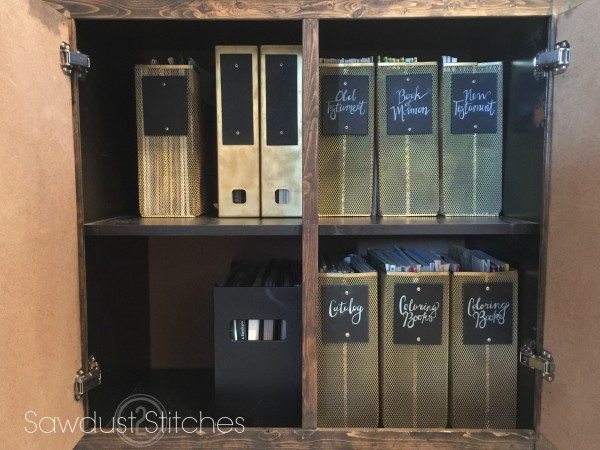
 Once the primer has dried, you are free to spray paint. I used a metallic gold, and I loved the way it turned out.
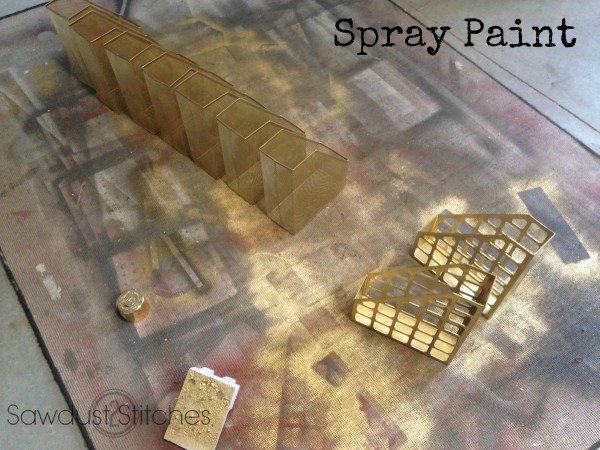
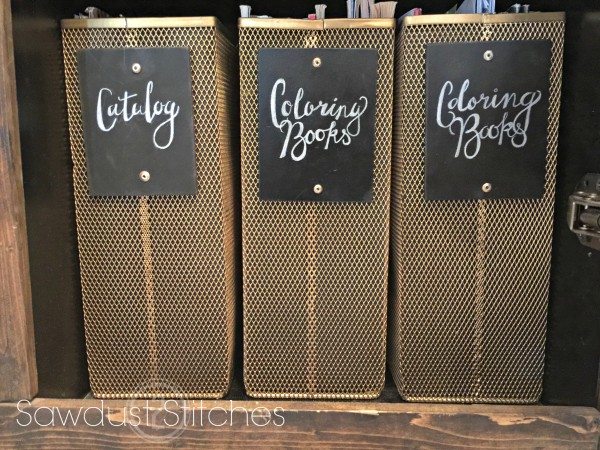
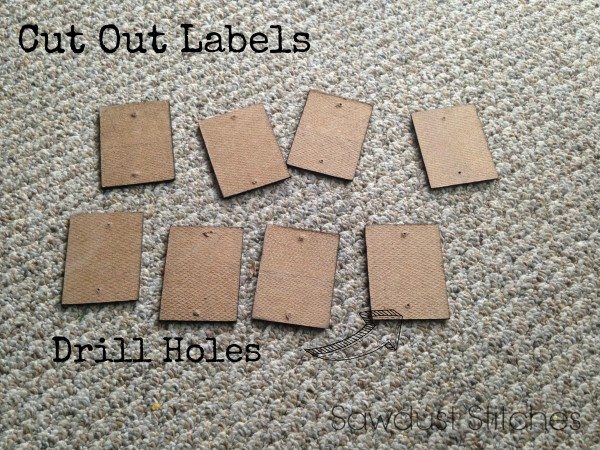 I then painted them a flat black. I wanted these to have the look of chalkboard, but because I was writing the labels on there permanently, it didn’t matter if I use the fancy “Chalk Board Spray Paint”.
 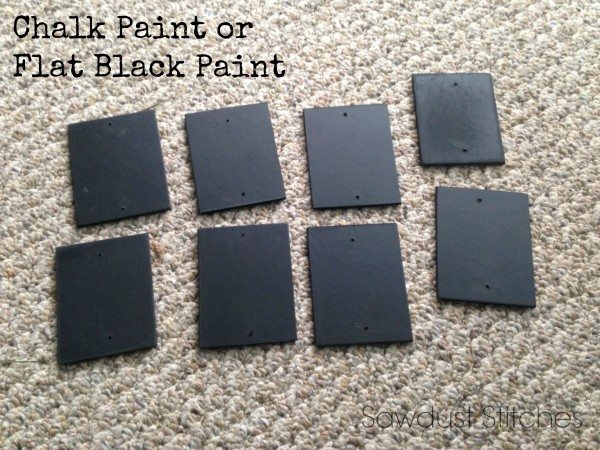 I then used a white Prisma Color pencil to write on the label. The pencil stays put pretty well, but if you want to make sure it really stays put, spritz a little bit of hairspray on them. It works as a great fixative!
  To attach the labels, I used a rivet gun. They are fairly inexpensive little tools that are pretty cool. However, if you don’t have one, and would prefer not purchase one, I would suggest using fastening brads. Remember those things we used in elementary school to make our book reports ? Yeah those are the ones!
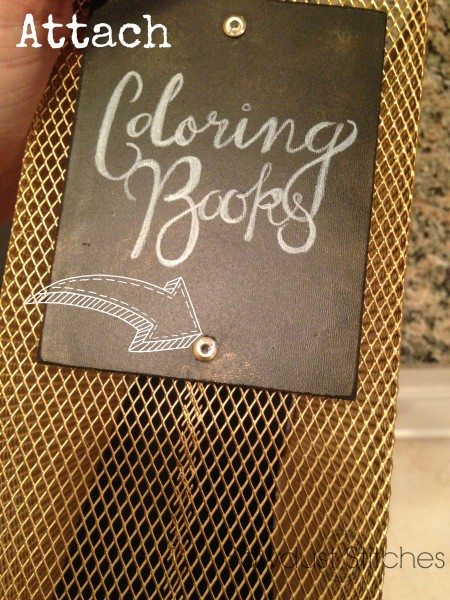
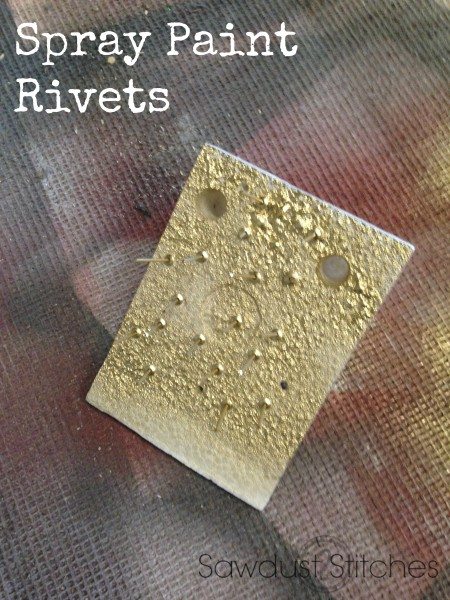
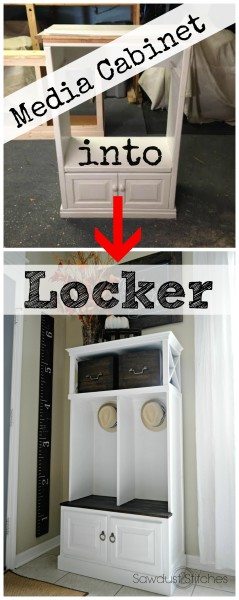
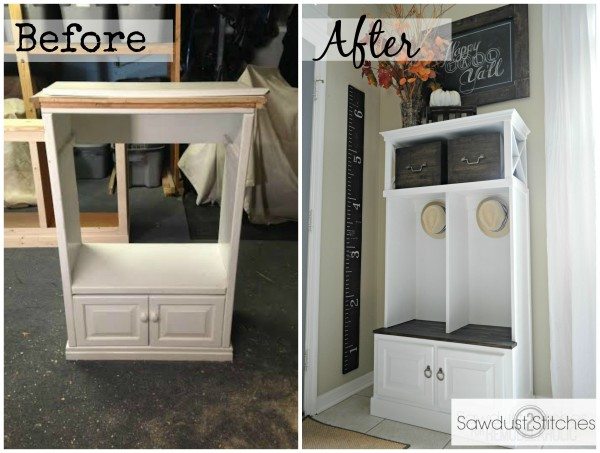
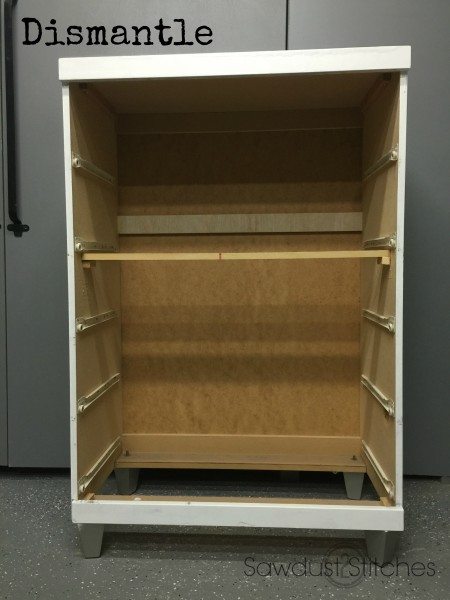
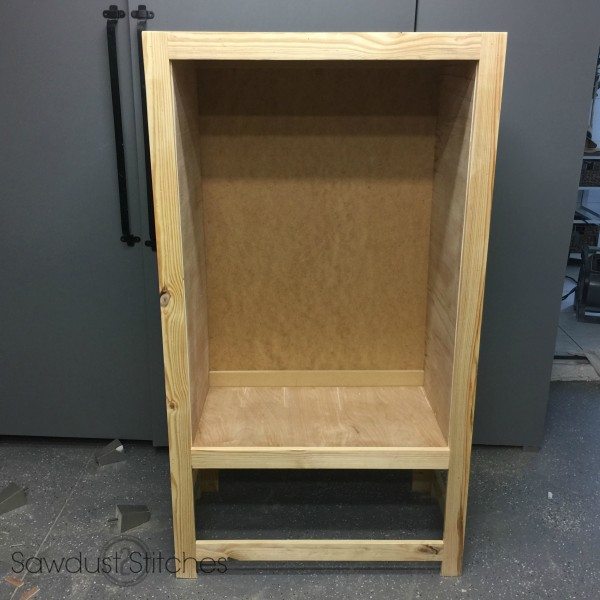
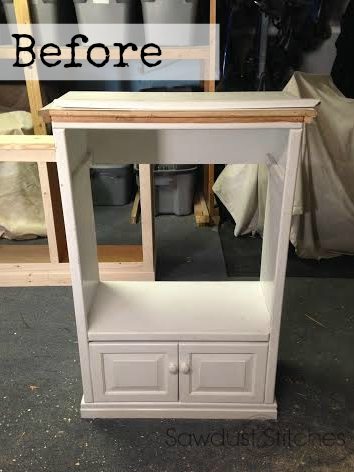 I wasn’t entirely certain what I was going to do with it, but I knew I needed to take off the decorative pieces. Regardless of the end goal, it would simplify sanding and painting.
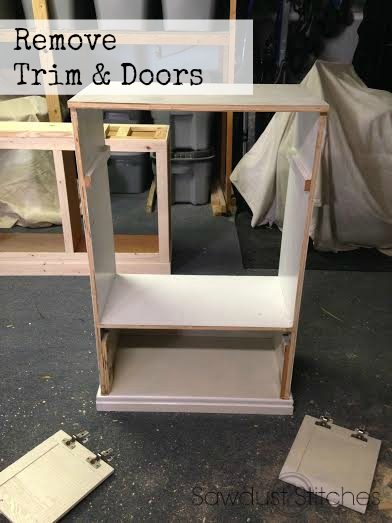 After trying to remove the many layers of sloppy paint, I decided it would be easier to just break down the whole piece and pull out the “big sander”. It was then that I started to really get a clear image of what I wanted this piece to look like.
 I wanted there to be ledge that stuck out for seating. So I cut into the boards so that it would create a ledge.
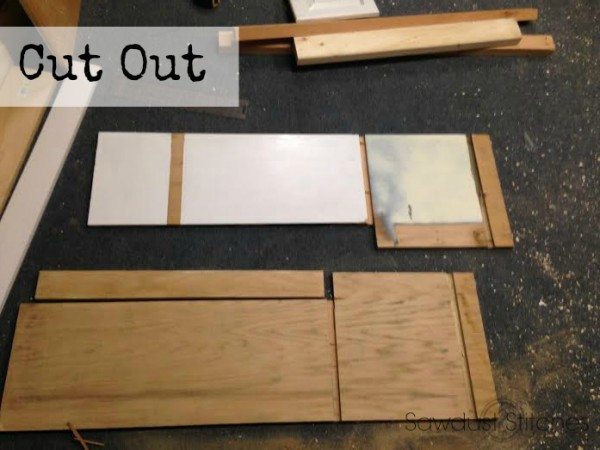
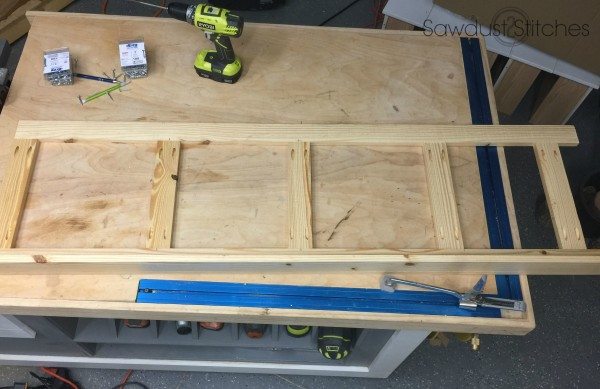
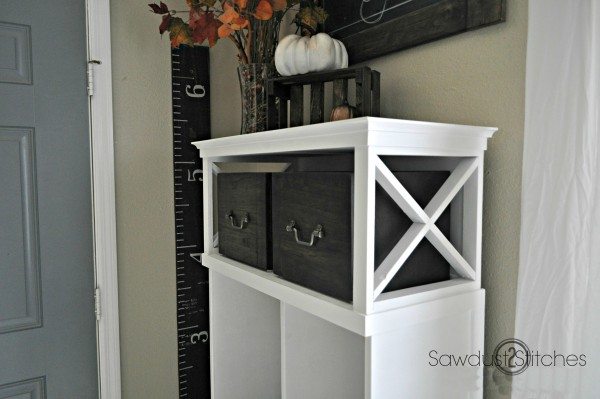
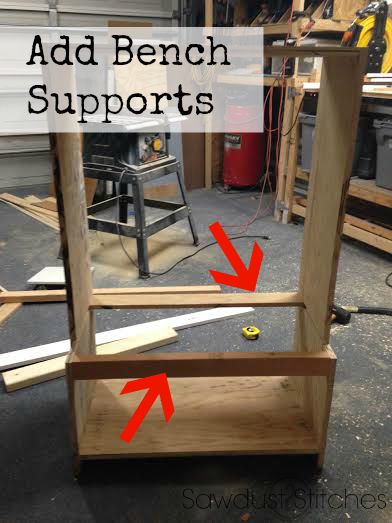 I also decided I wanted this piece to sit a little higher, and I wanted to give it visual weight on the base, so I beefed it up with some 2×3’s.
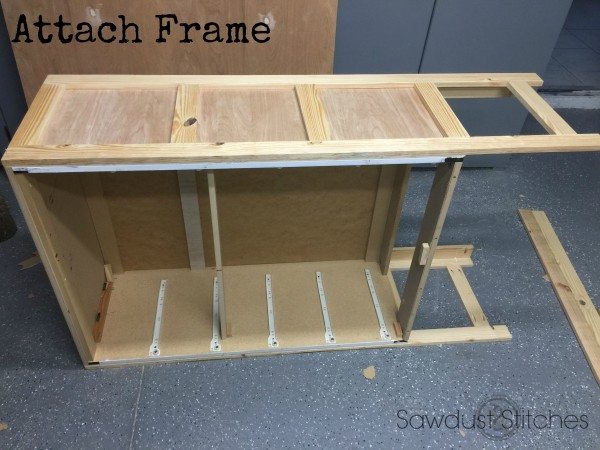
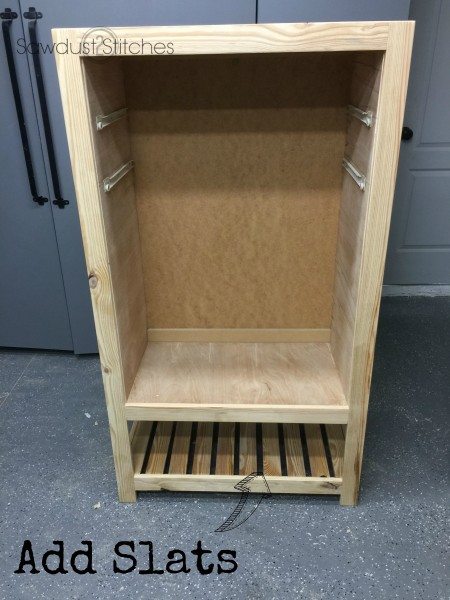
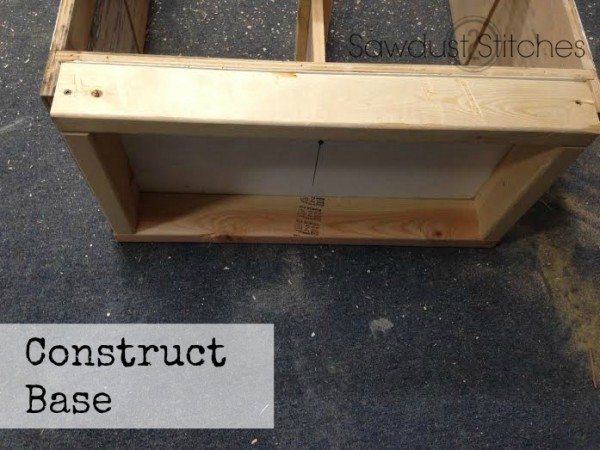 Once the cabinet/locker was re-assembled and stabilized I started on the aesthetics. I added all sorts of trim and face frames to five it a nice finished look.
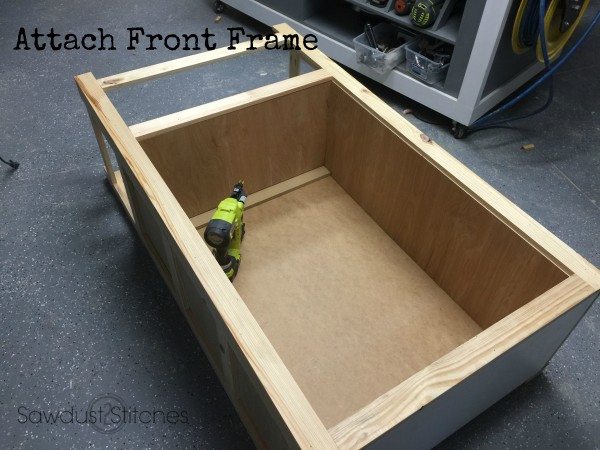
 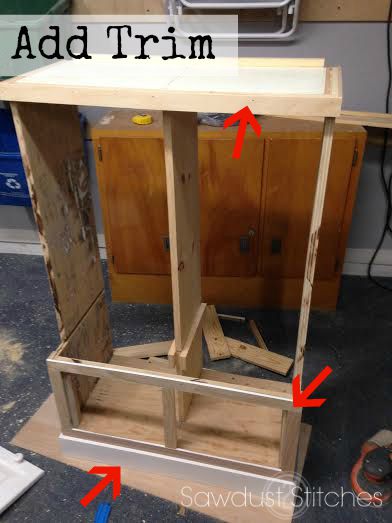 I knew I still wanted it to have more height, and I thought an “x” frame box was the perfect way to do just that! I then used 1×3″ boards to create the bench. It was a cheap and easy option that would add the rustic feel I was trying to create.
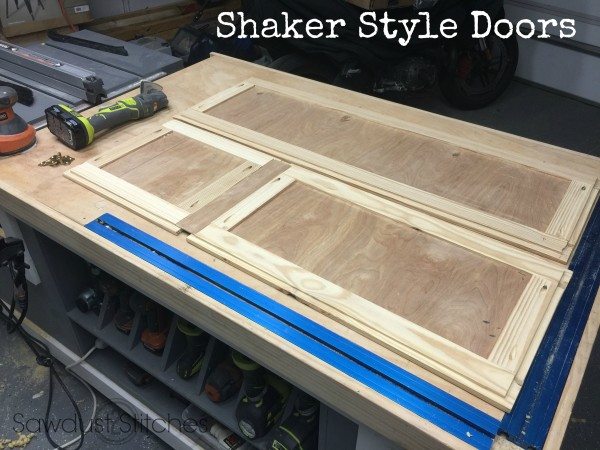
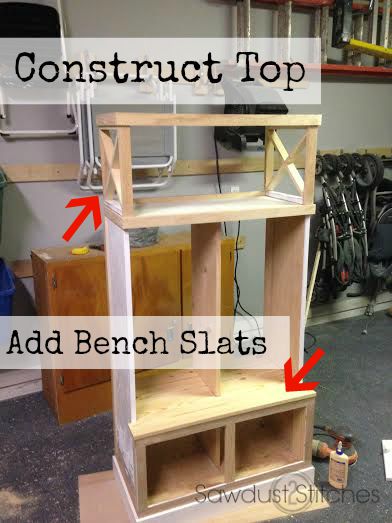 It then needed some molding to really finish the piece, and a piece of thin paneling to close off the back.
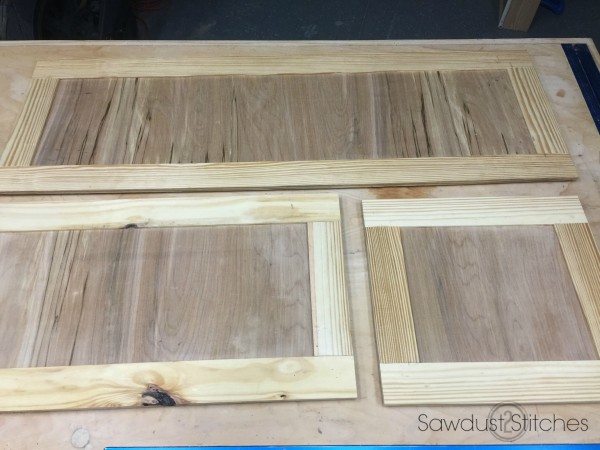
 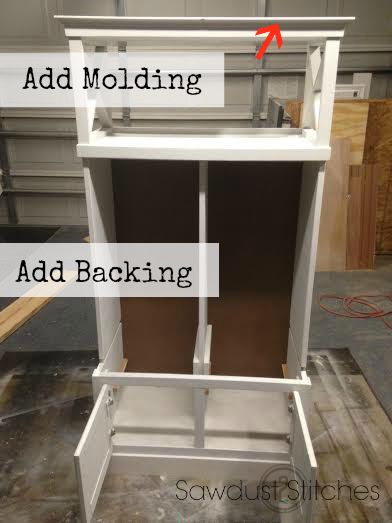 I made two customized crates that would fit in the top section of the locker. I did this for two reasons, I wanted it to have added storage, but I was also planning on staining the bench portion of the locker and wanted to carry the stain color elsewhere on the piece.
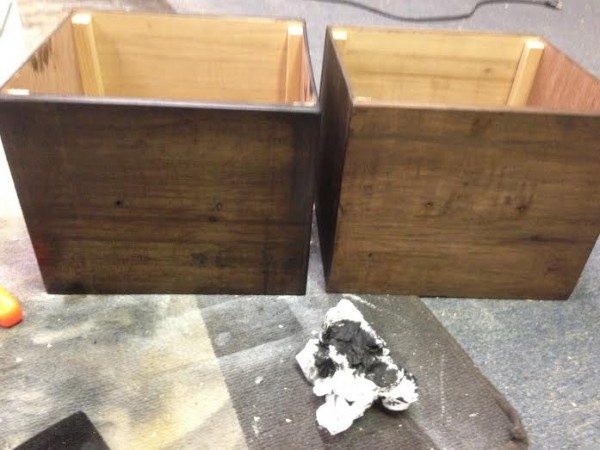 All that was left to do was the finish work (prime, paint, and stain), and then re-installed the doors, and added hooks.
 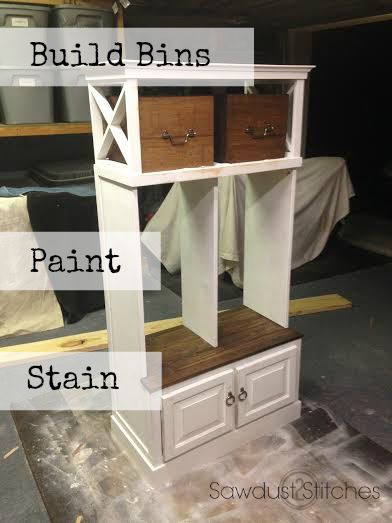 There you have it! A perfect combination of form and function! Booyah!
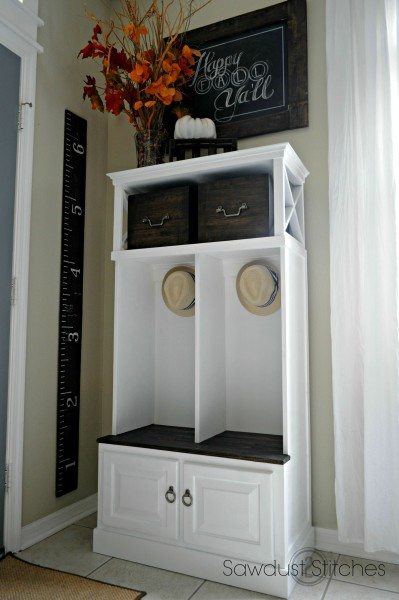
 Ok sports fans, I am particularly psyched out of my mind about today’s post! Today I am teaming up with a group of very talented DIY bloggers in a
 DISCLAIMER: Let’s be real, this is NOT a detailed build plan, it is more of a basic breakdown of the process I went through. HOWEVER… here is general list of the tools and supplies I used.