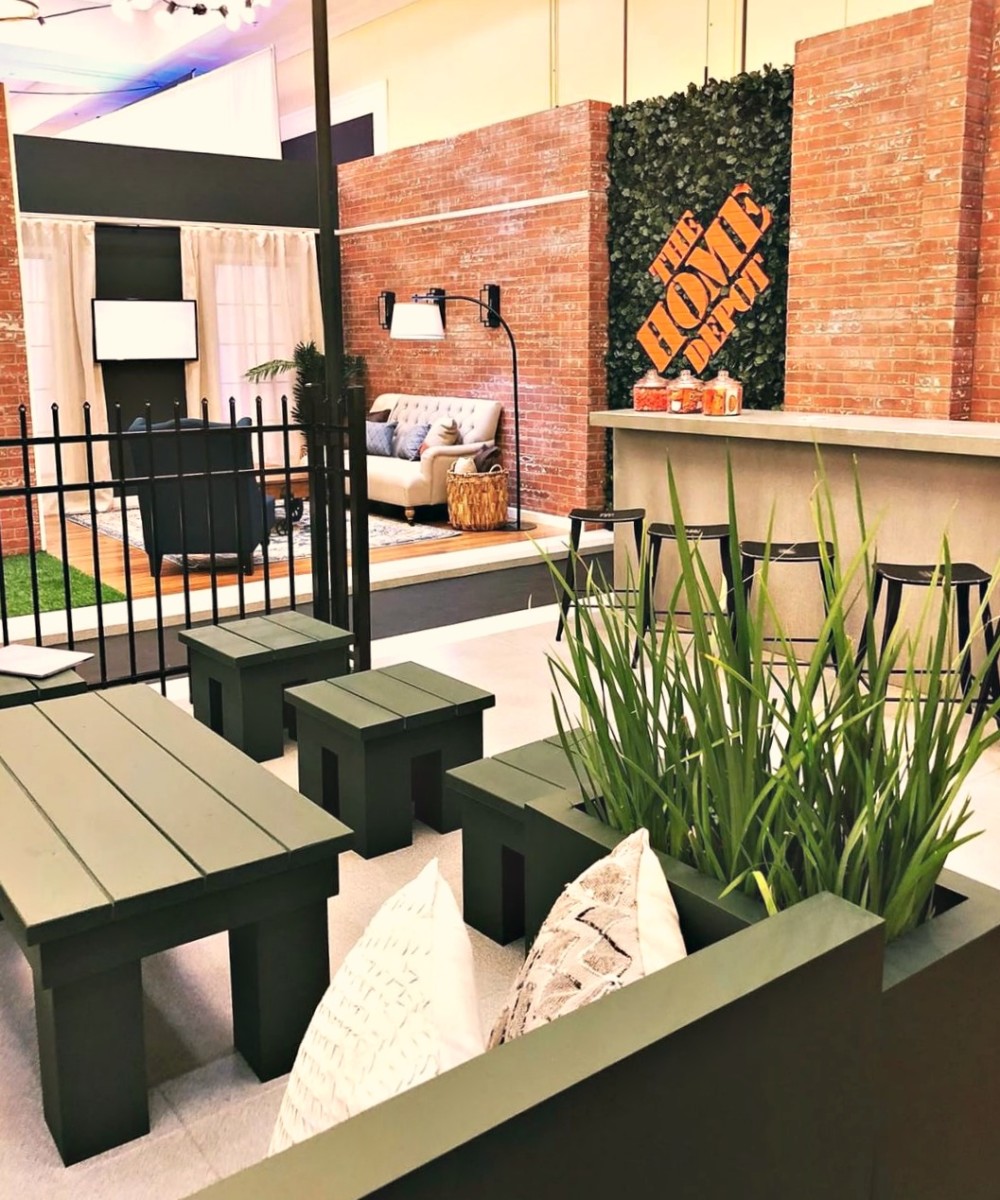
For the past few years I have attended “Haven” a conference that is geared towards DIY and interior design bloggers. This past year I was presented with an awesome opportunity. I was able to team up with the great folks at The Home Depot and help design part of their booth that would be displayed at the conference. I would be working with Mandi from Vintage Revivals. She was asked to design the “patio” section, and I was designated the “Living Area”. They gave me the space, and dimensions , and a small tidbit of direction. The conference was being held in Charleston, South Carolina and it was a suggestion that it have a “Charlestonian” vibe. Well I LOVED that idea and I ran with it.
The only peramenters I was given was that I needed to find all the necessary furnishing on www.homedpot.com. Let me tell you, it was not a quick search. They have thousands of options when it come furnishings and home decor! After sorting and searching I finally came up with the perfect combination for a “Charlestonian” feel. Let me show you what I came up with!
- This post is NOT sponsored by The Home Depot, I just loved the experience and wanted to share my finds. It does contain affiliate links.
I wanted it to have a historic yet trendy vibe. I had never been to Charleston but in my head that is what it was. Thank goodness, after my visit I still believe that to be true. I am telling you , it is now one of my all-time favorite cities! I digress. I choose pieces that I thought a old feel, with a trendy twist.
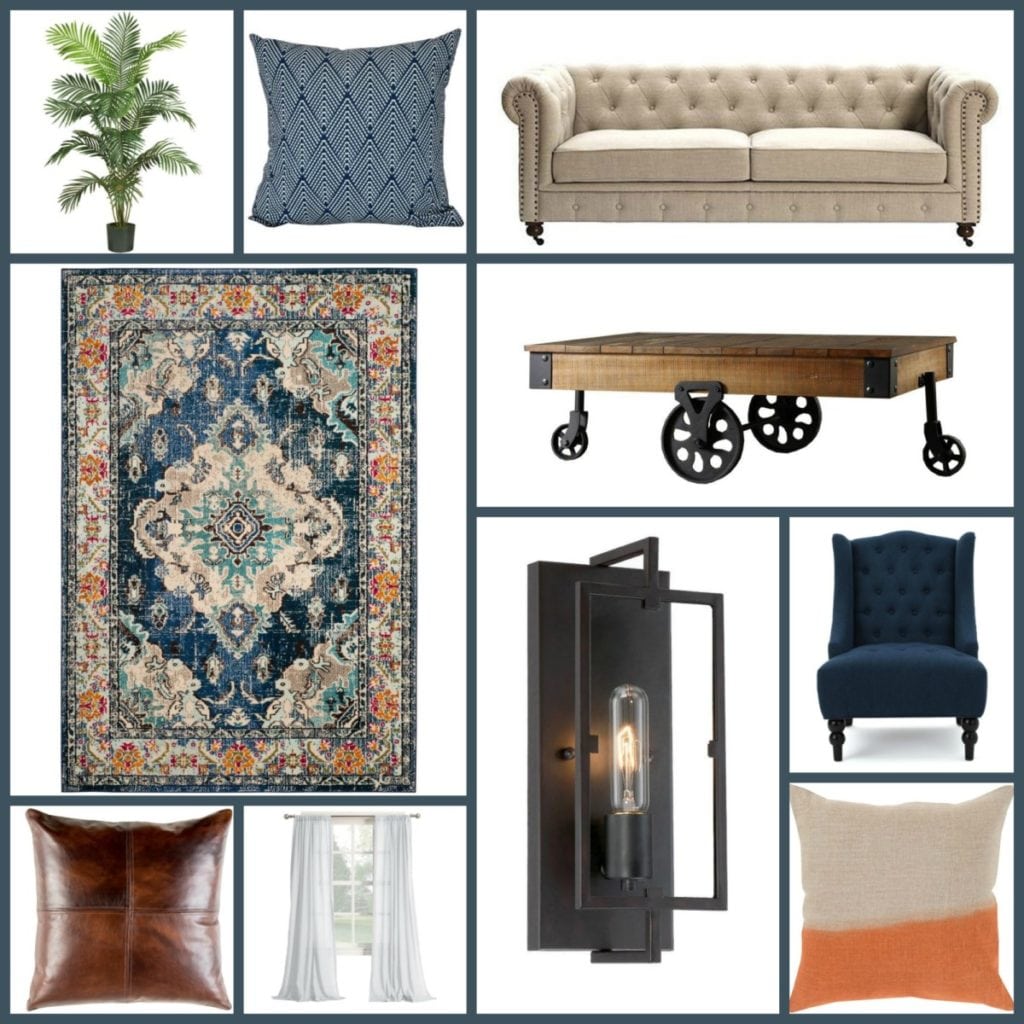 Starting with the rug. Vintage style rugs are coming back and making their mark! I wanted to embrace that, and also incorporate some bold colors! Charleston is known for it’s color and I didn’t want my fear of color to hinder it’s overall feel. I am so glad I got over my hesitation, because seriously this Monaco Rug is EVERYTHING, and a great price to boot!

Next order of business was a sofa that would fit the theme. It is a pretty widely accepted statement that the Linen Tufted Couch have made their comeback. That are a very traditional style, but when paired correctly can have a trendy eclectic feel.  I also needed a coffee table that I felt looked “as though it had a story to tell”. (Any other F.R.I.E.N.D.S fans out there?) I had a hard time narrowing it down, but finally decided on this beauty, “The Home Sullivan Coffee Table“.
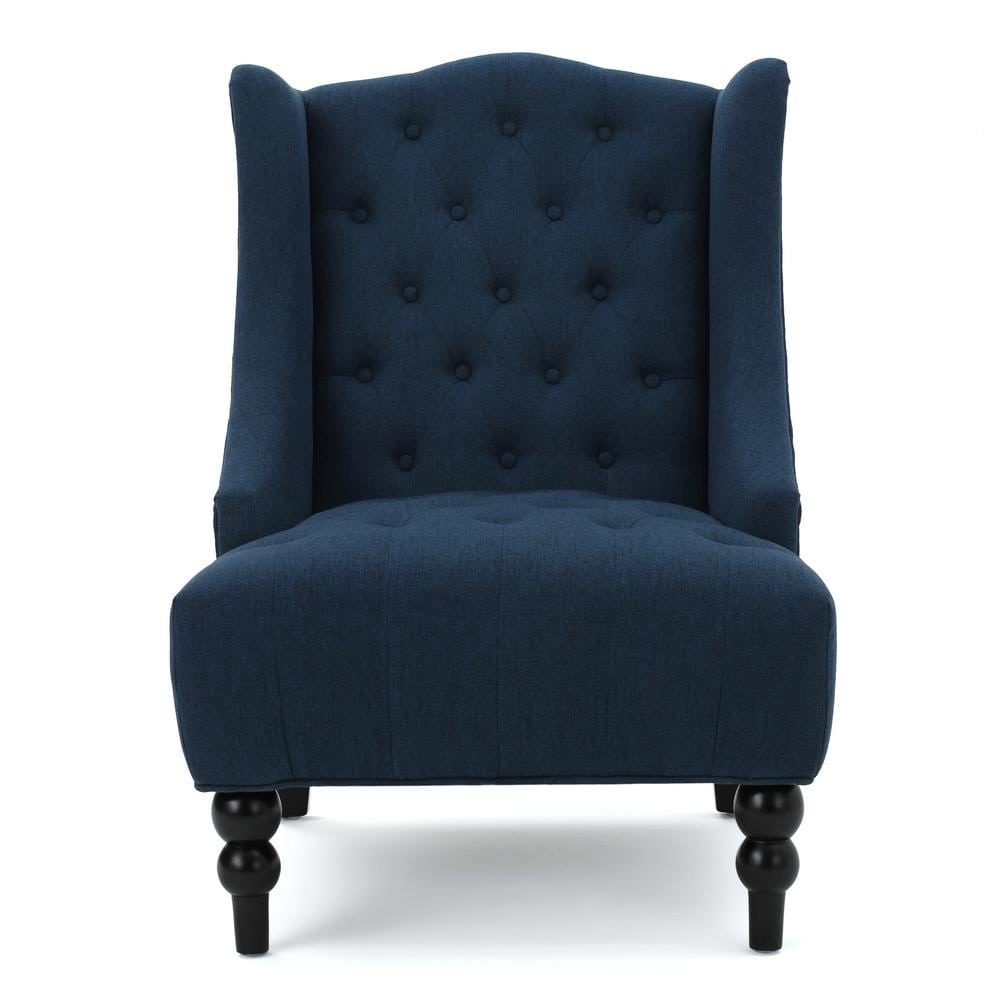
 Last large-r ticket item was a accent chair to round out the seating area. I knew I wanted a blue accent chair. So I went to www.homedepot.com and entered “Blue accent chair” I kid you not they had 164 different options!? These are the ones I ultimately decided on the “Toddman High Back Dark Accent Chair“. I loved a handful of other ones, but I wasn’t working with a HUGE space so I needed to take room dimensions into consideration.
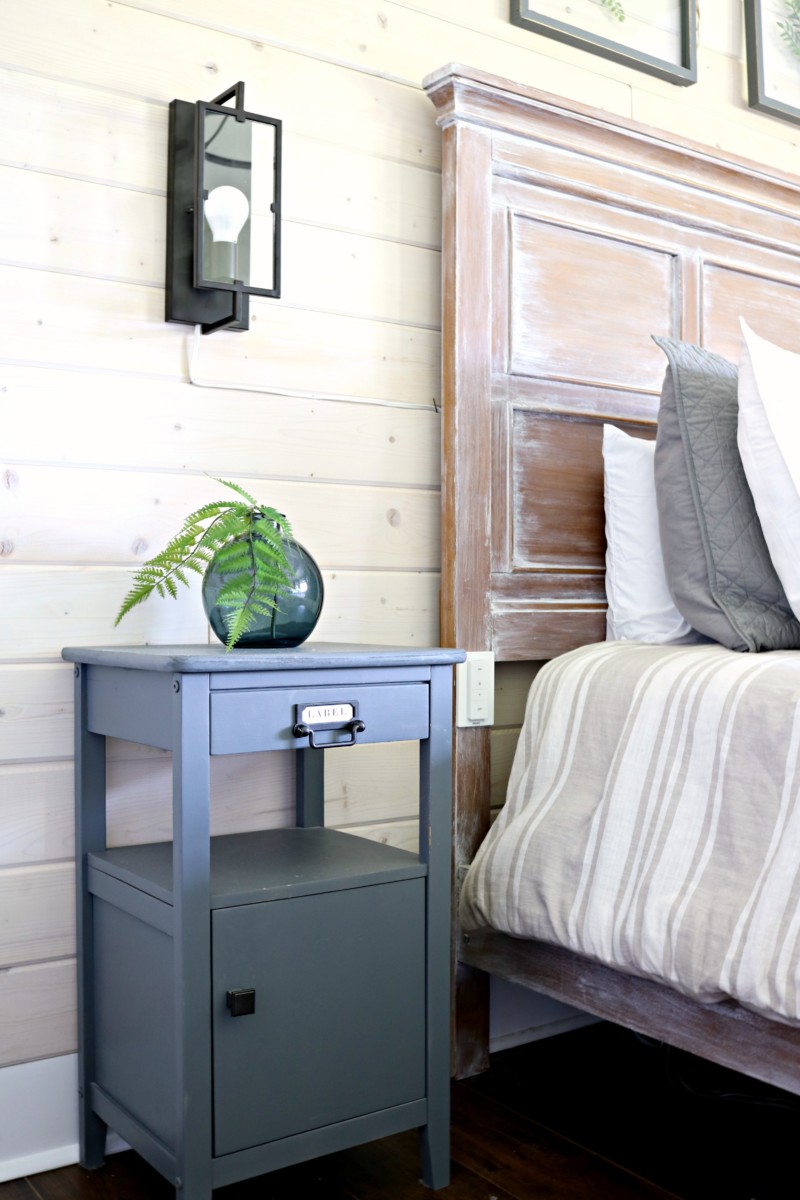
For the wall decor I took a little bit of a different approach. While there was a HUGE selection of artwork available, I wanted to try something unique. I opted for a wall of “Cordelia Wall Sconces”. (Which I ended up getting some for myself! Check them out here.)

Anyone else out there have a black thumb? I love adding pops of natural colors, but committing to feed another living thing is a little outside of my comfort zone. Because of my fear of commitment I often opt for faux plants, and this is a GREAT one for a great price! Paradise Palm Silk Tree .  One of the last things it needed was some fun lighting. I found this fun arch lamp that is perfect for cuddling up and reading in the evenings. It has a nice traditional feel but the matte black give it a little bit of an edgy feel . Kenroy Lamp
 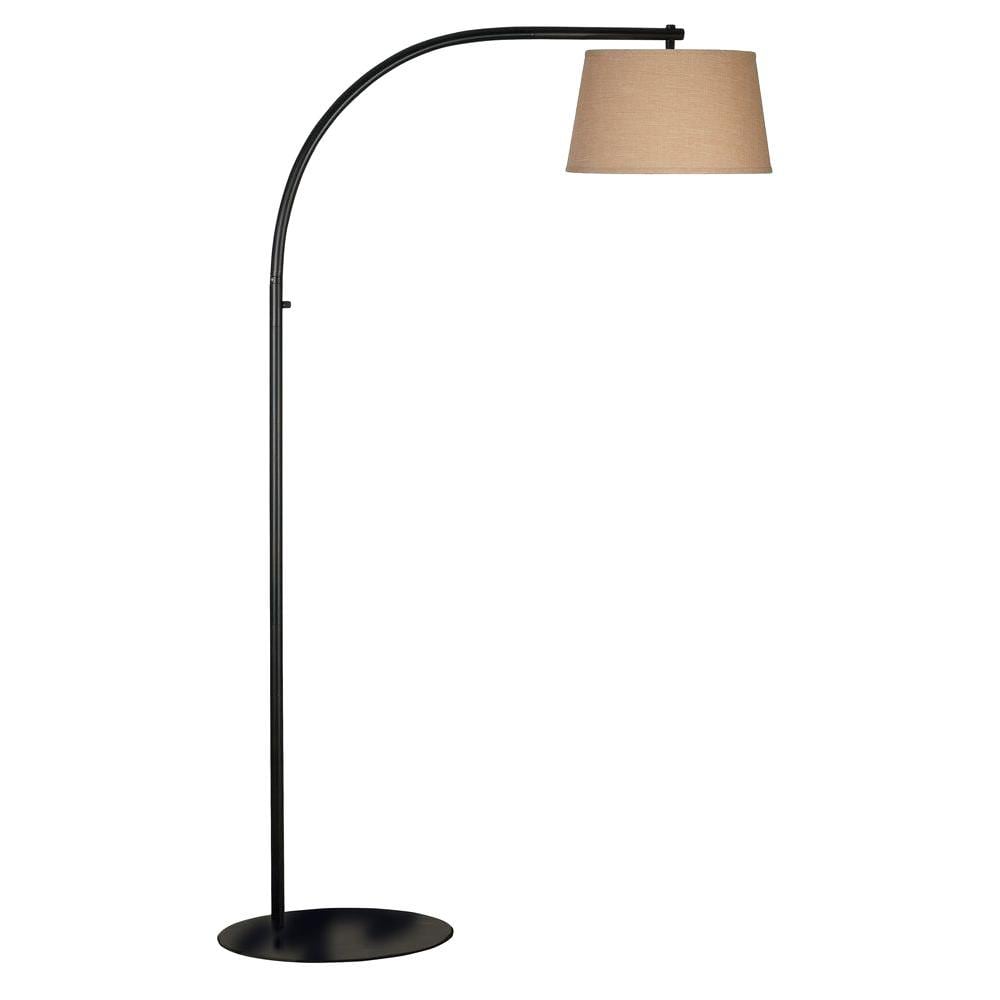 I picked out all of my pieces online, and then the great team from Home Depot ordered everything straight to the venue. I am not going to lie I was a nervous wreck that I would very publicly fail in front of all my friends and colleagues, but to my relief it came together perfectly! Everything I selected was exactly as it appeared online. There were zero surprises and overall I will call it a complete success!
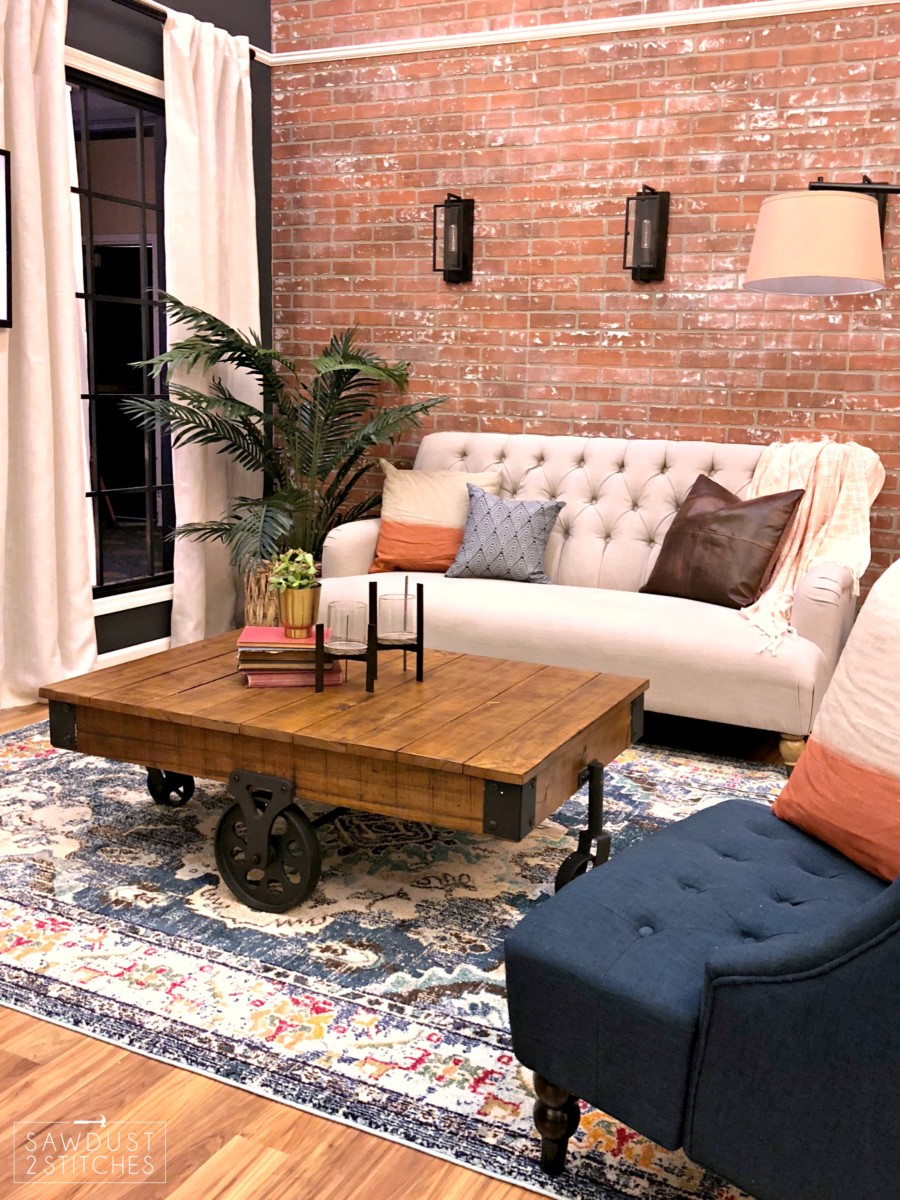
*Not sponsored I just really enjoyed the experience.
 Alright, let’s get this lighting party started! Begin by cutting the female end off of a small extension cord using wire cutters.
 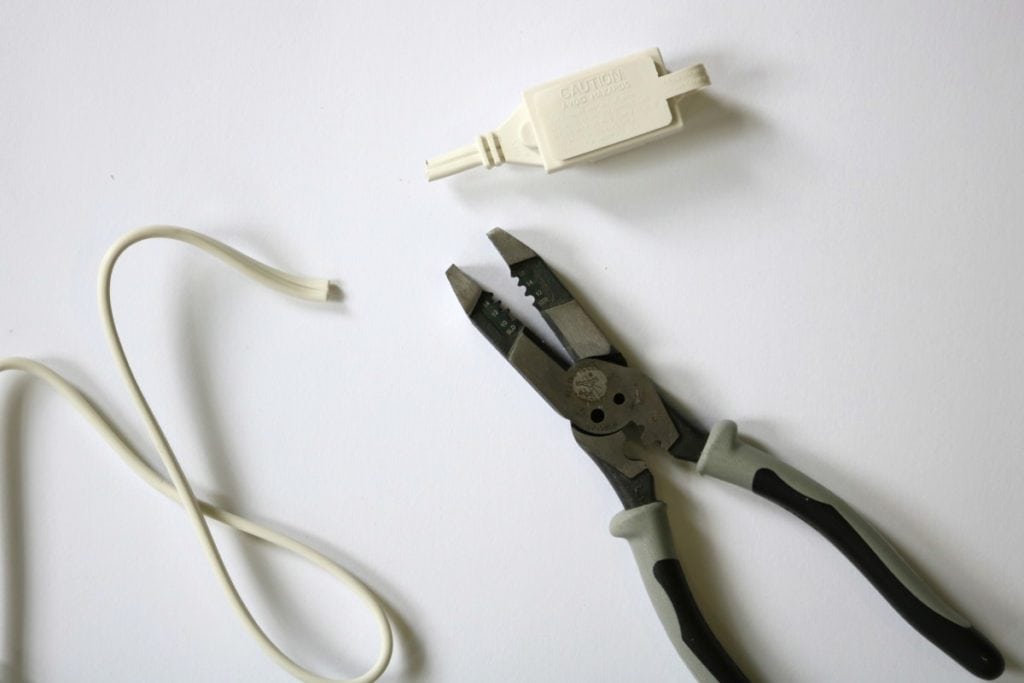 Then pull on both of the wires ( the cord consists of two wires that are connected together by the plastic casing). Once the two wires are separated strip the last 1/2″ of the wire casing using wire strippers.
 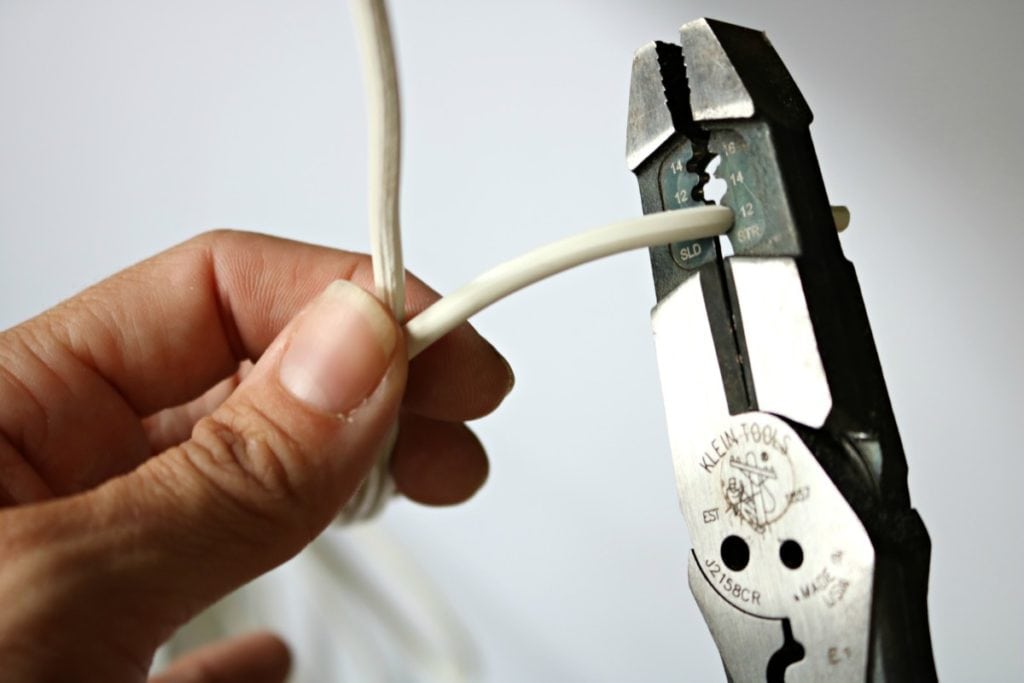 Next wee need to identify which wire is which. In most cases one wire is black and the other white. However sometimes when a wire is exposed (like with a hanging chandelier, or an extension cord) the wire will be one solid color. HOWEVER, normally one of the wires has a smooth casing and the other has a ribbed texture.
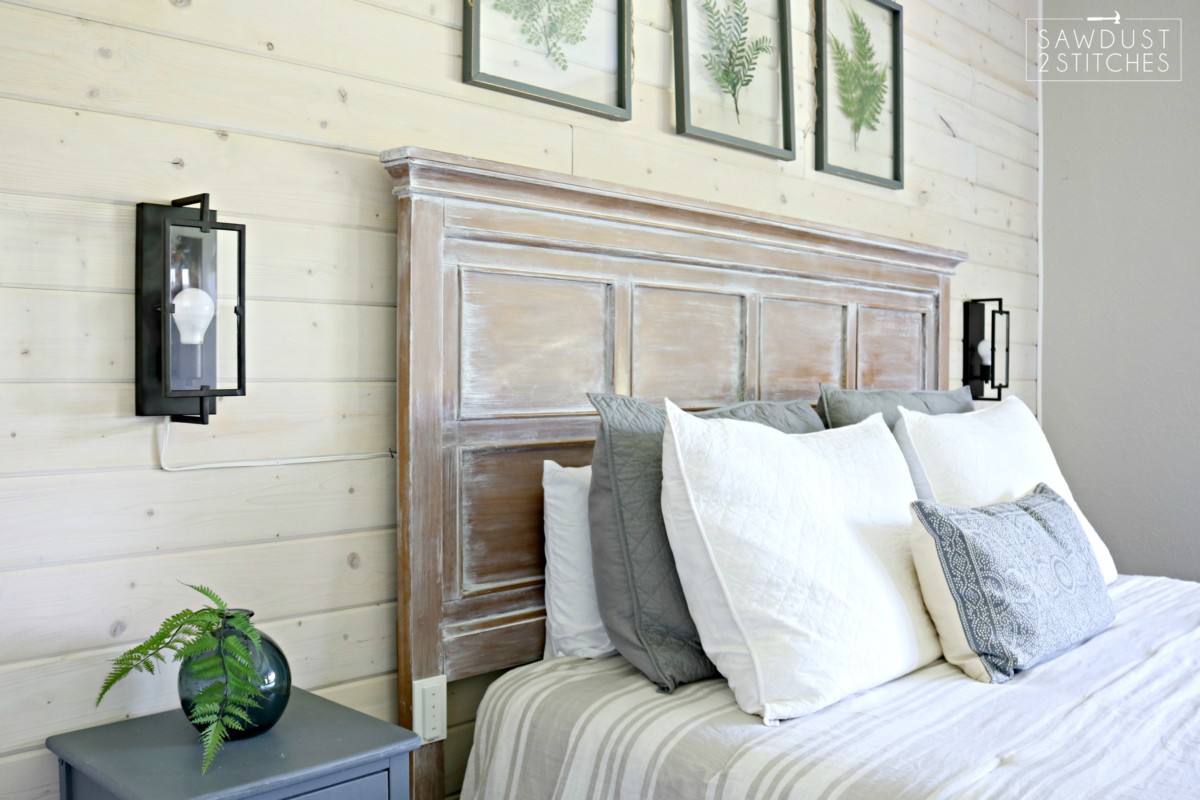
 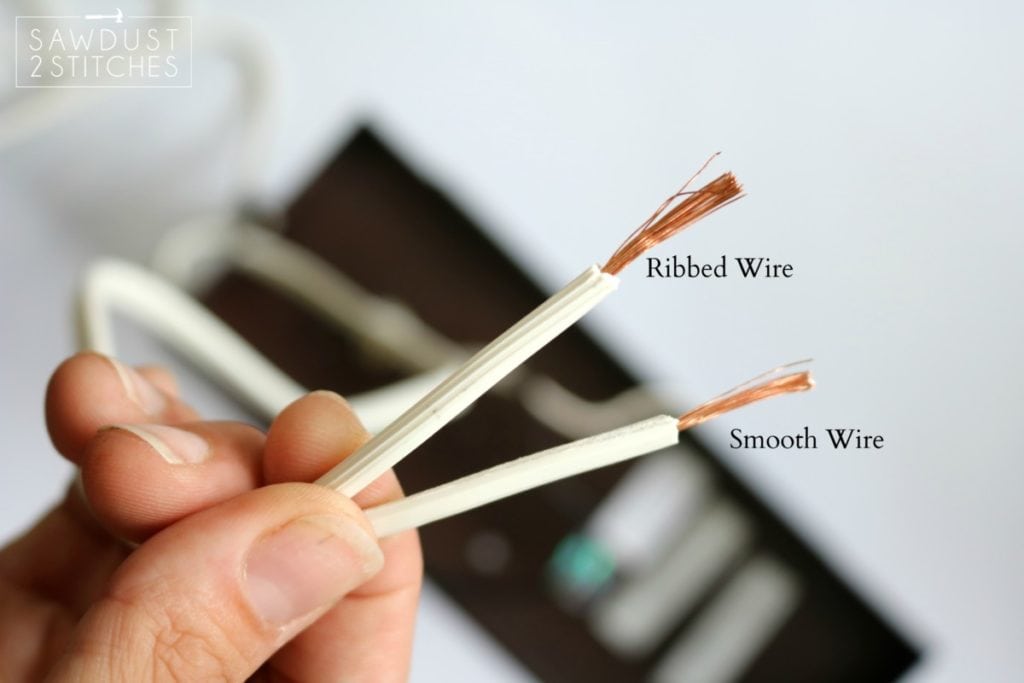 For this project I was using a wall sconce that can be purchased at The Home Depot. Because it was meant to be a wall sconce there is no place for a cord to run. So I needed to fix that little problem. It was a quick fix, using a drill bit I drilled a small hole in the bottom of my lamp. It does not need to be large, just big enough to run your decapitated extension cord through.
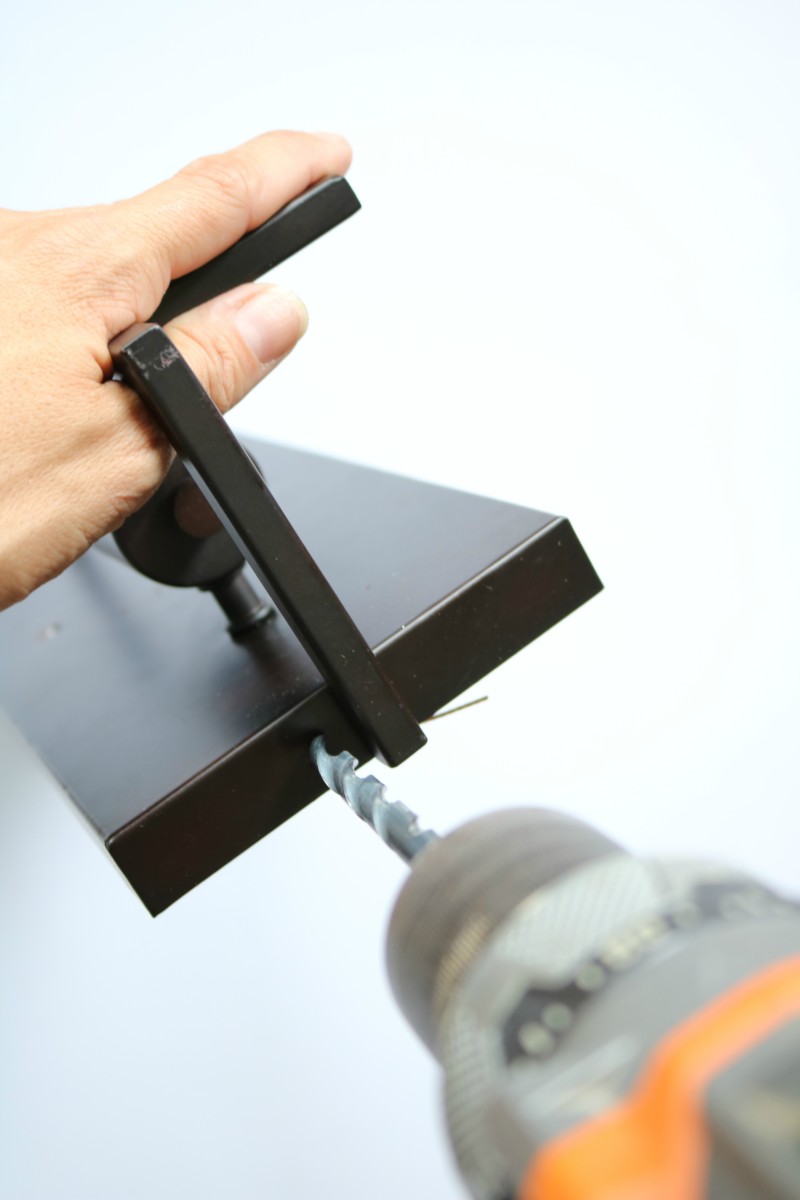
 Once the hole is drilled, feed your wire through it.
 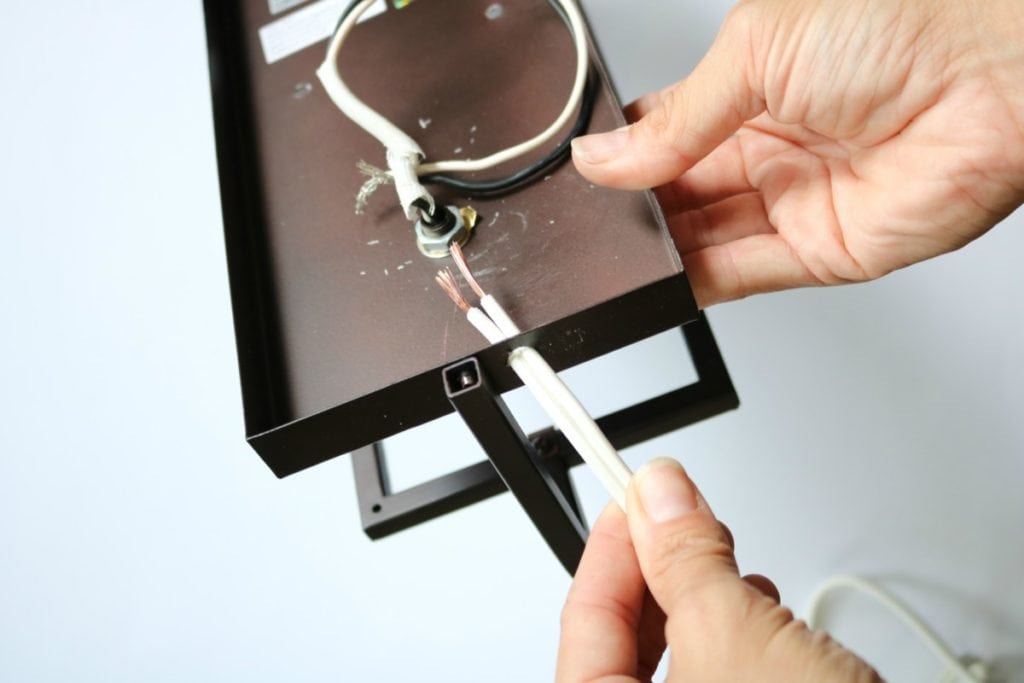 Here is the part that I think makes people’s heart race. There is no need to breath into a paper bag people! You go this! Lamps are very simple. They have two wires and that is it! Like we discussed earlier, a lot of the times if you are hard wiring a light fixture all the cords will be black and white and you just match colors. However in this example, we do not have the color coded option. Instead you are going to wire it, ribbed to white, and smooth to black. I just find it easier to remember “Ribbed White”. the rest falls into place.
 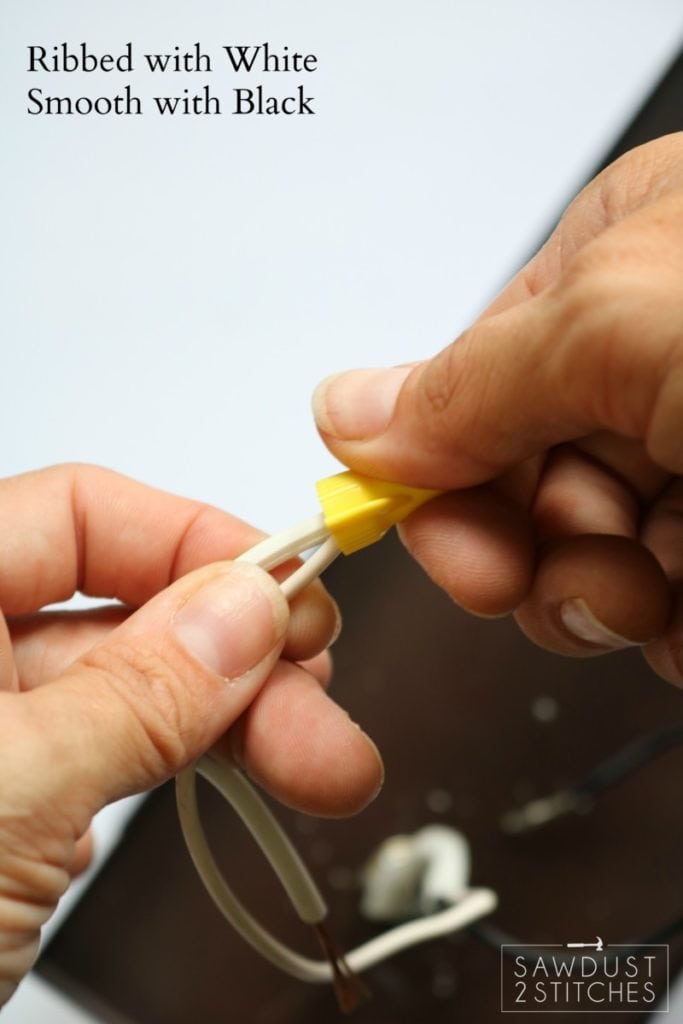 You simple twist the ends of your white and ribbed wires together and then add a wing nut. (These will more than likely come in your sconce light packaging.) The wing nut is threaded on the inside. You just twist it in place. If it is installed properly, you should be able to tug on the wingnut and it will not come loose. If it is loose, just try again.
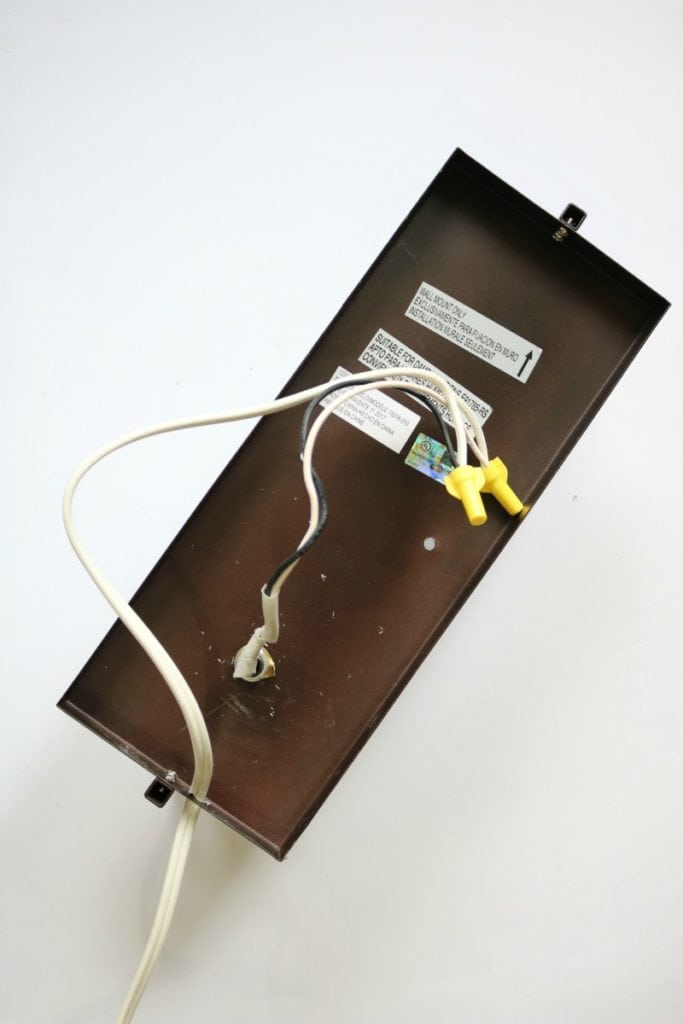
 Alright, that wasn’t so bad now was it ? Now is the easy part!
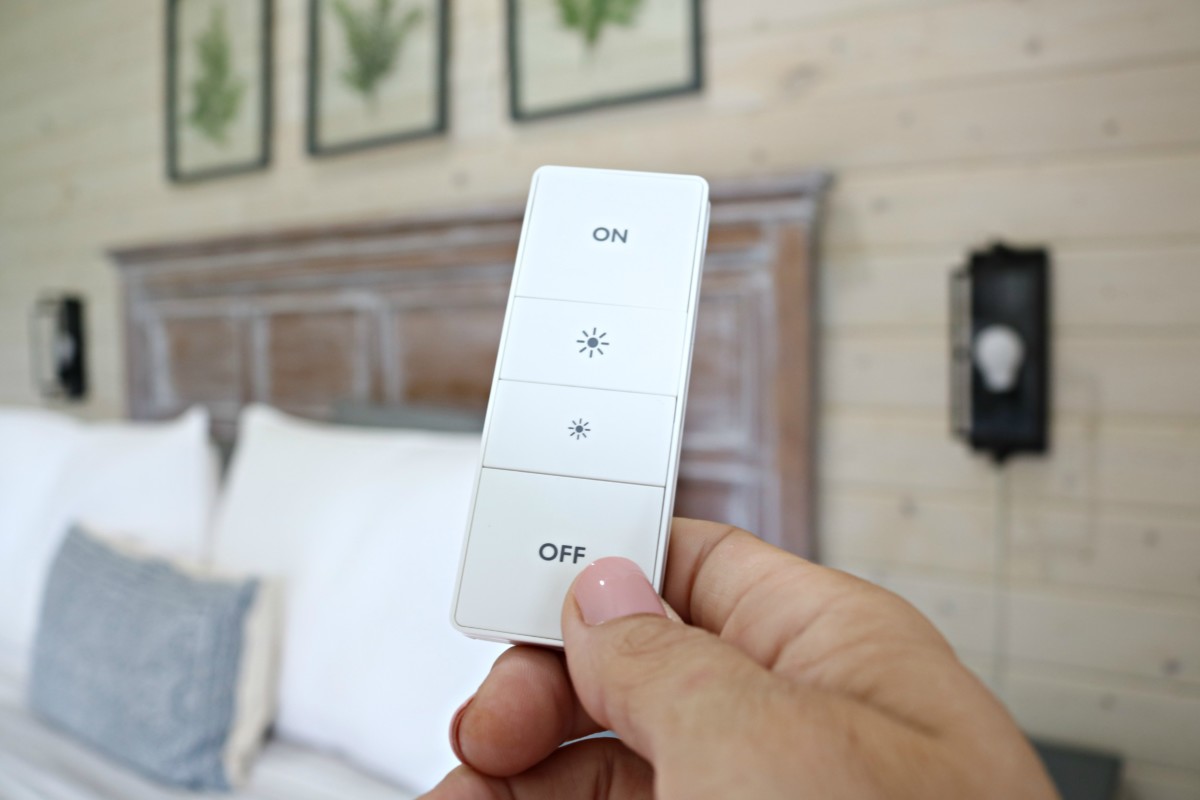
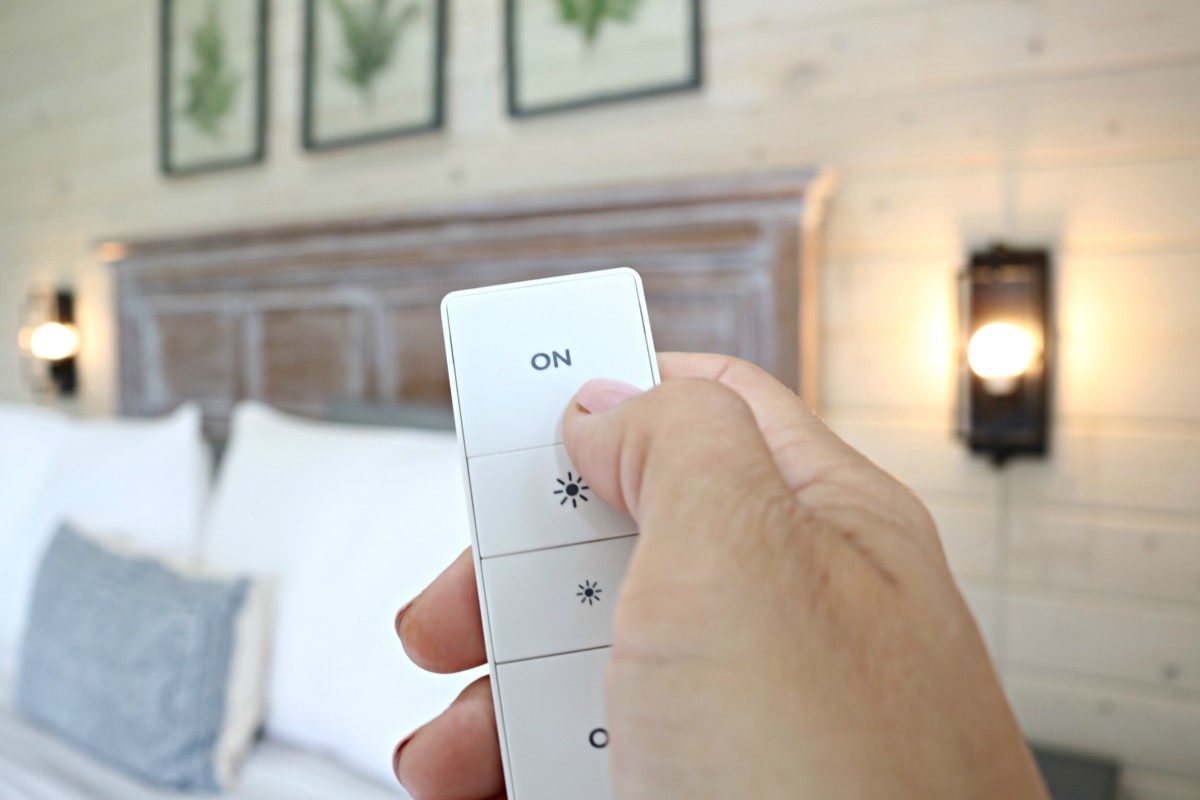
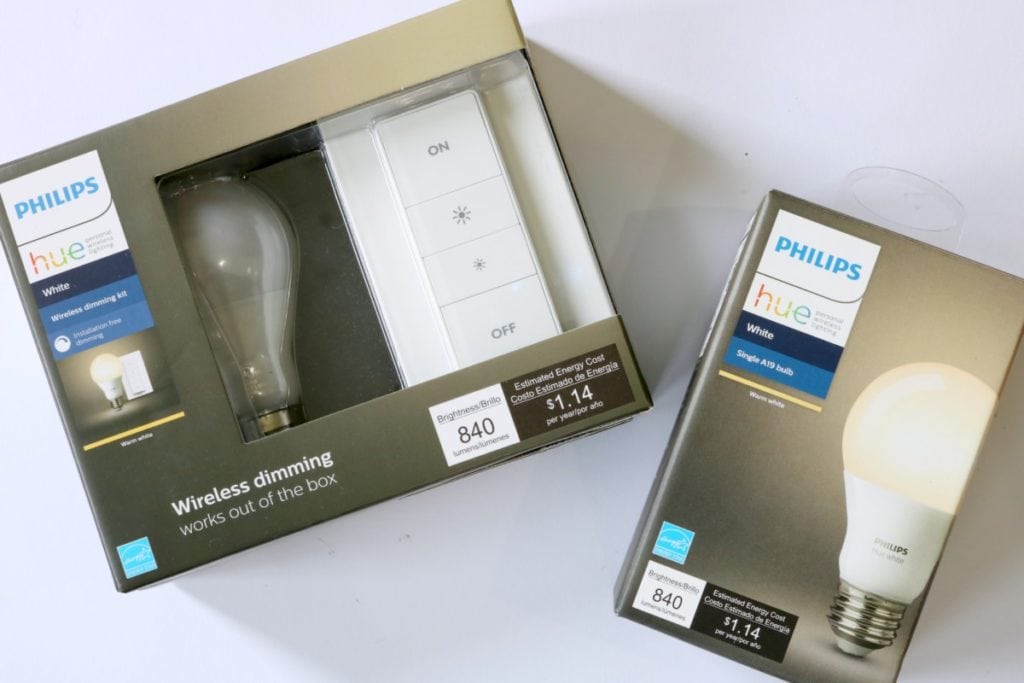 The package comes with a “switch” and a bulb. The switch actually can sit in a magnetic holster so it can be mounted to the wall, or you can take it wherever is convenient for you.
 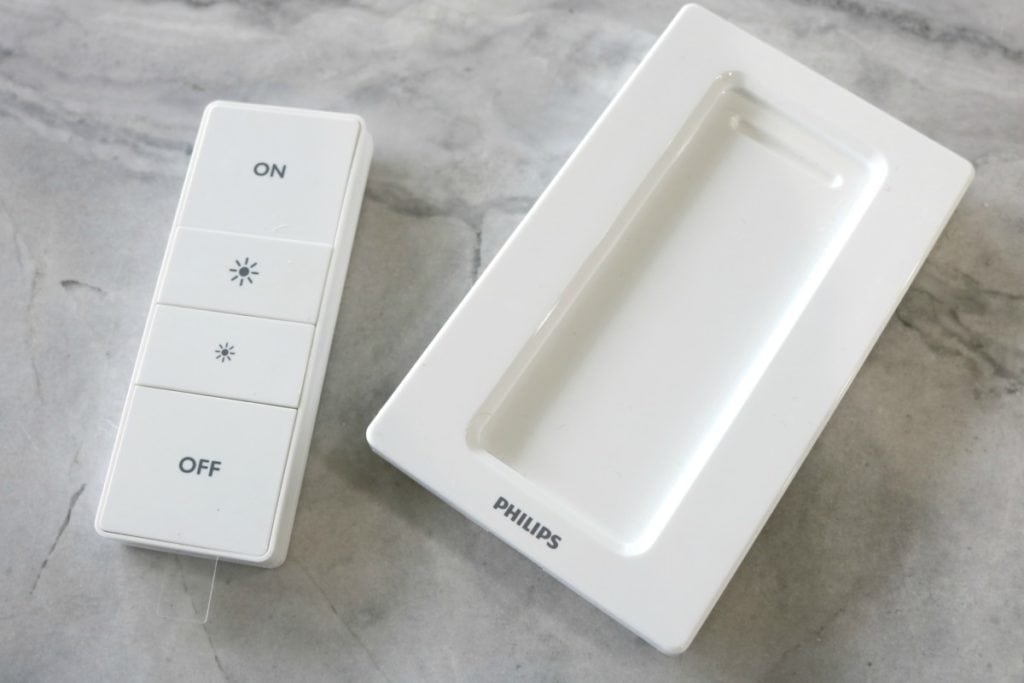 The installation for this light is ridiculously easy! So much so that I thought I was missing something! The mounting plate can come apart for options when mounting. It comes apart easily so that you can access screw holes should you decided to mount it via screws. But for this tutorial I want to show you how user friendly this is!
 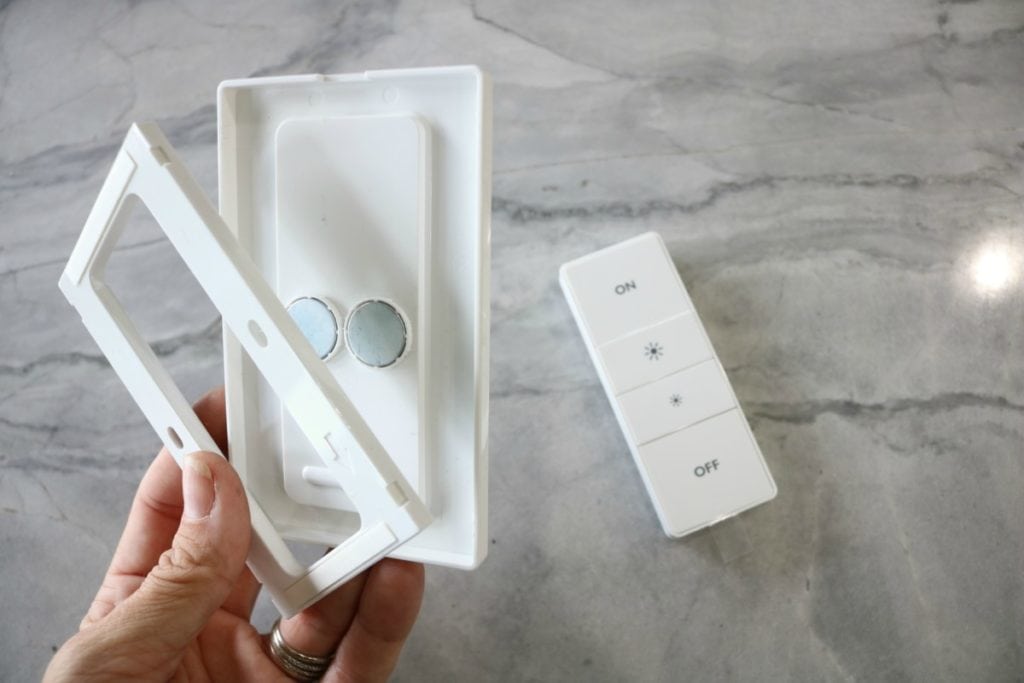 If you decide to forgo using screws, it comes with some STRONG double stick tape on the backside. All you need to do is remove the adhesive barrier strip.
 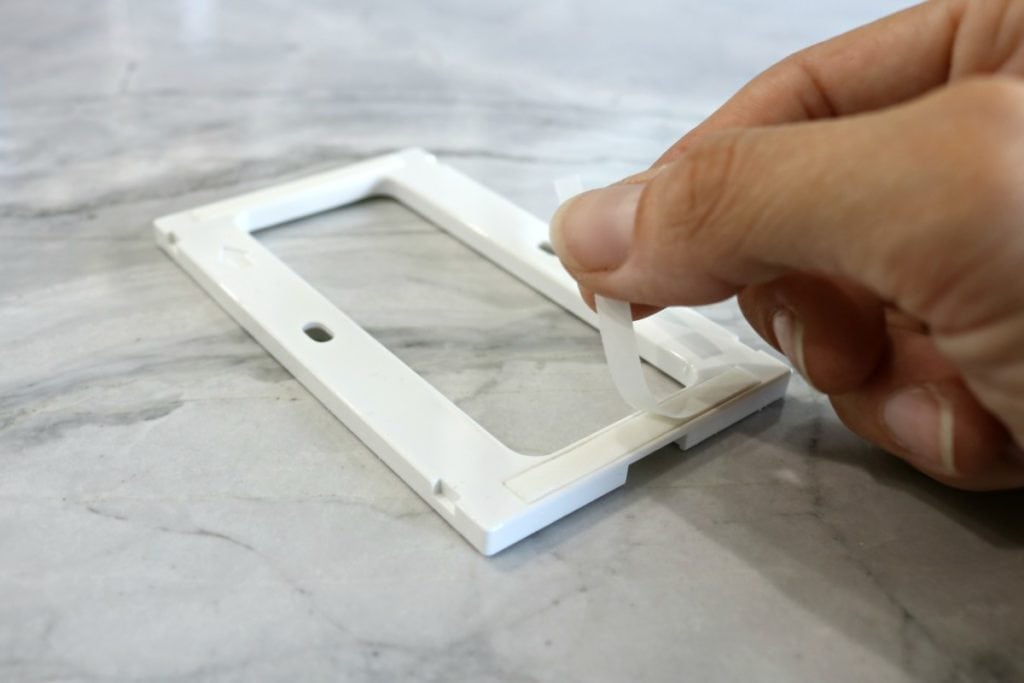 Then press in place… ANYWHERE! I am telling you, it is that easy! You don’t have to wire a single thing! Just press-n-go! (Again, if you wanted to attach using screws, you can do that easily anywhere as well. Once you have the plate positioned where you want it, just attached your face plate/cover to the installed base.
 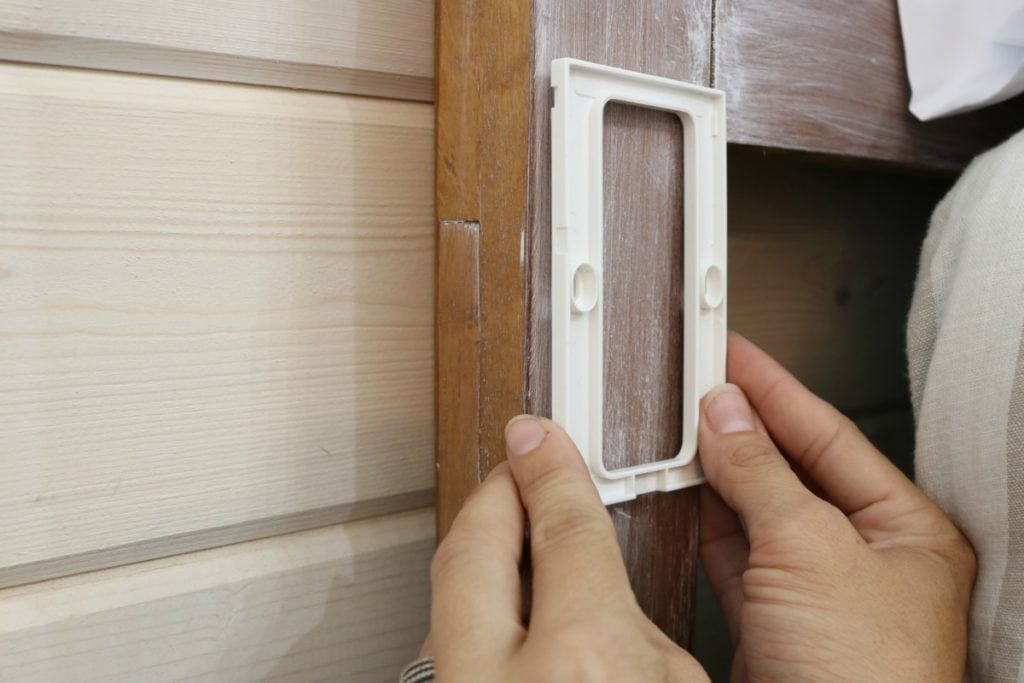 After the plate is in place, remove the clear battery strip and you can place the remote in the wall mounted cradle. In this case I attached it in a tucked away post on my headboard because these will be powering both mine, and my husbands nightstand lamps.
 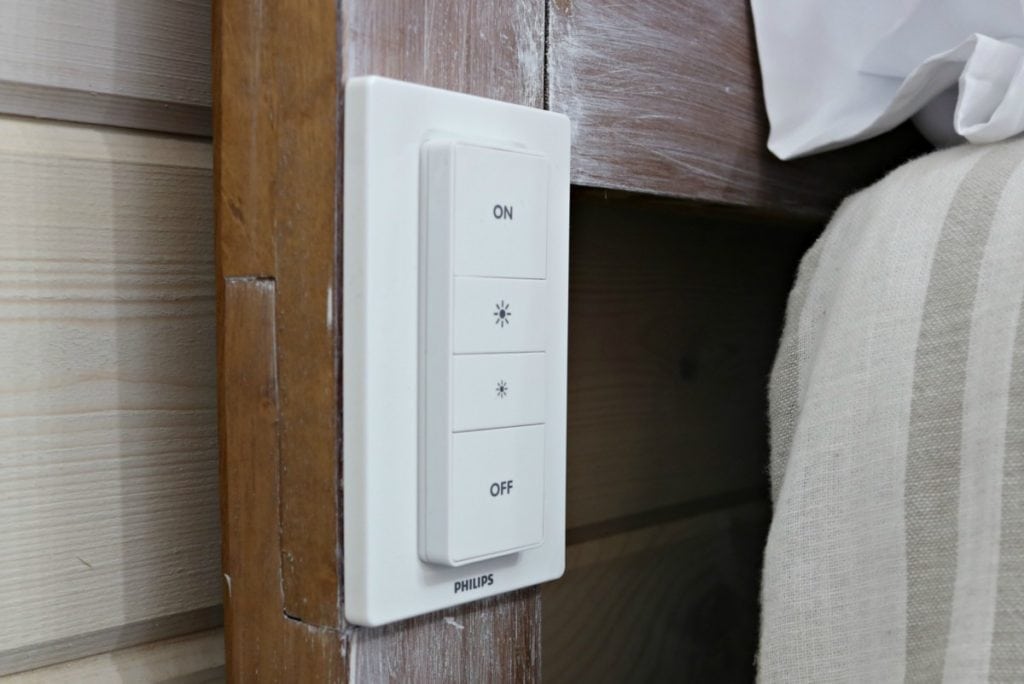 Then you screw in your light bulb…
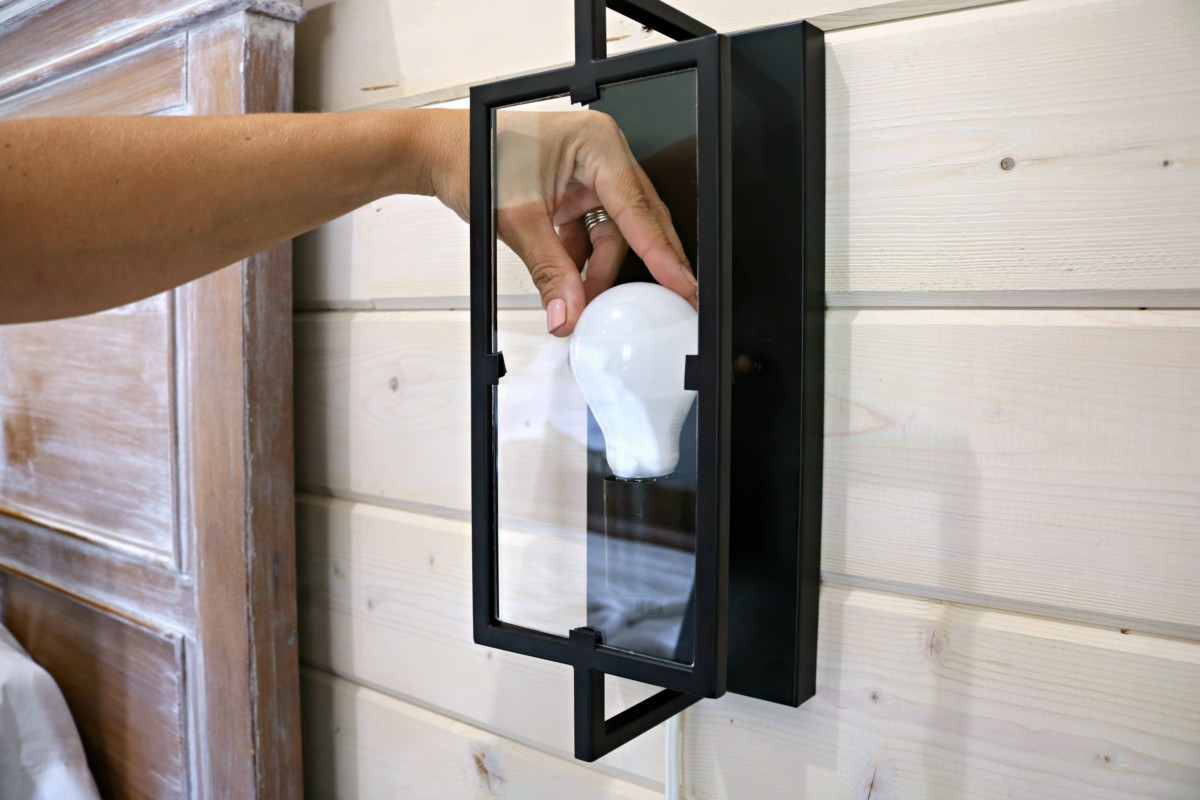
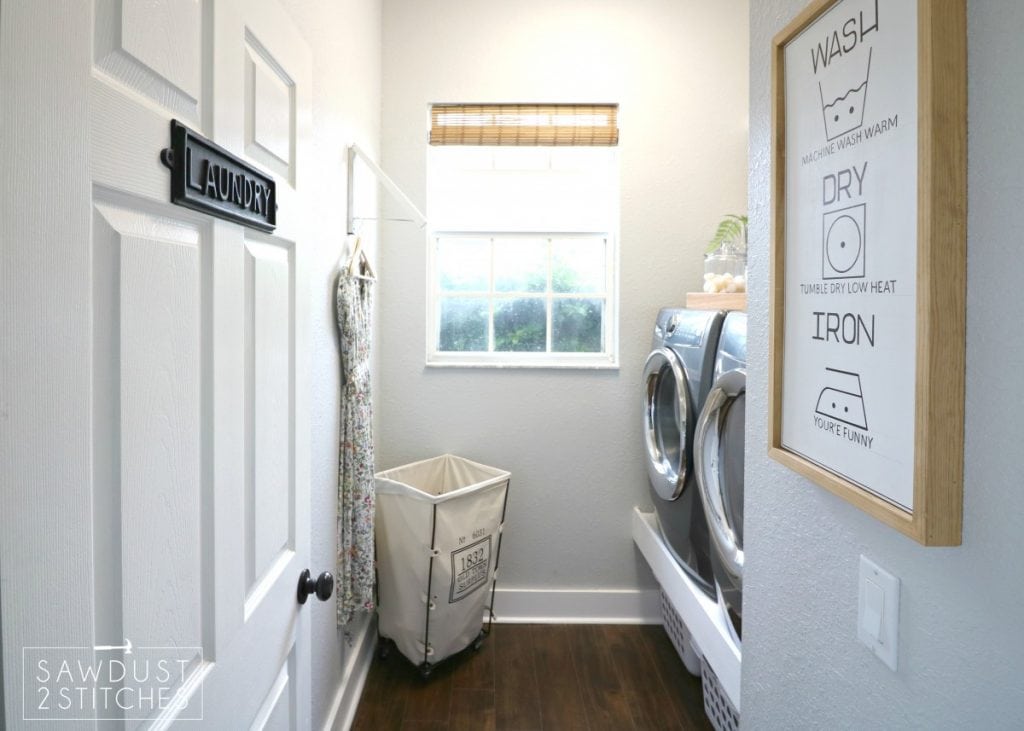
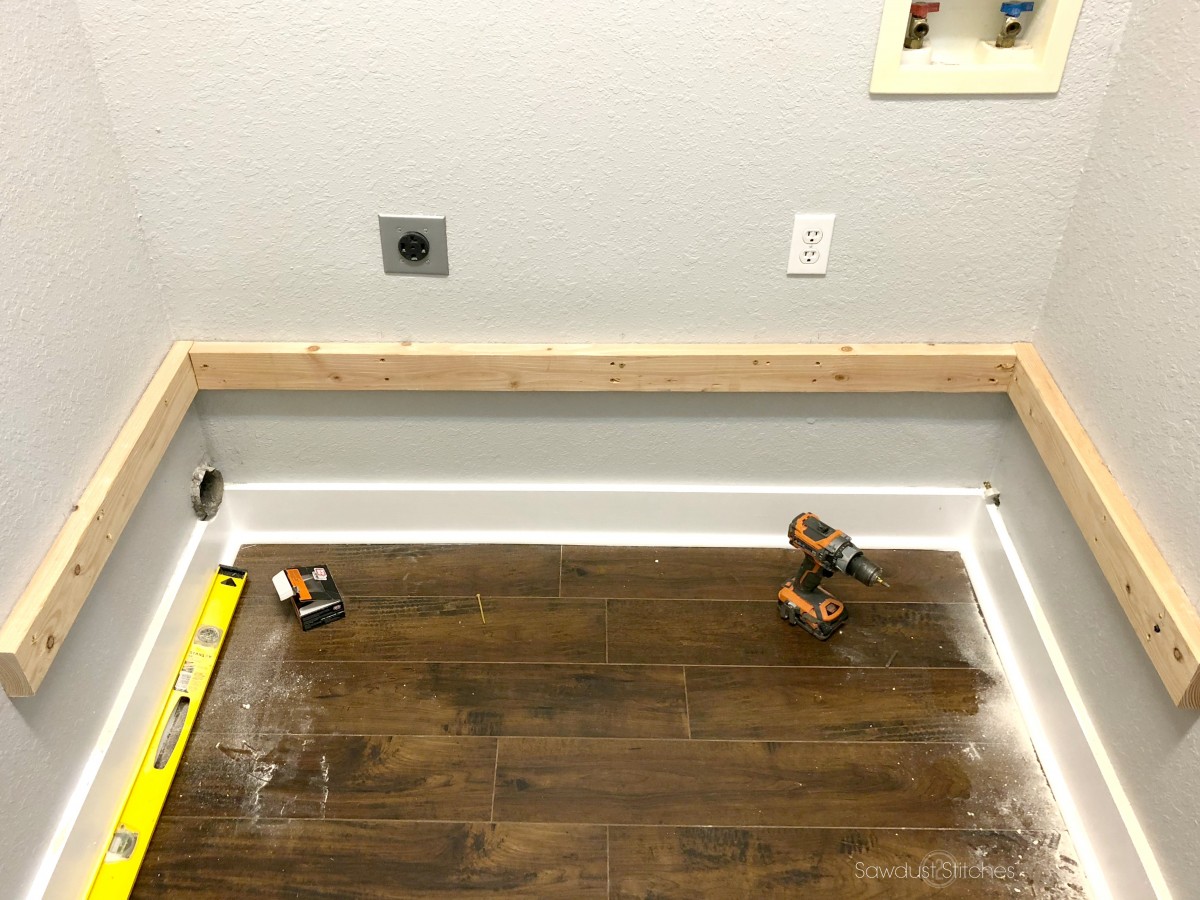
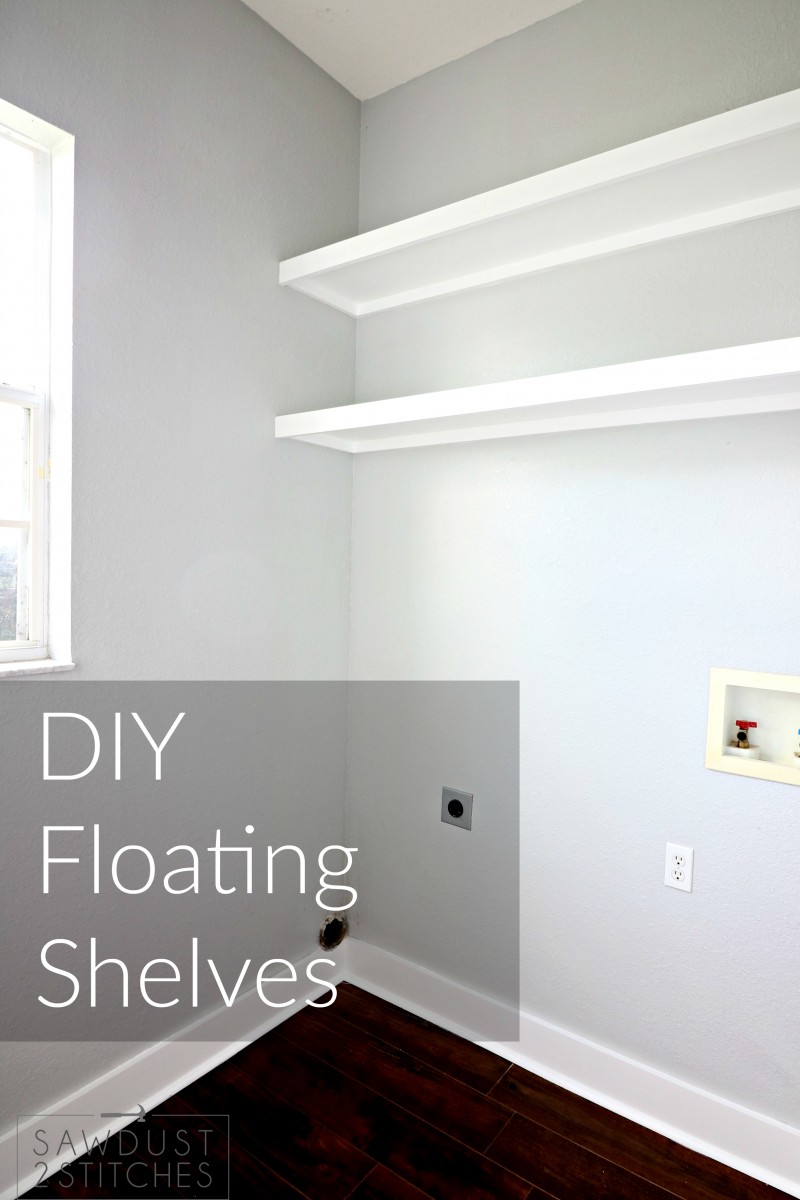
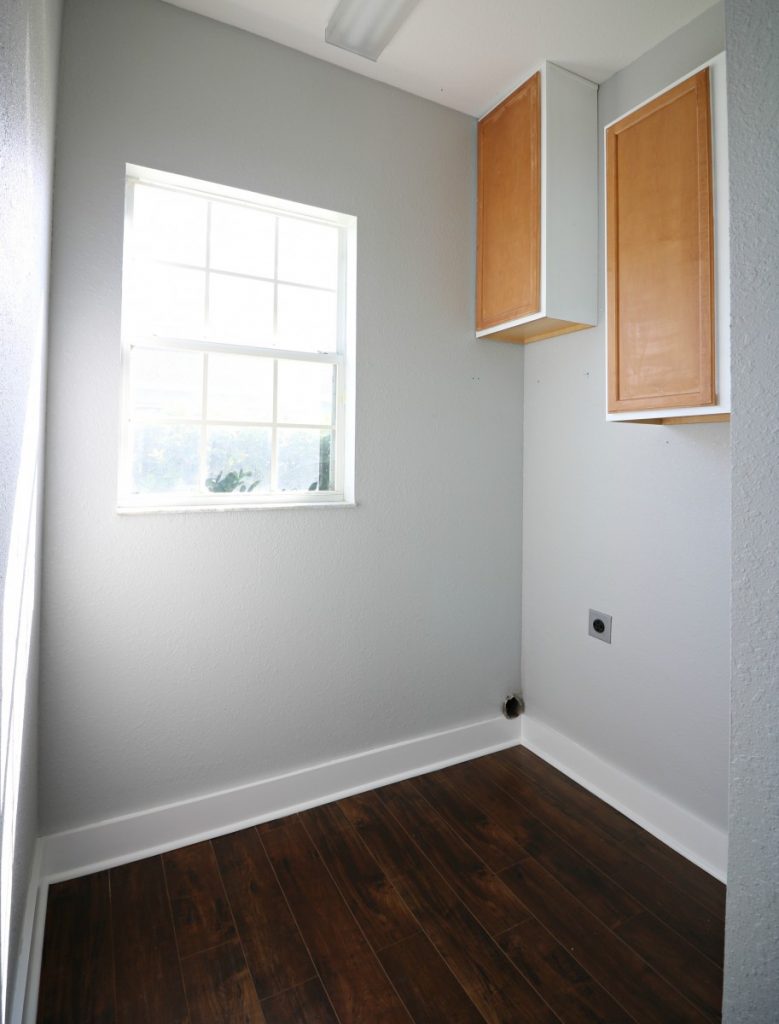
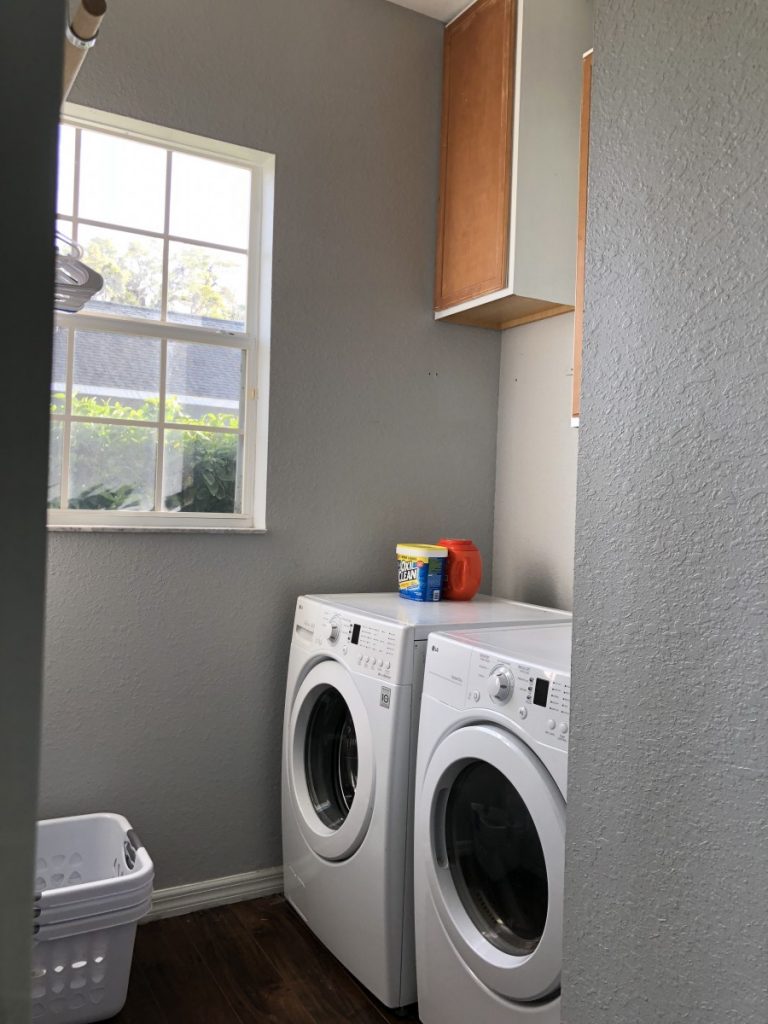 As you can see, it was just enough space for a washer and dryer with a small walkway to access them. Well, I had a few ideas to really maximize the space. So I added
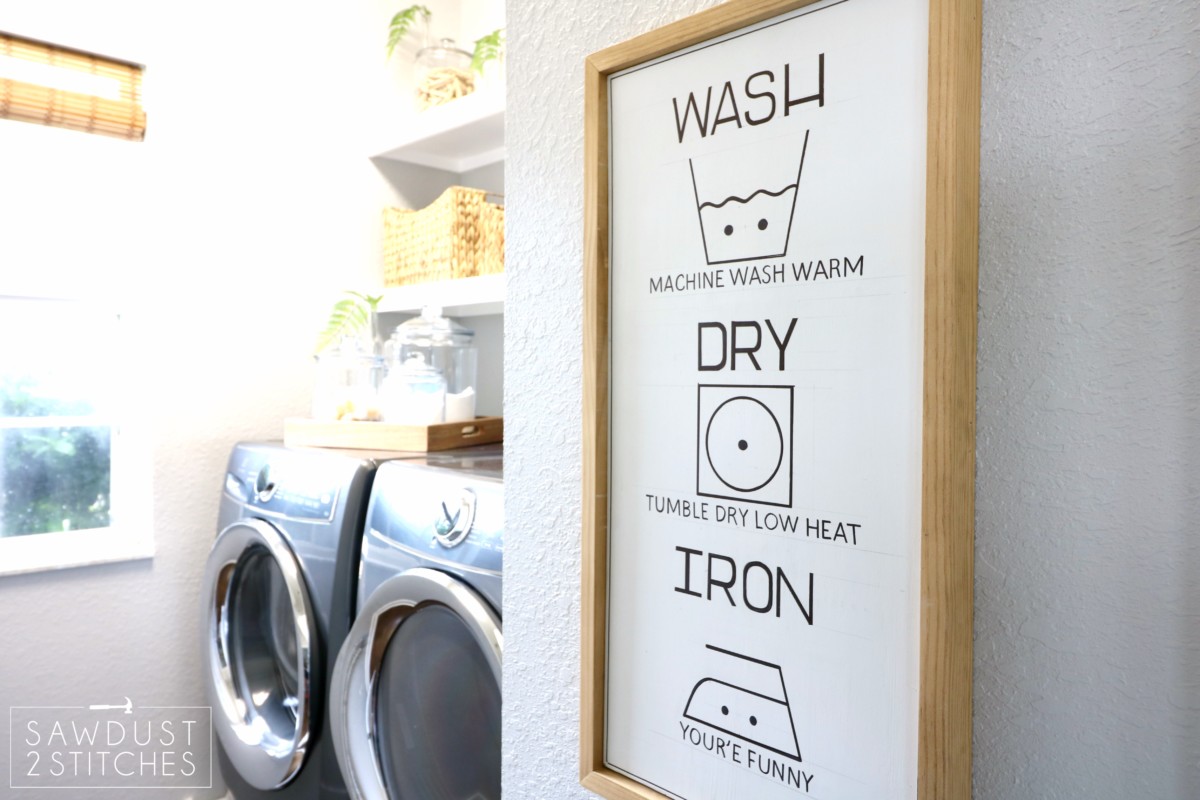
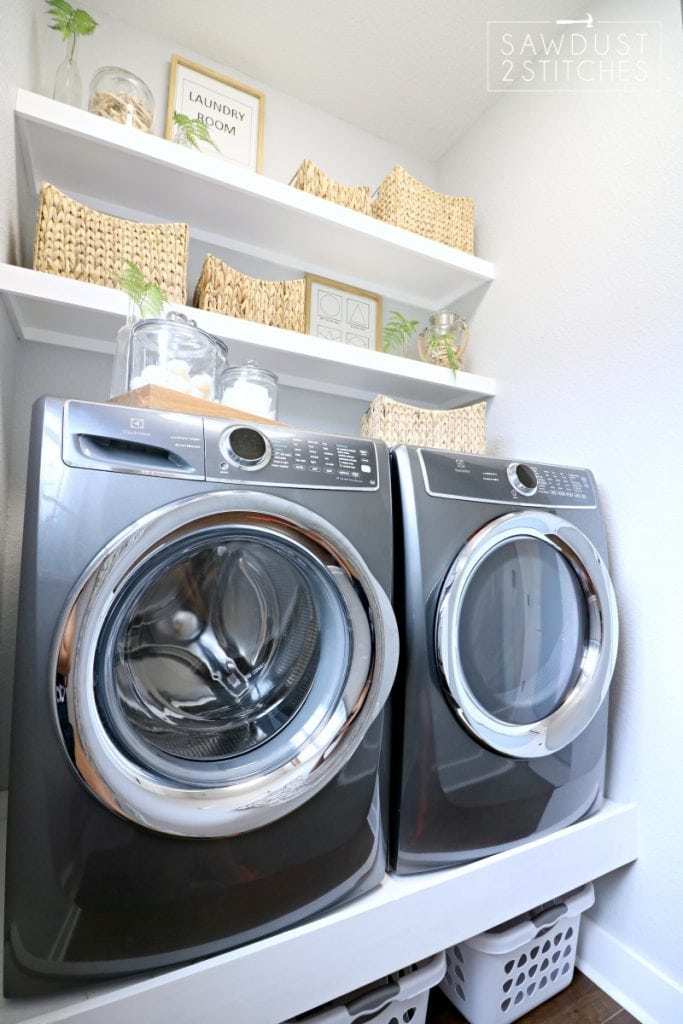 This small footprint room was only large enough to hold a washer and a dryer, but through use of shelving (of sorts) we were able to maximize our space! Now instead of the tops of the washer and dryer being a collection of cluttered cleaners, it is more of a calm reverie without needing to sacrifice practicality. Thanks to baskets we have plenty of hidden storage. Another great way to maximize space and efficiency is by making required cleaners easily accessible and when possible, beautiful! (However, always consider any little hands that might have access to cleaners.)


 A big thanks and shout out to this posts sponsor DAP. It is because of excellent partnerships like these that I am able to continue to provide more content at no cost to my readers.
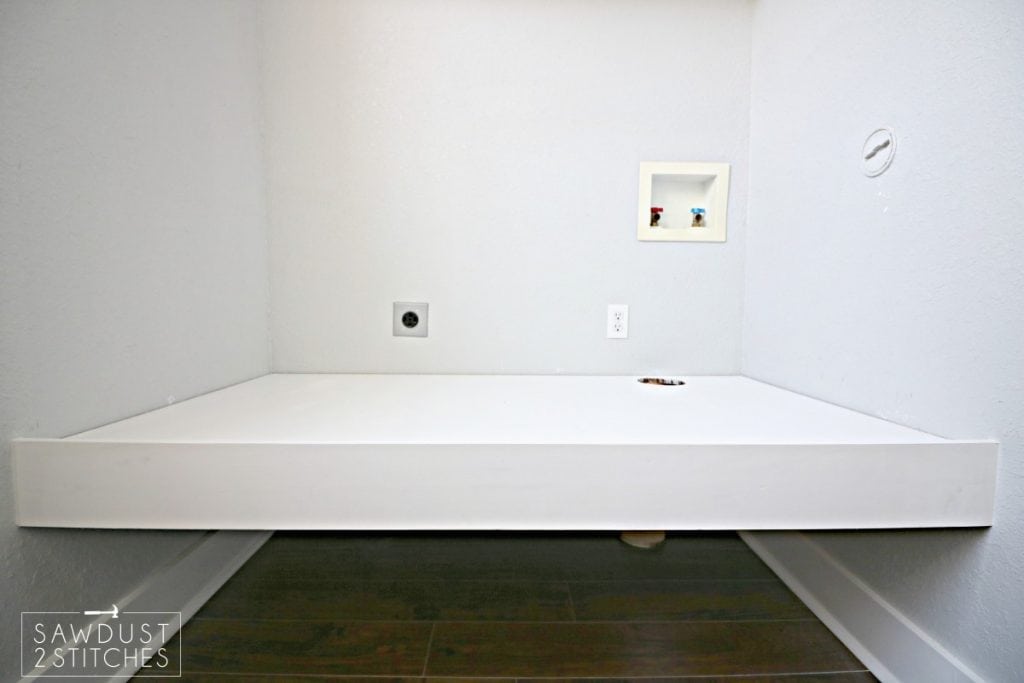
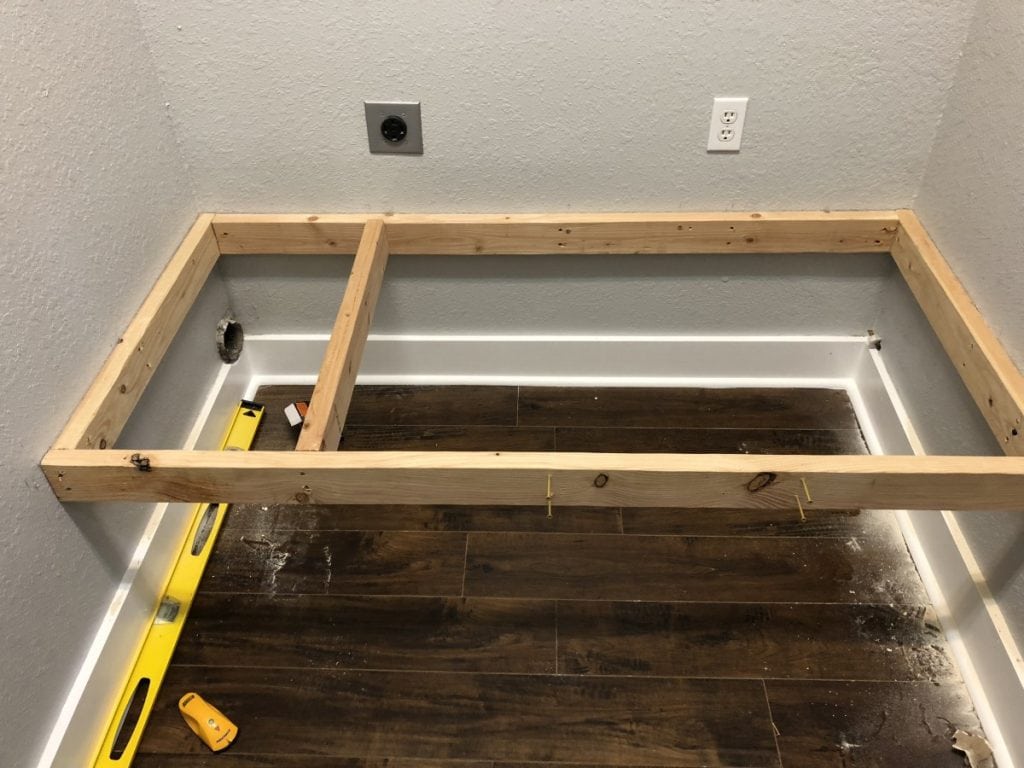 Once the front support is in place, I added my platform supports. To get this dimension, I just measure my interior platform dimension. The spacing of these supports will vary dependent on the overall width of your space. I would suggest not going more that 14″ apart though. Once you know your spacing measurement. Mark the measurements on both your front and back support. To attach the front board simply drive through the front support into the platform/middle support. I again used (x2) 4″ screws in each location. Now to attach the back. You have two options, you can use a Pocket Hole Jig or you can use the rough construction method and “toenail it”. Seeing as this would not be visible, I took the quick and dirty approach. You simply drive a screw through the top of your middle/platform support, at an angle towards your back support. The trick is to drive through a decent amount of each board. Repeat this again on the bottom of the board driving up towards the back support. Repeat this for every support.
 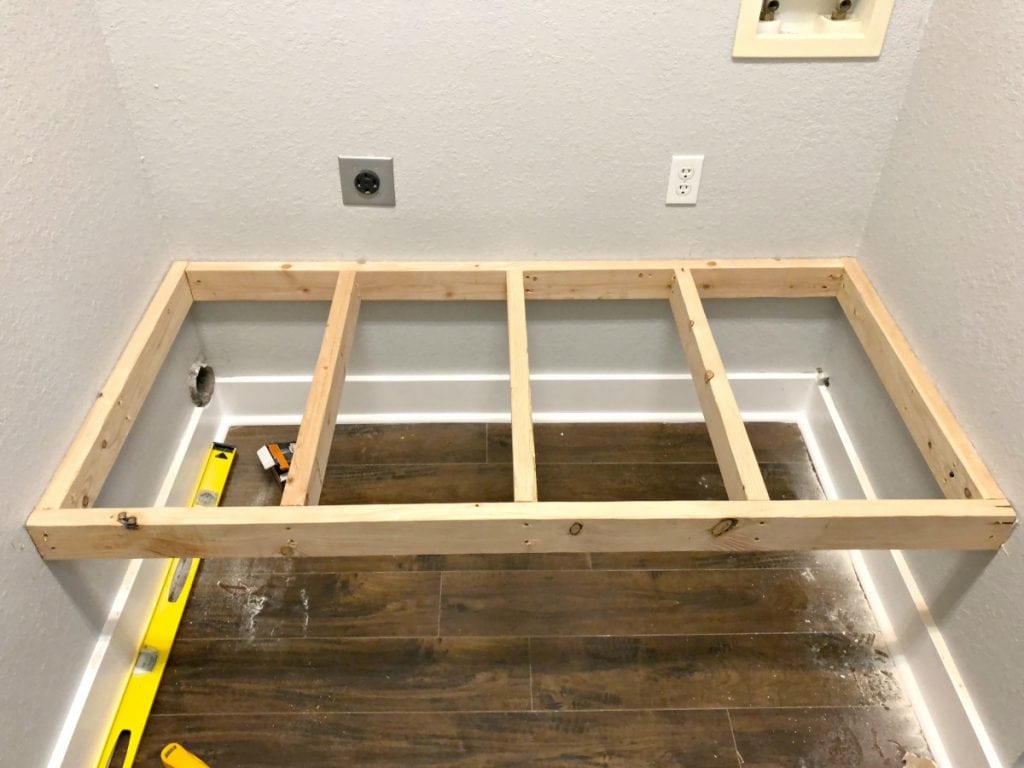 Not pictured but HIGHLY suggested. After the platform is built I went through and added a second 2×4 to the front support. Nothing special, just literally used another 2×4 with the exact dimensions and attached it directly to the front of the front support. This will just be a safeguard in the event one of them ever gave out.
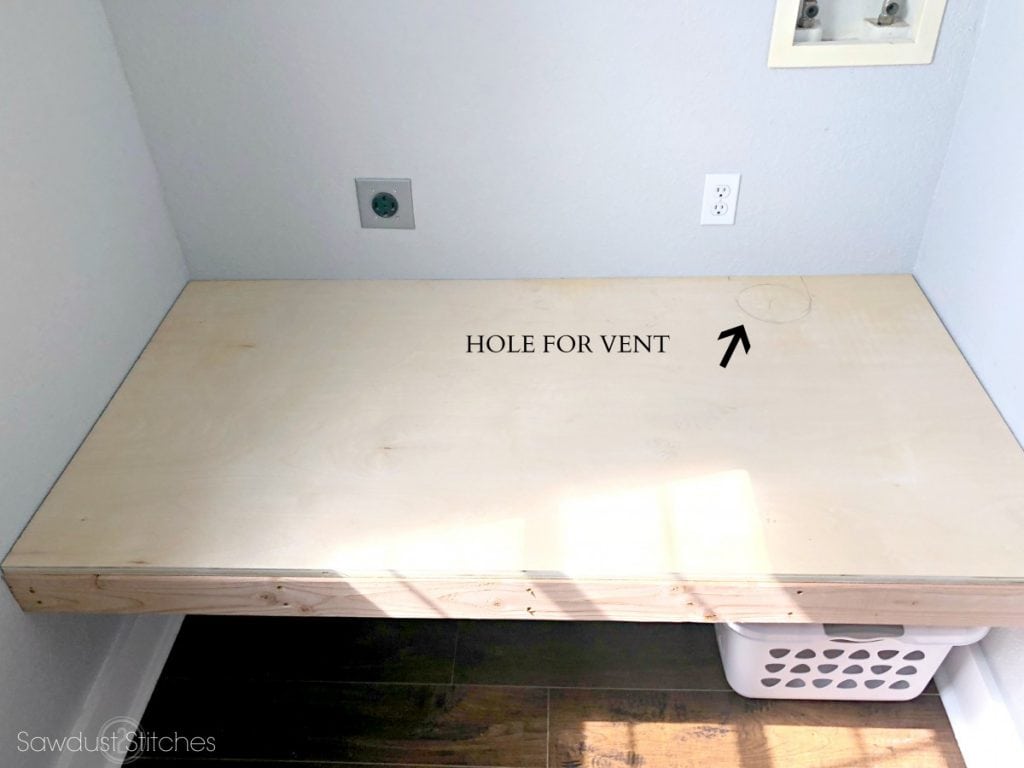 It was a quick process, when I cut holes I use a 1/2″ drill bit and give myself a starter hole. Then I use that hole as a starting point for using a jigsaw to cut out the circle. (Make sure you are aware of the placement of your 2×4 supports that are running under the platform. It won’t do you any good have the hole with a 2×4 in the way.
 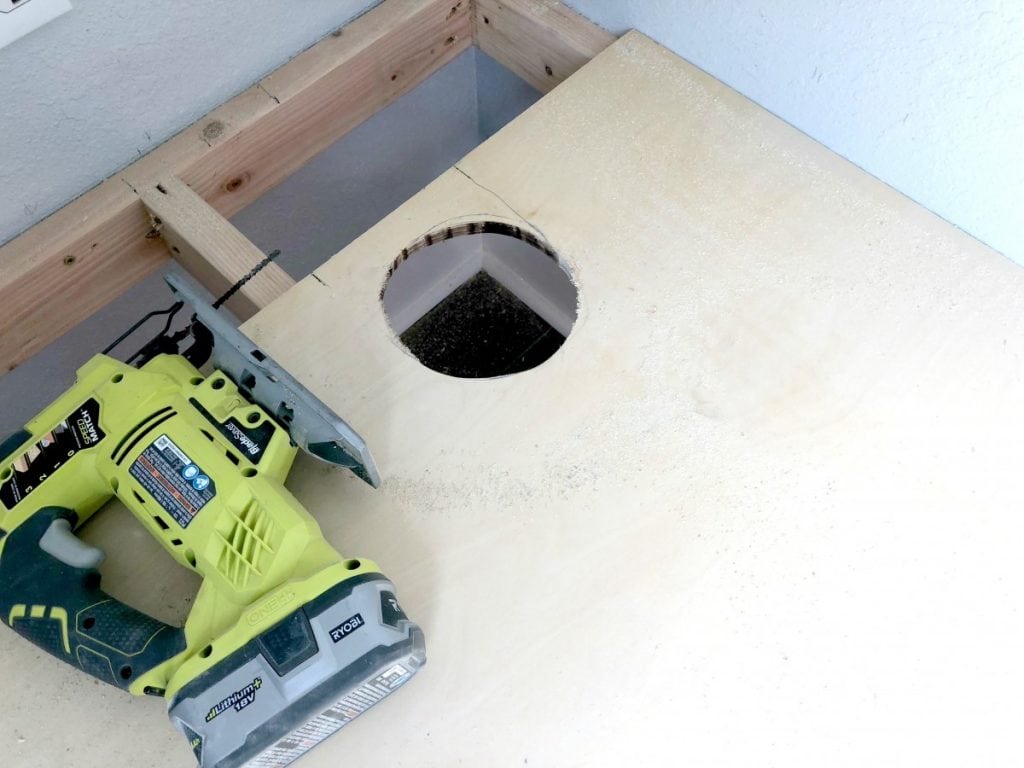 Last step, slide your plywood back into place and using screws secure it to the platform. This will just prevent the plywood from vibrating when the appliances are in use.
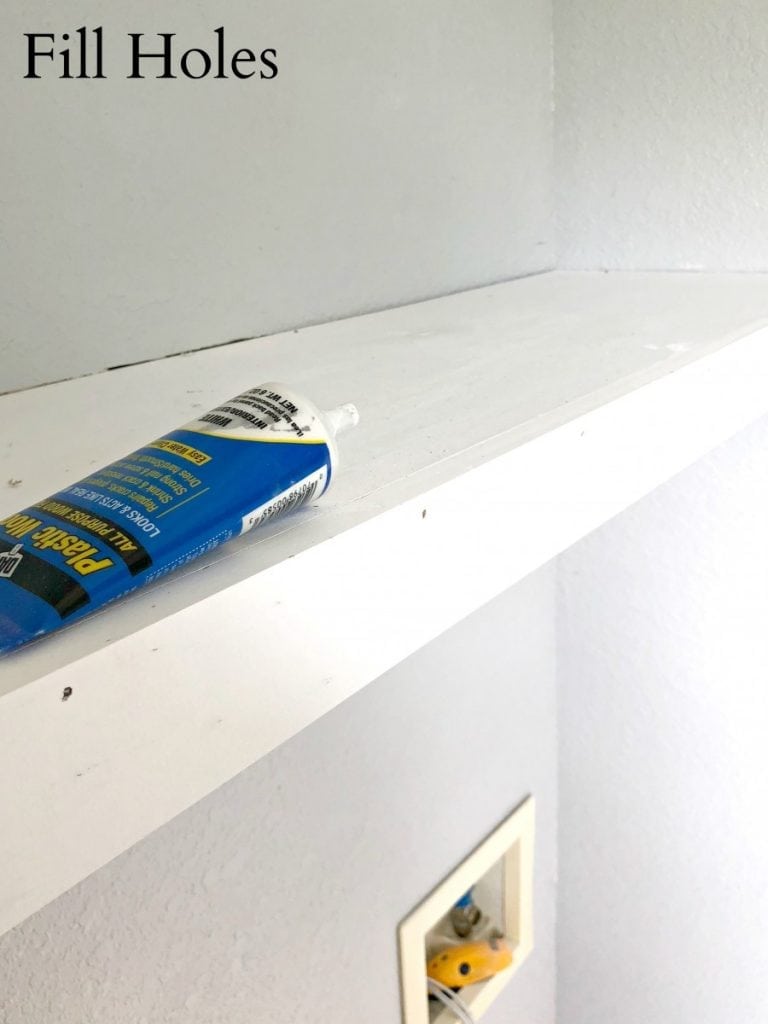
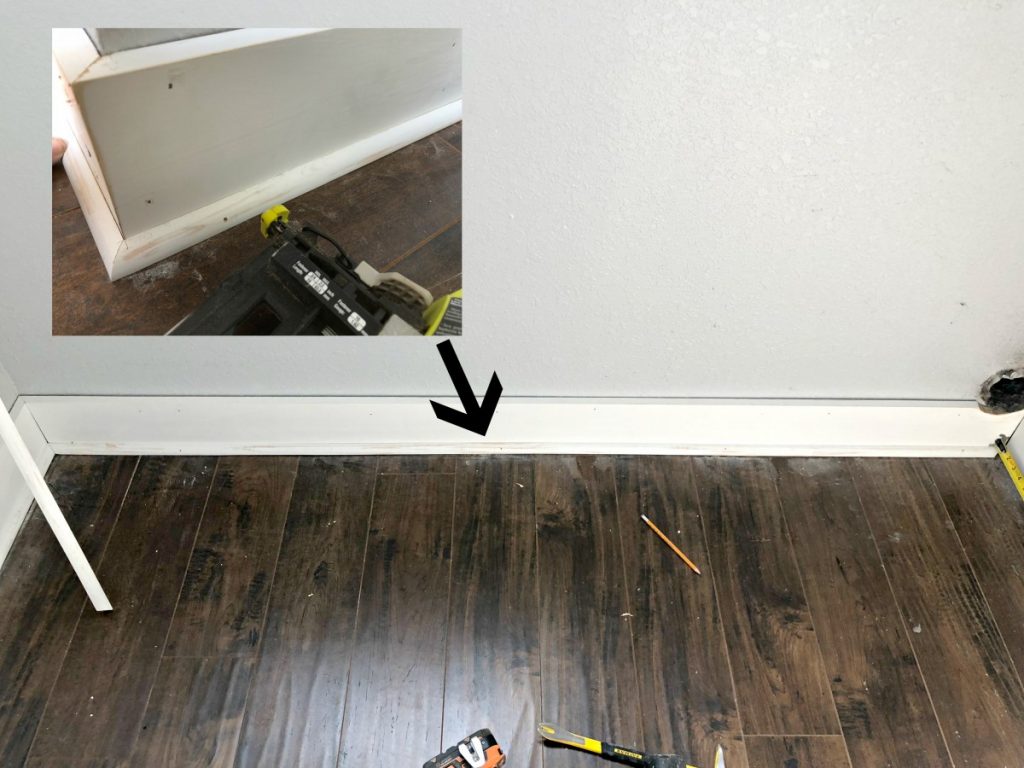
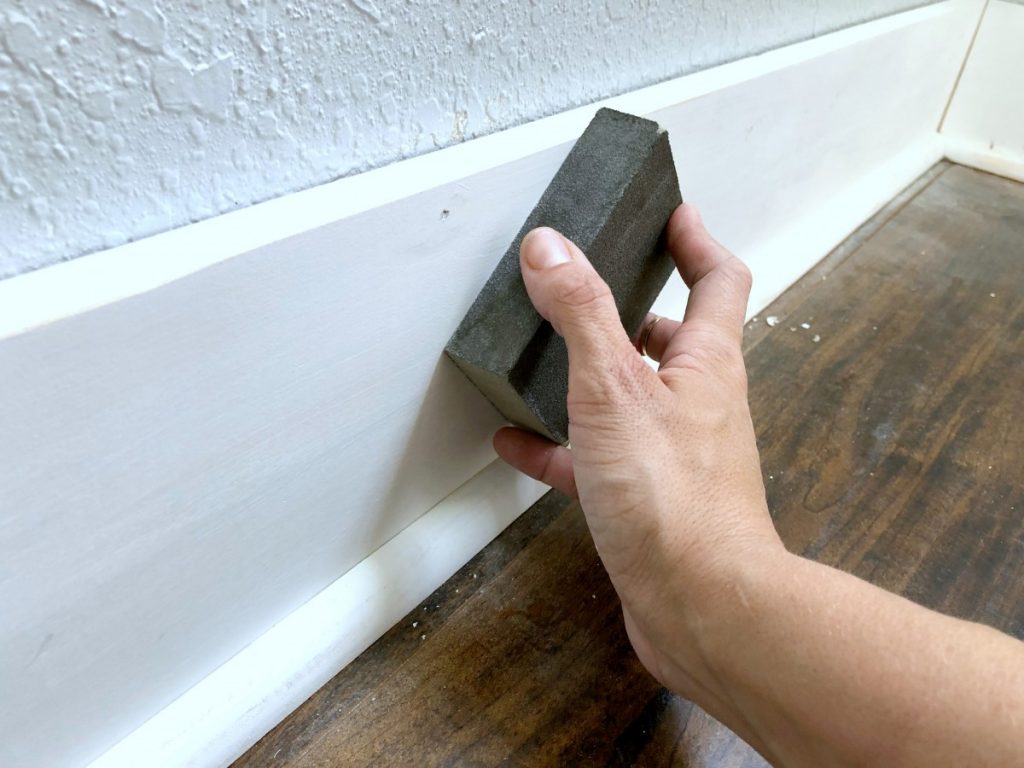
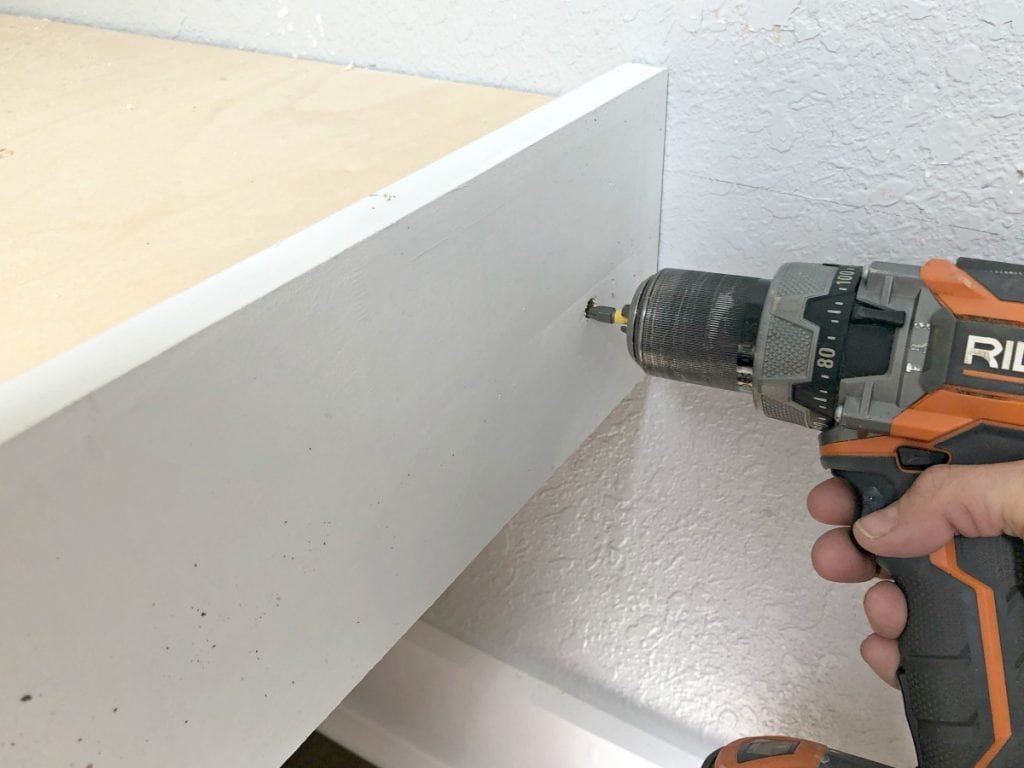 Now we are to the fun part, making it look pretty! Next I went through and filled all the visible screw holes using DAP Plastic Wood. It is easy to apply. Once dried I used a small sanding sponge to remove any excess filler. It creates a smooth flawless surface!
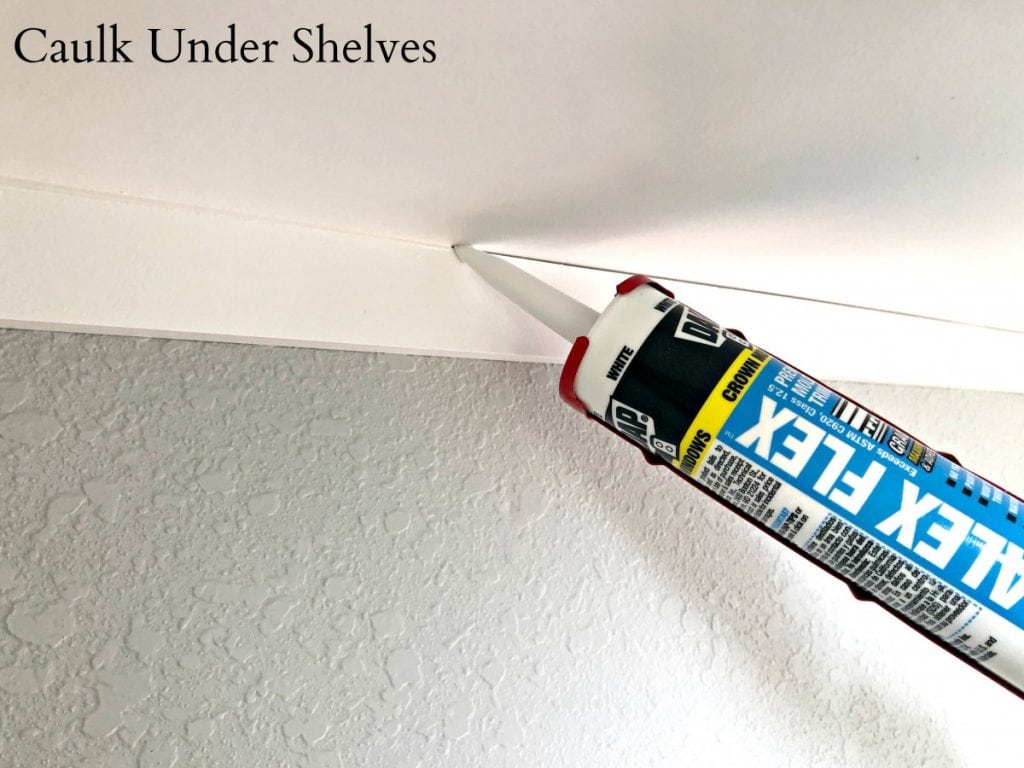
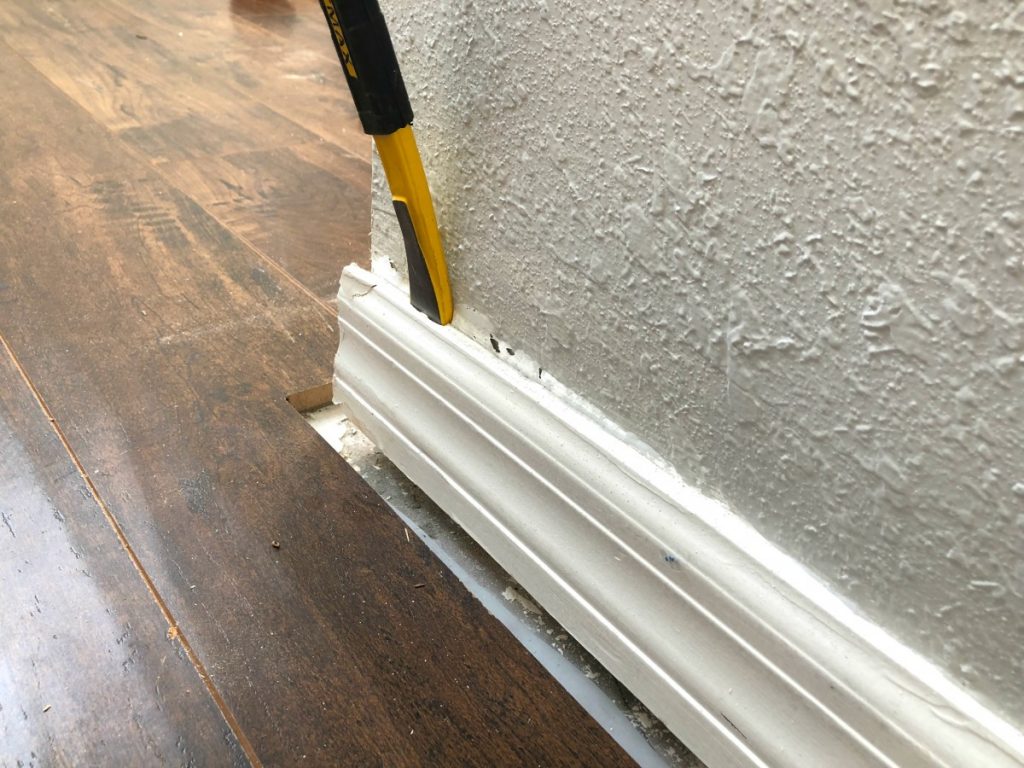
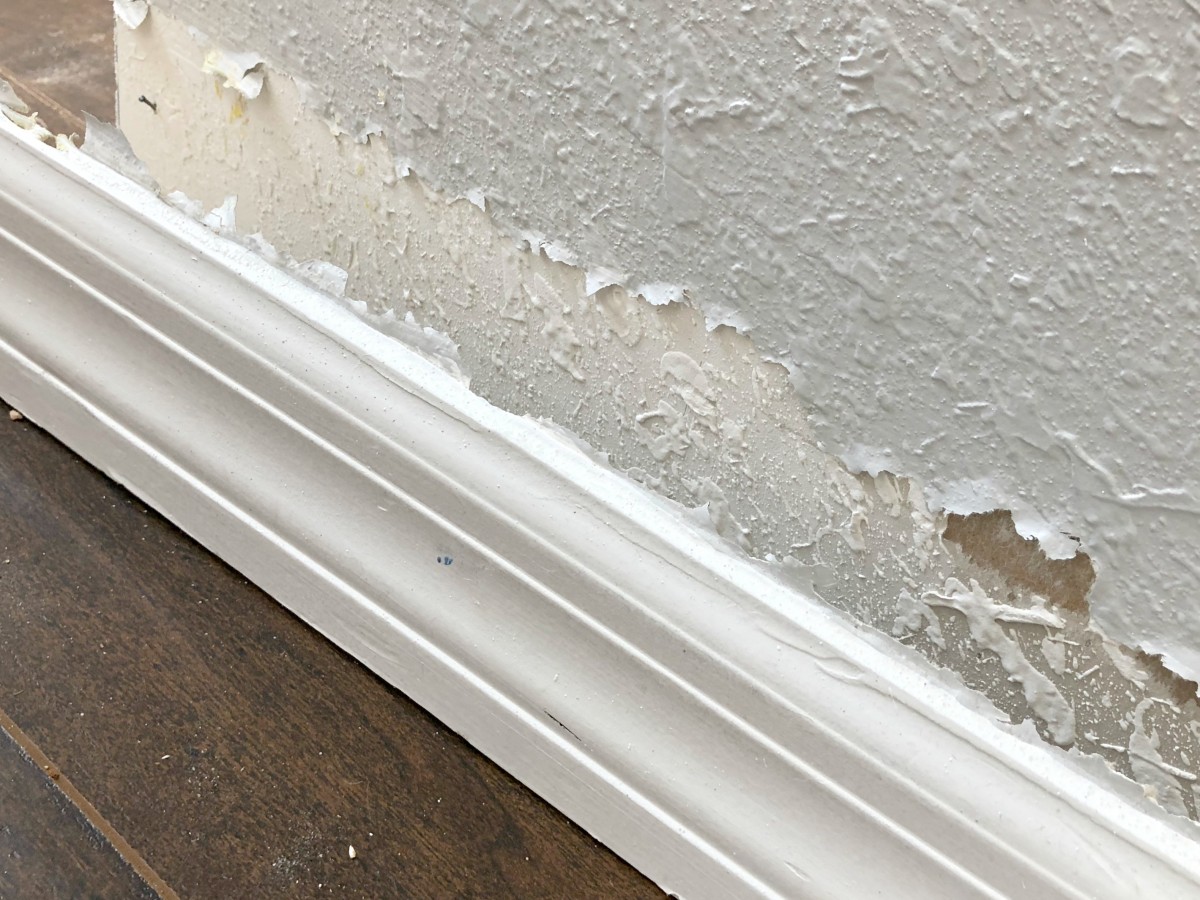
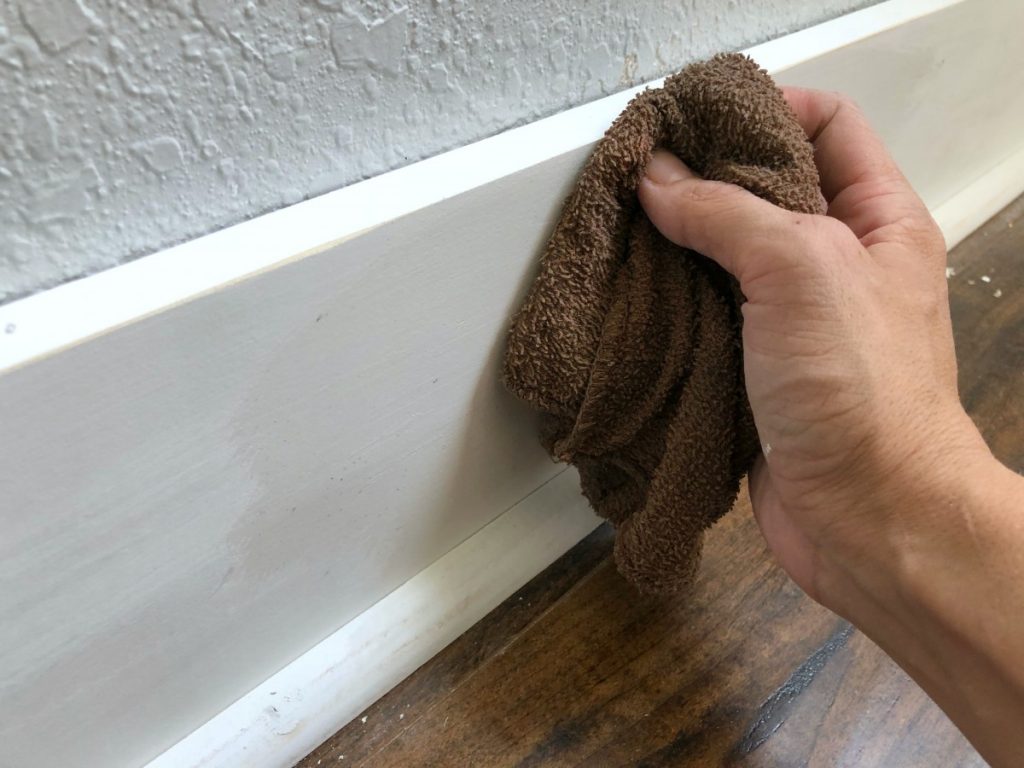
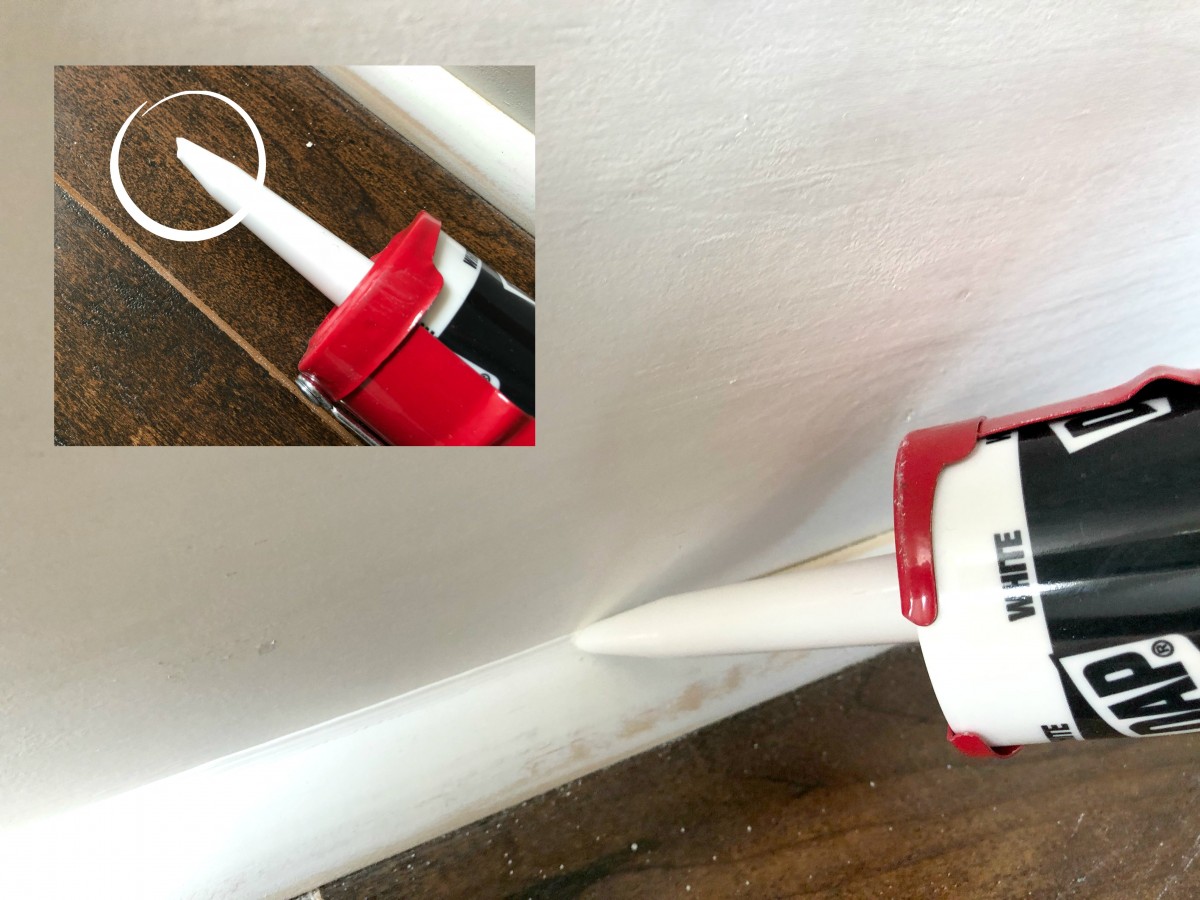
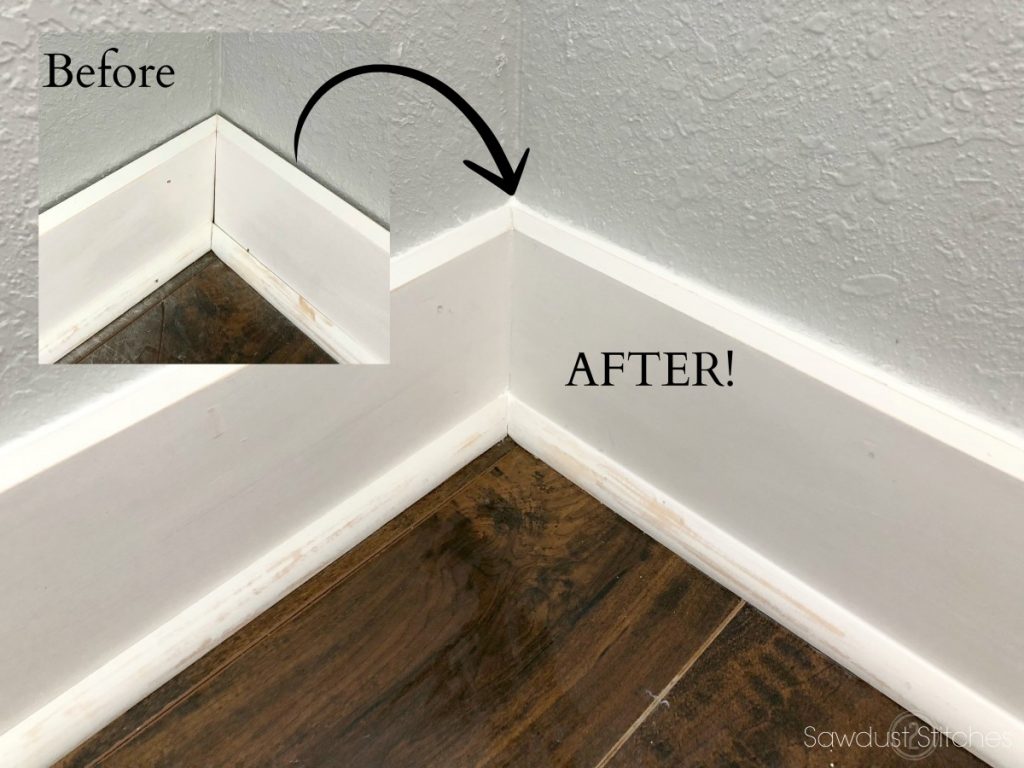
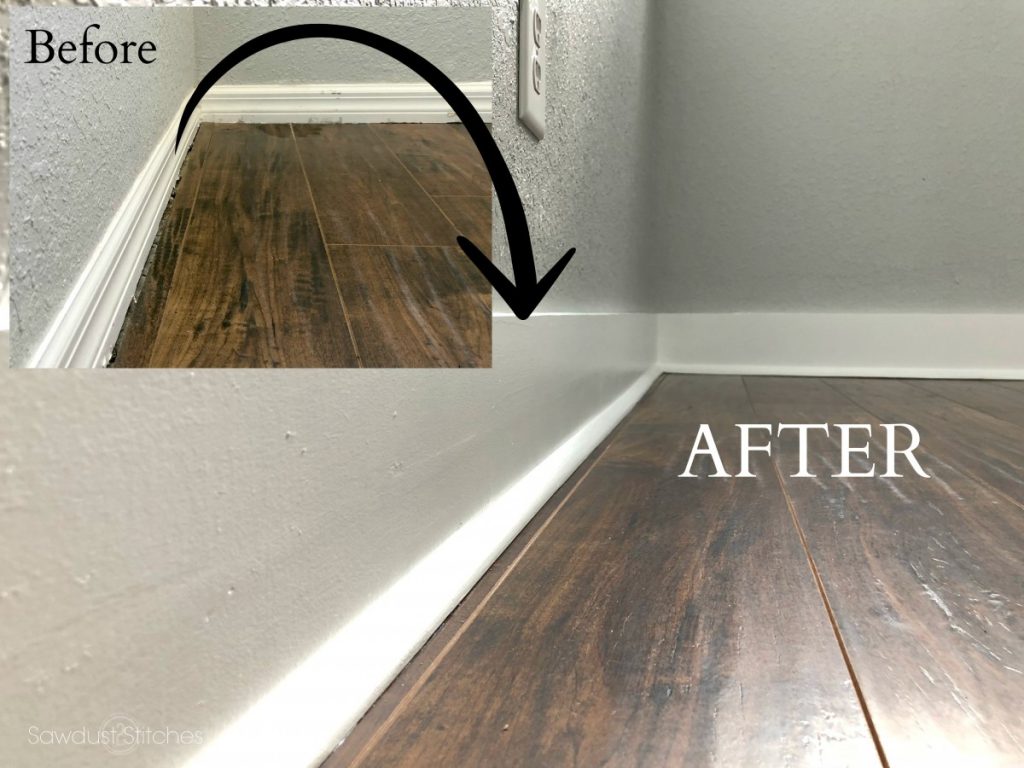
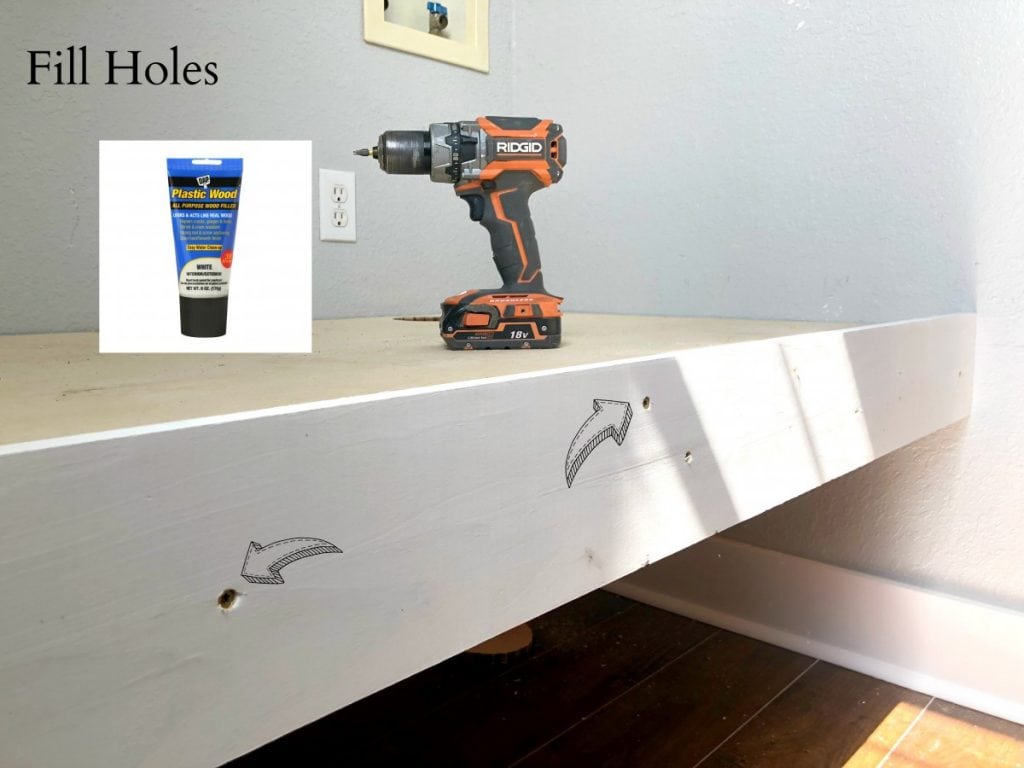 Once all the holes are filled we can move on to filling any unseemly , seams… see what I did there? I used DAP ALex caulk to fill all the seams where my platform and met the walls. This will blend any discrepancies and make it look like a flawless built. If you have never used caulk before you are in for a real treat. This is like a magic eraser for trim work. I always start with a very small cut on the tip. Again, you can always make the cut bigger if you need to.
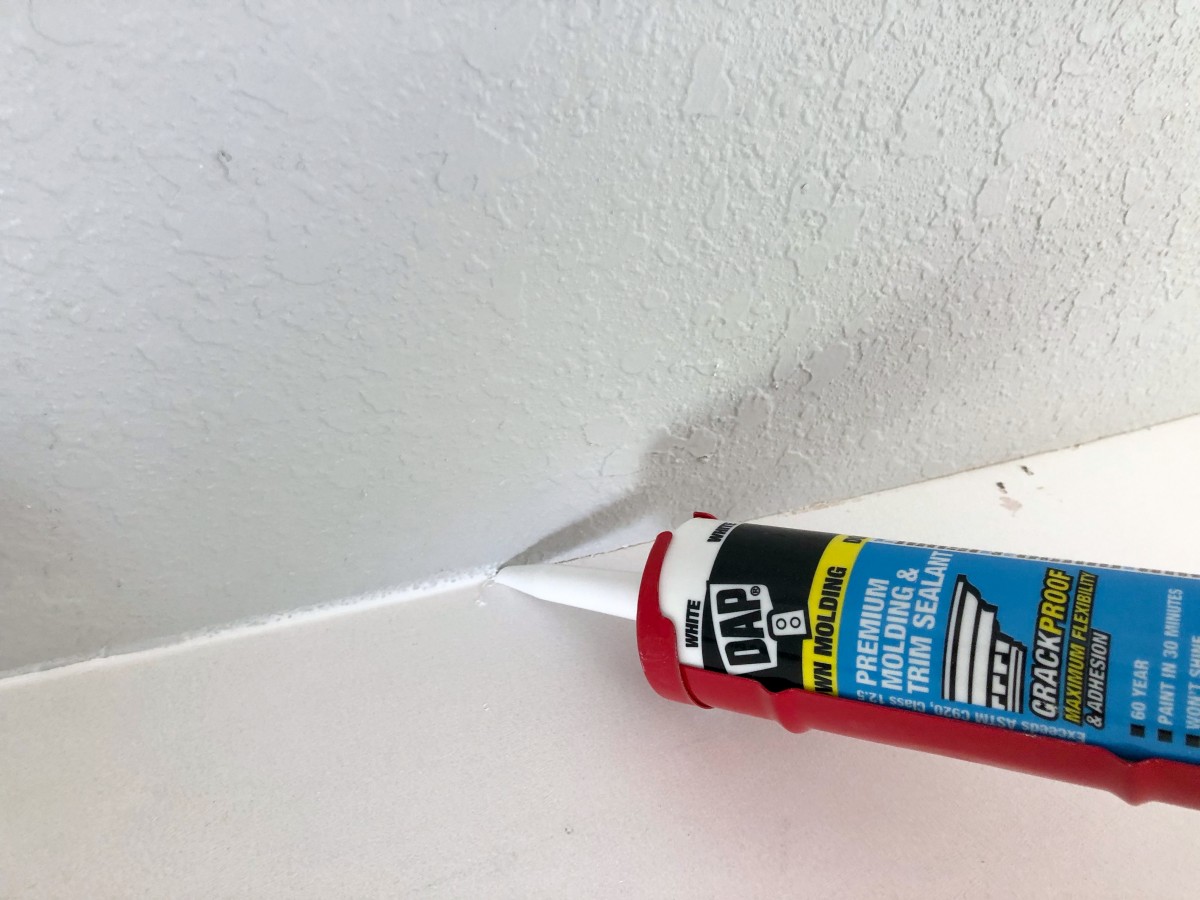
 Once it is all caulked you are ready to go! DAP Alex Caulk is paint-able within 30 mins. So, by the time you have you paint out and prepped you will be good to go! I wanted my platform to match my
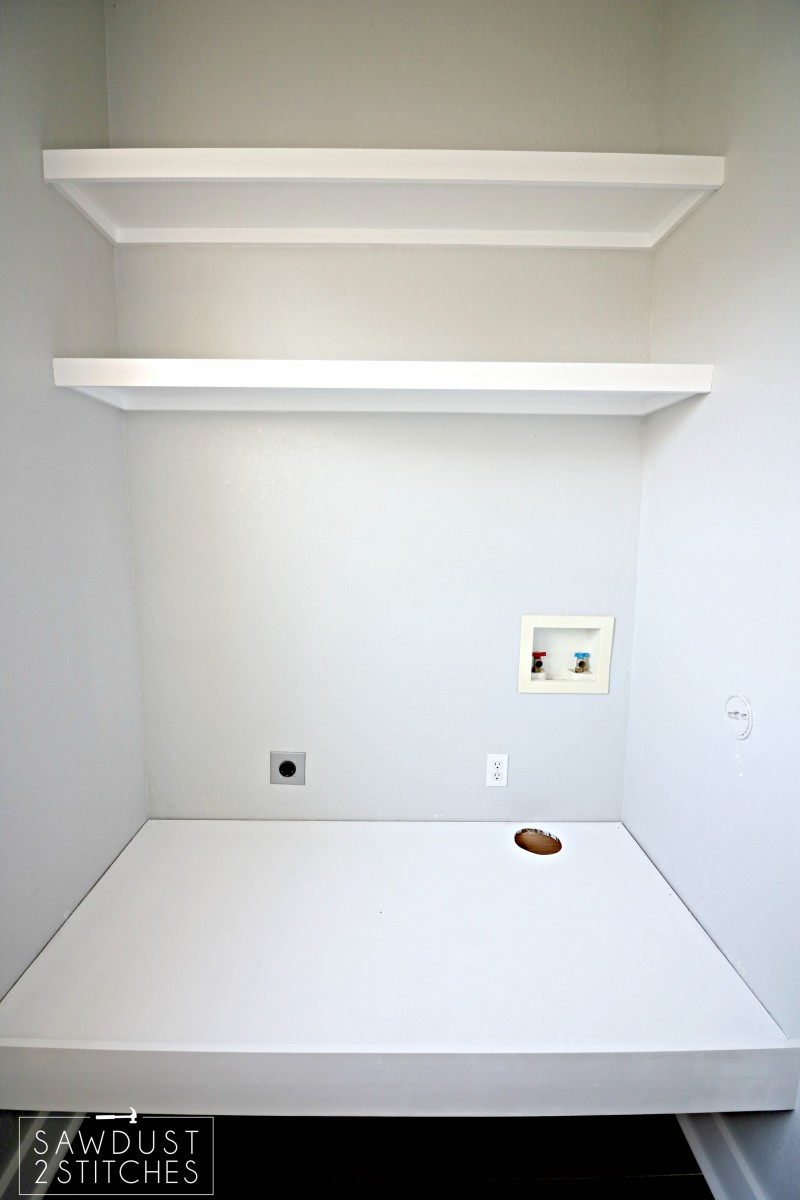


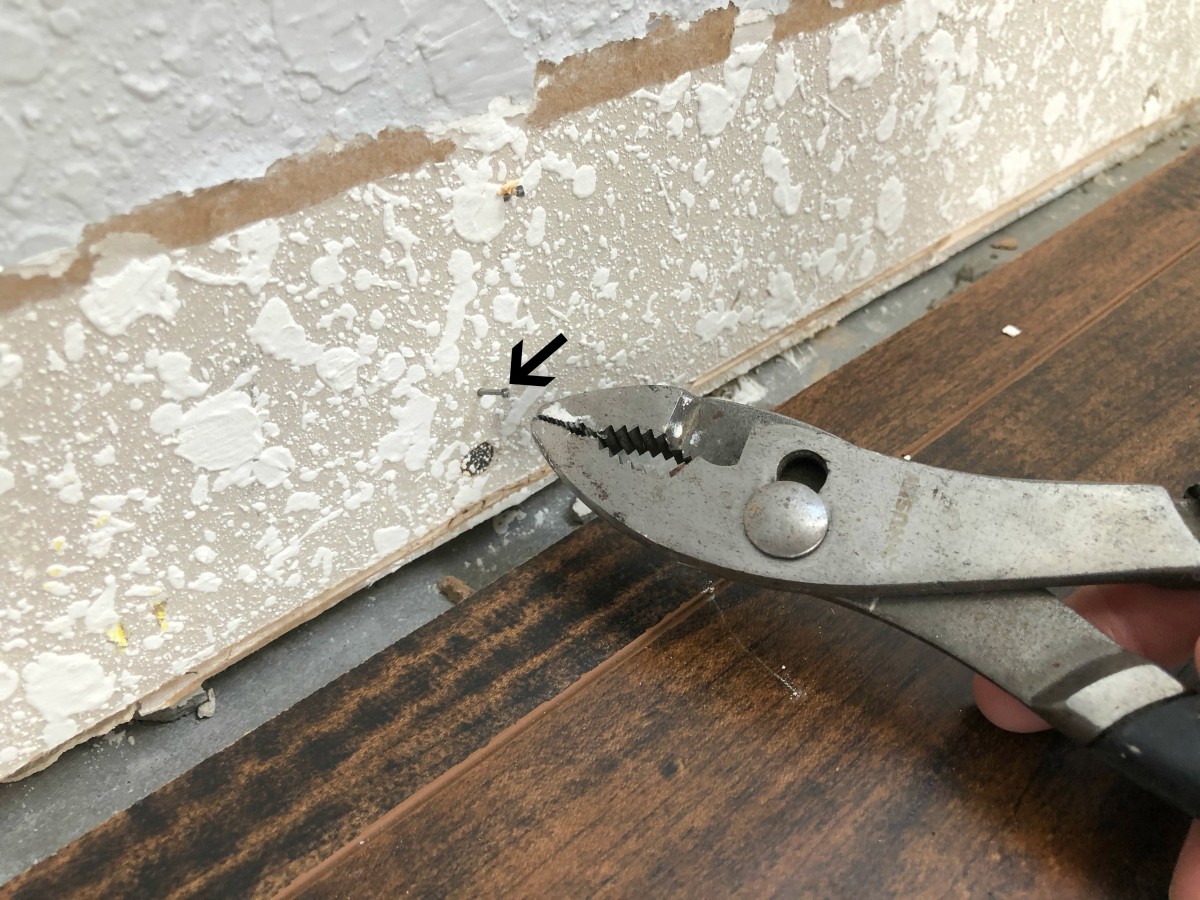
 In order to ensure it’s stability make sure you are securing the 1×2″ board into studs. (Remember how I said to take note where your studs are located ? This is why.) To secure it to the wall, I begin by marking the screw placement (directly over a stud), then I used a counter sink bit, next I pre-drilled using an 1/8″ drill bit. THEN I used a 3″ screw to attach the board to the wall/stud.
 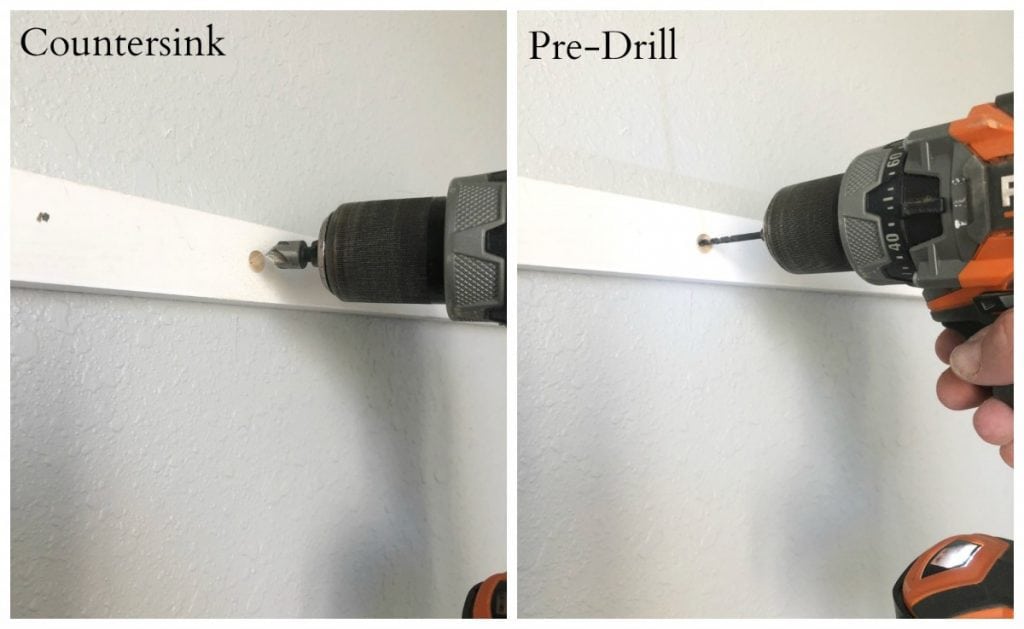 The reason I like to use a countersink bit when attaching built-ins, is because it is easier to conceal. It creates a nice smooth hole to fill. To fill the hole I used DAP Plastic Wood. It goes on smooth and is sand-able.
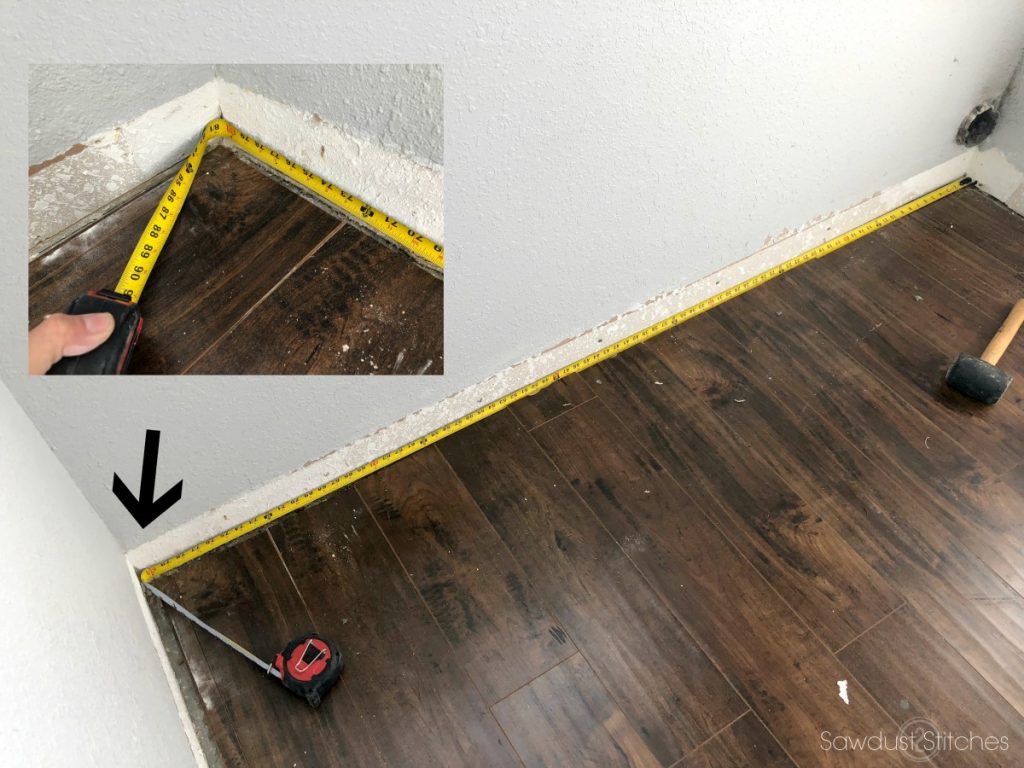
 Then repeat! You will complete these steps for both the back support and both side supports. (Cut the sides supports based on the desired width of your shelf. (Keep in mind the dimension of the back support. You need to factor in an additional 3/4″ for your overall depth.) Once you have your desired measurement, cut the side supports and install the same way we did the back support. Always double check that you are sitting level.
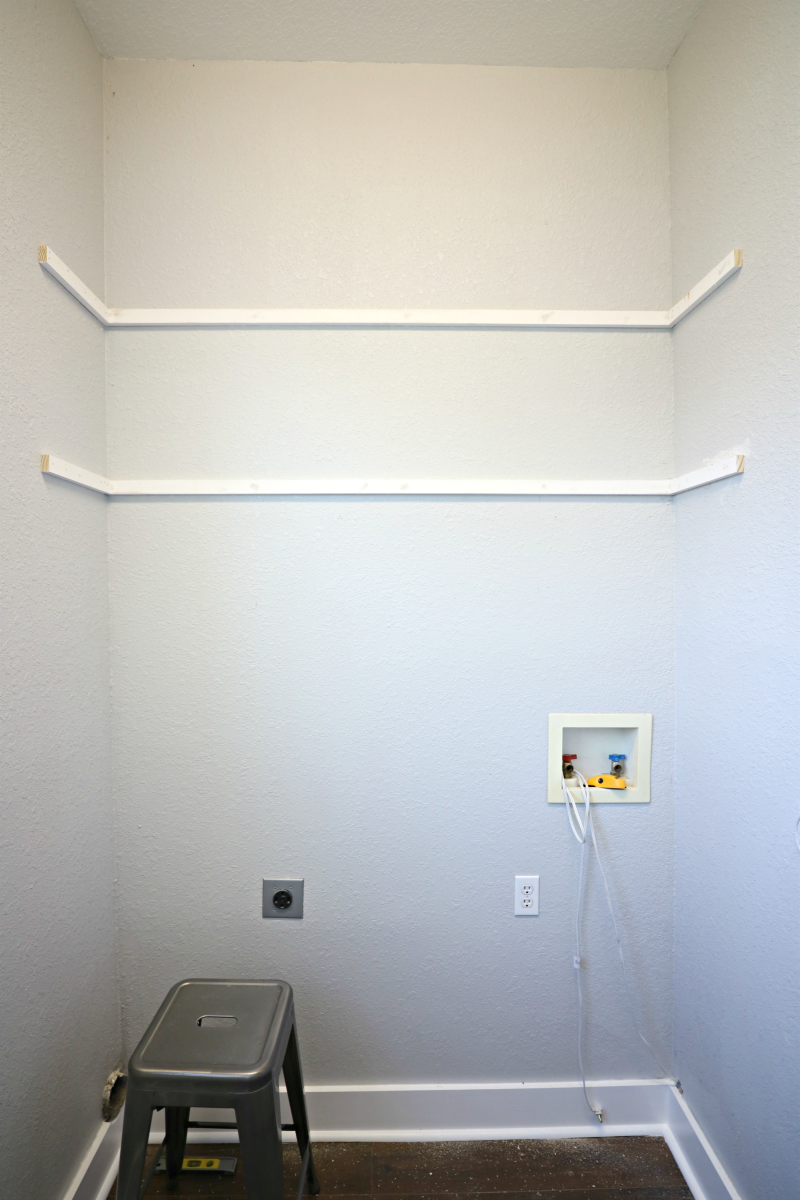
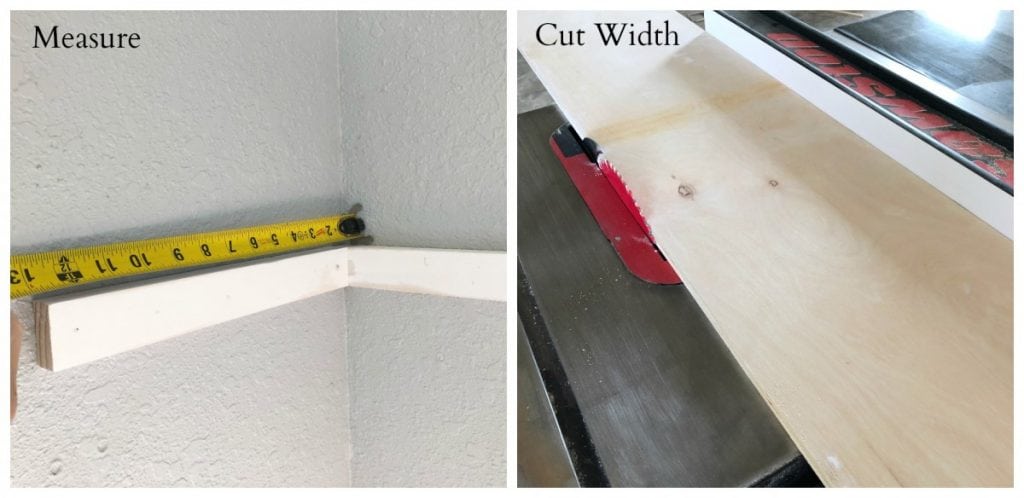 I tend to hate painting built-ins so I painted my shelving boards before I installed them. Typically I will need to follow up with some touch up paint, but that is a fairly painless process. Once they are dry I laid them so they are resting on the previously installed supports. I then measure the outer edge. (It is not uncommon to have not perfectlly square room, so I tend to make every cut to fit, when it comes to built-ins.)
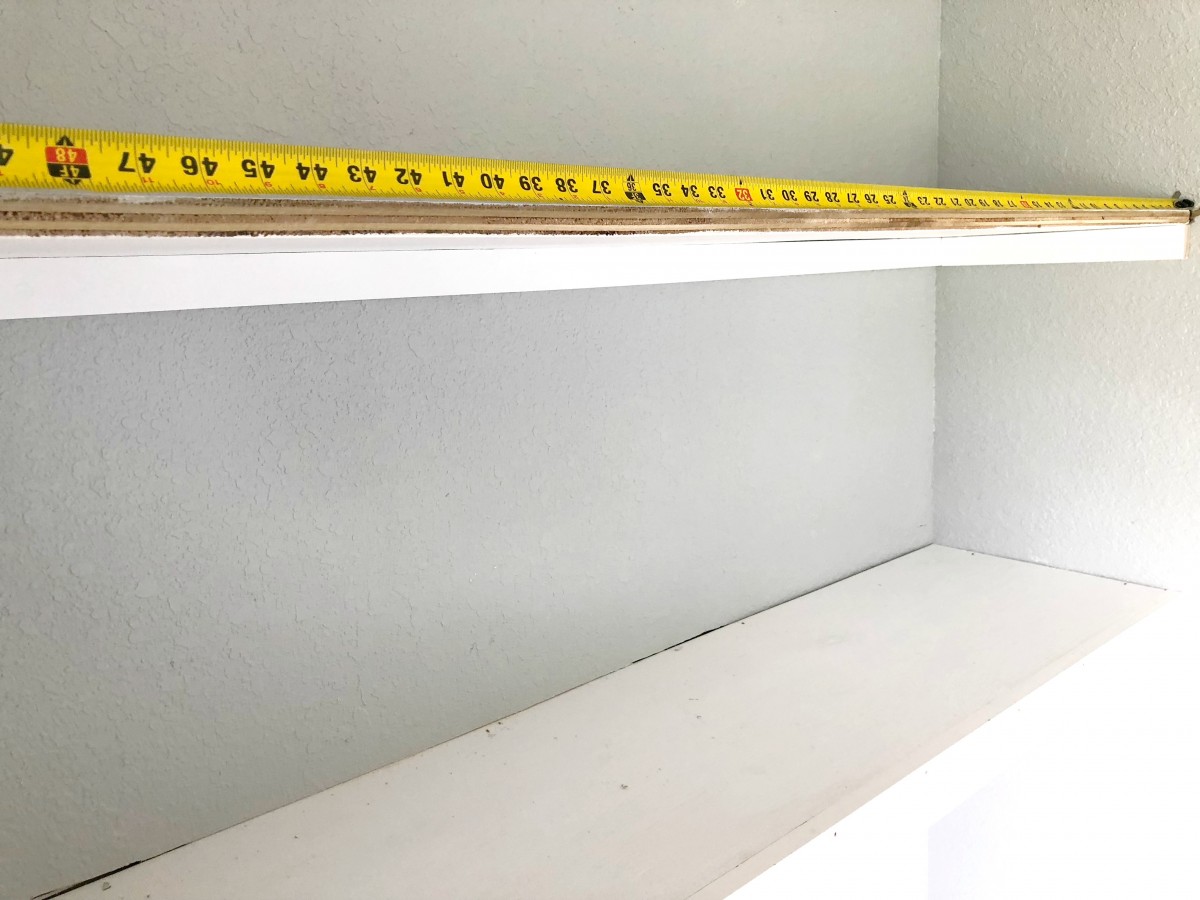
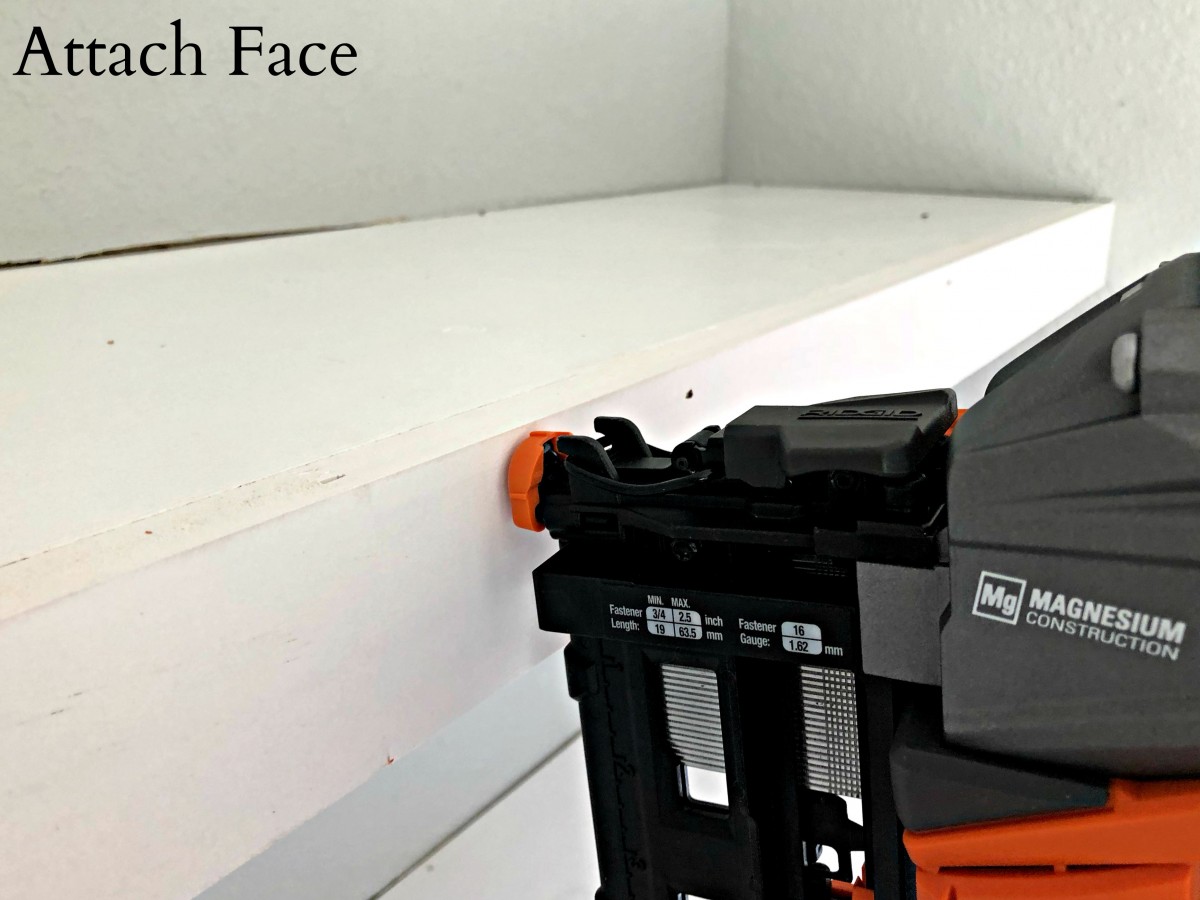
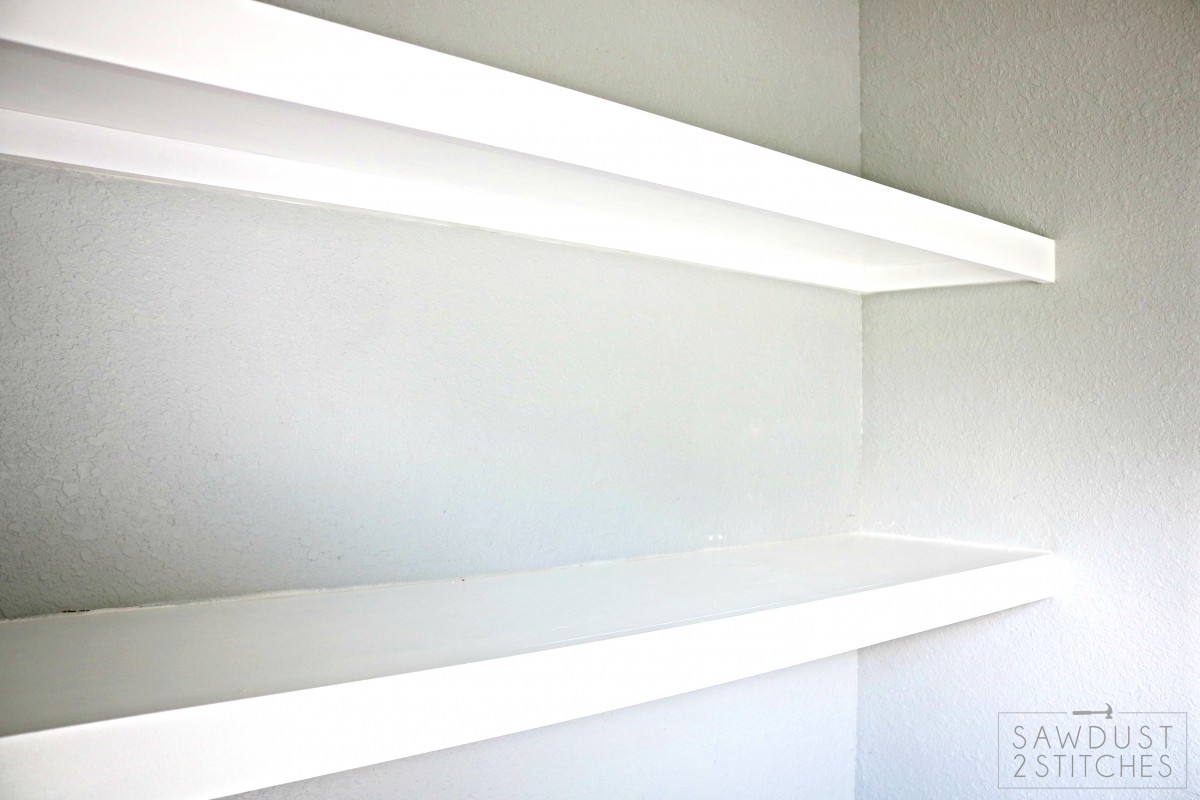
 I also like to caulk the seam where the top of the shelf meets the wall. In this case it isn’t absolutely necessary because of how high my shelves are placed, but as a rule of thumb it is always a good idea.
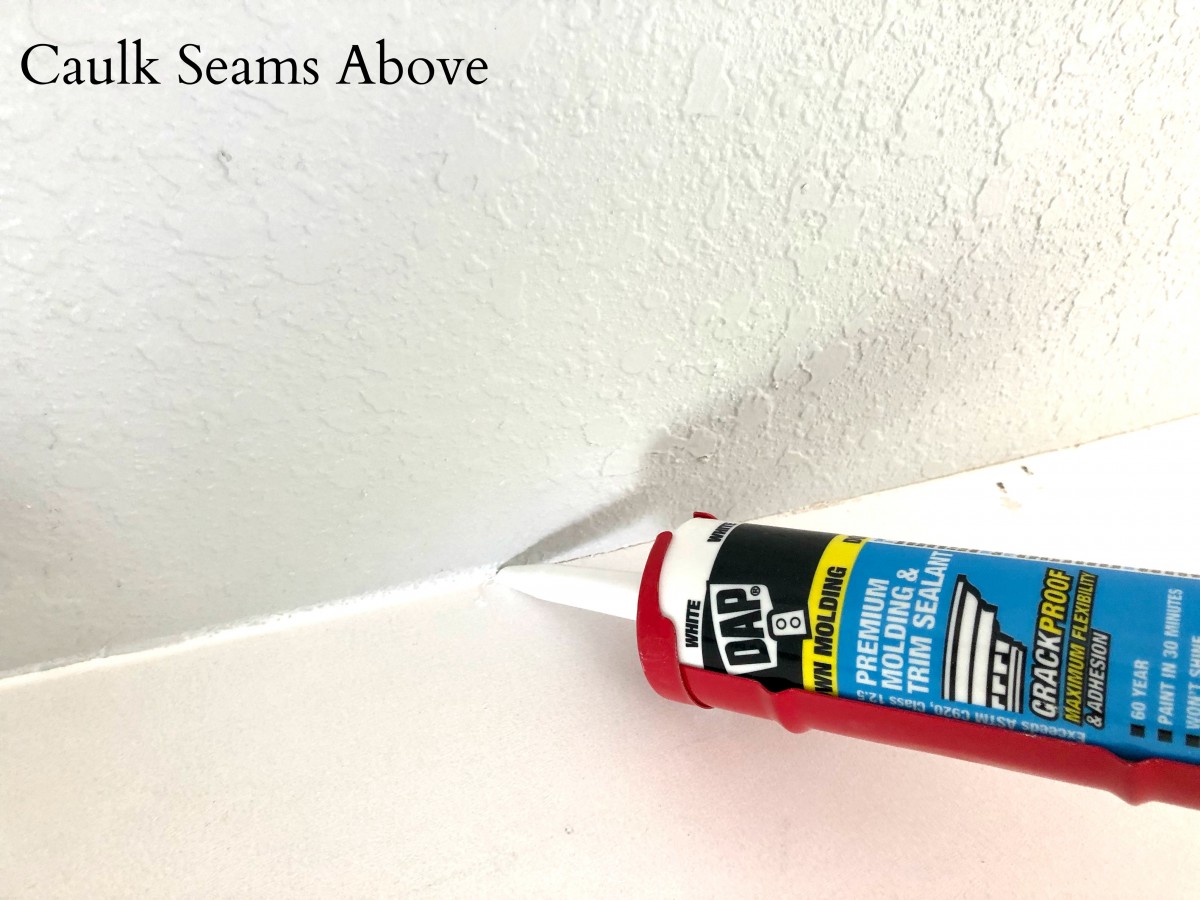
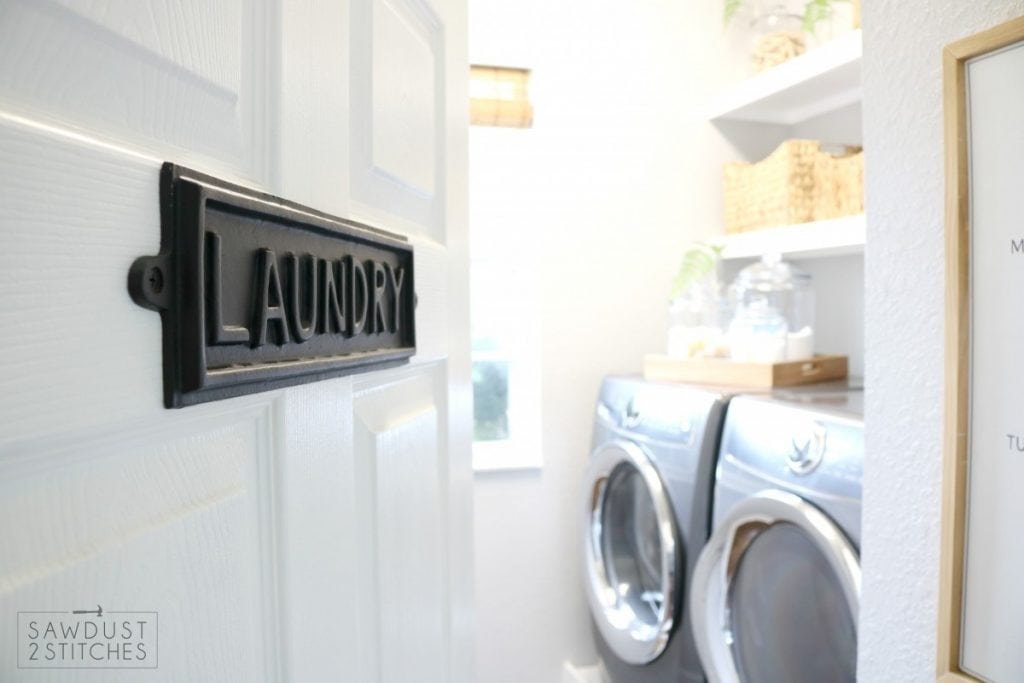
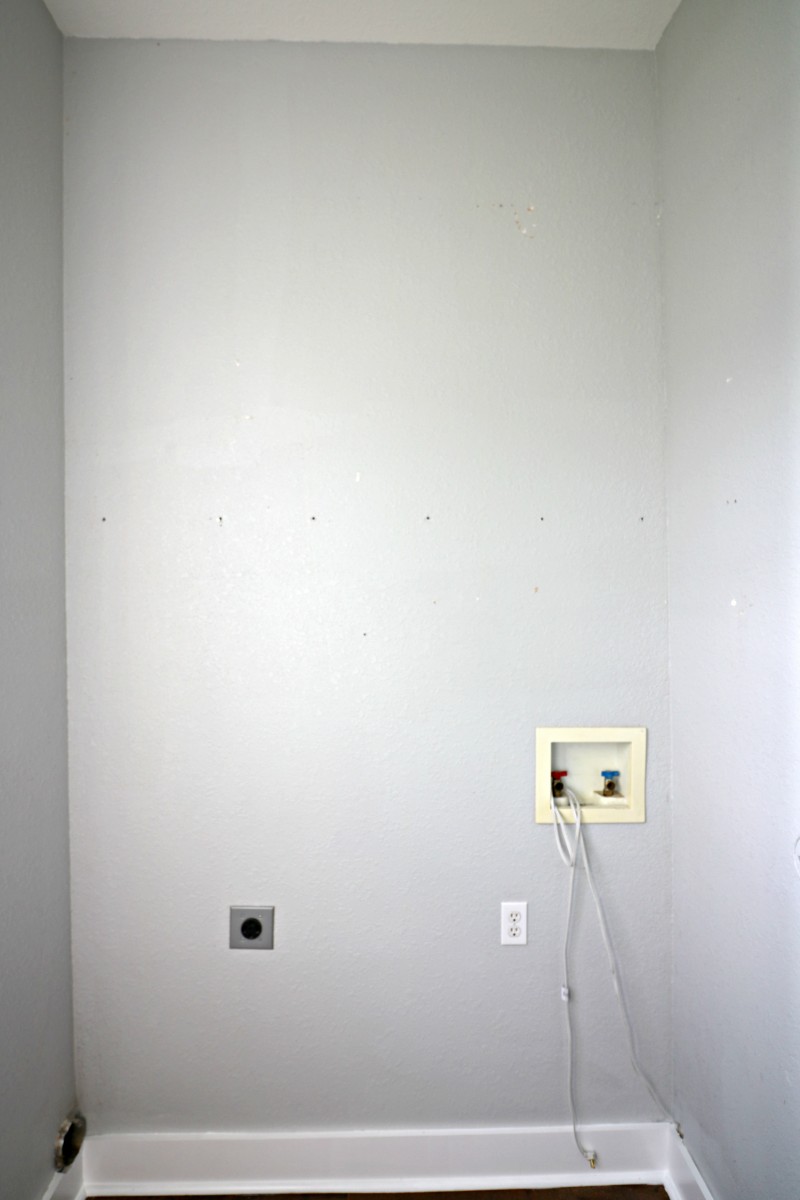
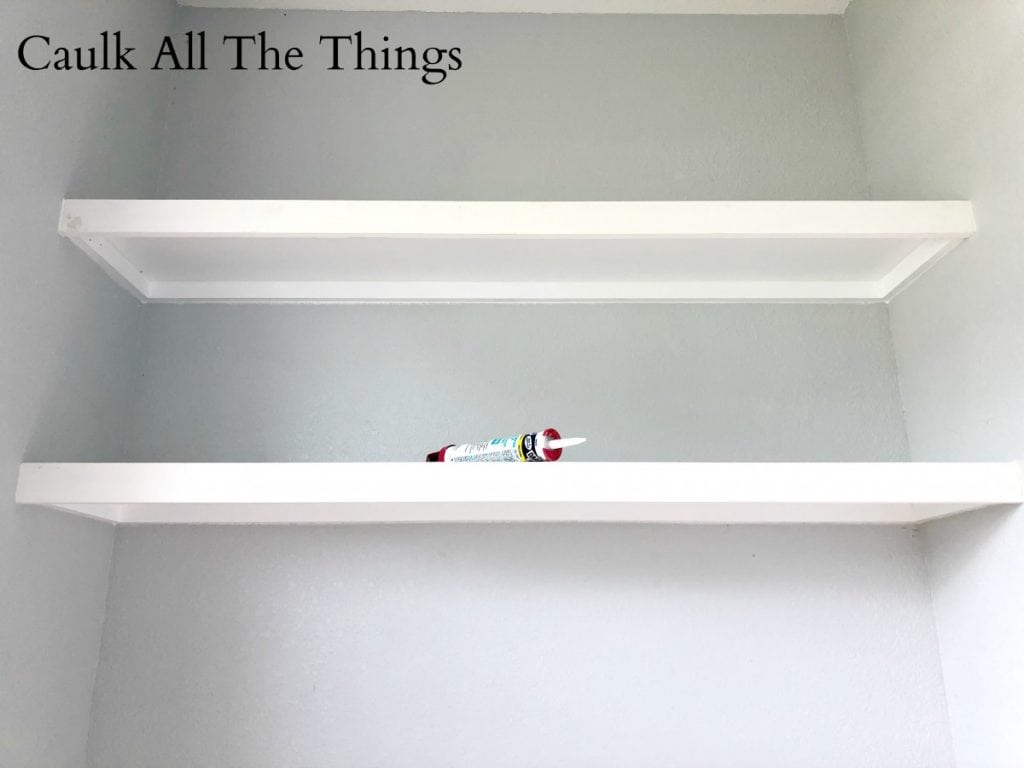 Well there you have it, in an afternoon you can take a truly boring space and turn it into a beautiful feature! Just make sure you stay tuned as I wrap up this Laundry Room Makeover, I am working on some adorable decor to be displayed on this DIY Open Shelving!
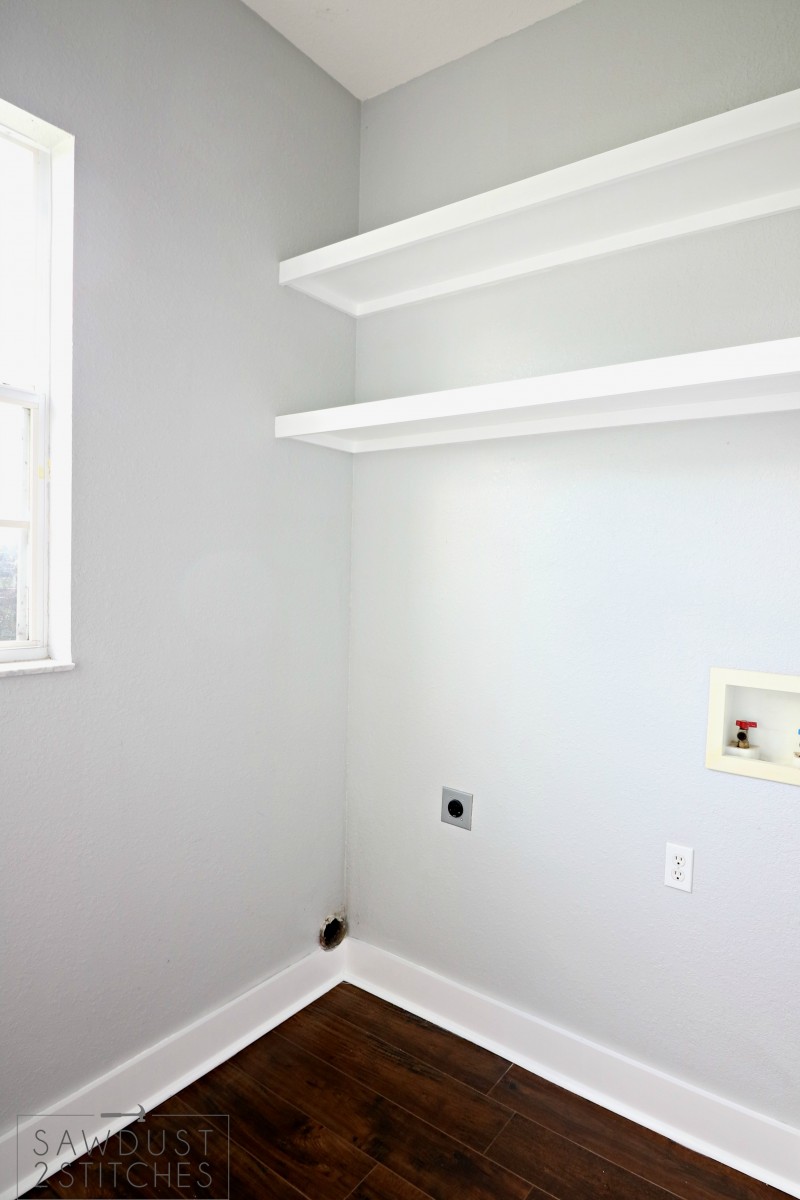

 Check Fit/Install/Repeat

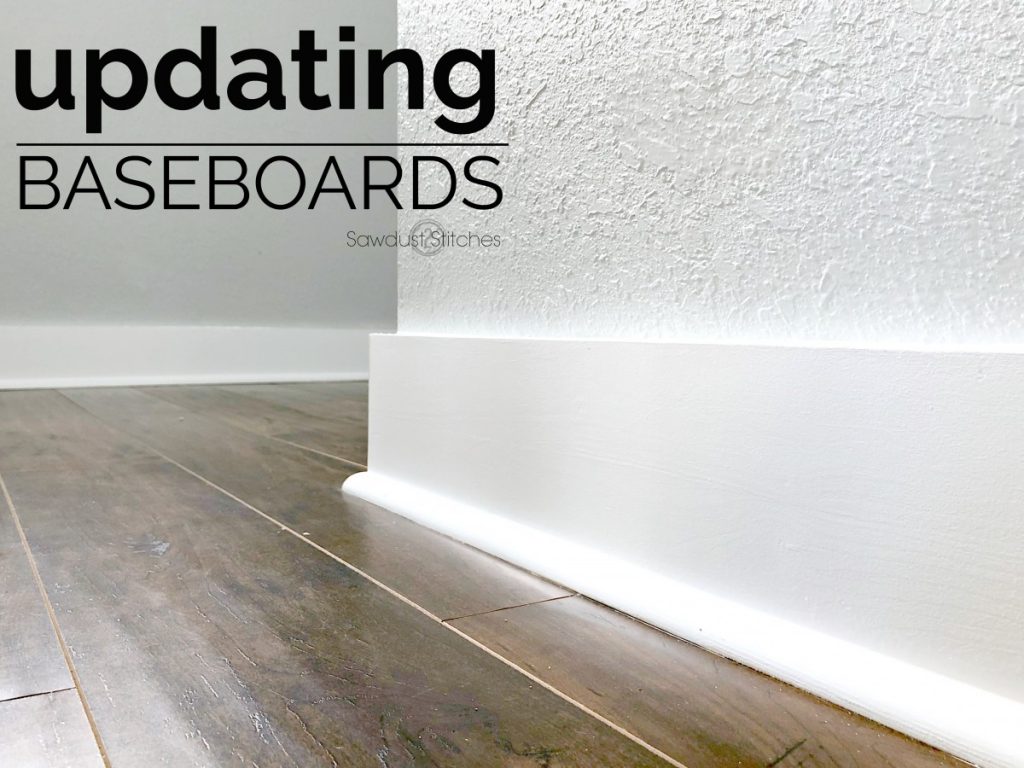
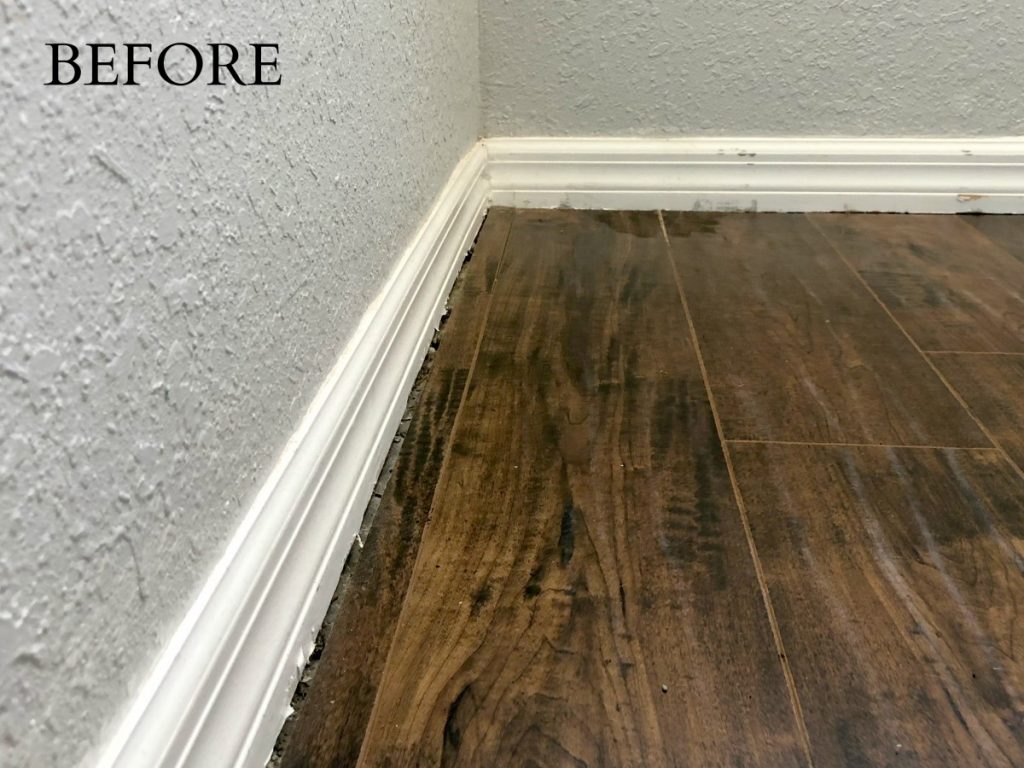
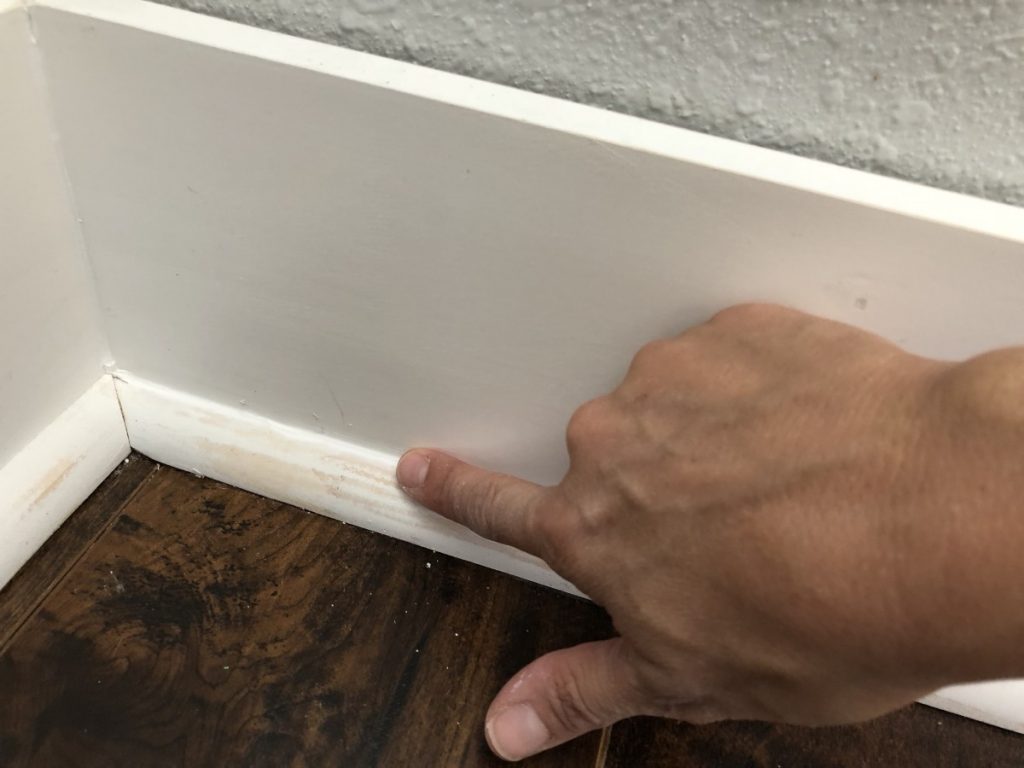 Ok, now take a look at the difference! I am telling you , caulk is a miracle worker. As my friend
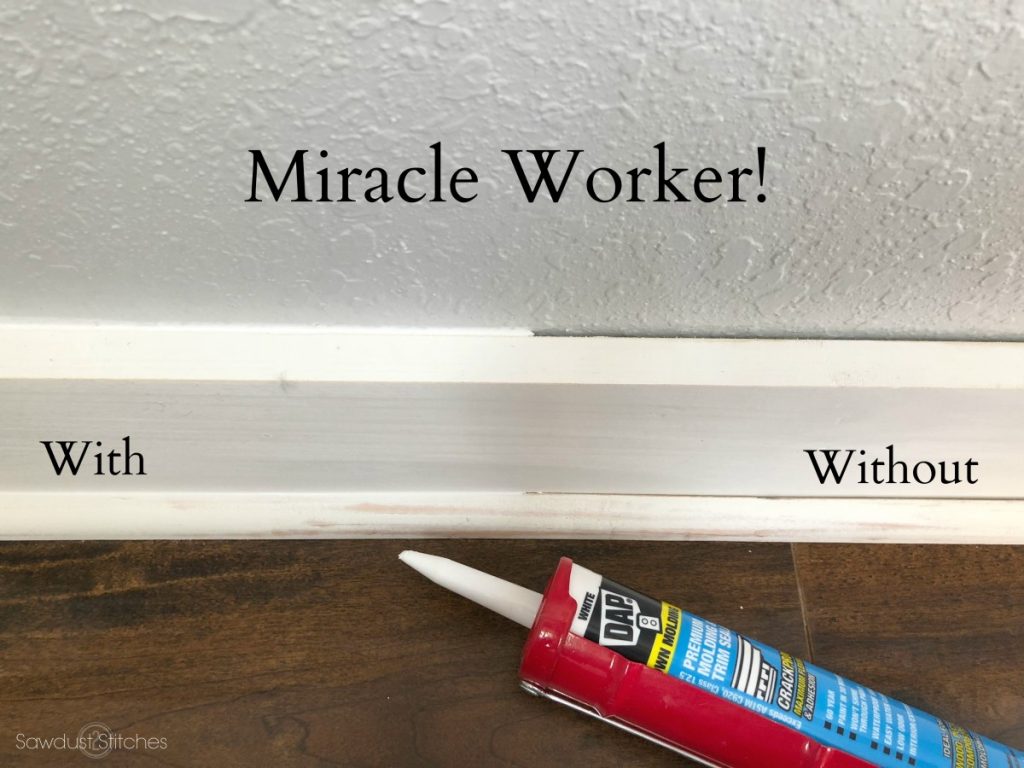

 Take Luck,