 When we were looking at purchasing our current home, one of the major changes we knew we wanted to make was the flooring. There were some serious traffic stains on the carpet, and the tile that covered 80% of the downstairs was nothing to write home about… We ended up buying our home with plans to update the floors…that was over 4 years ago.
I am happy to report that we finally bit the bullet and made the change! We had looked at a lot of options, but ultimately decided that laminate was the best logical decision. It was budget friendly, family friendly, easy to install, and it is beautiful!
We ended up choosing “Barnwood” a hand scraped laminate by “Select Surfaces” and I am so glad we did! ( I did work with the great folks over at Select Surfaces and was supplied with materials per MY request . All the opinions are 100% my own. )
(This is not your Grandma’s laminate!) Don’t believe me? Check out how it completely transformed our house!
The Process:
First of all I sent my husband out to do the heavy lifting… (Actually a member of the Sam’s Club Team was more than willing to assist with a fork lift.) Yes, you read right, this is available exclusively at Sam’s Club!

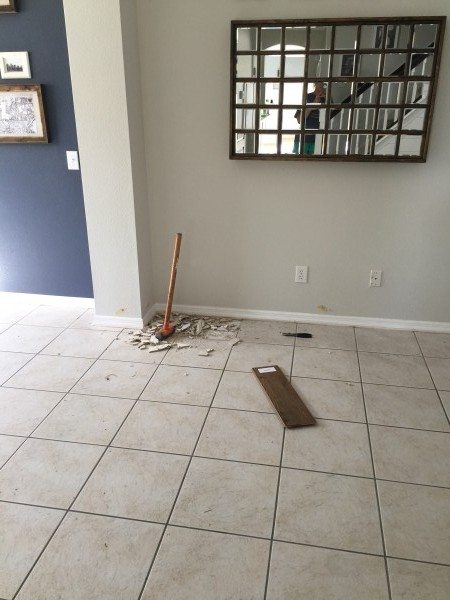
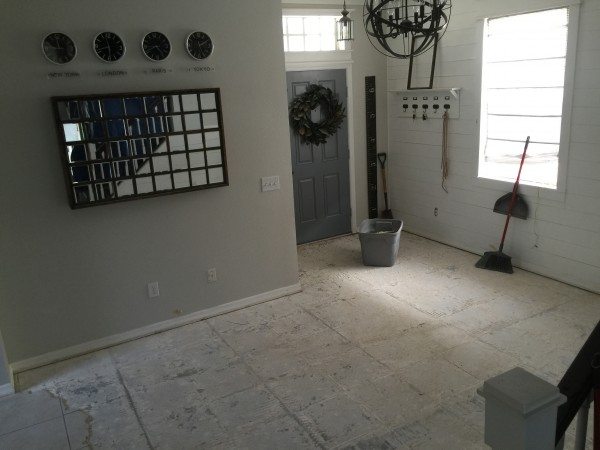
DEMO: As I stated earlier about 80% of our downstairs was ceramic tile. Before we could install our new flooring we needed to remove all the tile and carpet. The carpet was a piece of cake! The tile… the tile, it put up a fight, but I am stubborn and won out in the end! We tried a number of methods, but found it best to demo the tile with sledge hammers, and then used roto-hammers to remove the thinset (the material that holds the tile to the floor).
After all the thinset was removed and the floor was swept and smooth we were ready to begin the installation!
 Yet another reason I chose Select Surfaces laminate, they are pre-equipped with a foam backing. ( This keeps the floors from sounding hollow when you walk on it, and yes it works.) So, the only prep work needed before install is laying down a vapor barrier. We just cut the plastic to fit the room and we were ready to begin laying the floor!
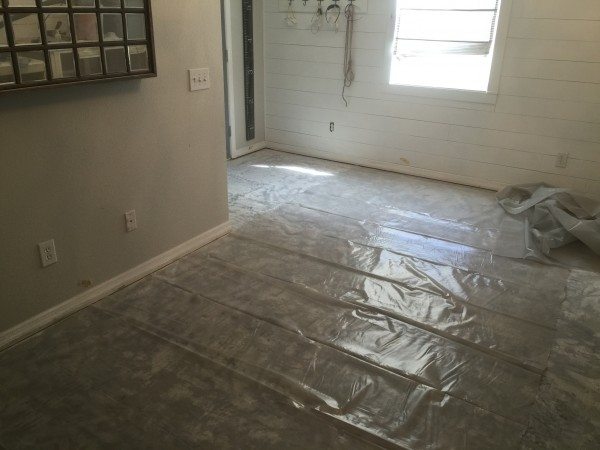
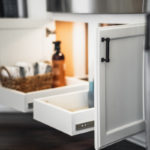
After having spent the last few days removing tiles, installing the planks was like a small vacation! Seriously, the install process was simple and easy for almost any level DIYer. (They simply click in place using a tongue and groove system. ) They do have more detailed instructions available here. 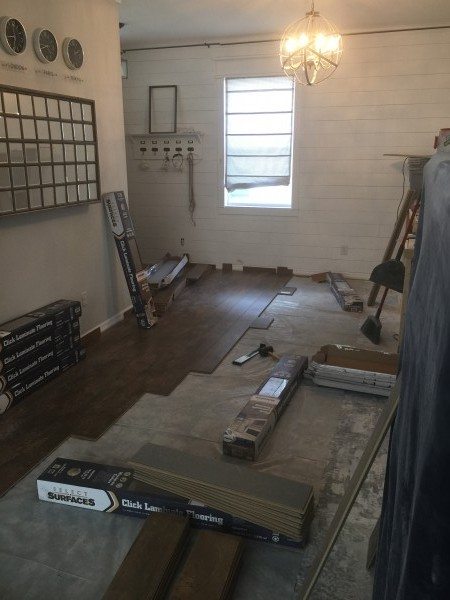
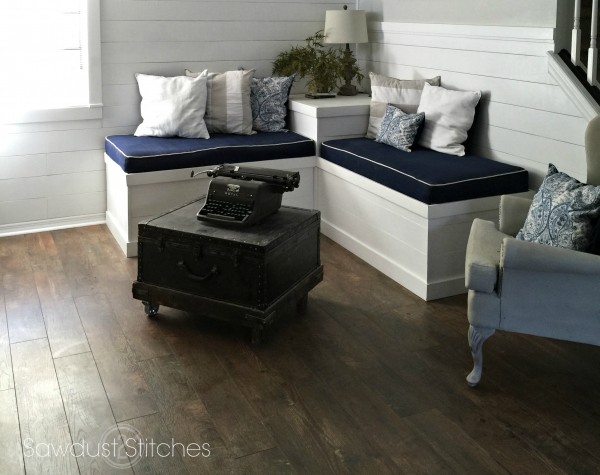
We followed this same process throughout the entire downstairs, and the results??? Ah-mazing! I mean, just look at the floors!
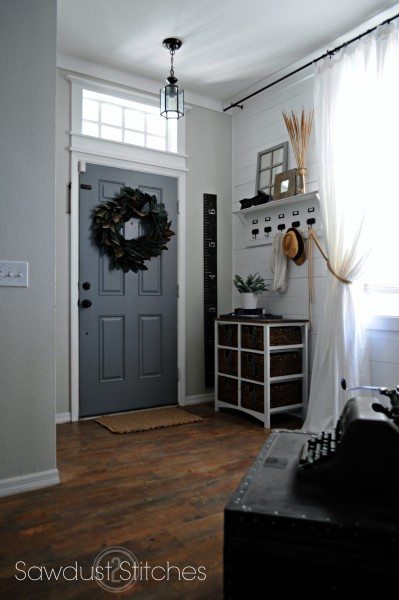 The Front Entry
 Sitting Room
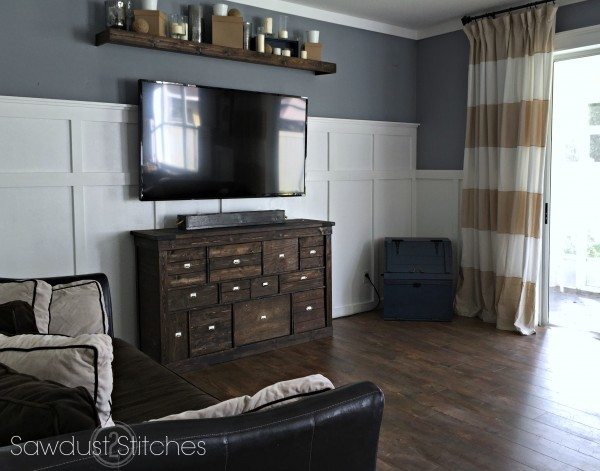 Living Room
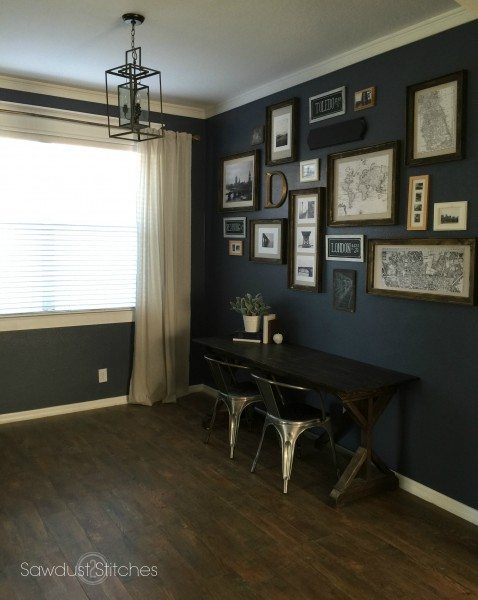 Office
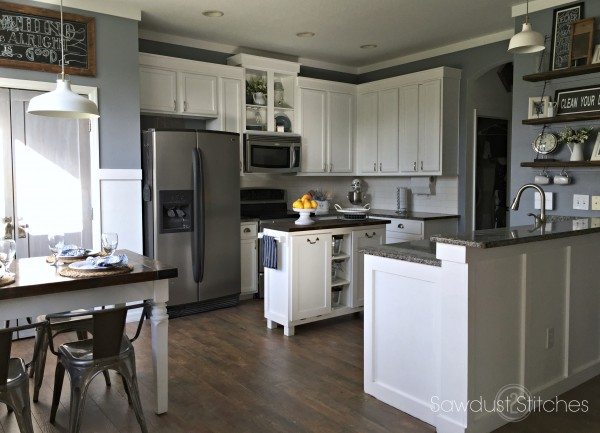 The Kitchen
Overall, I would say that the total downstairs floor makeover was a complete success! I have always loved the way my home looked, but I cannot believe what a HUGE difference these floors have made! They have really brought in the rustic warm feel that I love and have unified the whole downstairs. Bottom line, I LOVE the floors, and I would do it again in a heartbeat!
 Copyright secured by Digiprove © 2015


Hello! I just found your blog a couple of days ago, and you are very talented! I love your home! I’ve been eyeing up the laminate wood flooring from Sam’s Club for awhile. I love the flooring, but the only thing stopping me is that the floors are manufactured in China. Is that something you have talked with Select Surfaces about? I’m just curious if that was a factor for you. I’d love to get the flooring, I just wish they were manufactured in the US.
Wow, those are AMAZING! I would never guess laminate, they look soo pretty. Congrats on having them done. I’m hoping to redo ours sometime in the first 4 years ;).
Hello! I tried posting a comment earlier, but I don’t see it, so I apologize if this posts twice. I love your home, and everything you’ve done looks beautiful. I really want to install Select Surfaces laminate wood flooring. It is the only laminate that I like, and I dare say that I prefer the look over some real hardwood in our price range. You can’t beat the price, too! My only reservation is that I believe it is manufactured in China, so I am hesitant. What are your thoughts on this? Thanks!
Amy, thanks so much for reading and for your question! I understand the desire to buy “made in the U.S.A.”, it is something I consider when making purchases. Obviously, I like to support locally made (as made apparent by all of my handmade furniture:) However, if you are concerned about quality, I can tell you this.The floors are 100% compliant with all US standards. As a Sam’s Club supplier they have to met very strict standards, and both the product and the factories are routinely inspected to ensure they meet these standards and are kept and maintained. In addition, they regularly test the product both in the Orient and the USA with accredited labs to ensure that we meet all regulations. Hopefully that answers your question. Thank you so much for taking the time to read and comment!
Thanks for your reply! I just purchased 49 boxes of the same flooring in cocoa walnut, and I can’t wait to see it installed. I’m not looking forward to the work, though. Your blog post gave me the kick in the pants that I needed!
I can’t even imagine the amount of work that took to remove the tile. The new flooring looks fabulous! Definitely not your Grandma’s laminate for sure.
I love your site and really enjoy reading about your projects. Your recycling and upcycling is just so creative!
Just one question, as we are considering a similar flooring project – why did you go to all the effort of taking up the tile, rather than laying the laminate on top? Was the tiling uneven?
I have heard of people doing that! The only problem was, we had a mix of tile and carpeting. So it would have been uneven. But that would have been so nice!
That makes sense! Something I hadn’t considered. You’ve done an excellent job. Well done.
I love the floors! I’m so jealous! I’ve been living with our linoleum breaking, splitting and looking awful for the last five years! We had significant water damage in our front entry way due to the crappy workmanship from our builders. We finally got the door fixed and the water damage is gone so now everything is just cosmetic. I’ve been debating on hard wood flooring or laminate. I think I need to become a SAMs Club member!
Kim, you really should! I have been so impressed with this stuff, and everyone that comes over is blown away that it is laminate! You should seriously consider it!
Beautiful, absolutely beautiful. I am ready to move in and enjoy this flooring. You did an amazing job and it shows. Love your site, and your blog! Keep up the excellent work!!
Thank you so much! I am very pleased with the way they turned out, and comments like yours are one of the big reasons I keep at it! Thank you!
Holy cow, these floors are amazing! I cannot believe you did all of that tile demo on your own! Talk about brave! Great job!
Thanks so much Jacque! I did question my sanity during the demo. At least the install process was a breeze! Thanks Lady!