Hey Folks! I am back and up to my elbows in paint, sawdust, and Frogtape®! Things are moving right along with my Frogtape Paintover Challenge®. (In case you missed it you read all about the challenge and see all the “before” pictures here.)
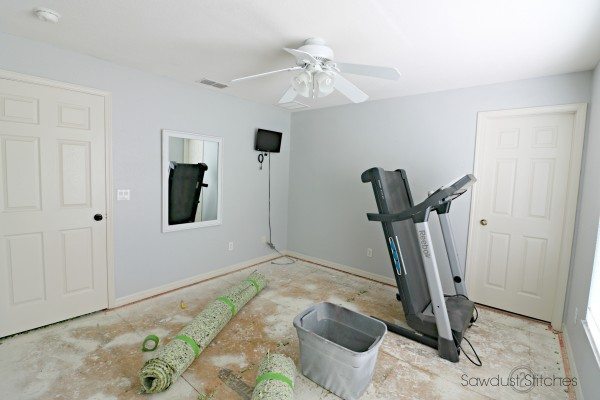
Things are moving right along and I am so dang excited to share the process with you. Day one, was demo and build day! That’s right, DEMO. I decided the flooring in this room was not working. All of my ideas for this room were overshadowed by the color of the carpet. So I just went for it, I ripped it out! My Husband is such a saint. Upon returning home from work he was greeted by rolls of carpet in the hall. “So you tore out the carpet?”. ( I love his blind trust in my visions.) “Yup, it needed to. It’s gonna be great!”
While the carpet was out I took the opportunity to get all the painting done! I started with casing the window to give it a more finished look, and then started painting! I gave the baseboards a nice fresh coat of white paint, and was then ready to tackle the walls. 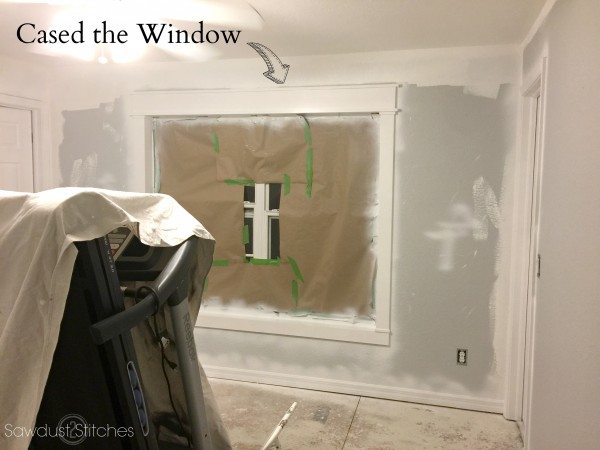 While the wall color was a pretty color, it was not going to work for what I have planned. So I painted them all white!
 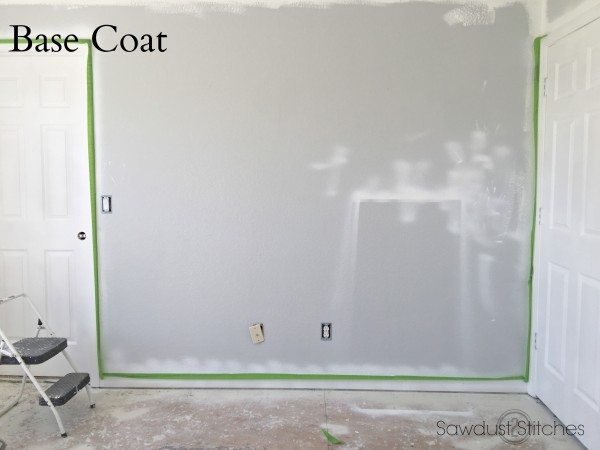 …and THIS is why I needed the walls to be white. I am painting stripes, lots and lots of stripes! After a few hours of mapping out the lines I was ready for tape.
 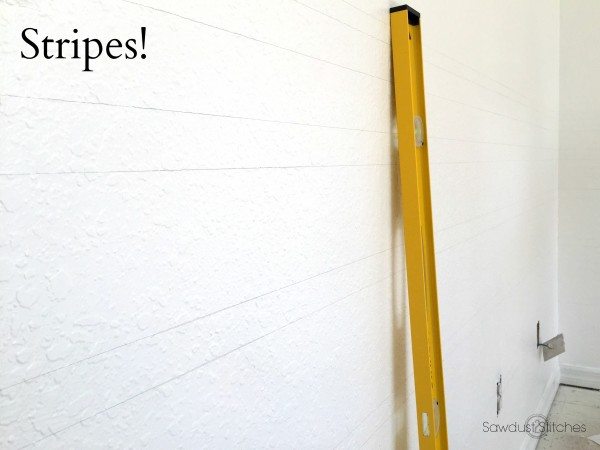 I was actually really surprised how quickly I was able to get everything taped and ready to go!
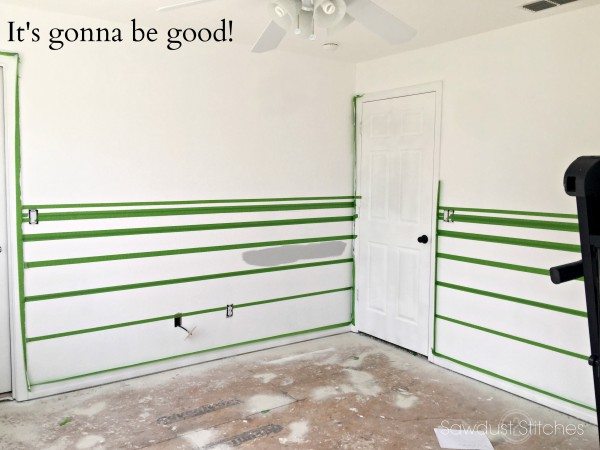 Once the tape was on I was ready to paint! And paint I did, 6 different colors in fact!
Am I crazy, or doesn’t it even look cool with the Frogtape®? It is going to be EPIC! 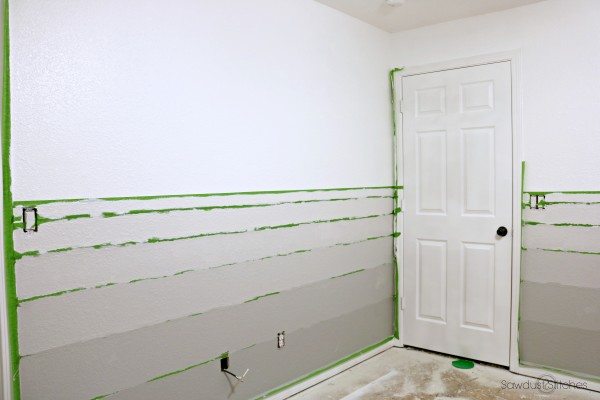
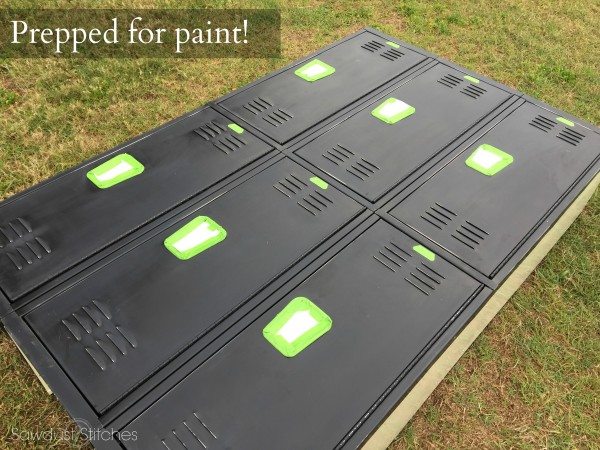
Now that the walls are well under way it’s time to move onto the decor! Remember my brainstorming process here? While the plans are slowly evolving, they definitely still include some vintage lockers! I found these on our local Craigslist for $200! They are a good chunk of my $1,000 budget, but I think they are totally worth it and will completely MAKE this room. I think these lockers are great by themselves, but I wanted to make it look a little more custom fit to the room, so I made a cabinet that would serve as a built in.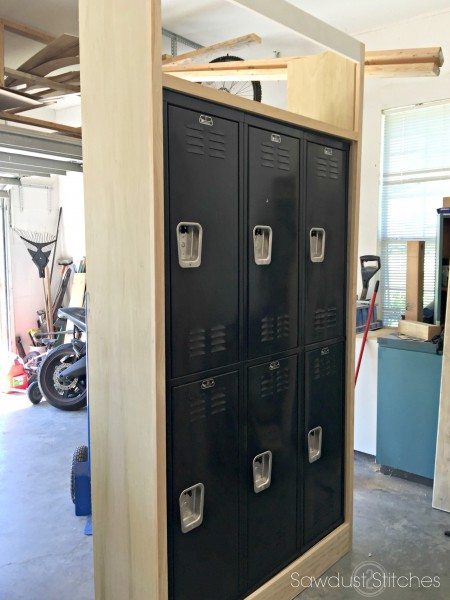
The only problem left is the color schematics. The black wasn’t my favorite. Believe me, my husband and I lugged these lockers upstairs while in their original state.I sat and stared at them for a day trying to convince myself the color was fine…
As you can see I ultimately decided the color needed to go, and now here we are, prepped and ready for paint! It’s gonna be good!
But the fun doesn’t stop there, I have all sorts of fun customized projects in the works! Here is a small sneak peak into what’s happening around here.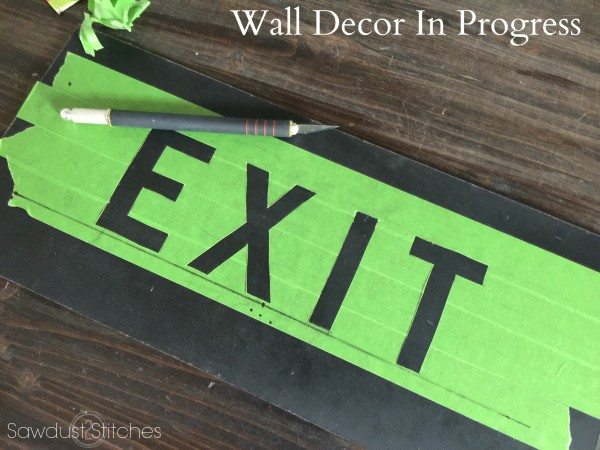

 I was really hoping to find a vintage gym clock, but when the flea markets fail you, it’s time to DIY for a fraction of the cost! I dismantled a wall clock I had in my decor stash and I am customizing it to fit perfectly in the new gym! Not bad for $6 in supplies !?
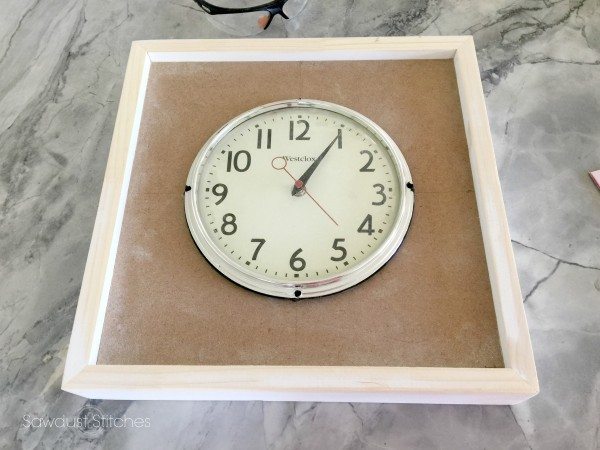
There was one last element I REALLY, REALLY wanted for my room, but again finding a vintage piece was proving to be impossible, so it’s time to DIY! I don’t want to give it away, but here is a sneak peak on this simple build.

Well, I better get back to it! Stay tuned, because next week will be the BIG REVEAL!
Make sure you are following along on Instagram and Facebook, for sneak peaks along the way! I will be checking back in with a progress report in a week so stay tuned!
In the meantime, you can see how the bloggers spaces are coming along….here.
Take Luck and I will see you back here in a week,
Corey
 Copyright secured by Digiprove © 2017


So far, SO good!!! Niiiiiice! Can’t wait to see the end!