Sponsored by The Home Depot*
I think it is only natural to create a “to-do” list when you initially move into a home. We normally tackle these projects one at a time and slowly but surely get through it. It’s a natural process. You know what is also a natural process? The domino effect, much like the allegory of “If You Give a Mouse a Cookie”. Only in this case the proverbial “cookie” is new carpet.
When we first moved into our home we had a long to “to-do” list. We prioritized the list and the entire upstairs took the back burner. The carpet was in really bad condition, and the color was a tone that did not jive with any of the color schemes I gravitate towards. Because of this, I never really did much with these rooms. I did not want to design an enitre room taking into account the color of the carpet, so I just kind of ignored these rooms. 
Sure, I painted the room to get rid of the overwhelming band-aid color, and I tossed our old sectional in there, but that was it. I didn’t want to invest time or money into a space that I knew would someday be next on our “to-do” list.
Well I am happy to report that that day is today! I am ecstatic to share that I am teaming up with the great folks at The Home Depot, and LifeProof Carpeting to finally tackle this project. I have all the details on the entire process and necessary steps to take when considering carpet yourself.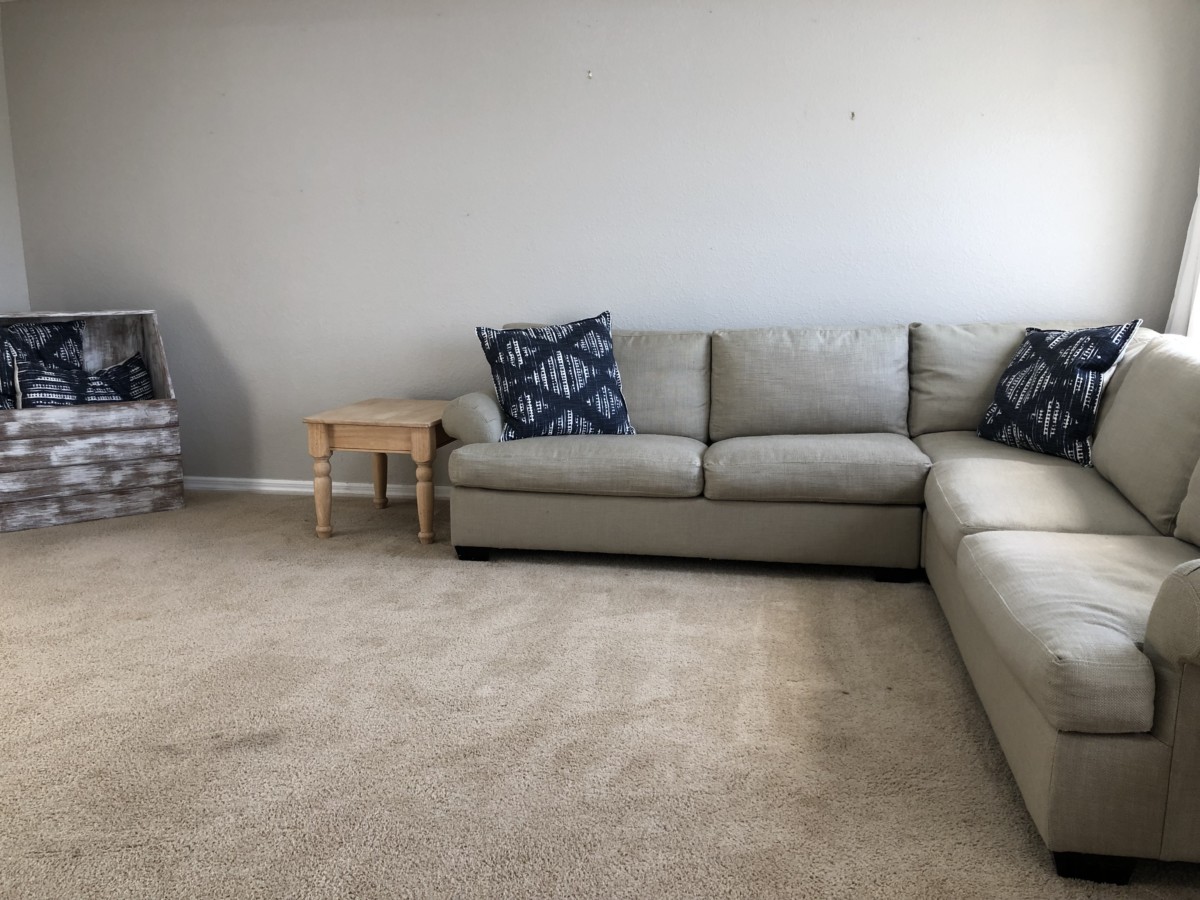
Make sure you check out my post over at the Home Depot.
Trick: Capitalize the use of OLD CARPET
Remember how I compared new carpeting to “giving a mouse a cookie”? Well if you are unfamiliar with this popular children’s book it explains the series of events that are triggered by a small act… a domino effect. In this case I reasoned, “If I am finally replacing the carpet, then I can finally replace the old sectional.” (Its due to retire, but I have put it off because I didn’t want to pick a new sofa based on the current carpet color.) This thought led to…” Heck, if I’m swapping the couches, I should probably consider putting up some wall decor….Dang, if I going to give the whole room a face-lift, I should probably FINALLY paint the trim upstairs white too.” (All the trim work through the rest of the house was painted white years ago…)
At this point I would like to remind you of my mantra/tagline. Sawdust 2 Stitches “Where we can’t leave well enough alone”. It’s true. Might not be healthy, but true nonetheless.
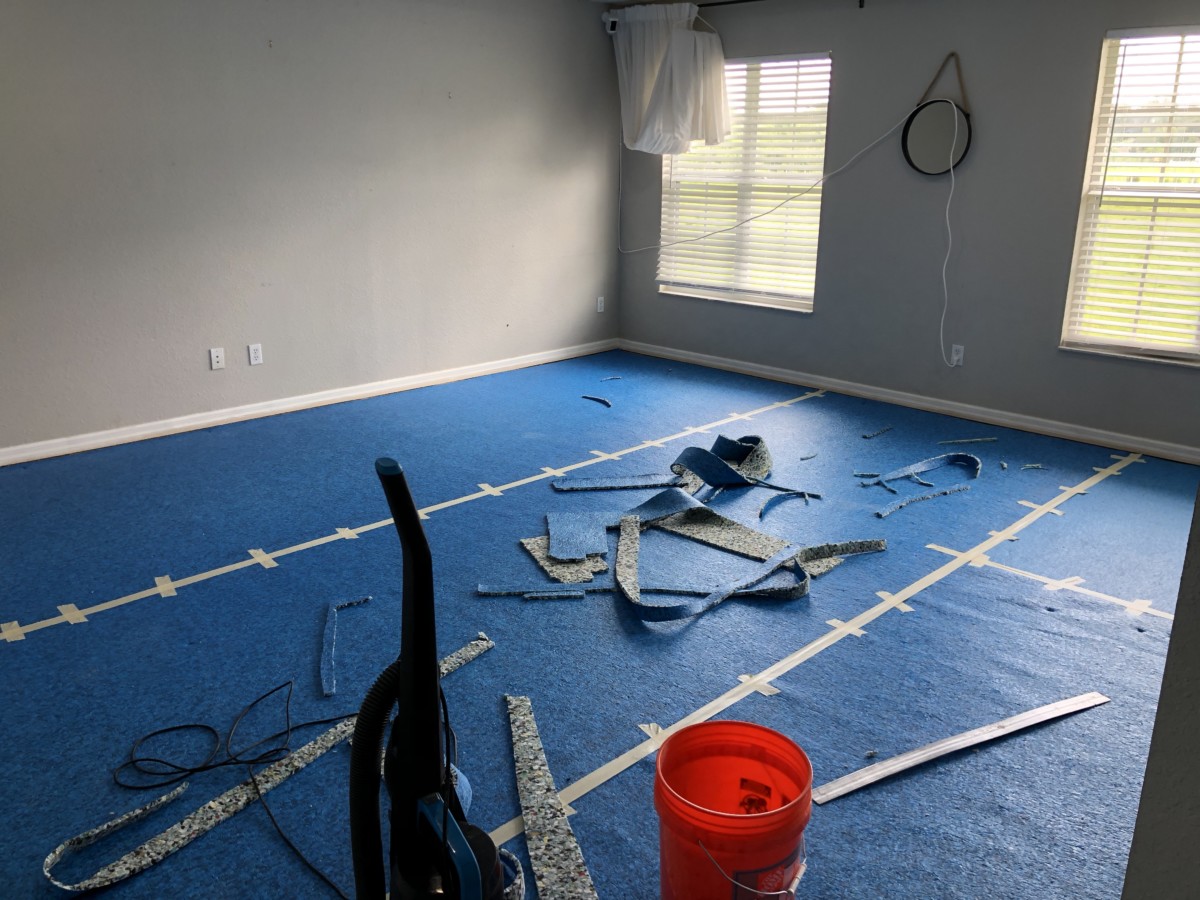
So let me show you the tip I would suggest using if you are considering new carpet! Go big and give the whole room the refresh you have been putting off.
Think about it, you are replacing the carpet, and removing a majority of the furniture and decor items from the space in preparation for the install. Why not take advantage of that and PAINT!
Here are my baseboards. I know it is hard to tell in the images, but they are actually an off-white. I want them brilliant white. Plus when I originally painted the walls, I did not use much care, because I was planning on painting the baseboards regardless. 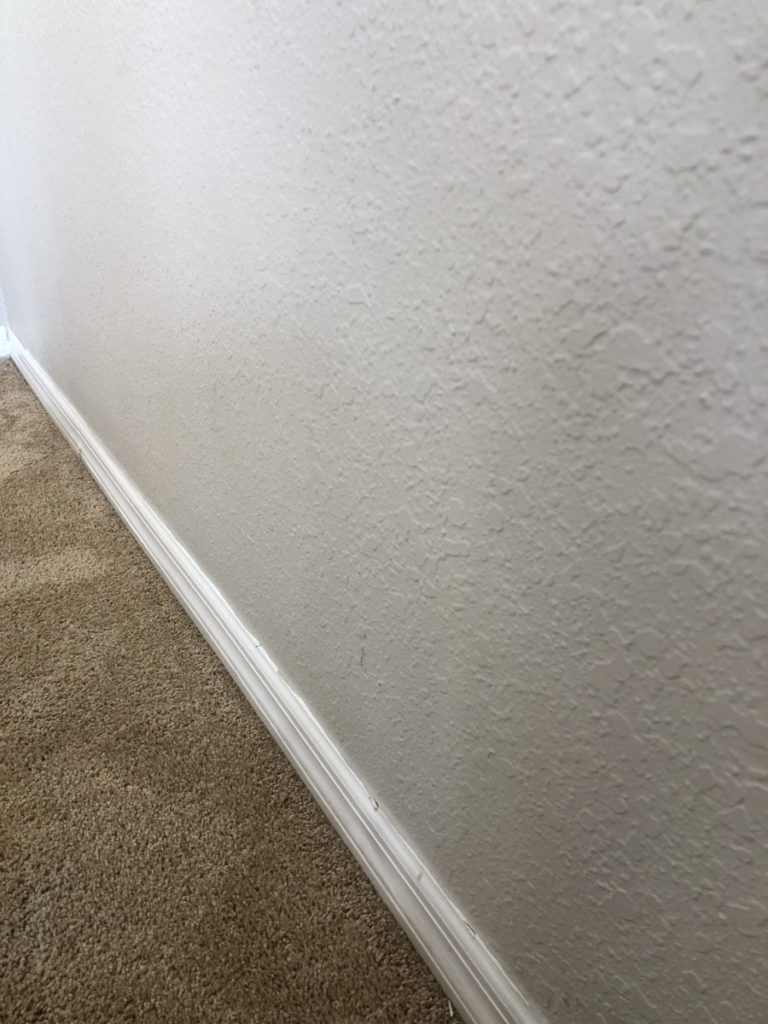
Next I added my Frogtape, so that I could create that nice crisp professional paint line. 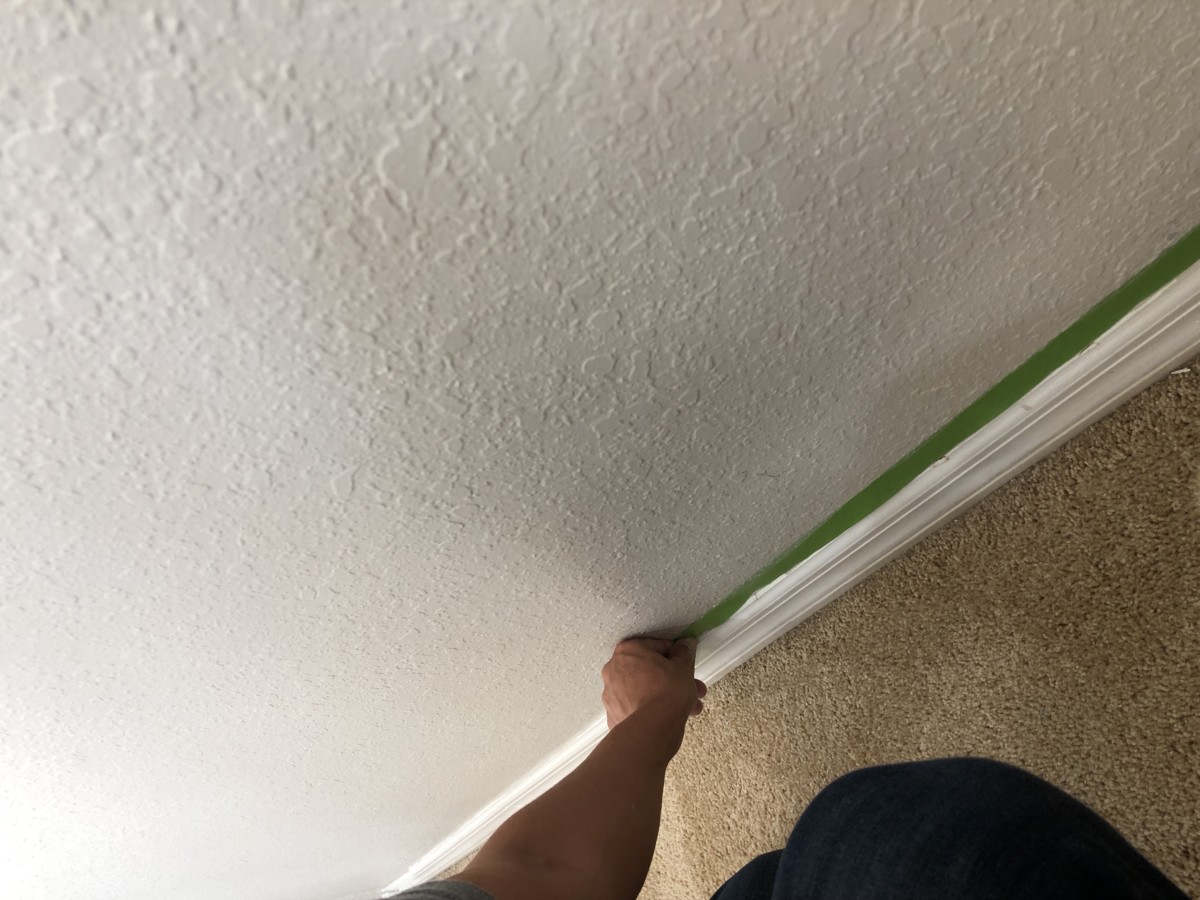 Next I prepped my paint sprayer. You can also do this with a paint brush, but with a sprayer this project can be done in MINUTES!
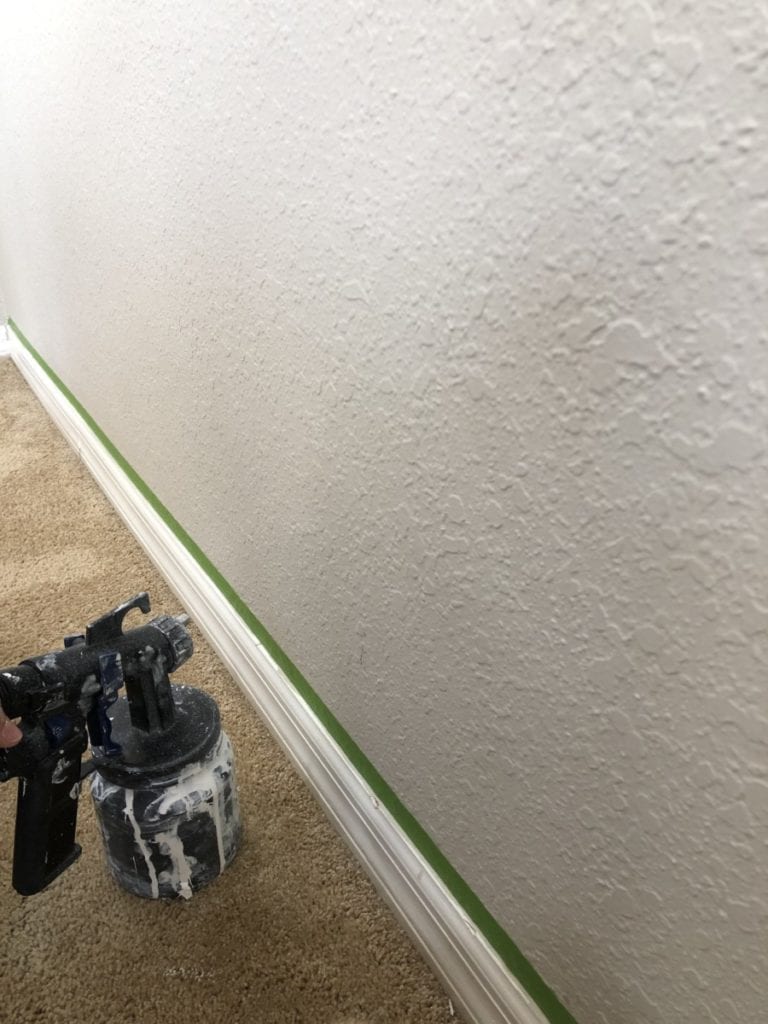 That’s pretty much the extent of the prep work. All I did was hold up a piece of paneling that would shield the wall from paint. Then I sprayed!
  Without needing to going over the top draping furniture, and cover flooring it took what would have been a several day job into an afternoon project!
Okay, so crossing off tedious paint jobs before new carpet is definitely a trick I would suggest you take advantage of. Heck if you have been considering painting in general (walls or ceiling) NOW is the time. Do it when you don’t have to worry about the prep work. I honestly believe projects are 75% prep work, especially in regards to painting.
Can I tell you how great it felt to have the room looking fresh as they installed the carpet ?! 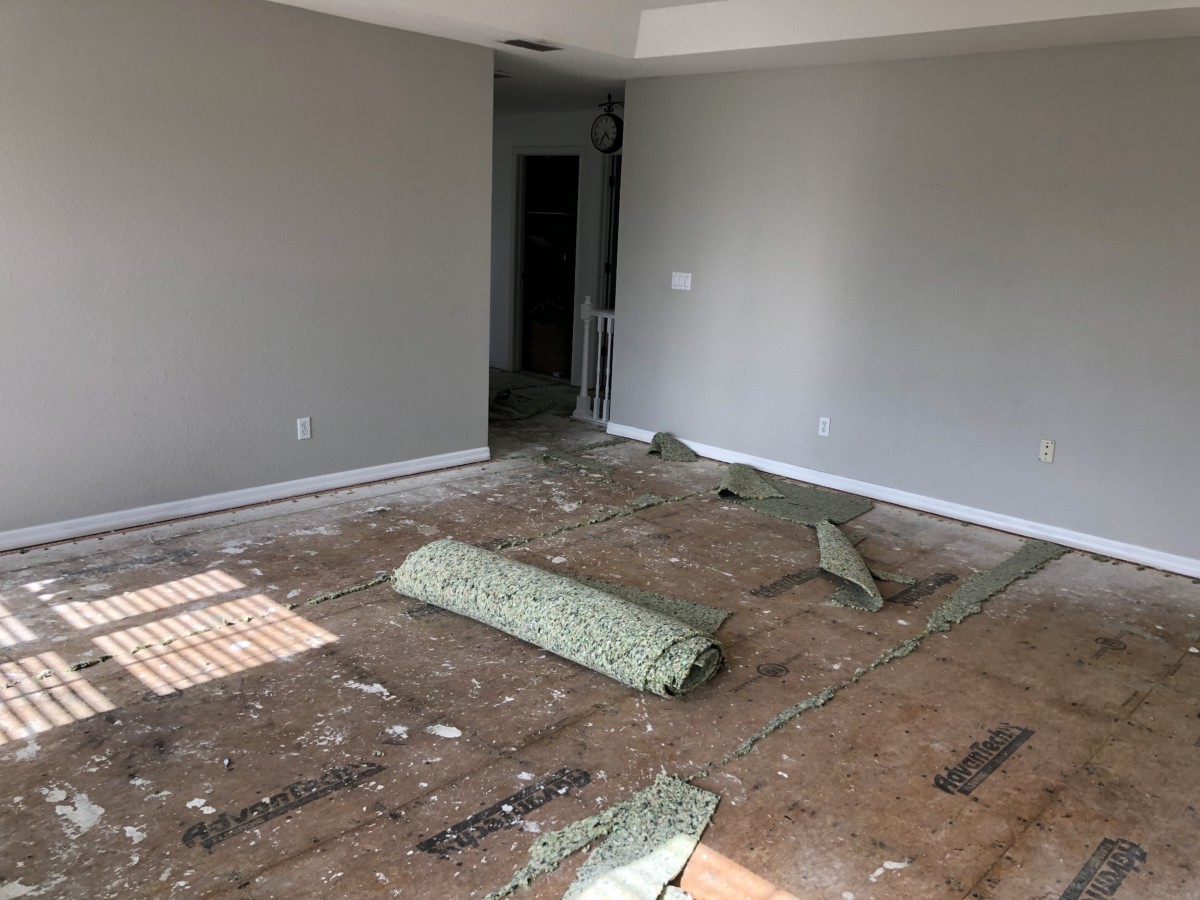
It’s amazing how quickly a room can transform. Using the aforementioned painting hack, and The Home Depot install service you can have an entirely new space in less than 24 hours. Unbelievable!
Okay, are you ready to see my beautiful blank slate !?

In a little under 24 hours a room went from a place I tried to avoid, to an oasis that I didn’t want to leave! I gave myself an hour to lie on the fresh carpet… but I had everything to update this room waiting to be brought in! Want to see what I did with this space!? Head over to The Home Depot blog to see the entire reveal!
In the meantime want to see the rest of the upstairs with the new carpet!? Yeah you do!
I think one of the spaces I was most excited for the new carpet was the stairs. Silly I know, but the stairs are the first thing when you walk in my home. The carpet on the stairs was in horrible condition and clashed with all the colors on the lower level. Not anymore!

Previously the guest room had a huge rug to try and hide the stained carpet. With the new carpet I 86’d the rug and let the room feel fresh and open. 

The boys room, I figured would take a little more abuse so I just dealt with the old carpet. However this new carpet. completed changed the feels of their room!

Plus knowing that I have the LifeProof guarantee I have zero concerns! This carpet is meant to be lived on and they are willing to back it up with a 25 year guarantee. 
Thanks fro following along, and “Take Luck”.
Corey

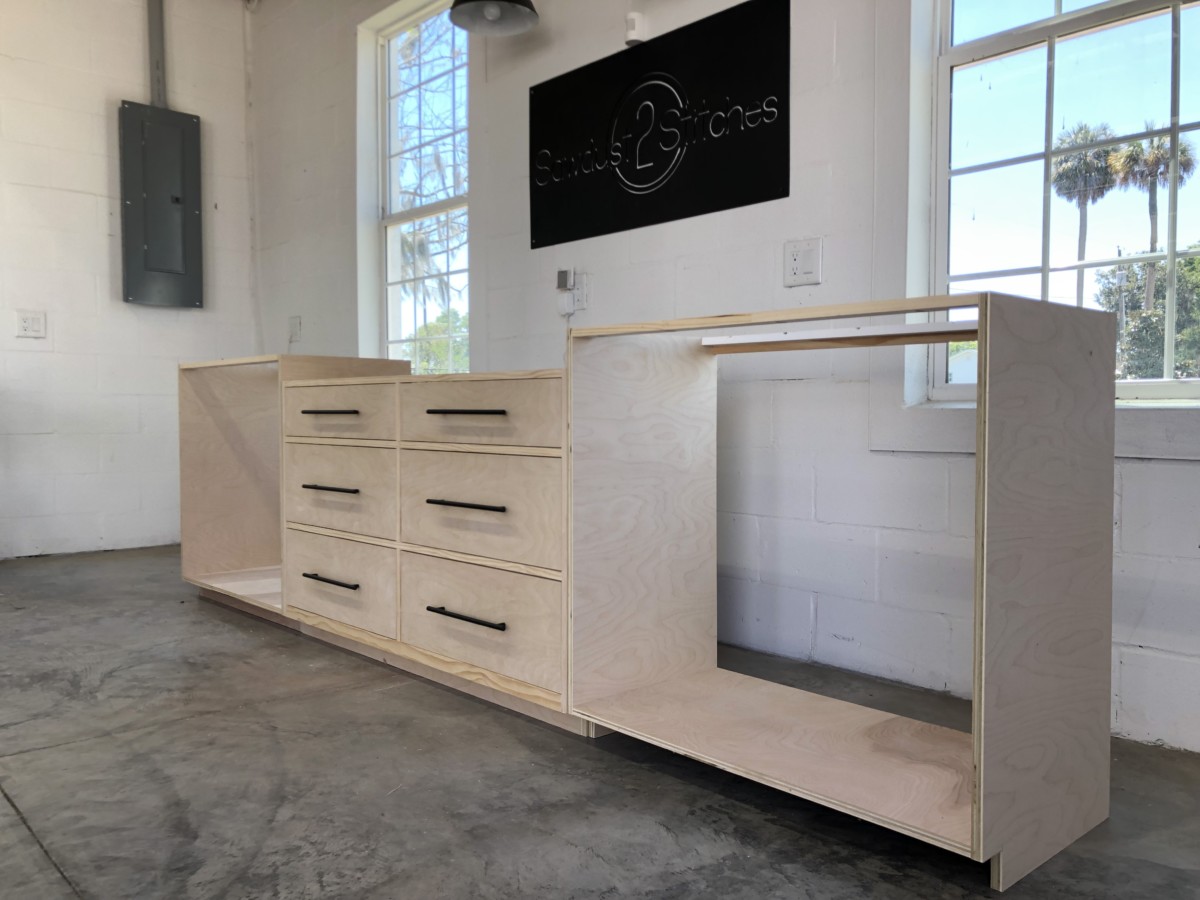
 I knew she needed as much storage as possible, but she also needed plenty of open workspace. A mobile island was just the ticket. It would allow for flexibility and maximize practicality.
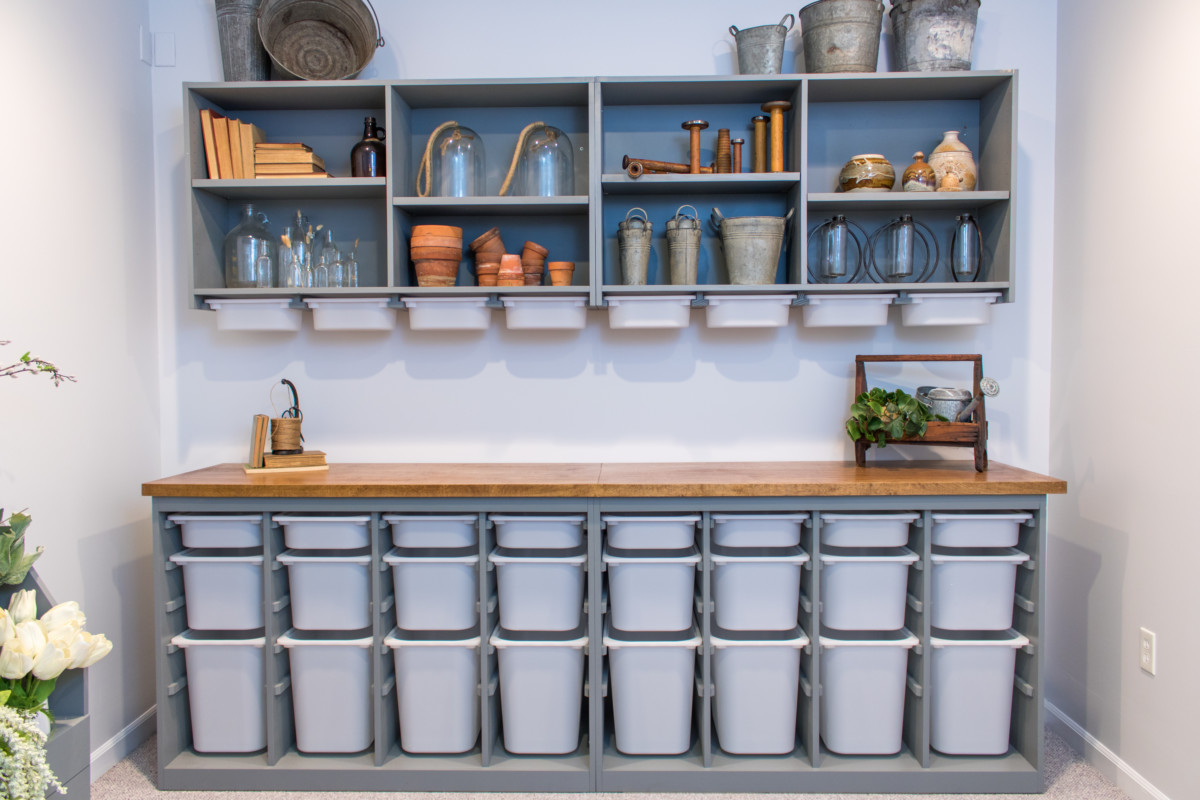
 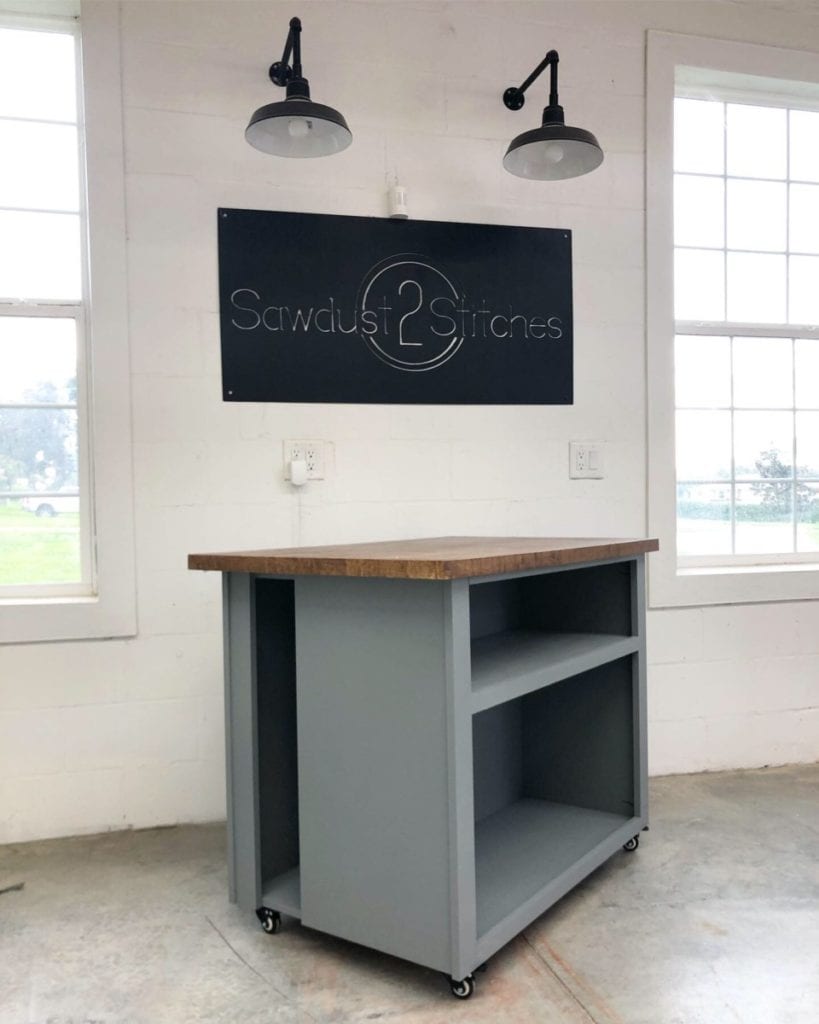 The last build was the (in my opinion) the crowning jewel of this install. I mean how on earth do you expect to have a “Florist Studio” without a full-blown flower display ? I insist that you can not!
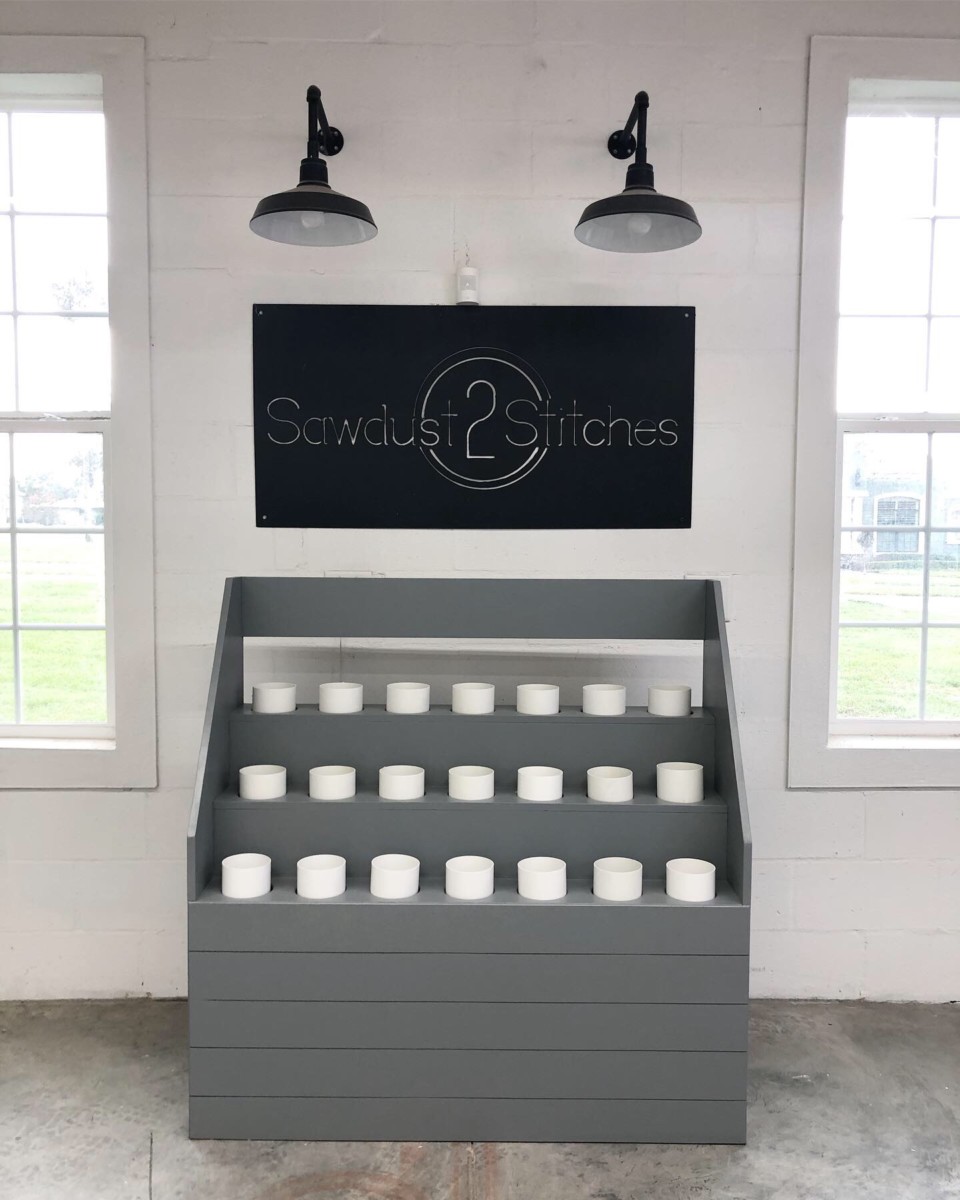


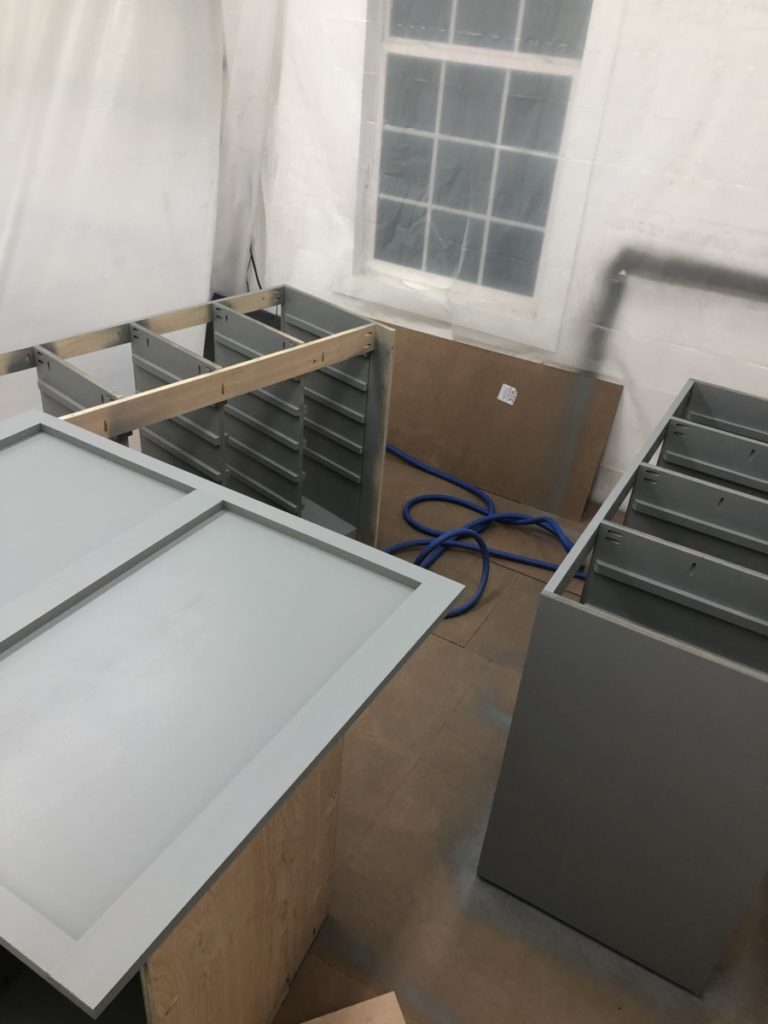
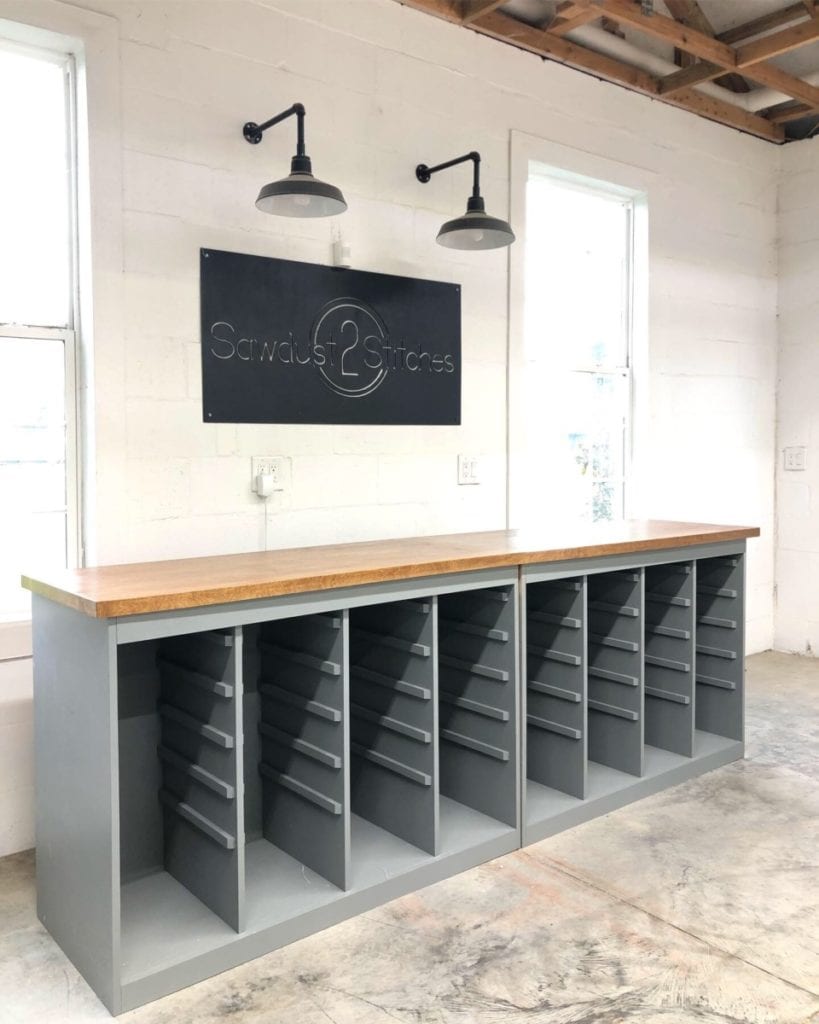 This unit was designed to go in a larger florist studio, so I actually built 2 of these units and made a longer countertop to make it appear to be one large unit.
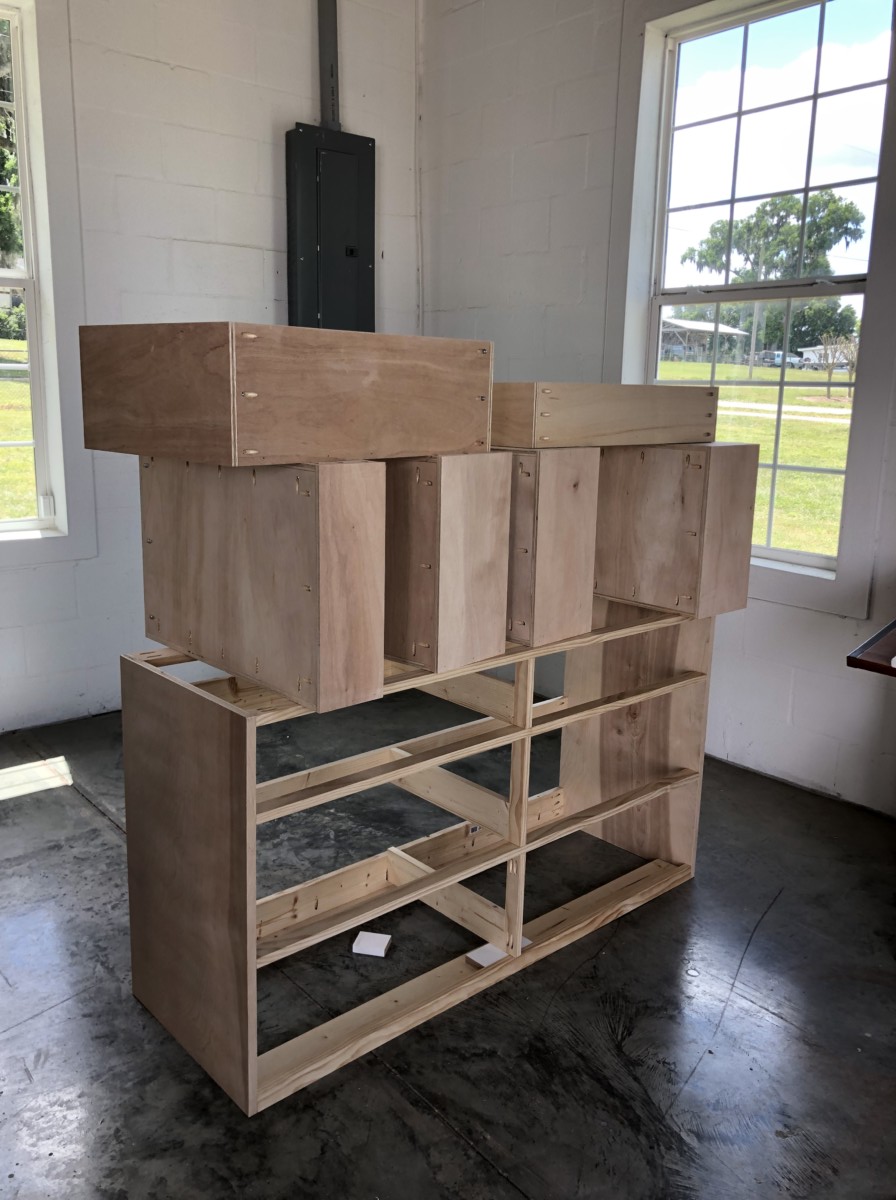
 Time for more boxes.
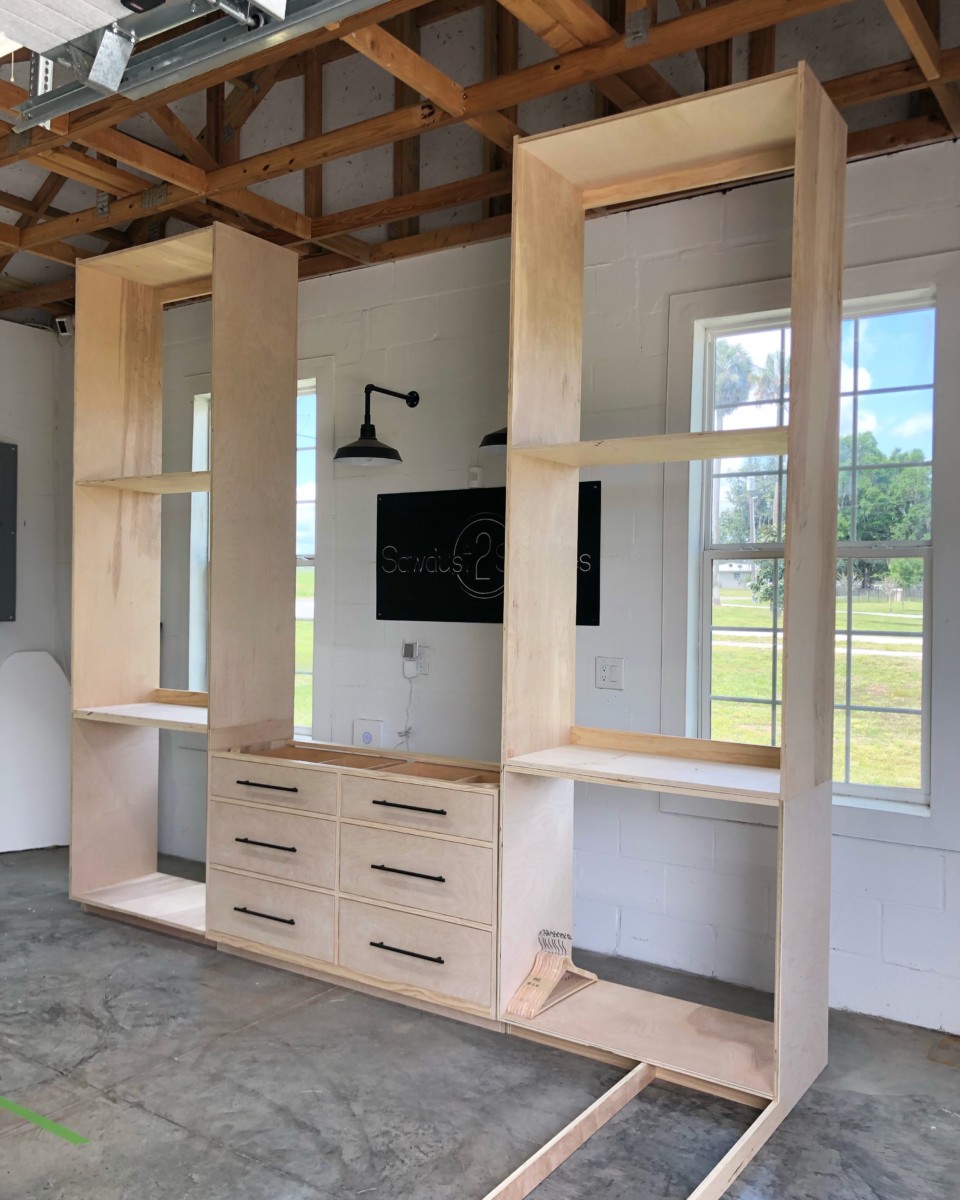
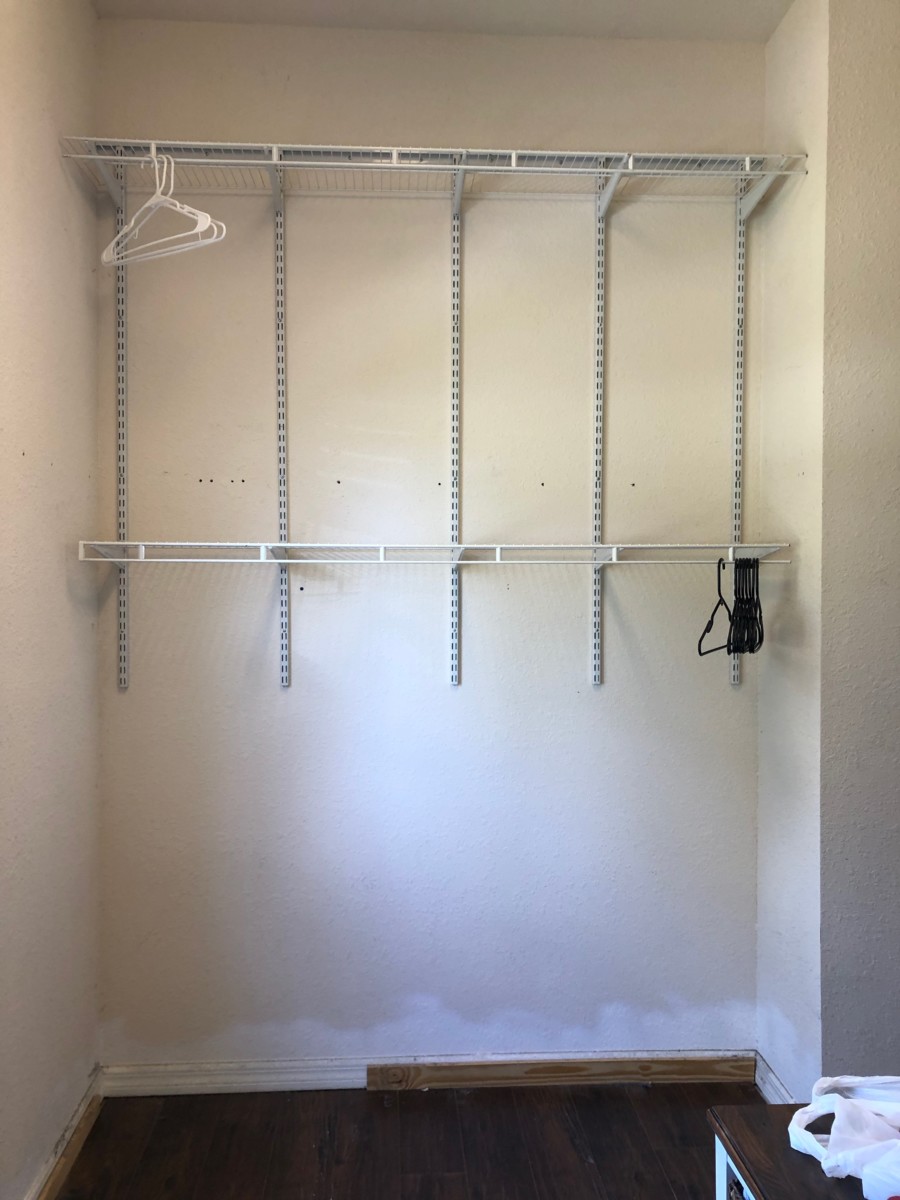
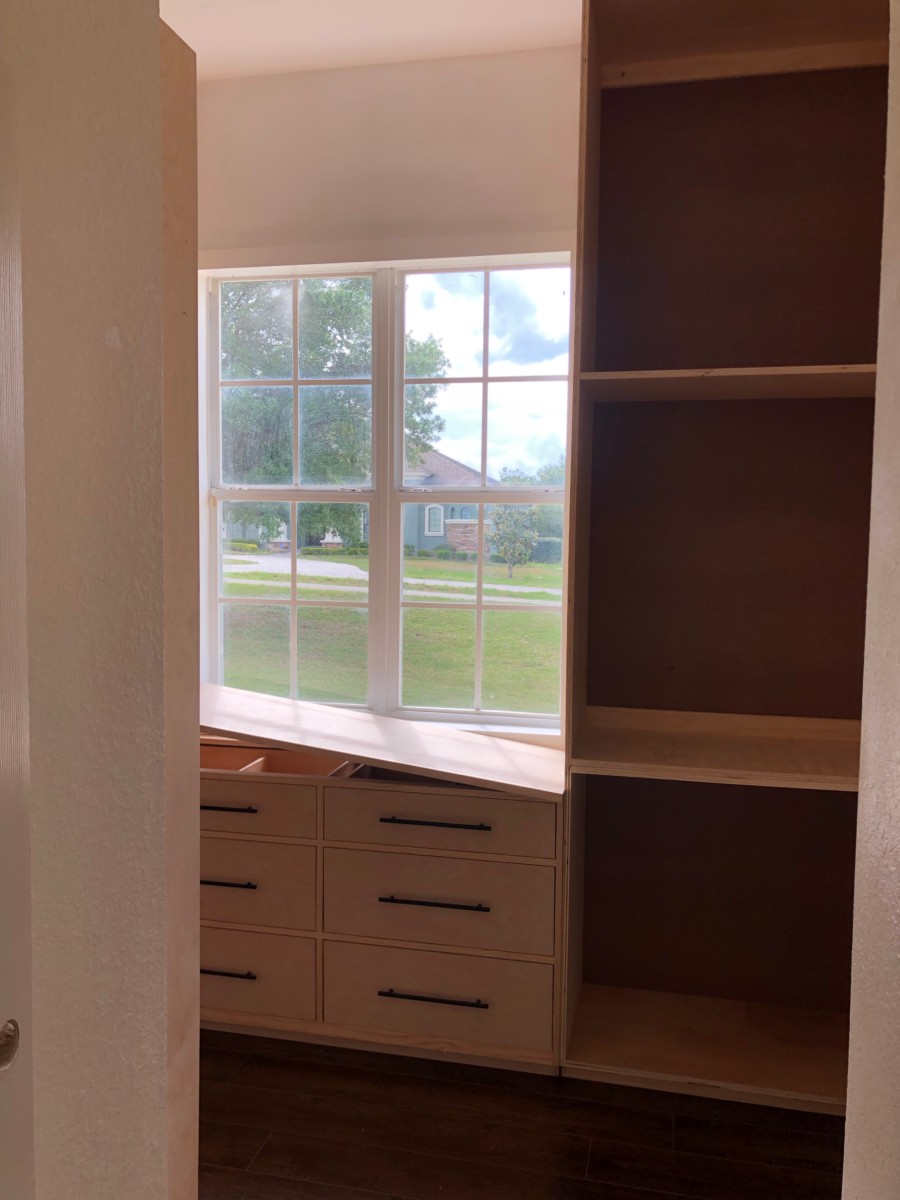
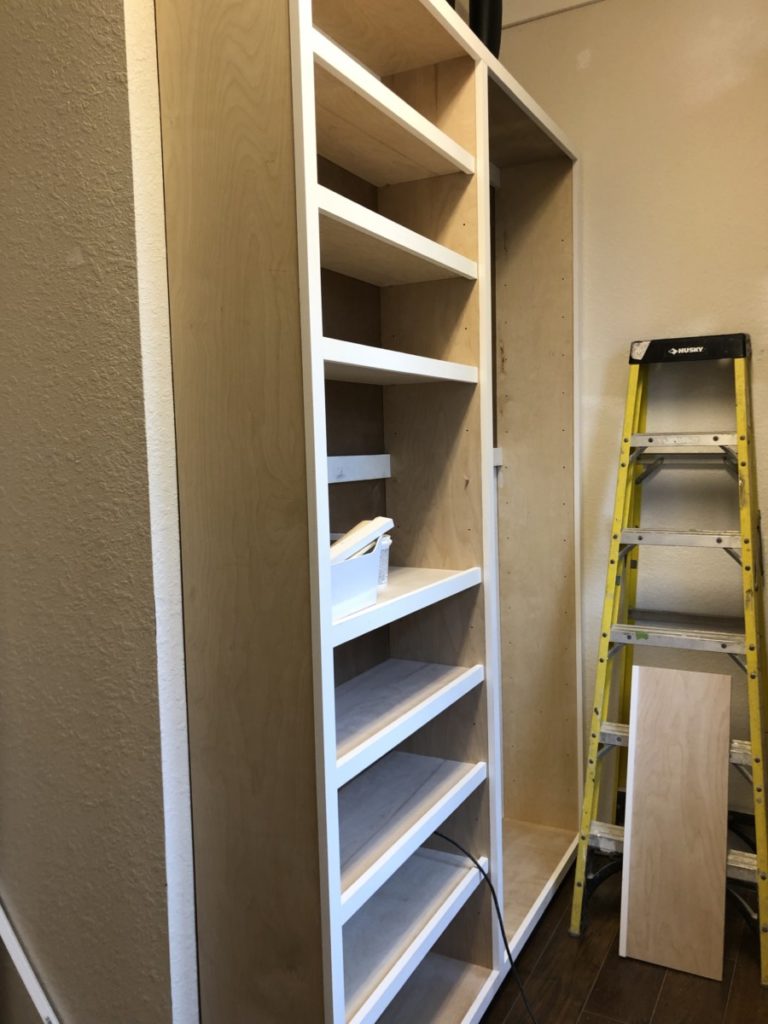
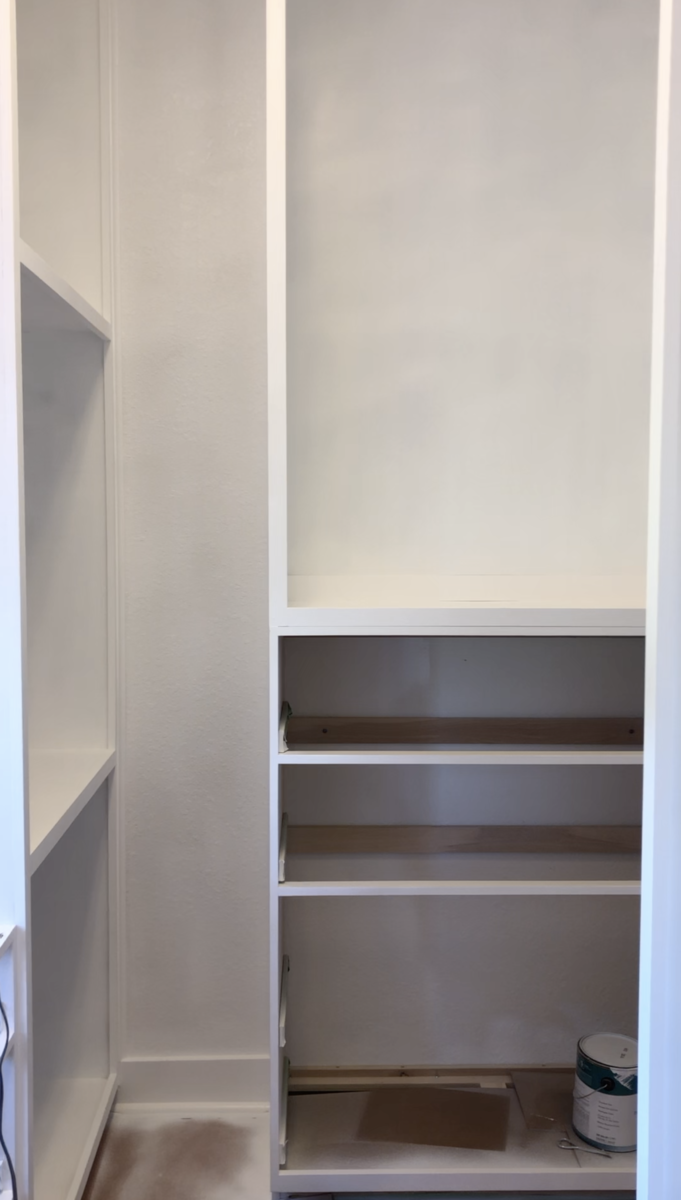
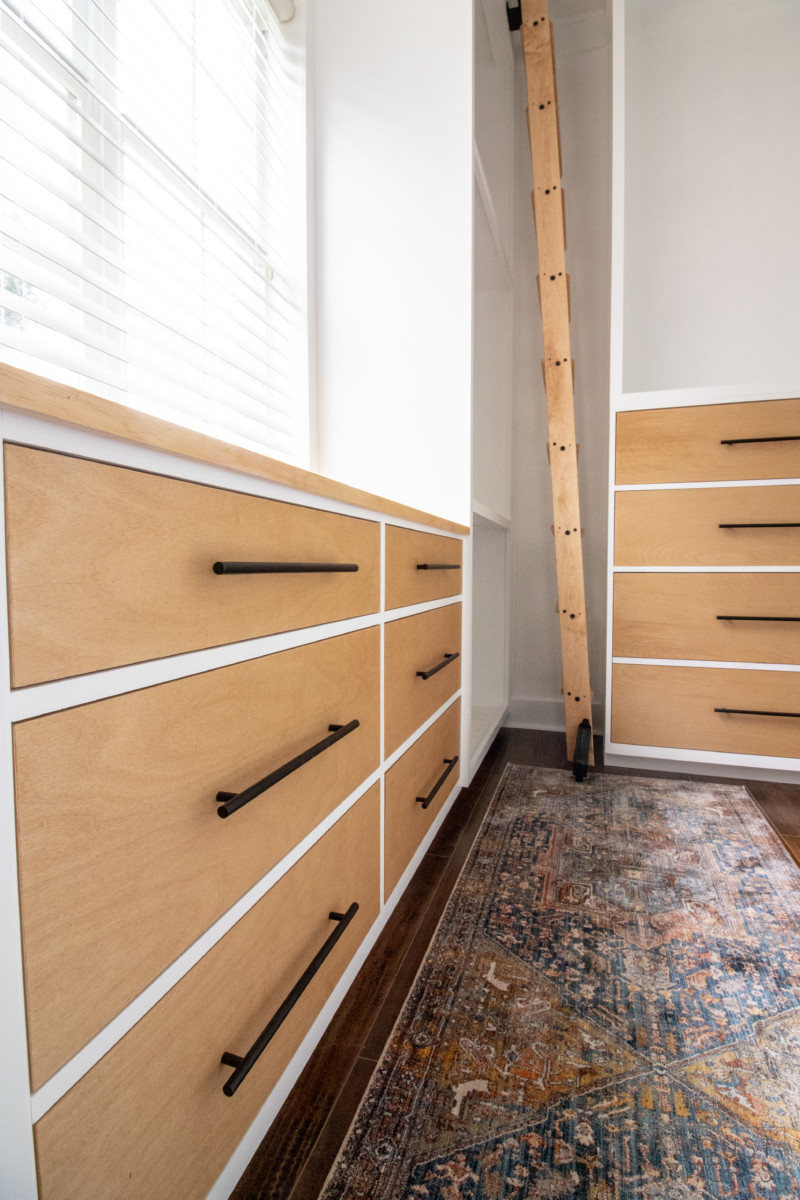
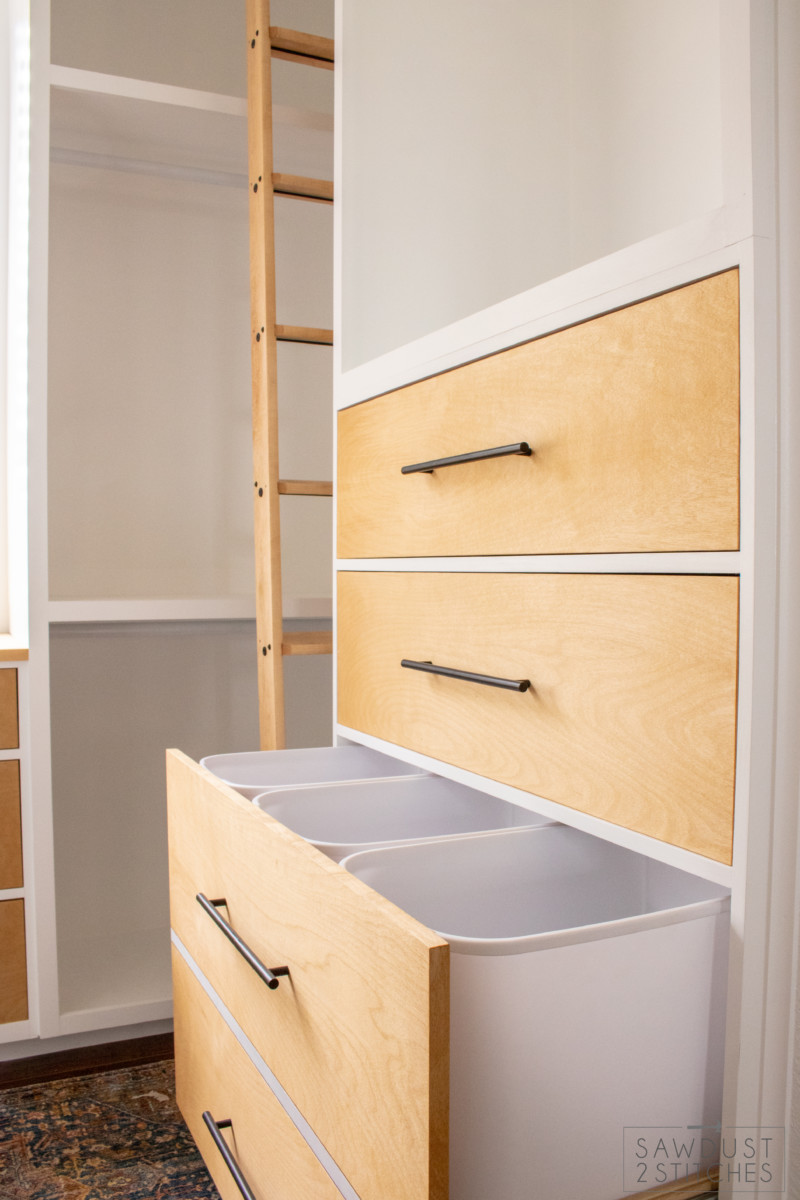
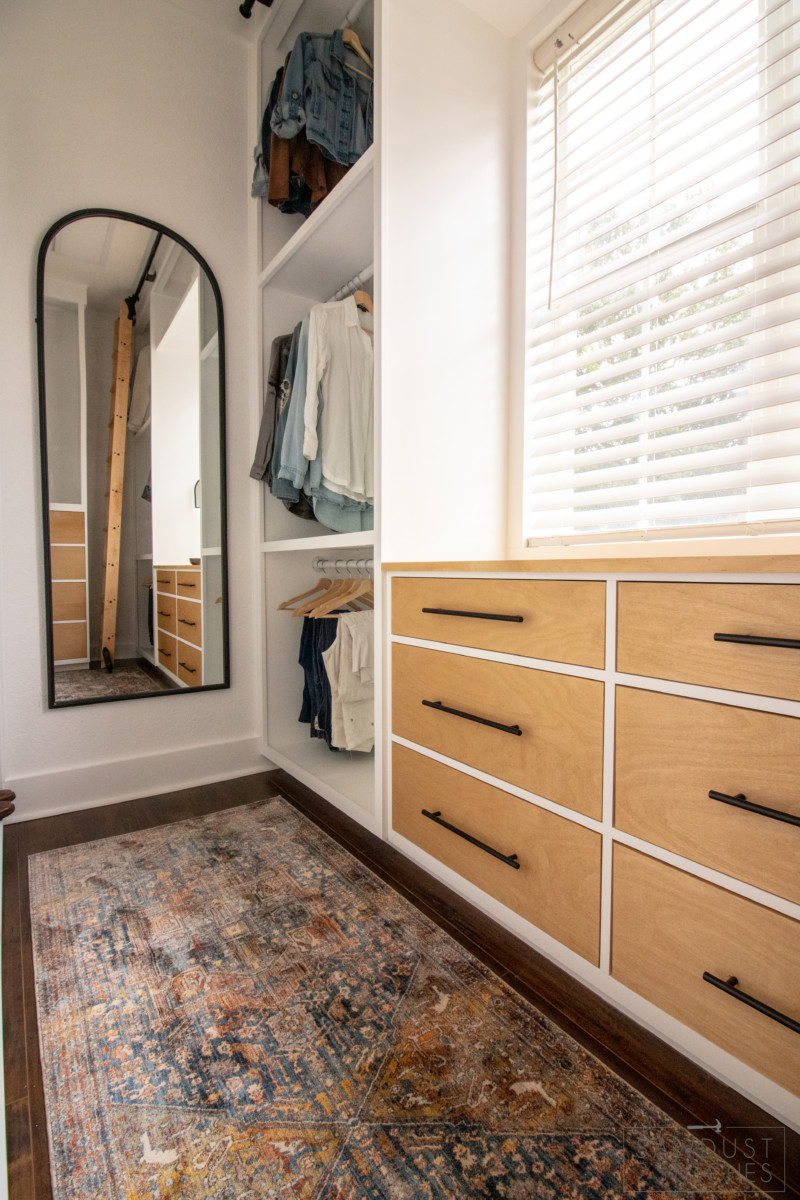
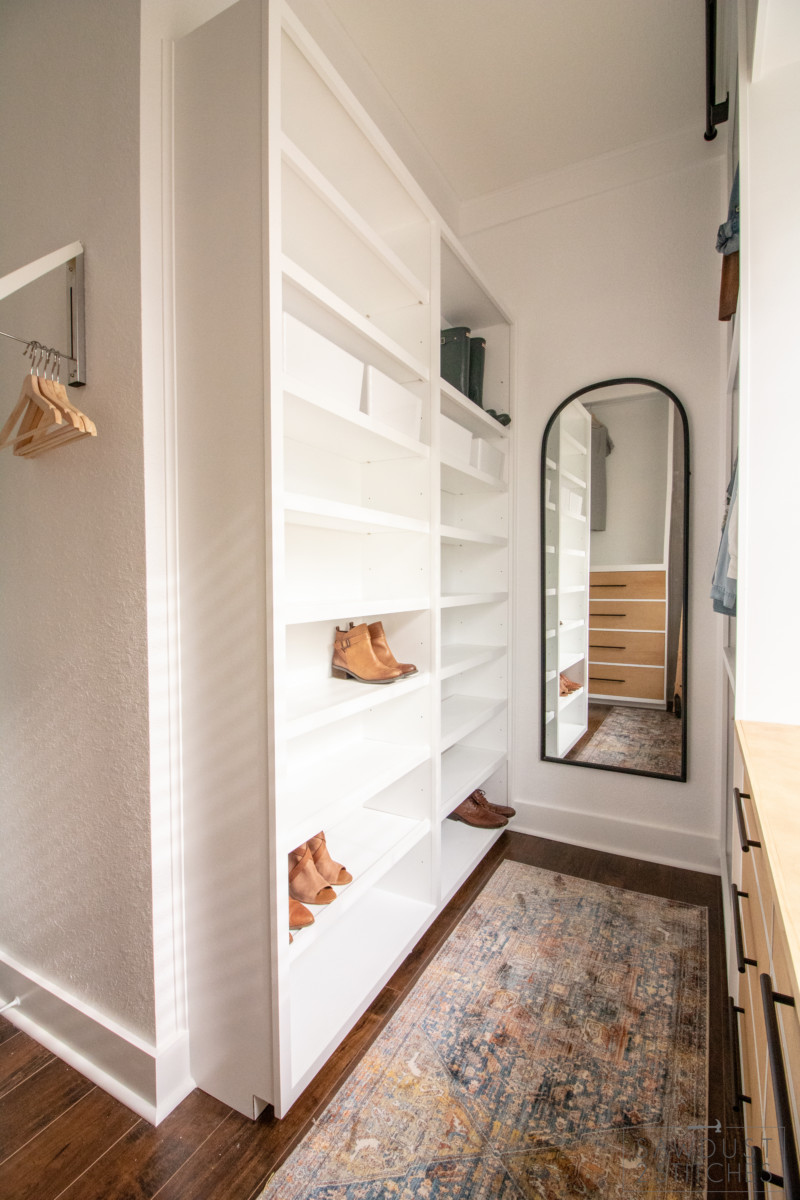
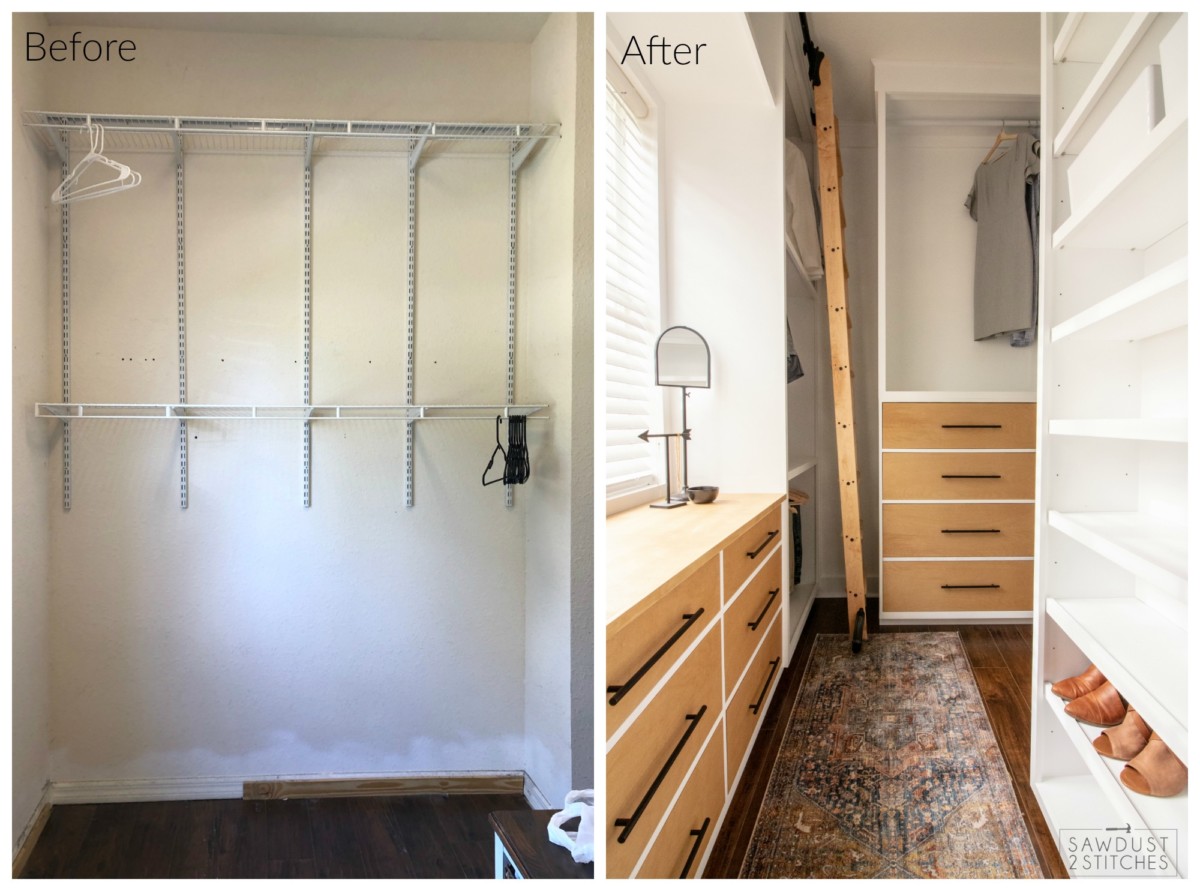
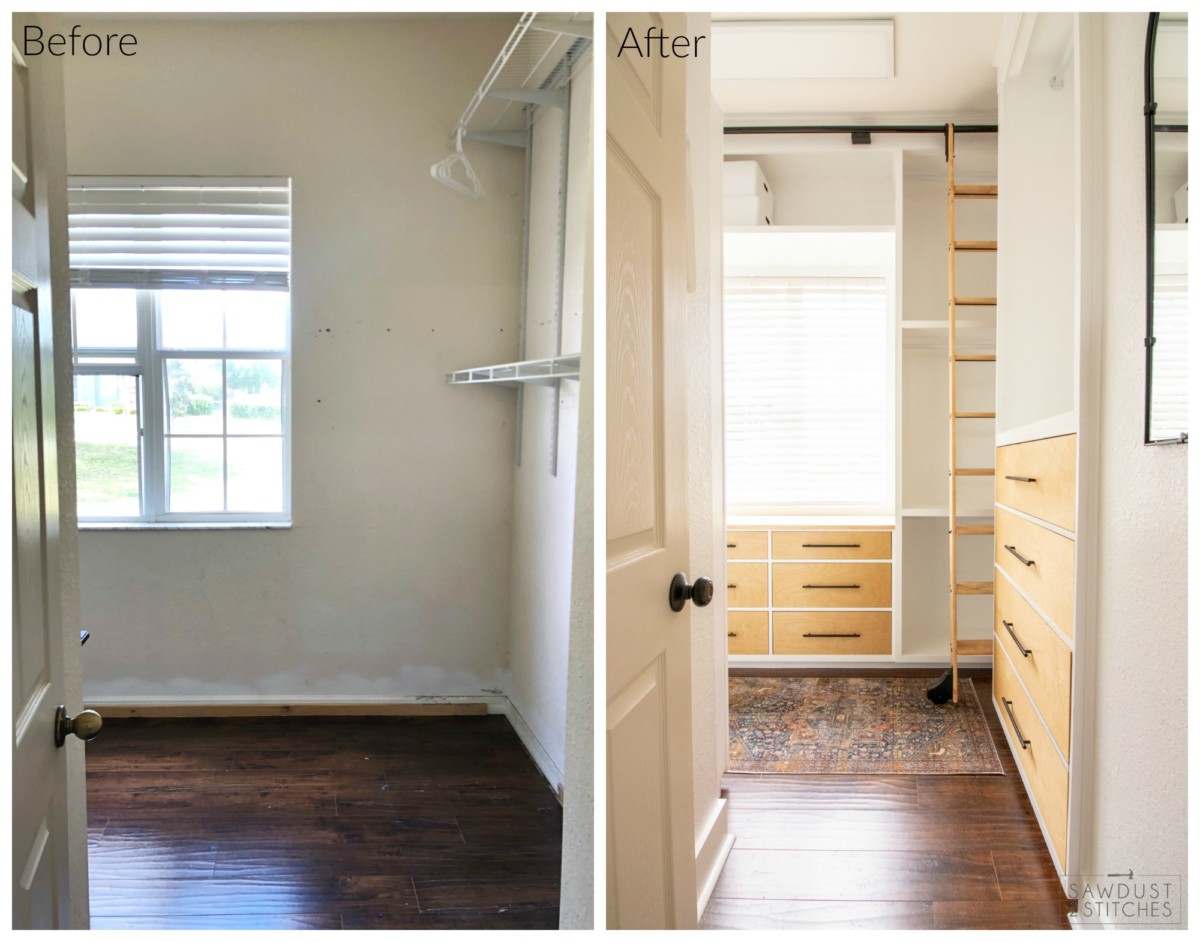
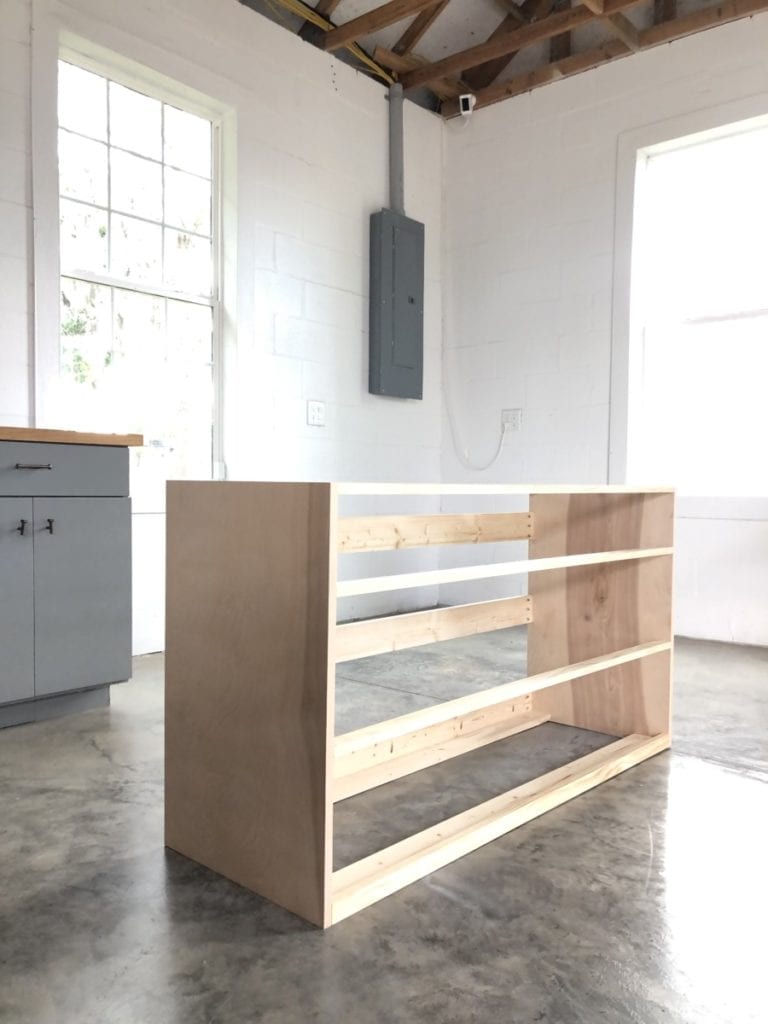
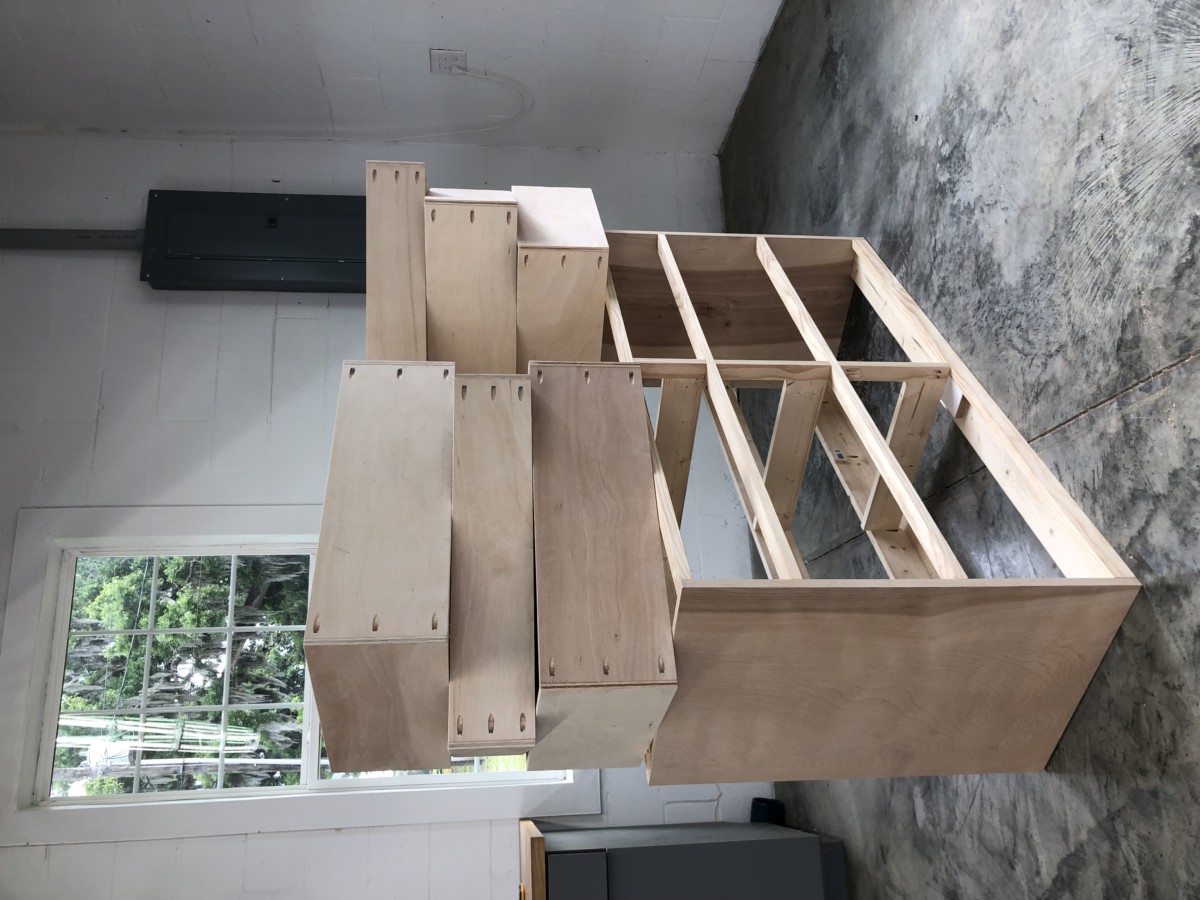
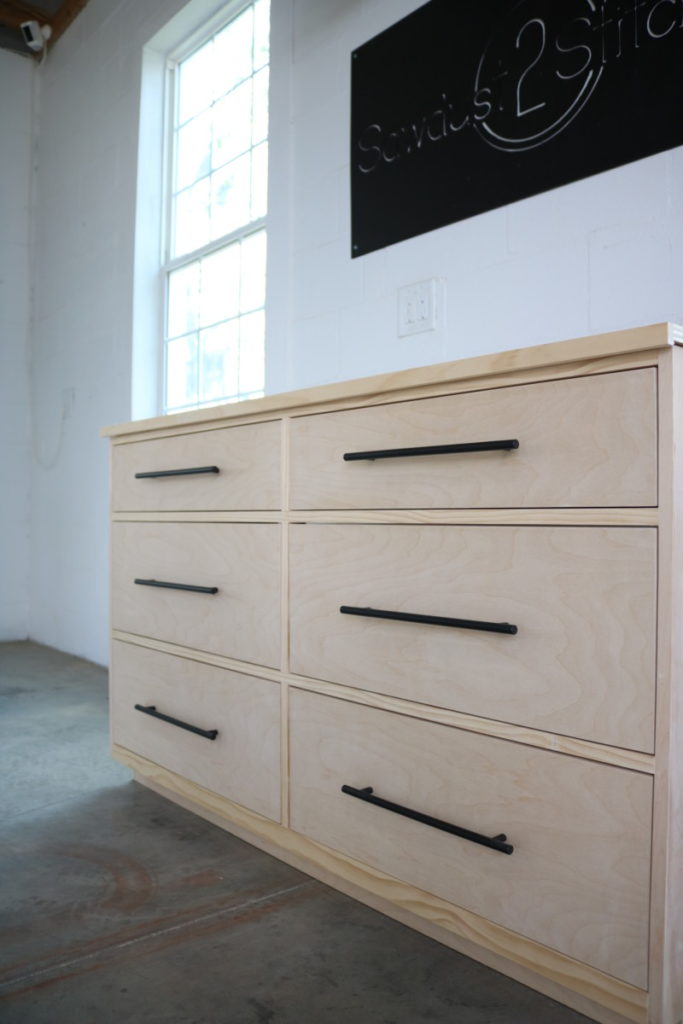
 I ended up building another dresser that would also act as our laundry hamper. (Build Plans Coming Soon.) I also added three more large wardrobe units. I created a very long wardrobe that I stacked on top of my second dresser. Also, after laying out the space with tape I realized I did in fact have space for some shallow shelves. Far too shallow for any clothing, but perfect for shoes!
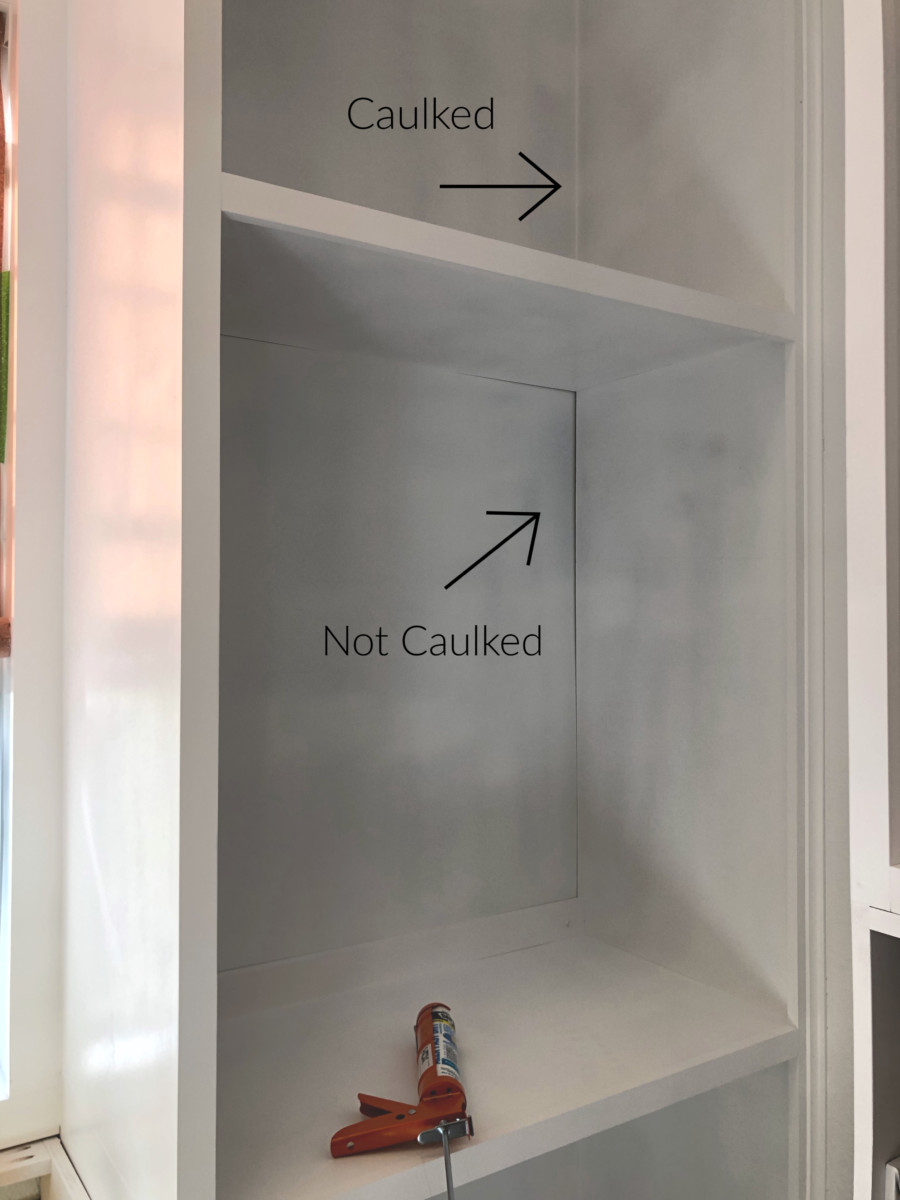
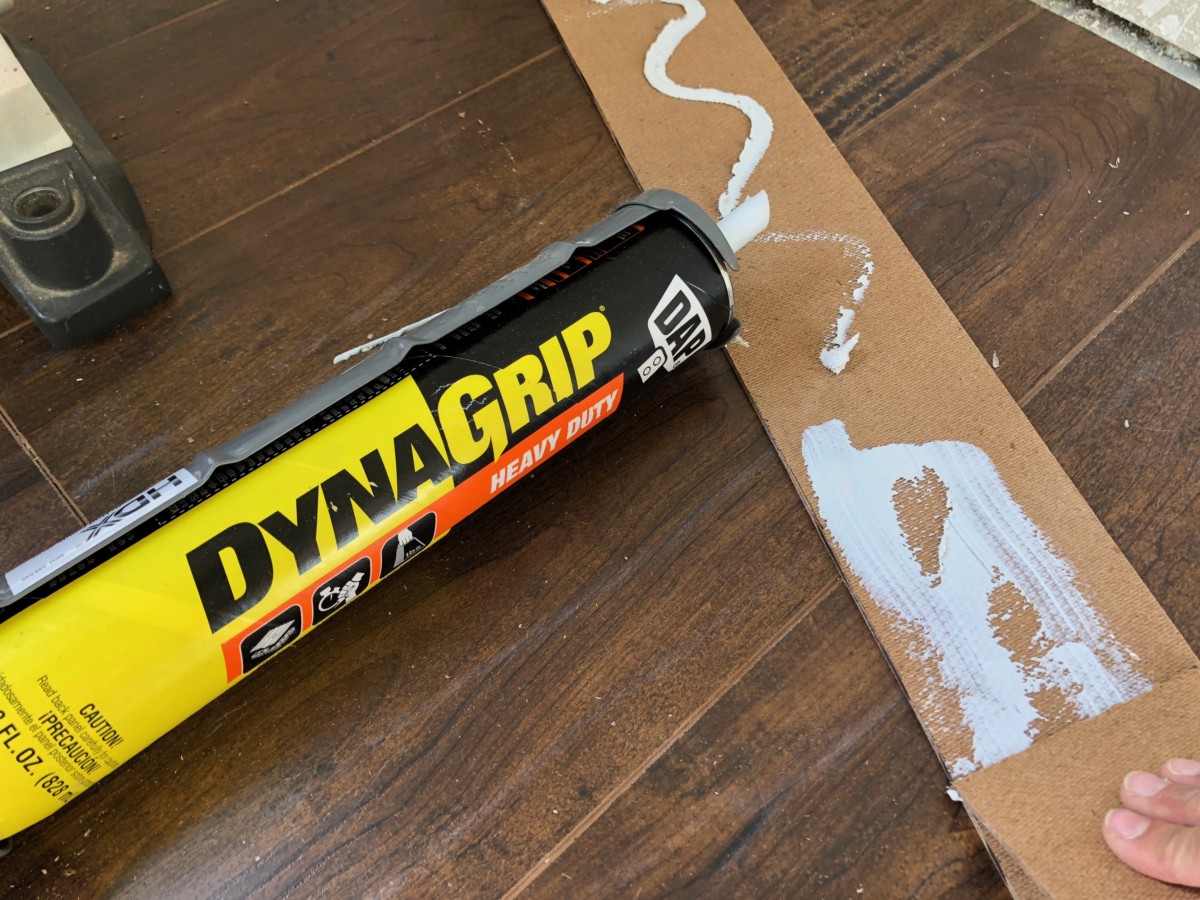
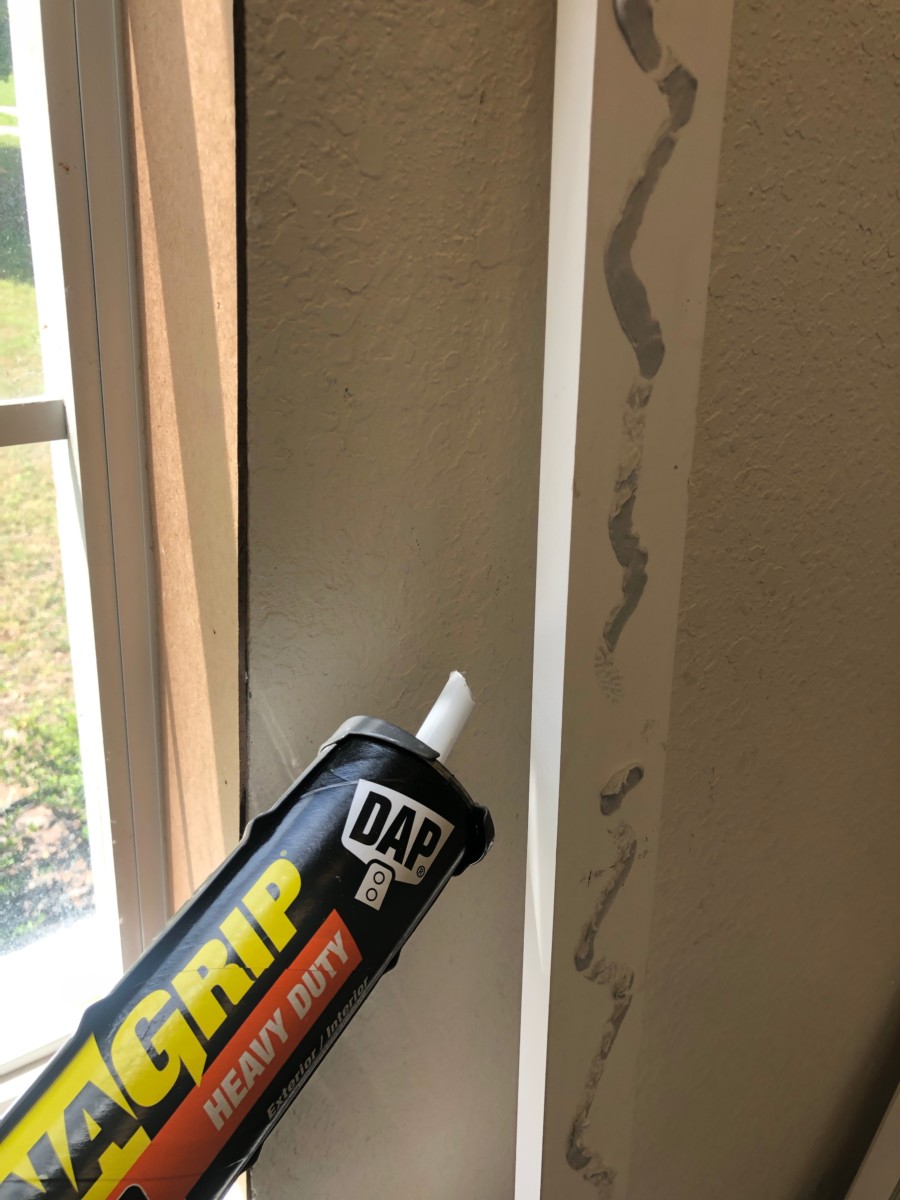
 Once all the trim work is finished is the time to bring in my “magic eraser’ for trim work, caulk! Even the worst of gaps can melt away when DAP caulk is utilized properly. If you are interested to see more about where and how I used it make sure you check out my
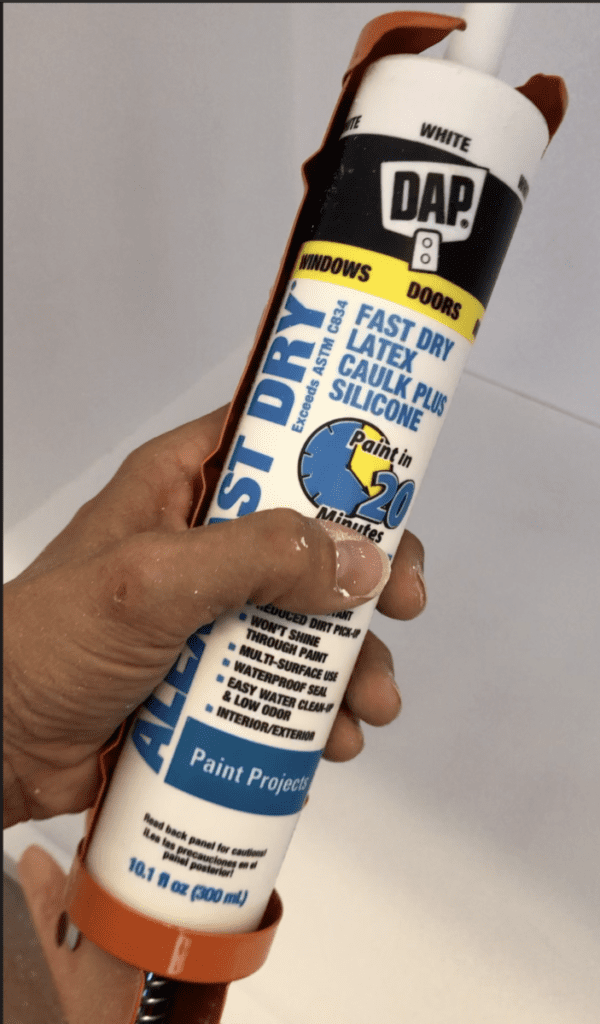


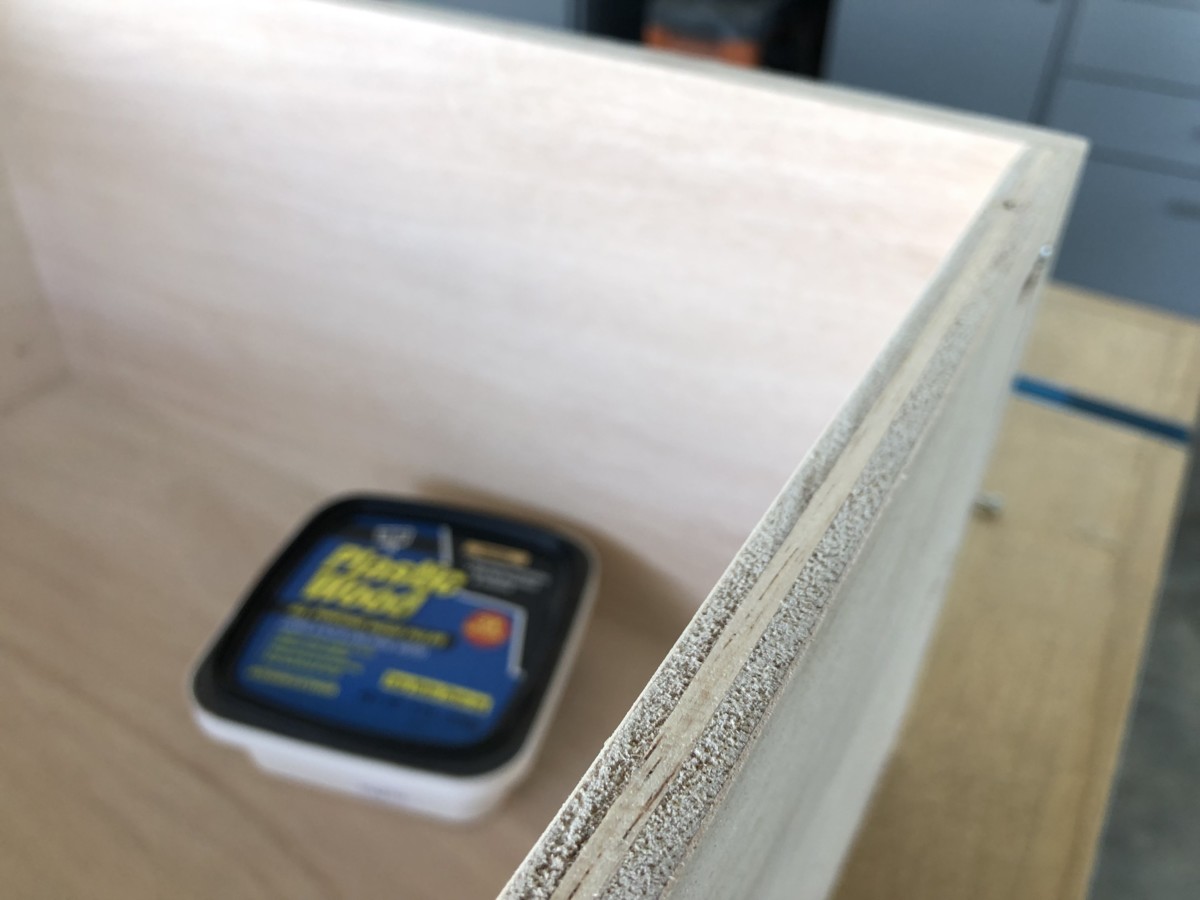
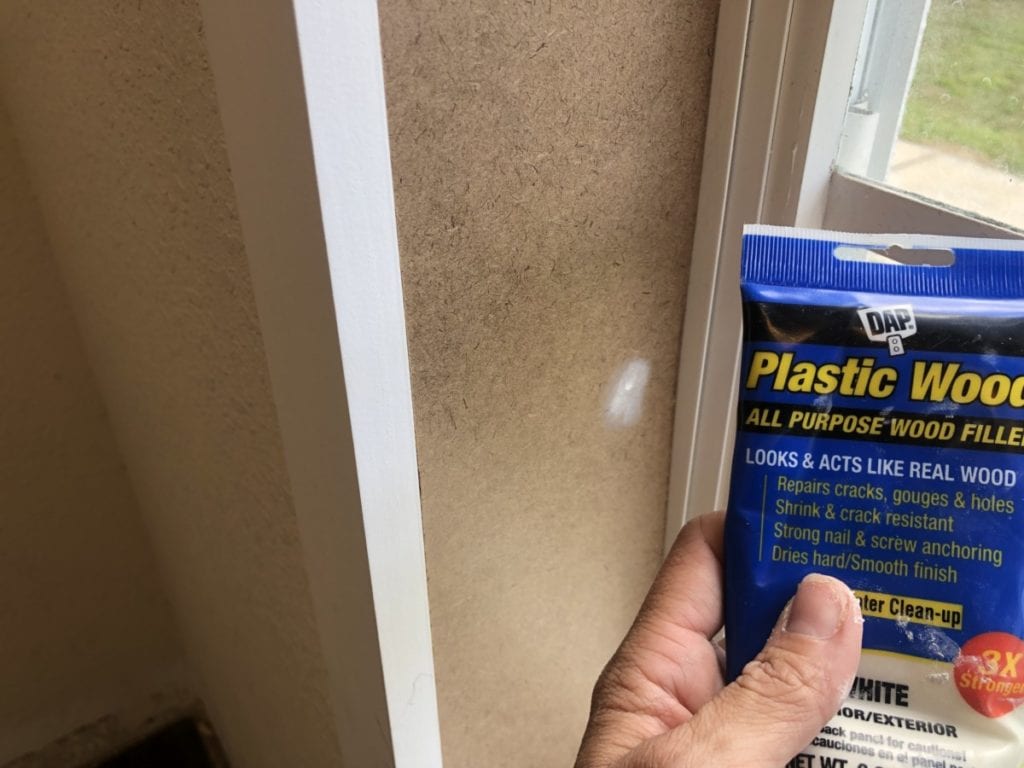
 Just add a small amount of DAP Plastic Wood to the seam and allow to dry. Once dry, lightly sand with a fine grit sanding sponge. It makes the seam all but disappear! BOOM BABY!
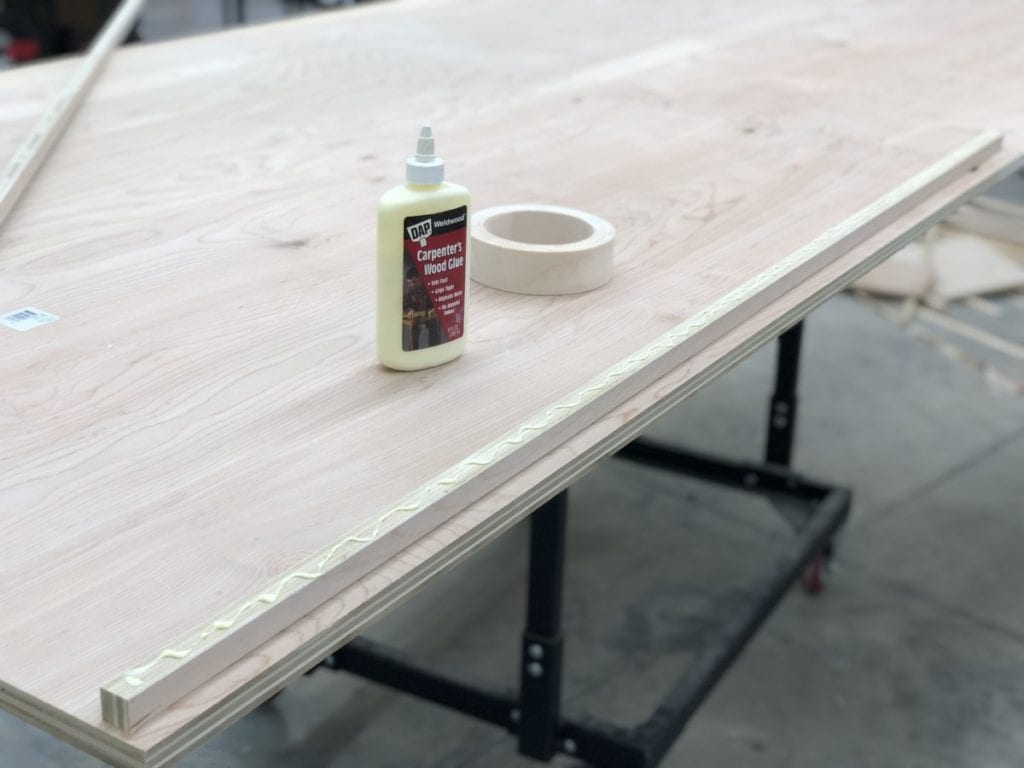
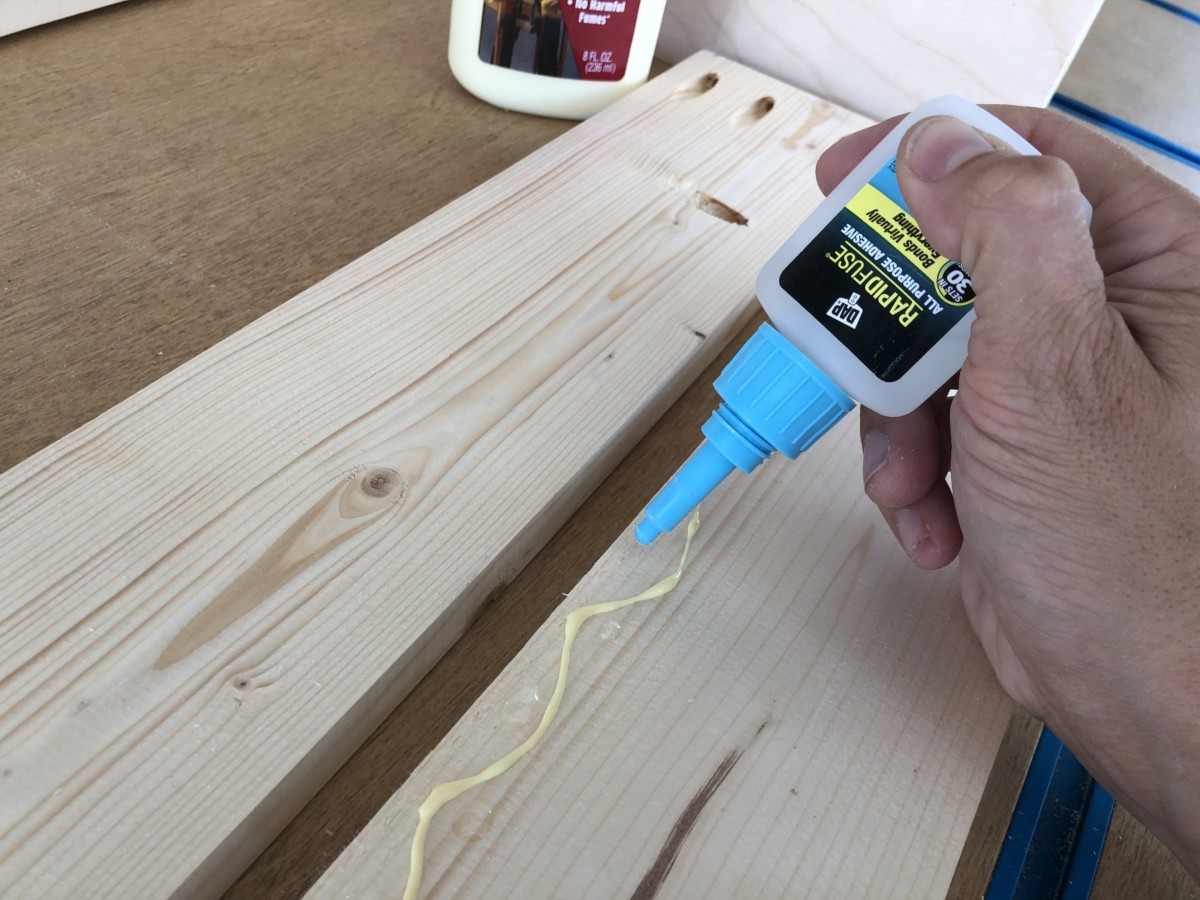
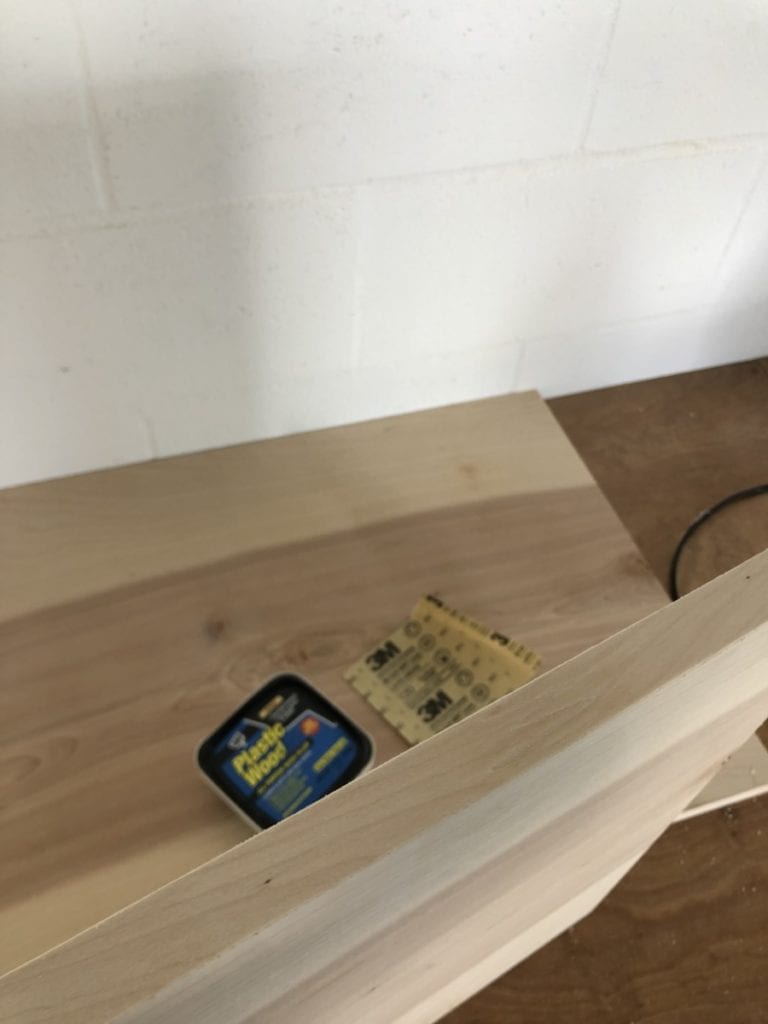 Next up? The Rails for the dresser. I love how quickly the carcass of a dresser goes together! Just a few boards and it reallly starts to look like a dresser. When attaching my boards, I prefer to glue them up and use pocket holes to secure.
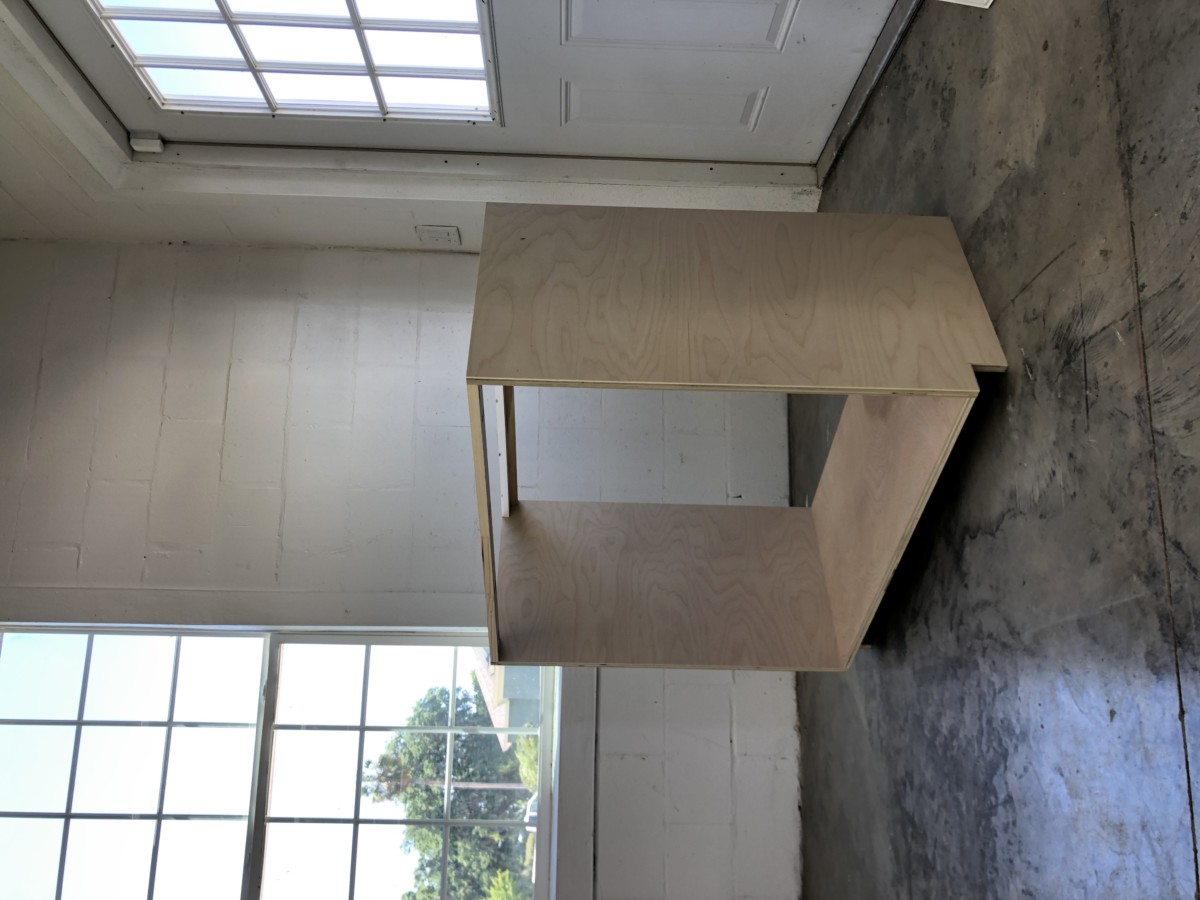

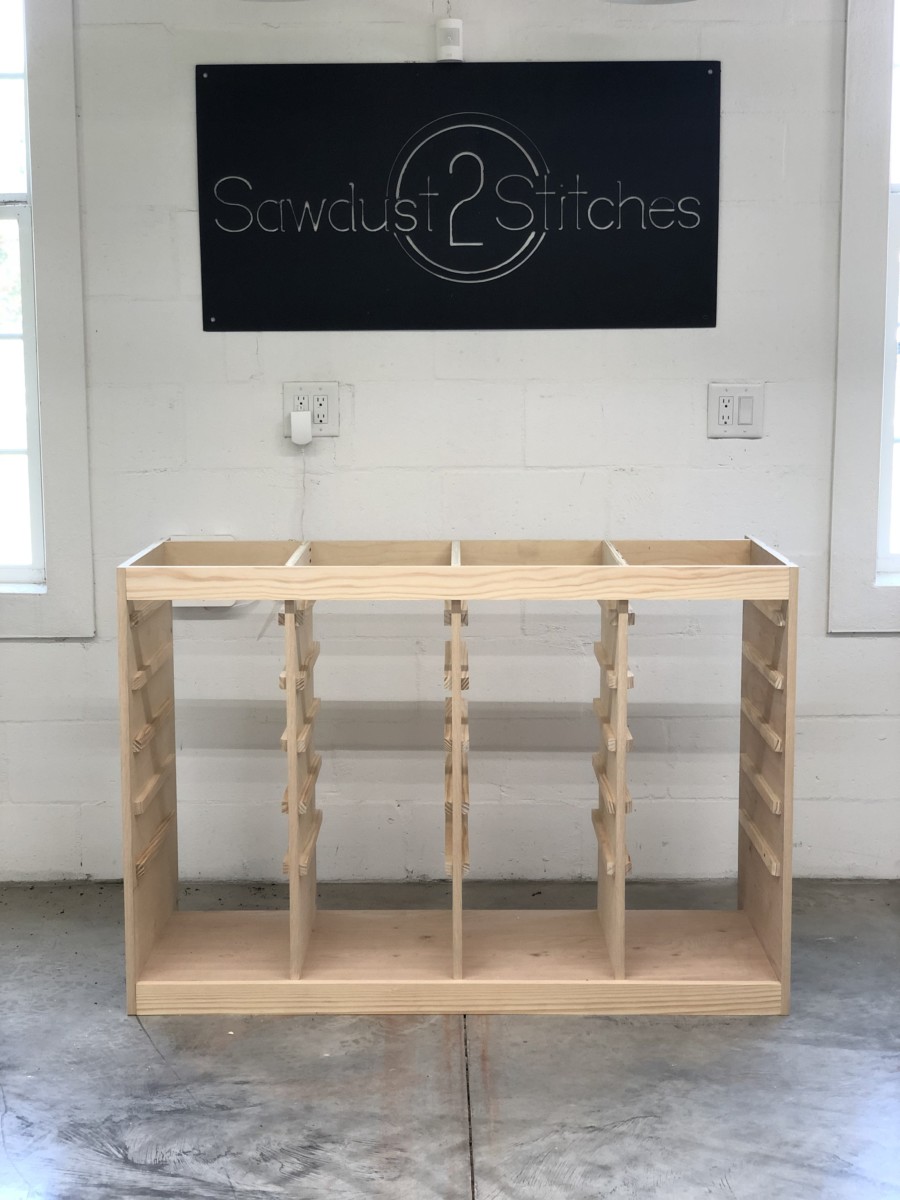
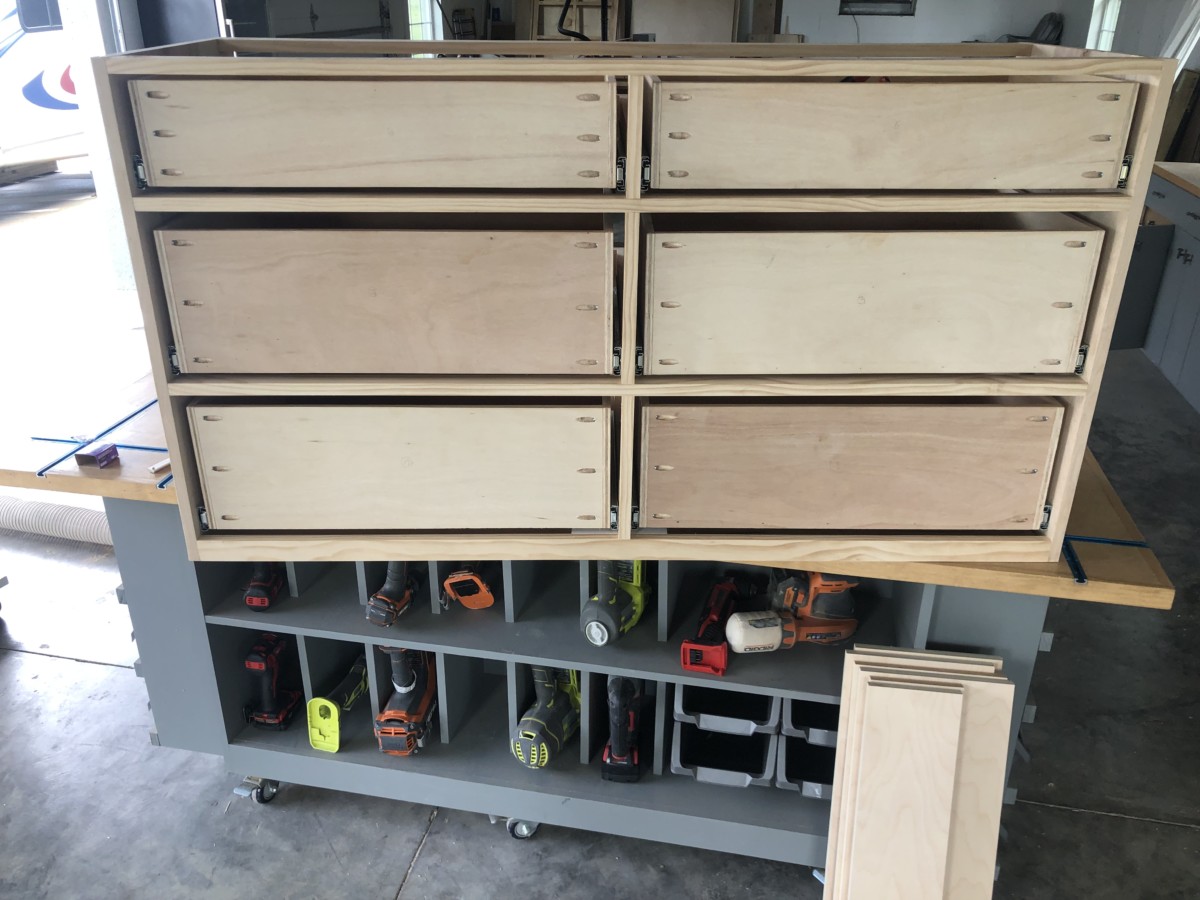
 Once the dresser carcass was complete it was time to move on to the boxes. I like a very simple sturdy approach, I use 1/2” plywood for the bottom and the sides.
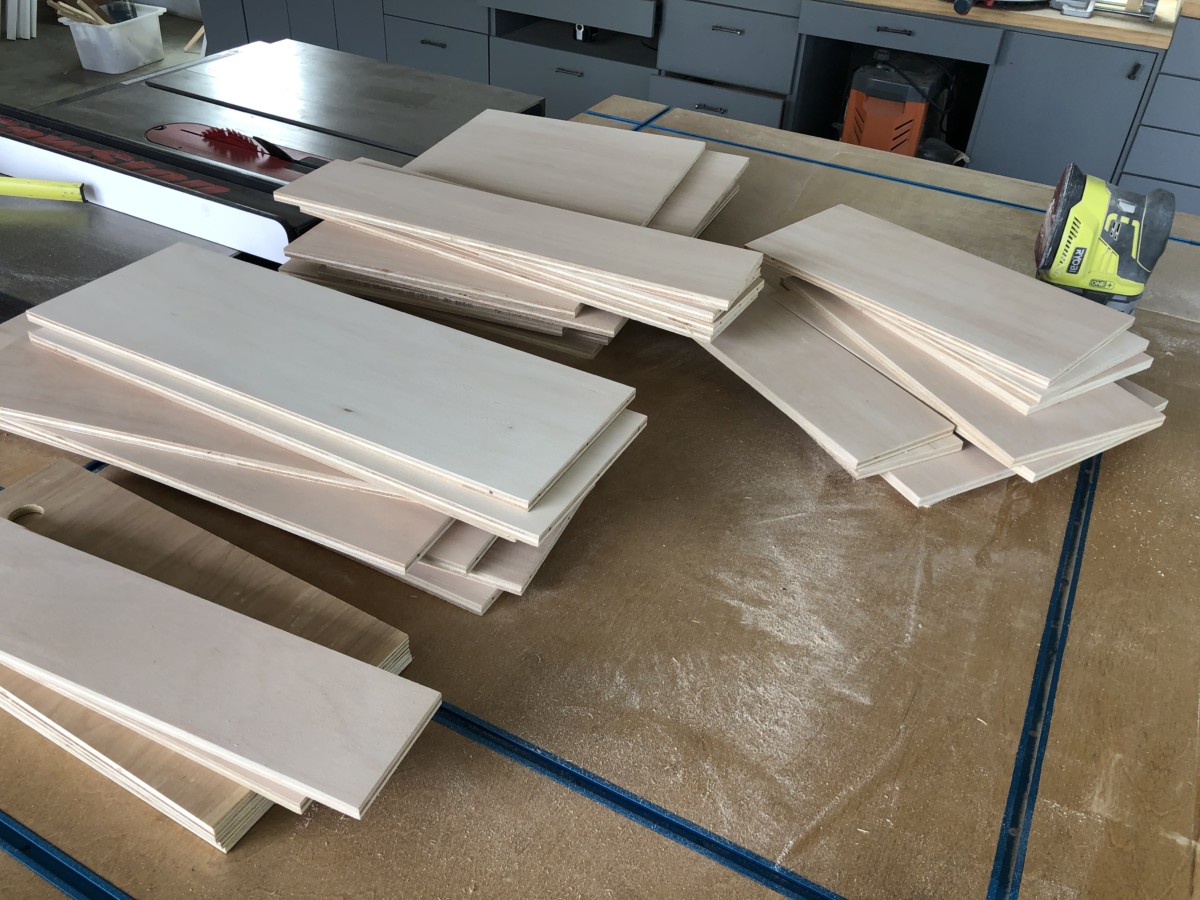
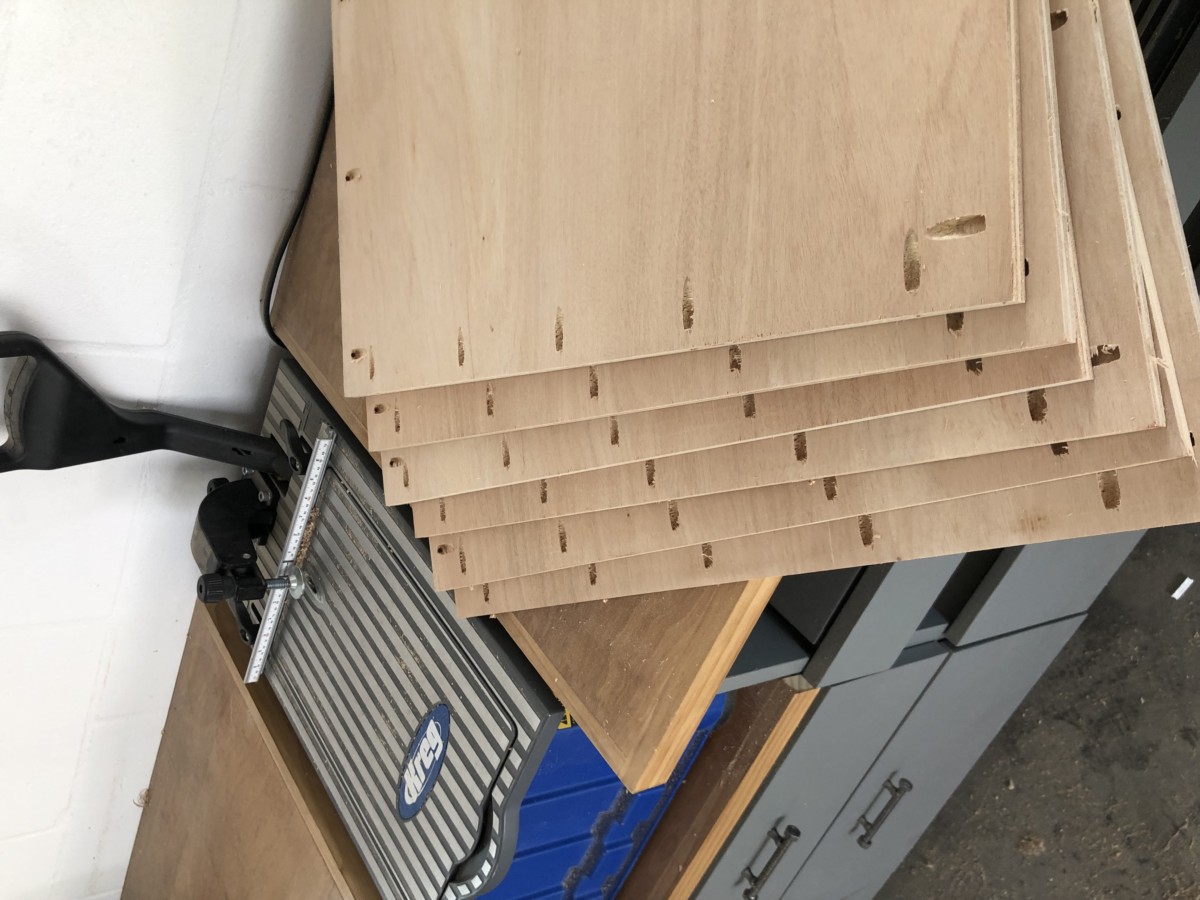

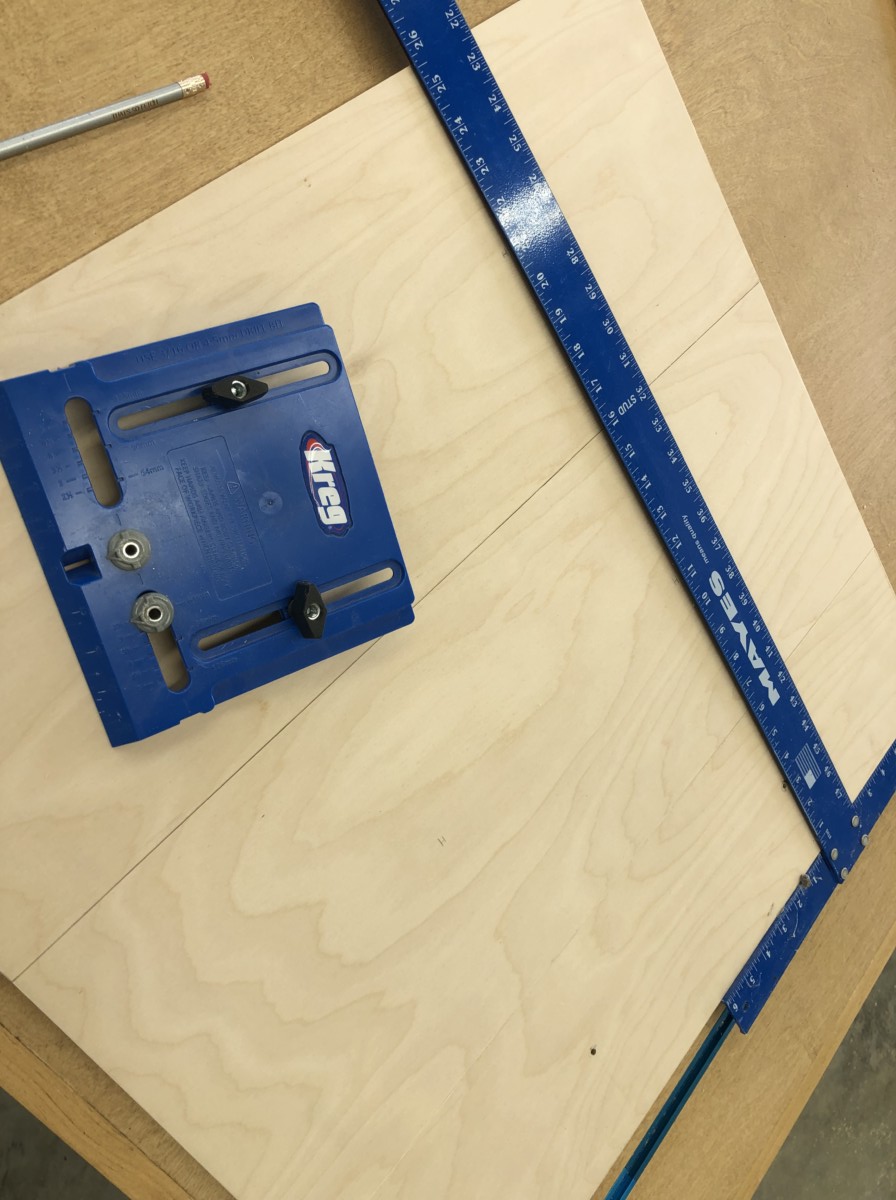
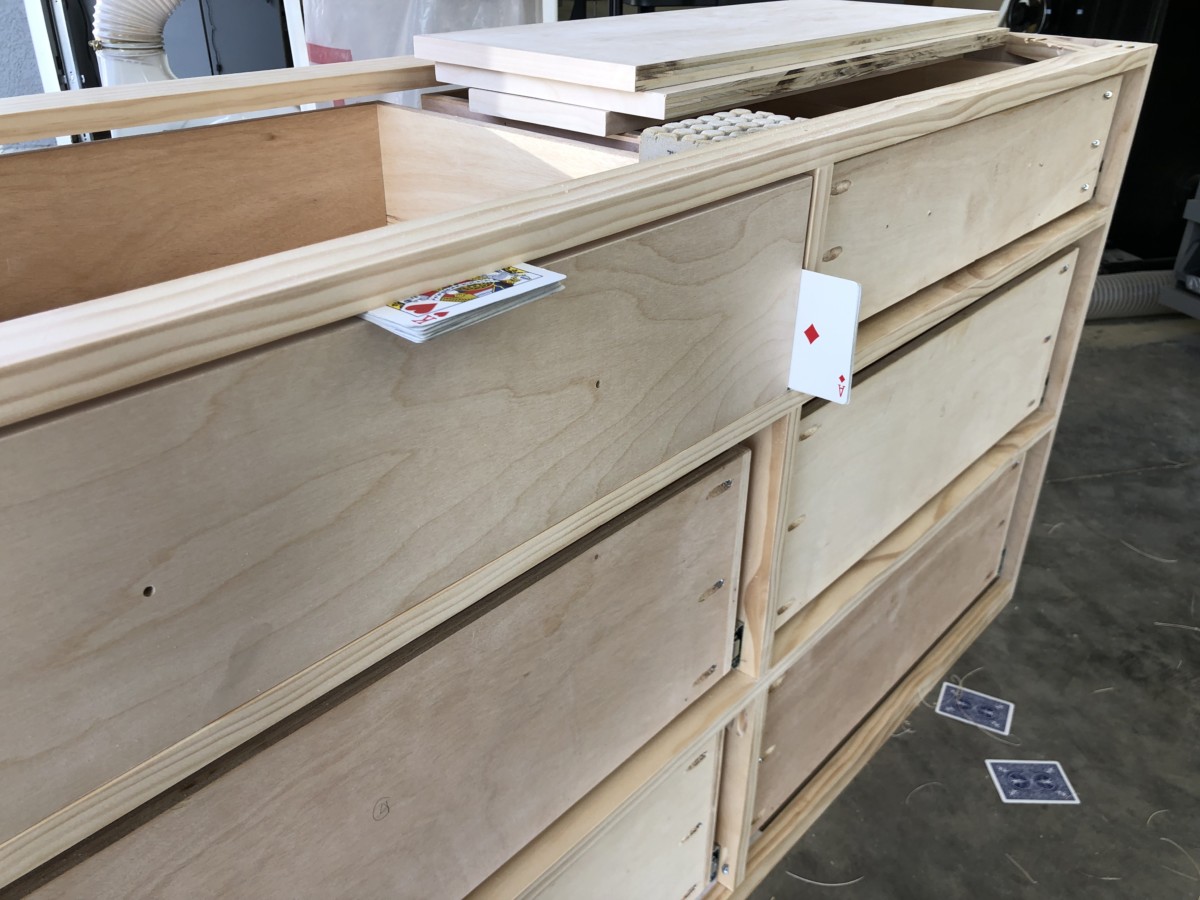
 When installing drawers, I like to use the ol’ trusty card trick. It’s a quick way to get even spacing when installing an inset door. If you want to see how I do this, just watch this
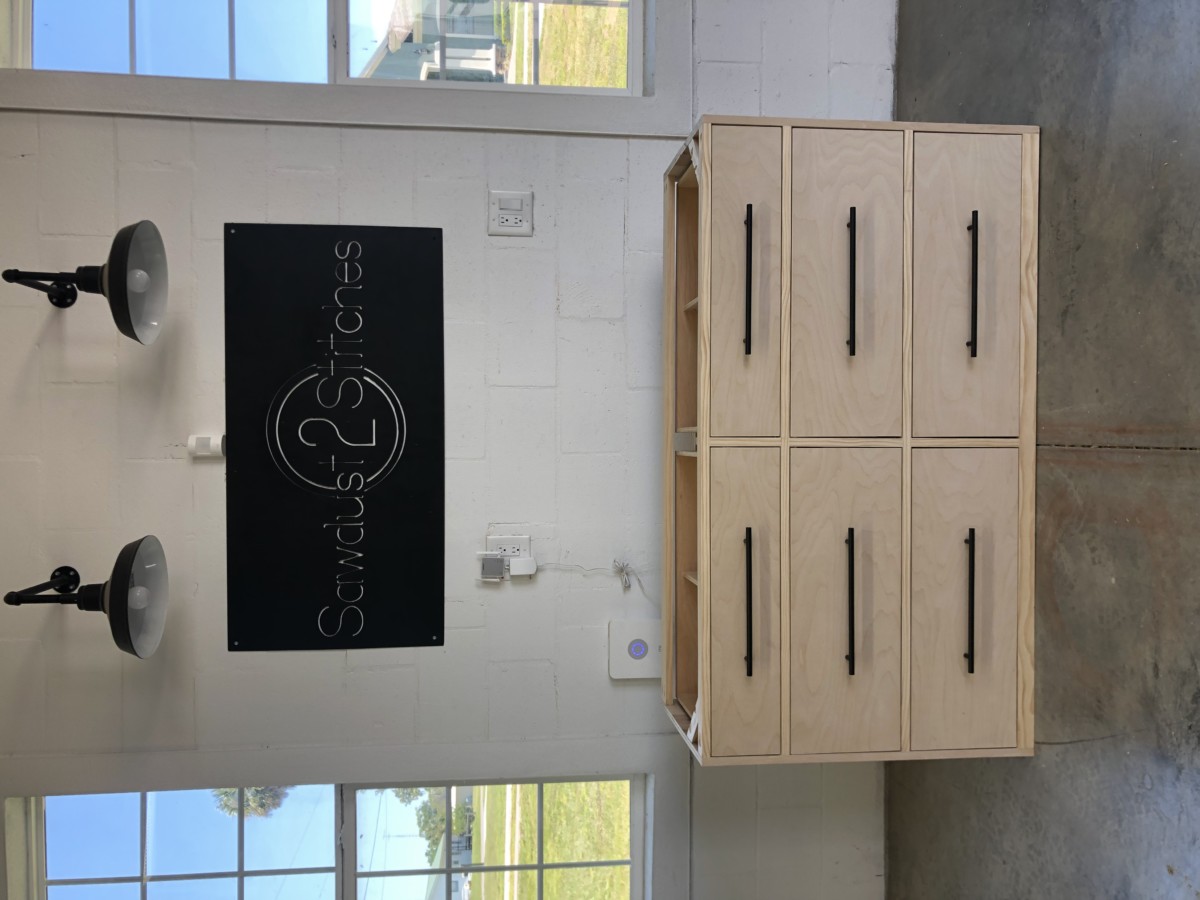
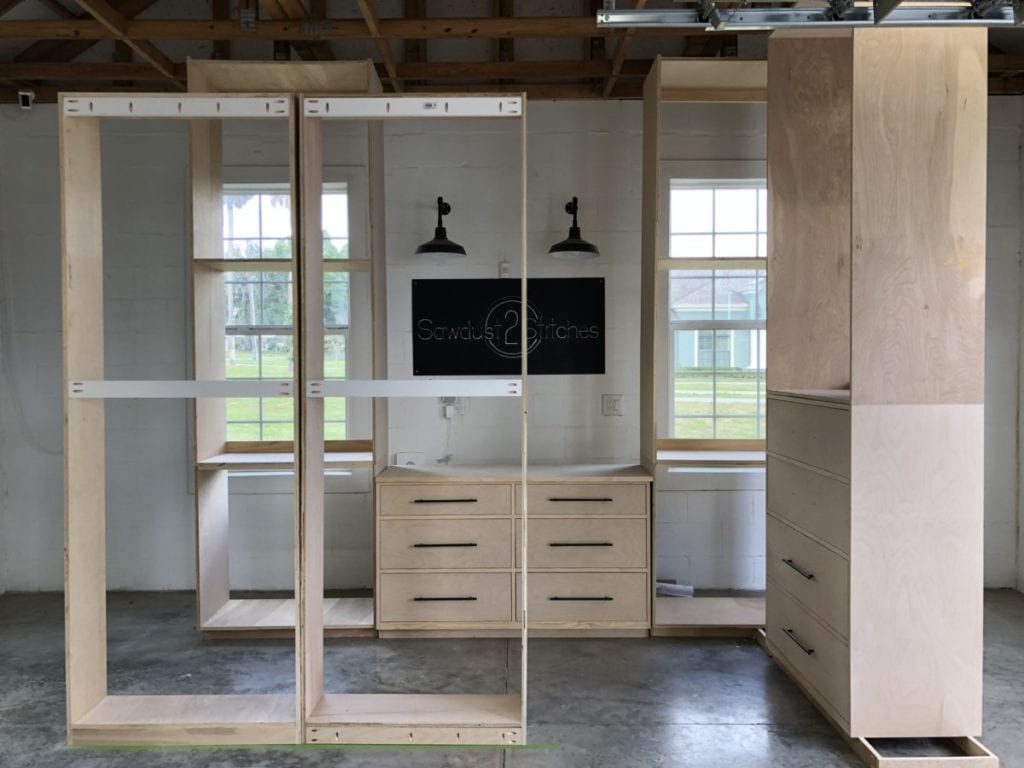
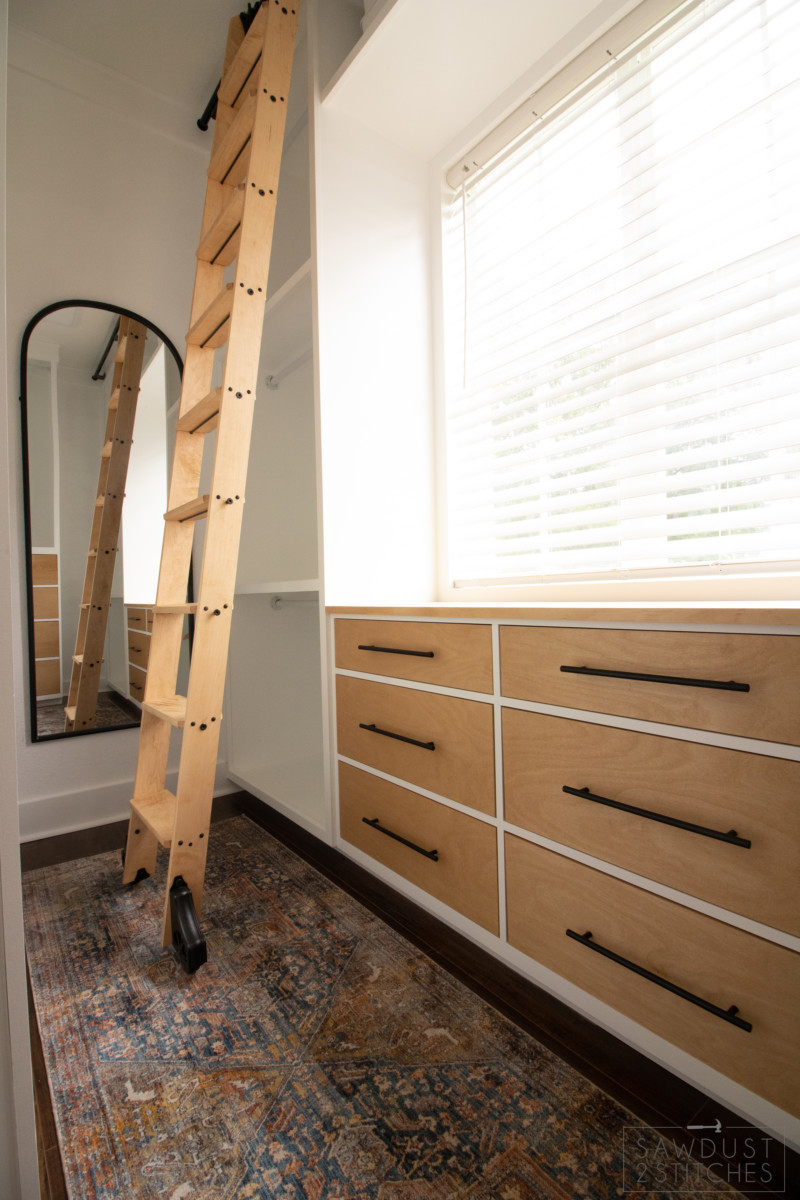
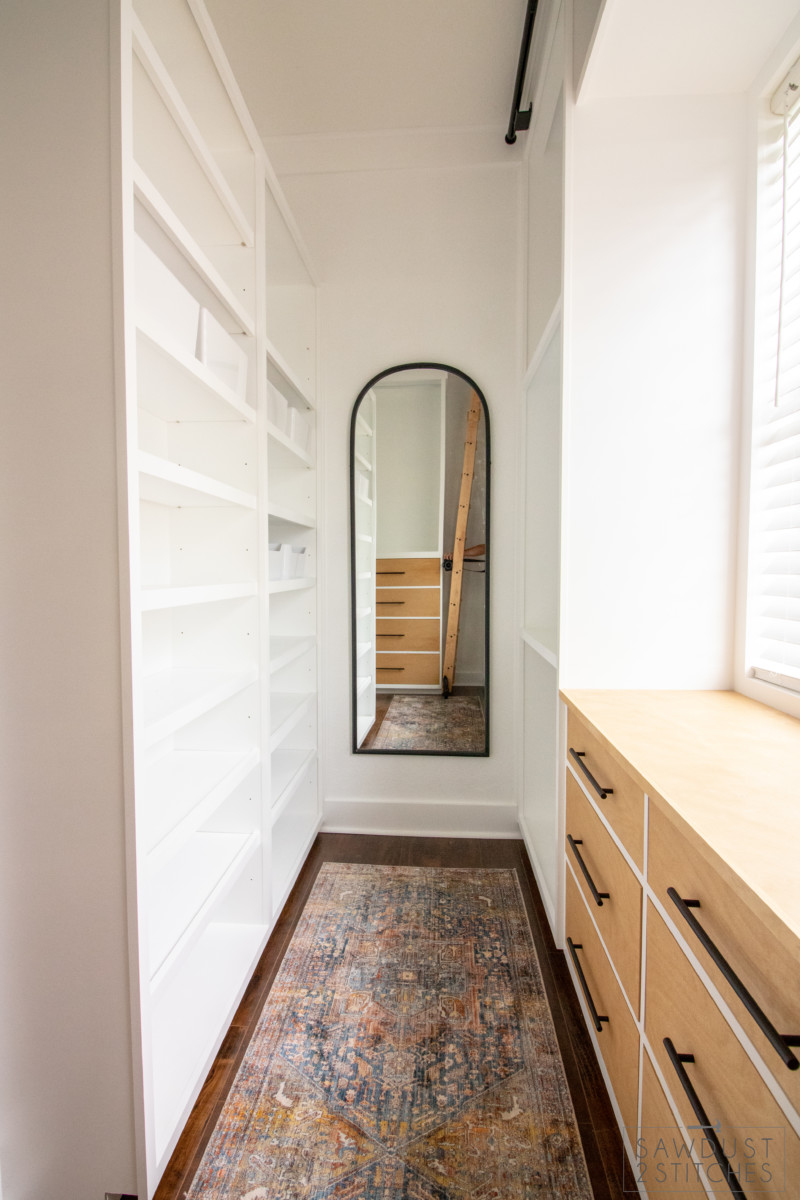
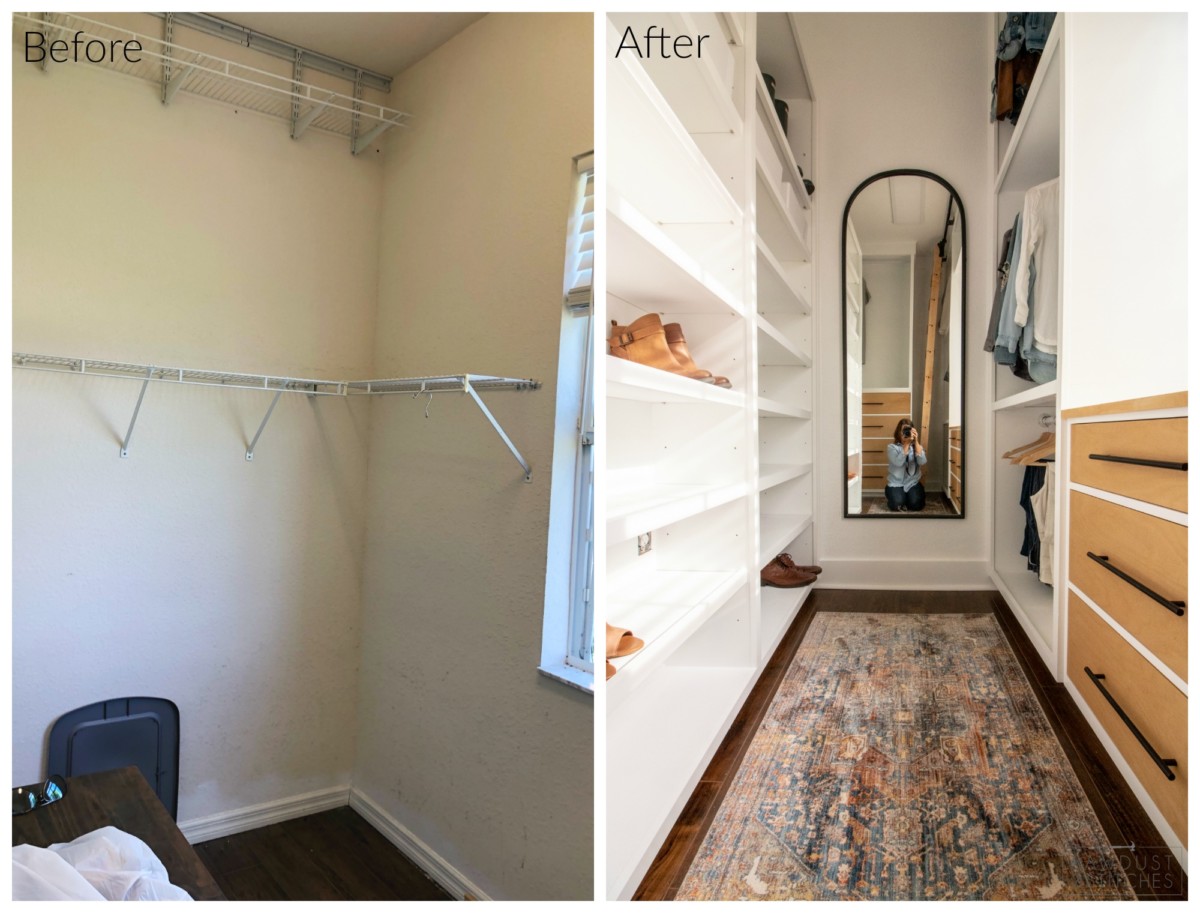
 That pretty much sums it up! If you want to build one of your own, I can help you with that! The build plans will be up and available shortly. In the meantime make sure you follow along on Instagram Stories for more behind the scene sneak peaks of the master closet makeover!
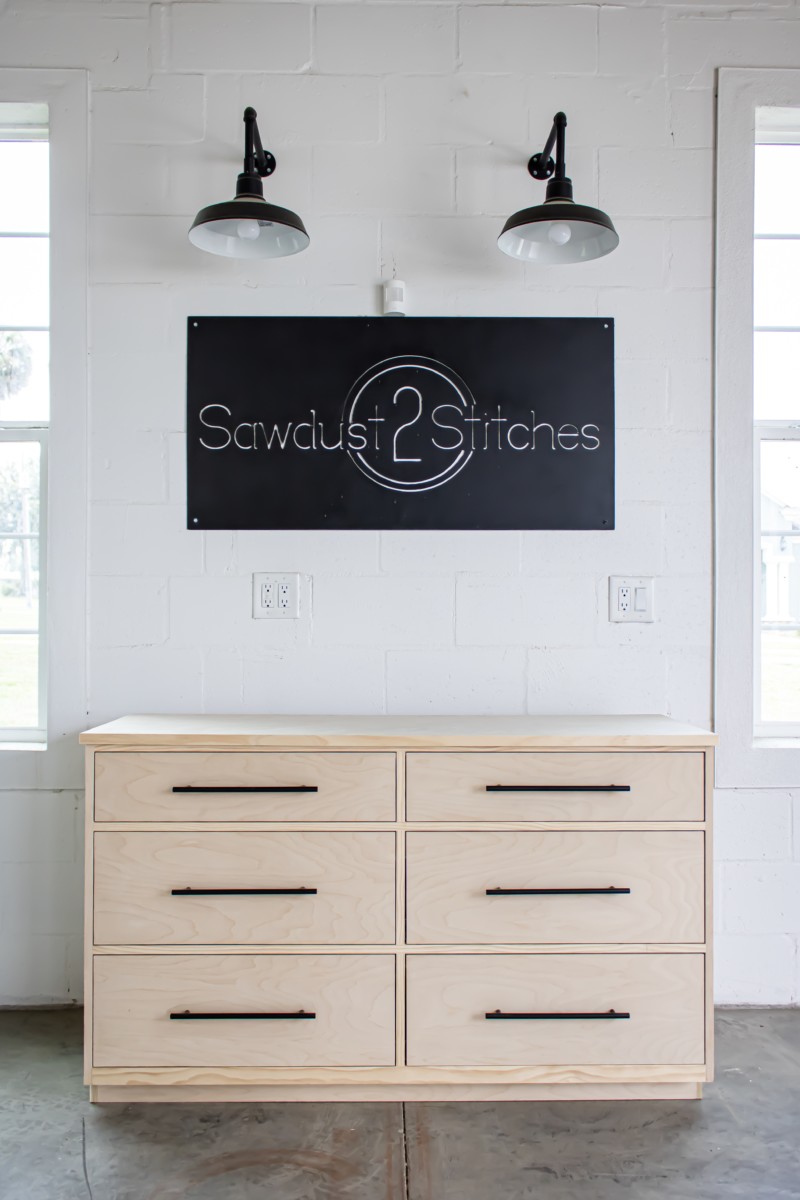
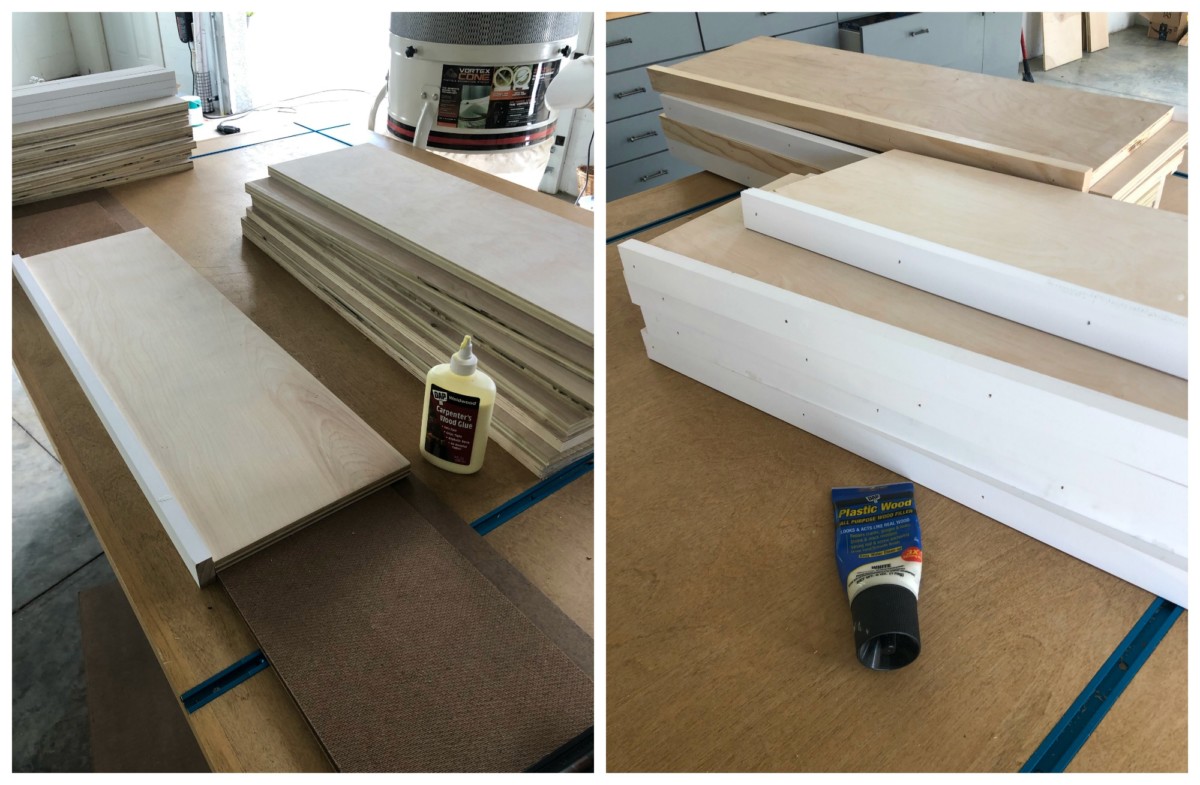
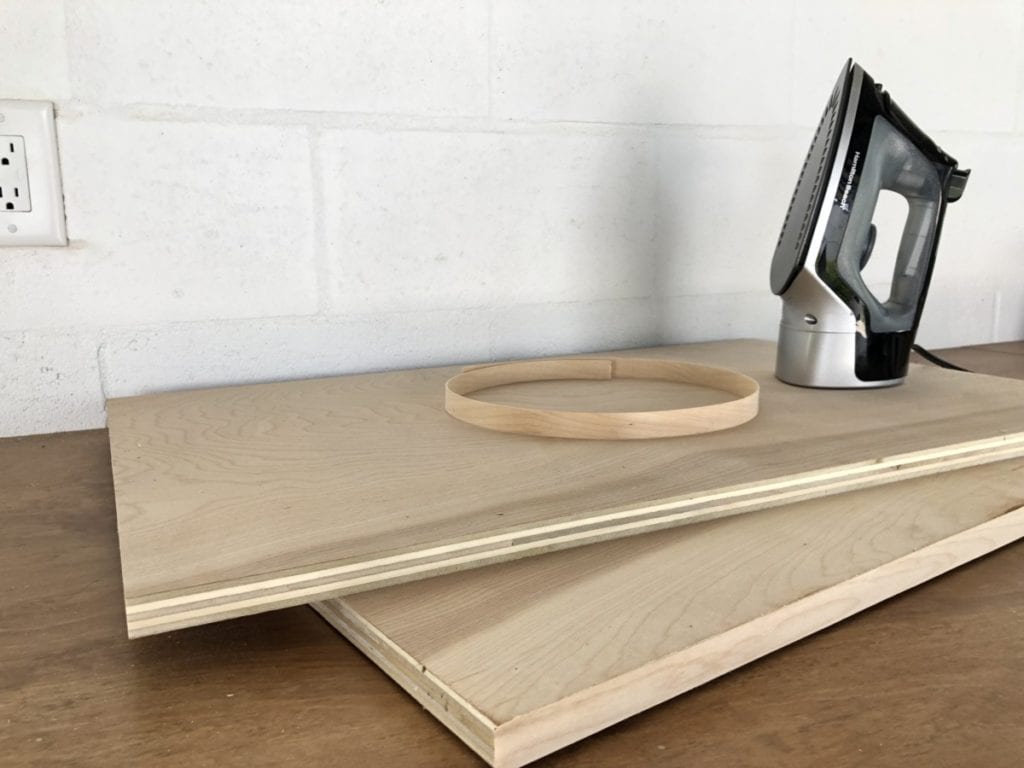
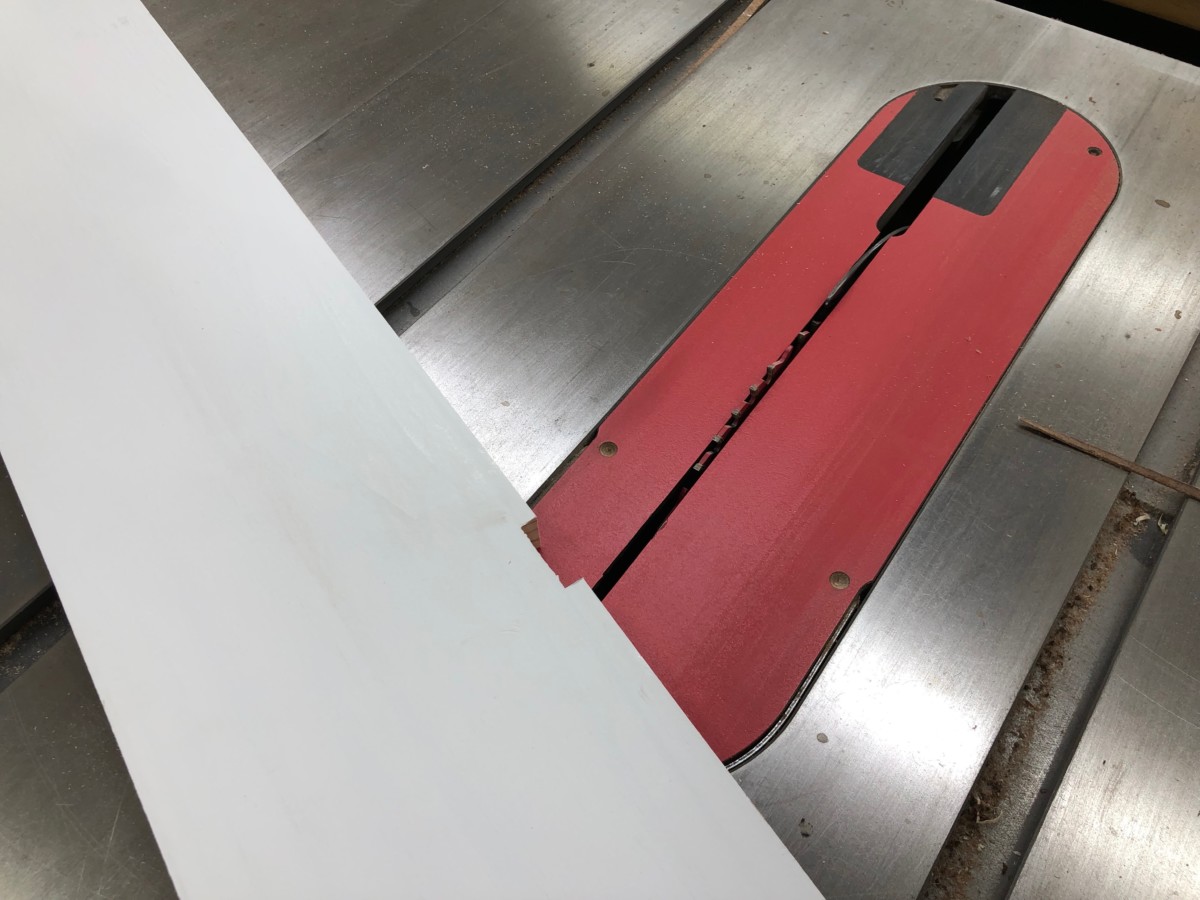
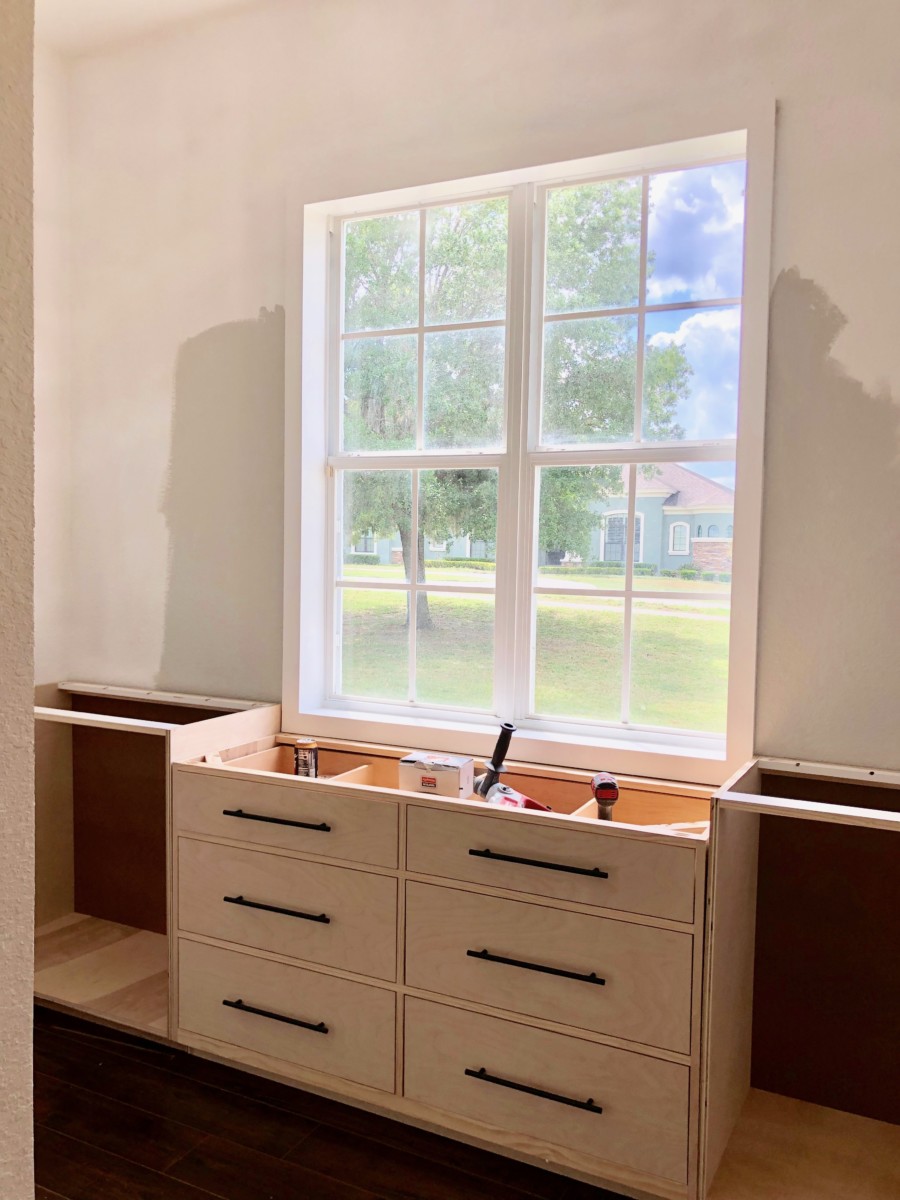
 Next I took the measurements and transferred that to my 1/4″ MDF board and cut them down on my table-saw.
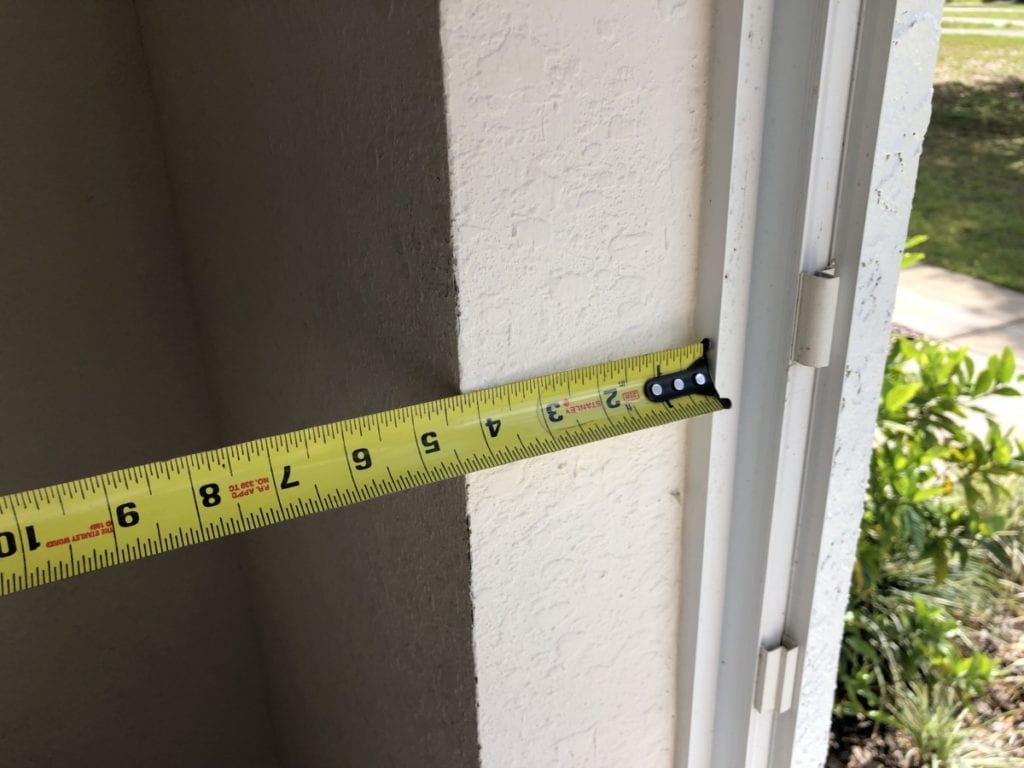
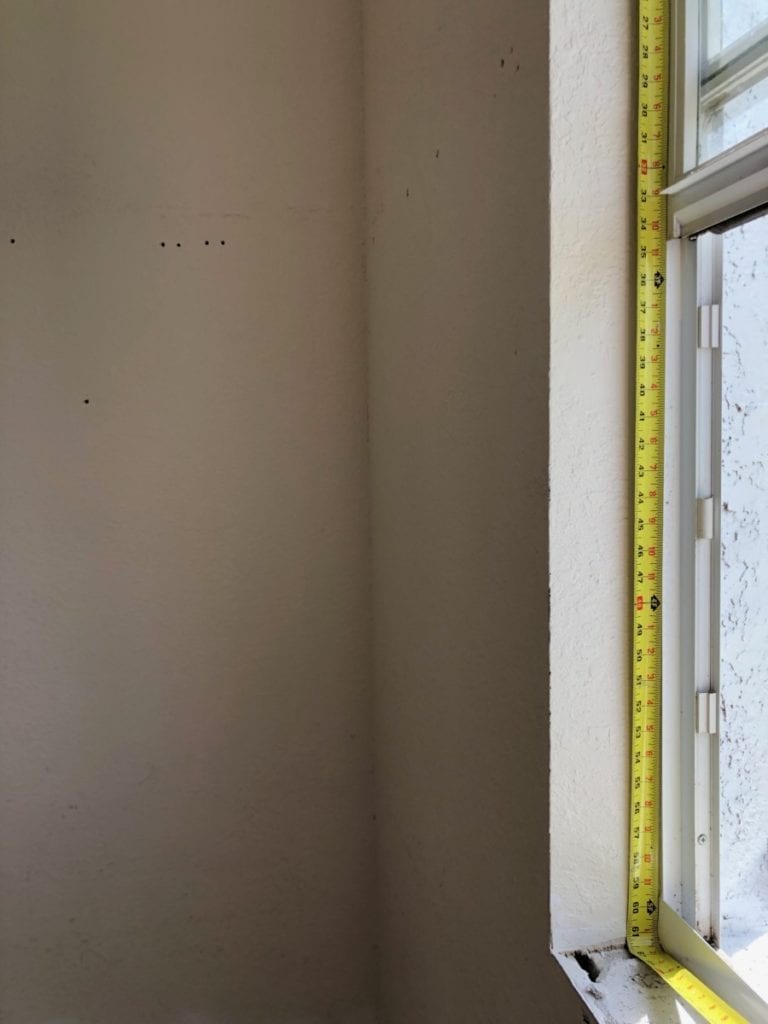
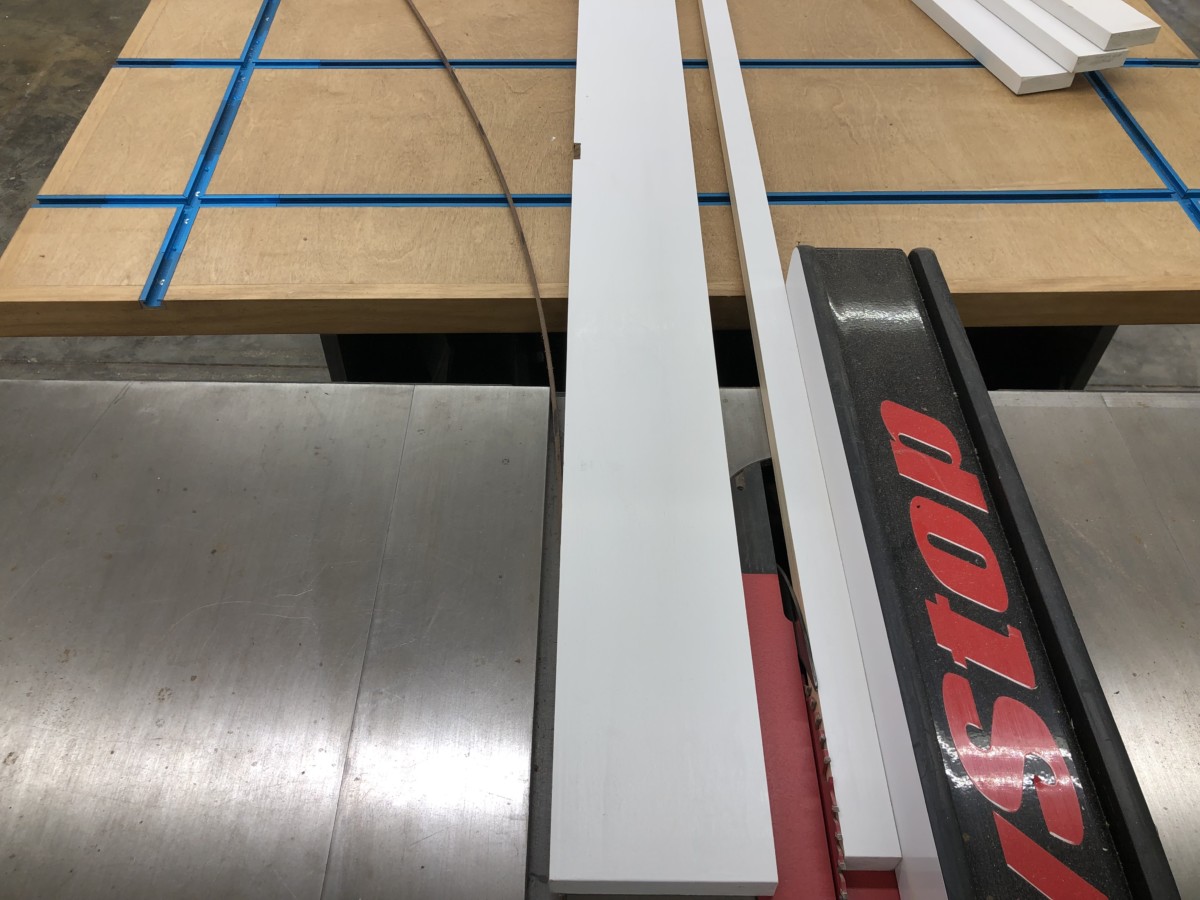
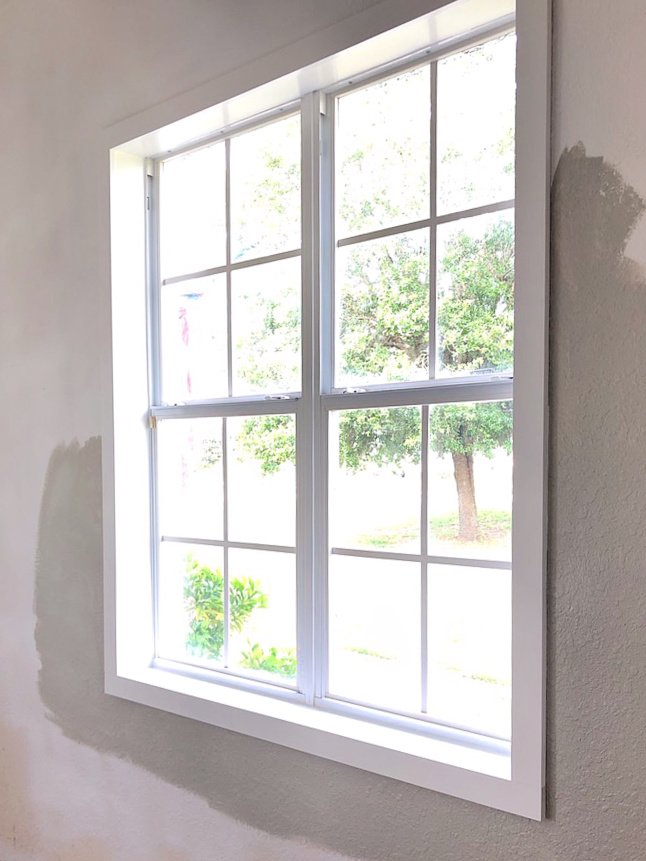
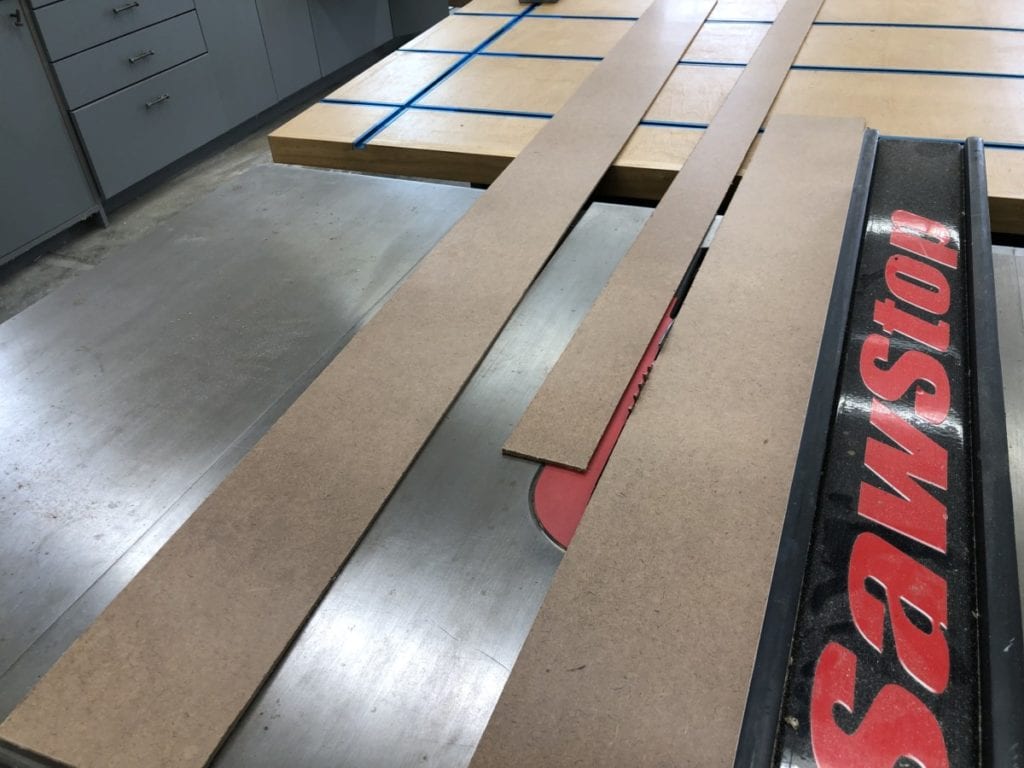 Once the width is cut you can move on to the lengths. I like to cut these to fit. As we discussed before, sometimes a home isn’t square so the measurements are a little off. Well I found my windows to not be square so I had to make some minor adjustments. I actually prefer cutting to fit. So I brought my handy little trim miter saw and just cut everything in place.
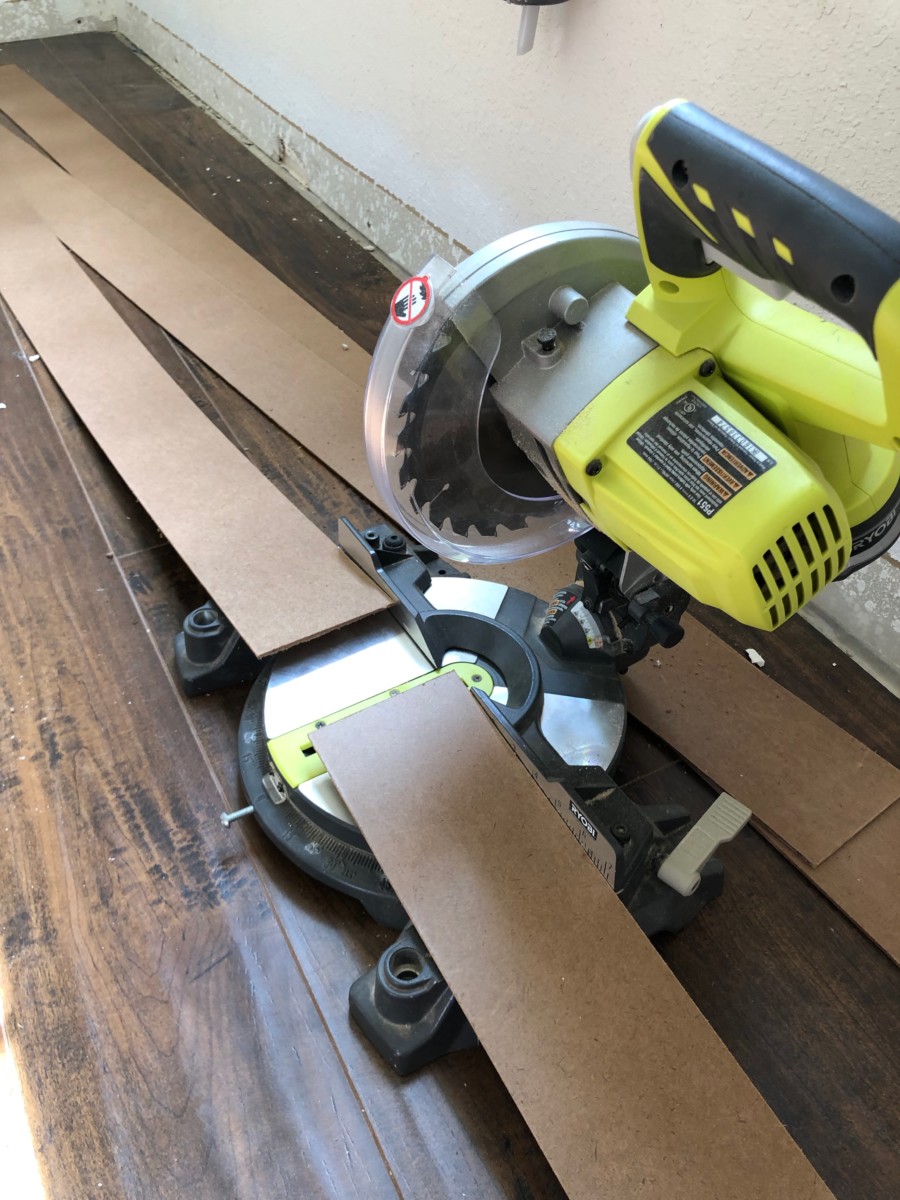
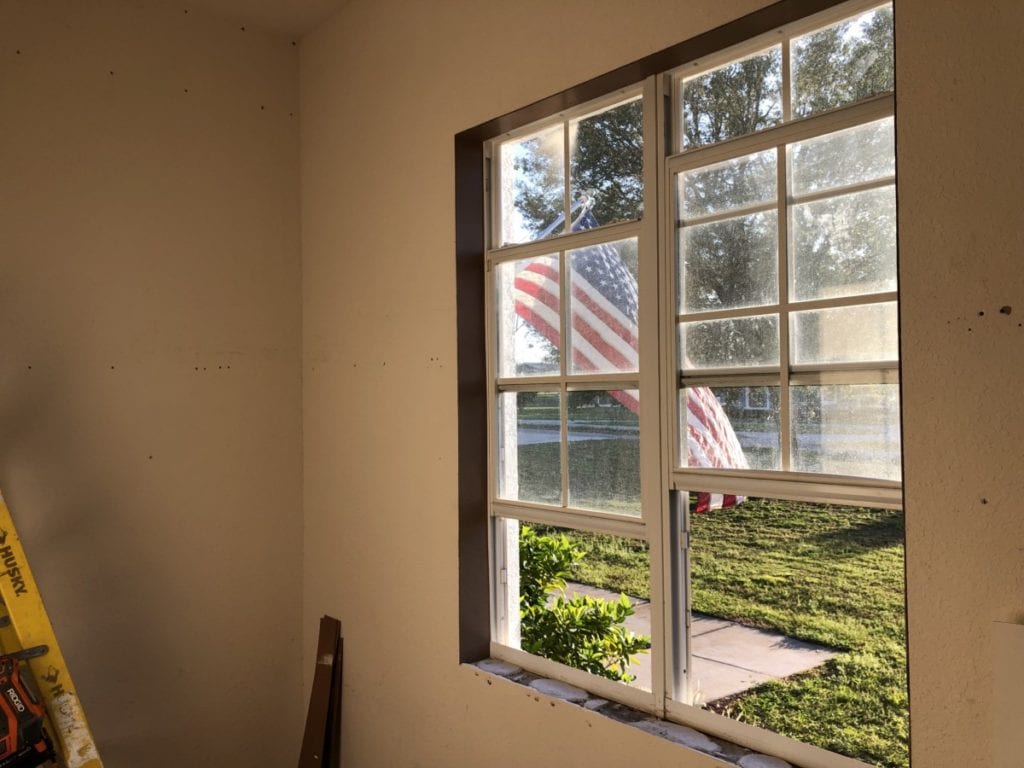
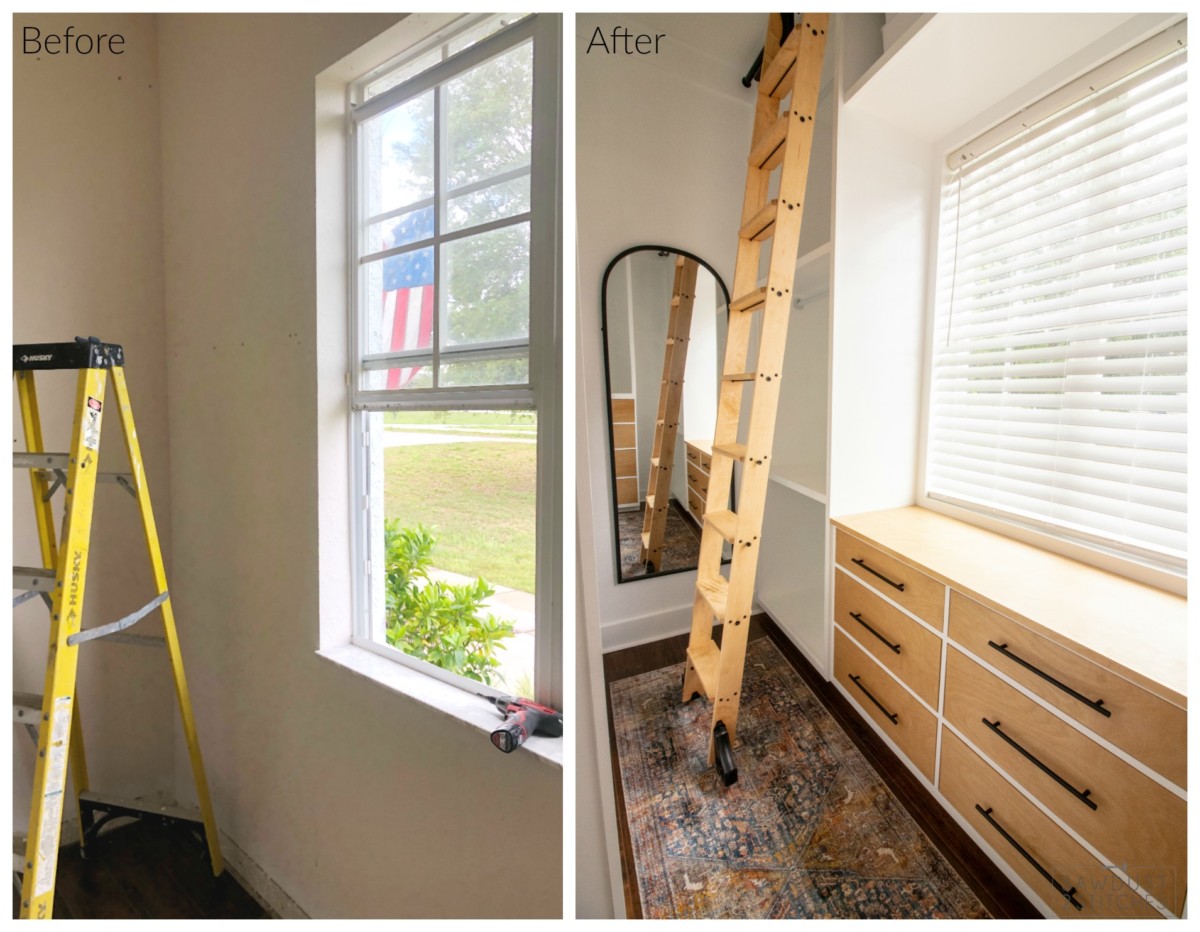
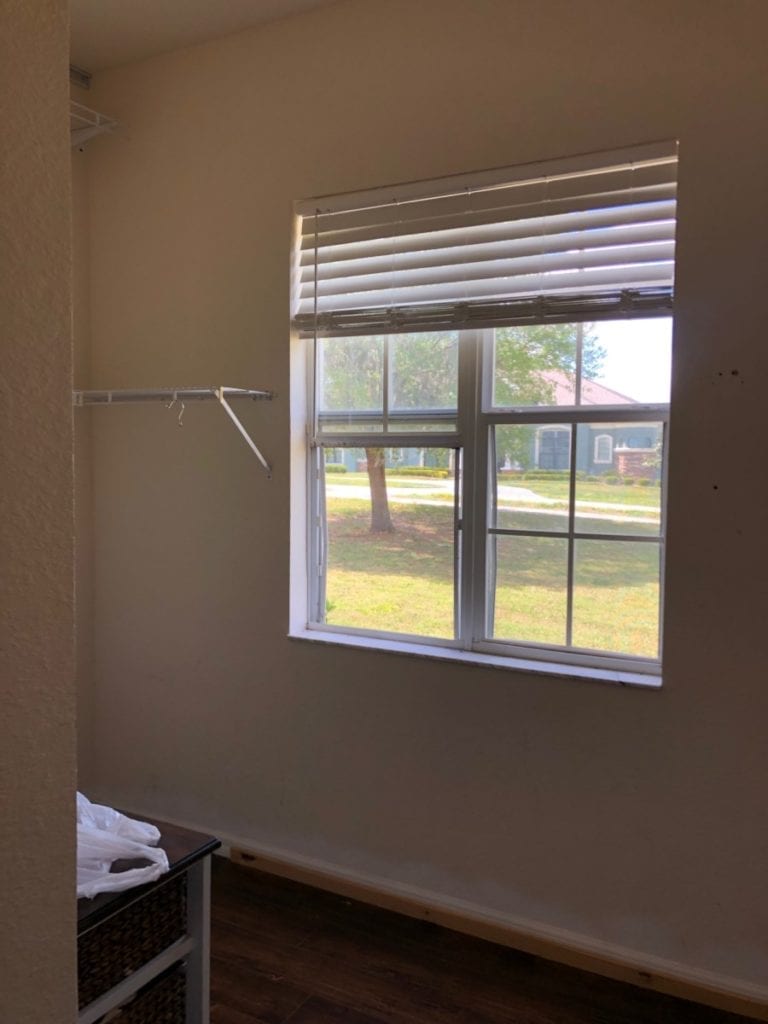
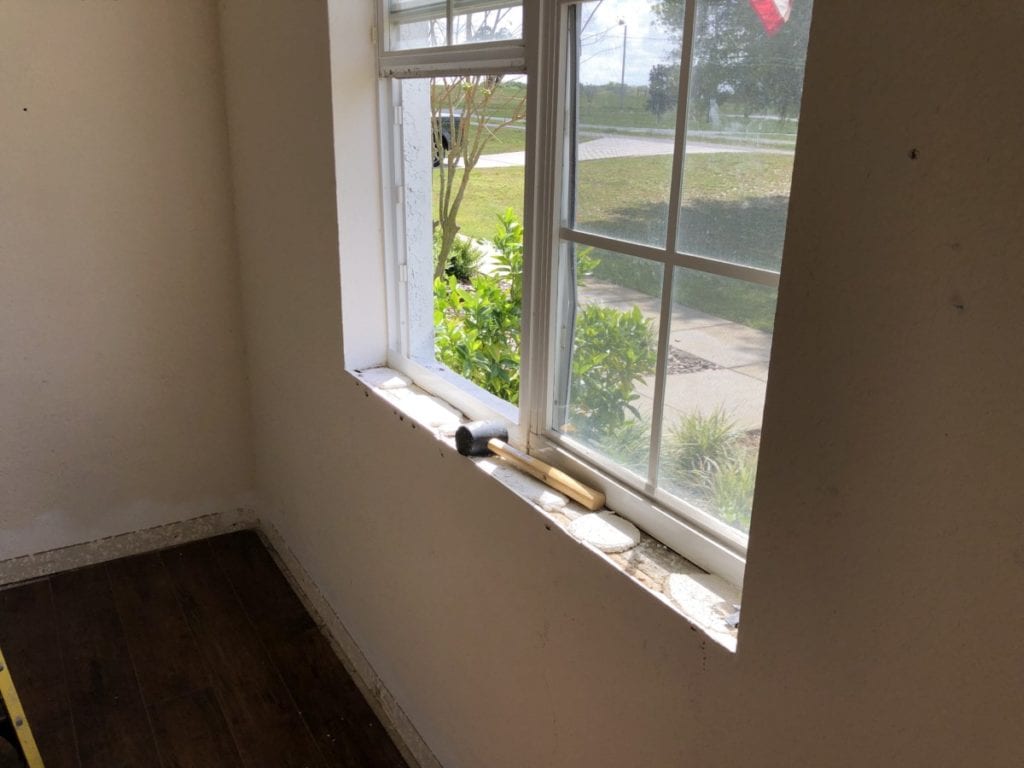
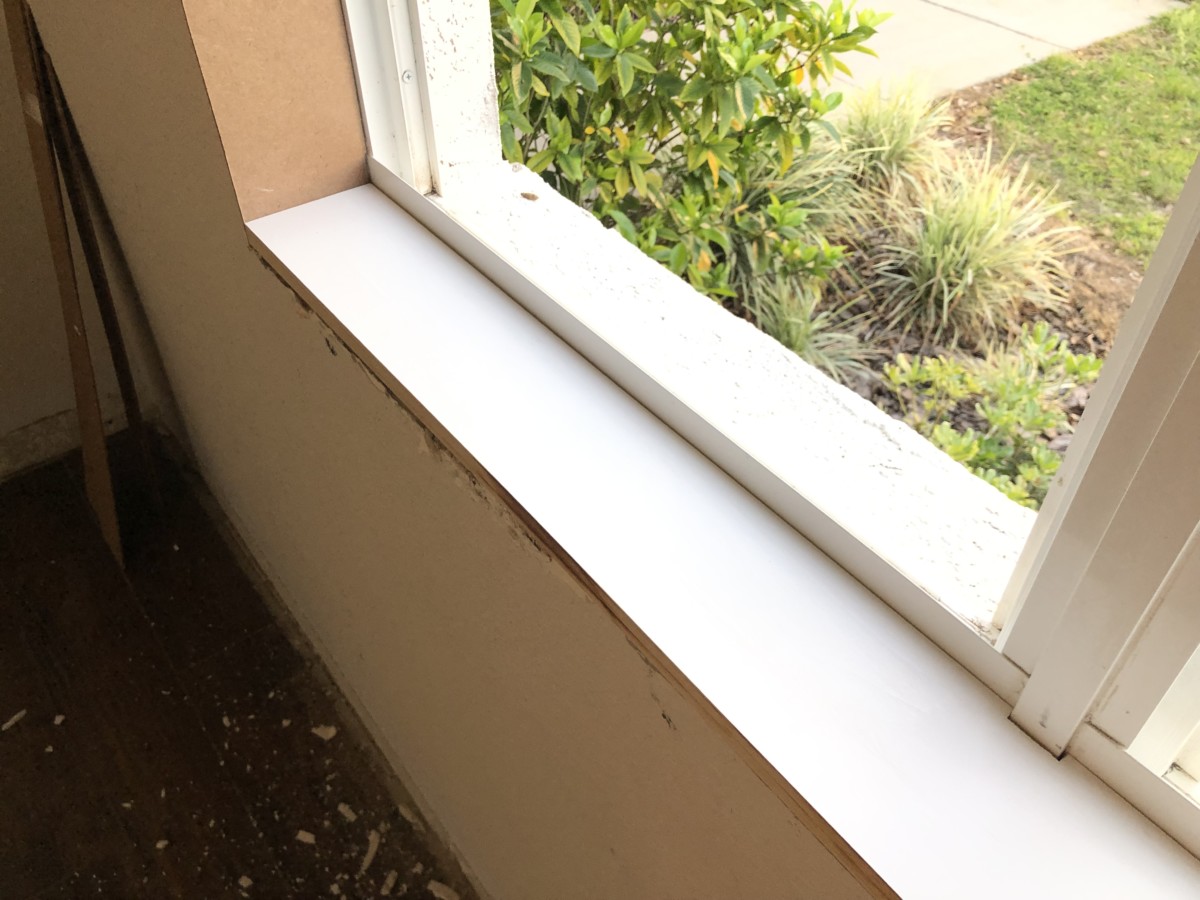
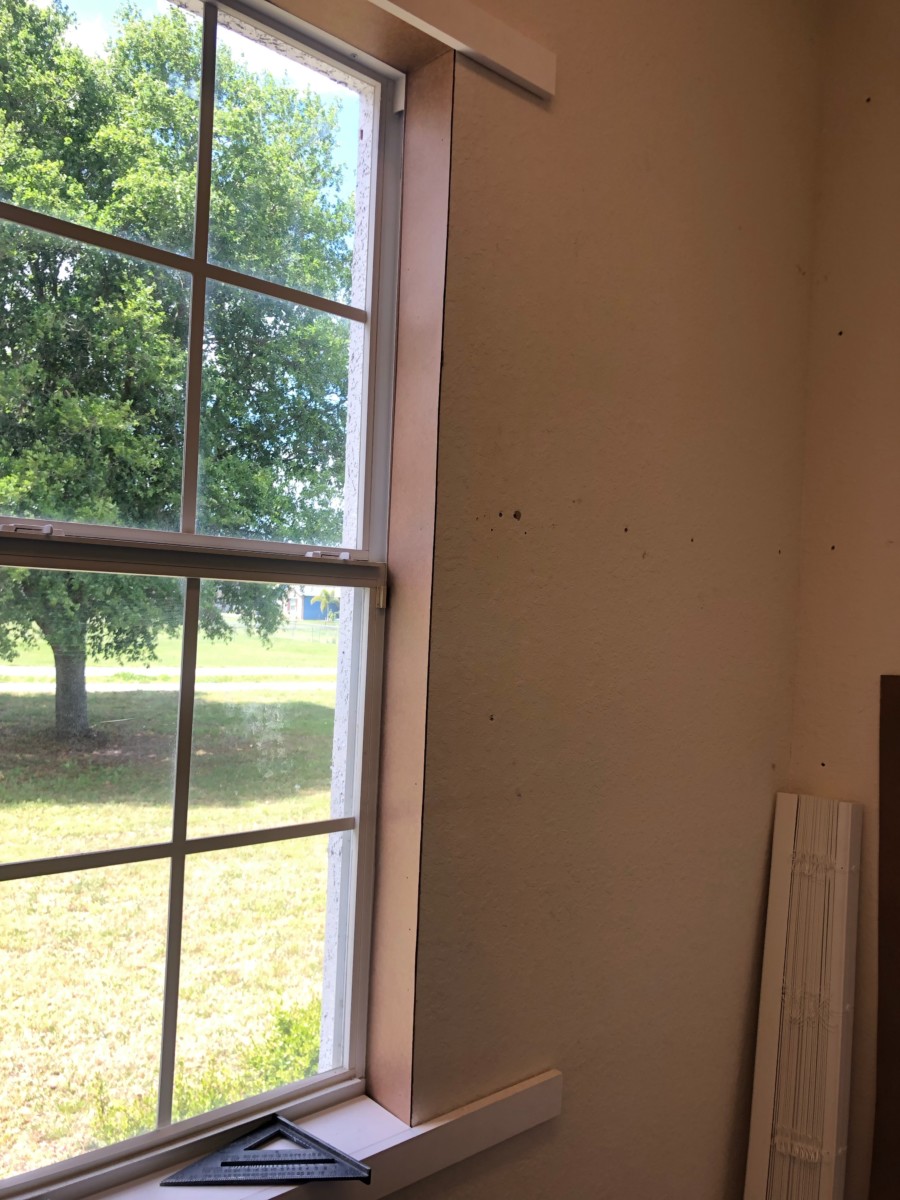
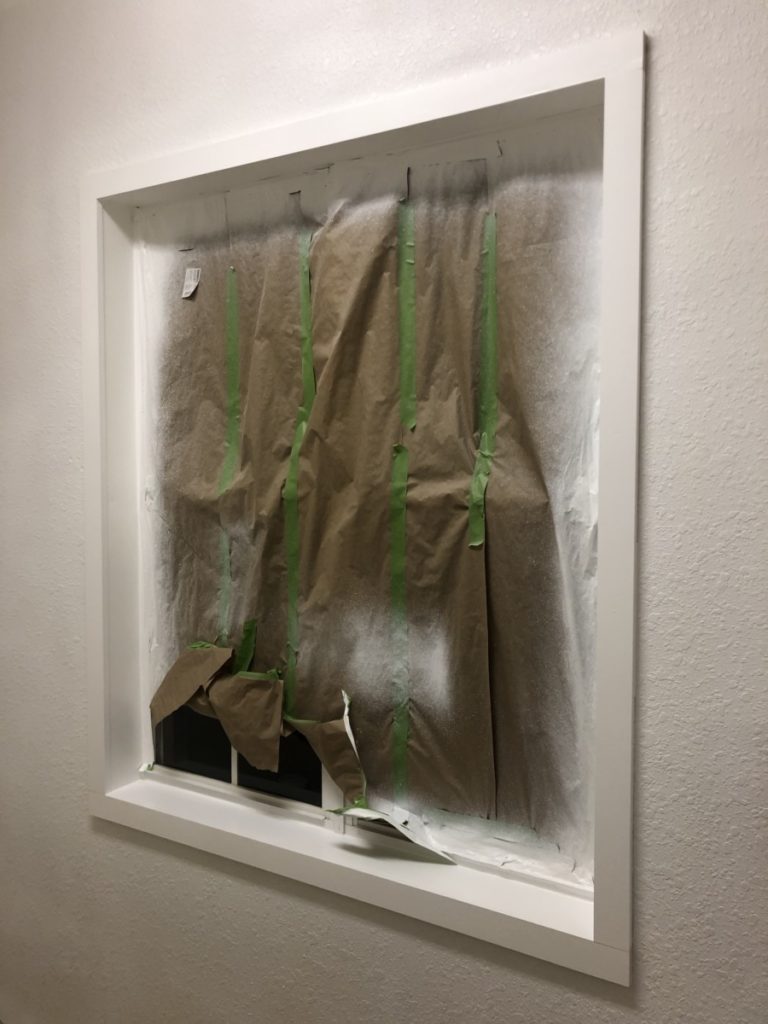
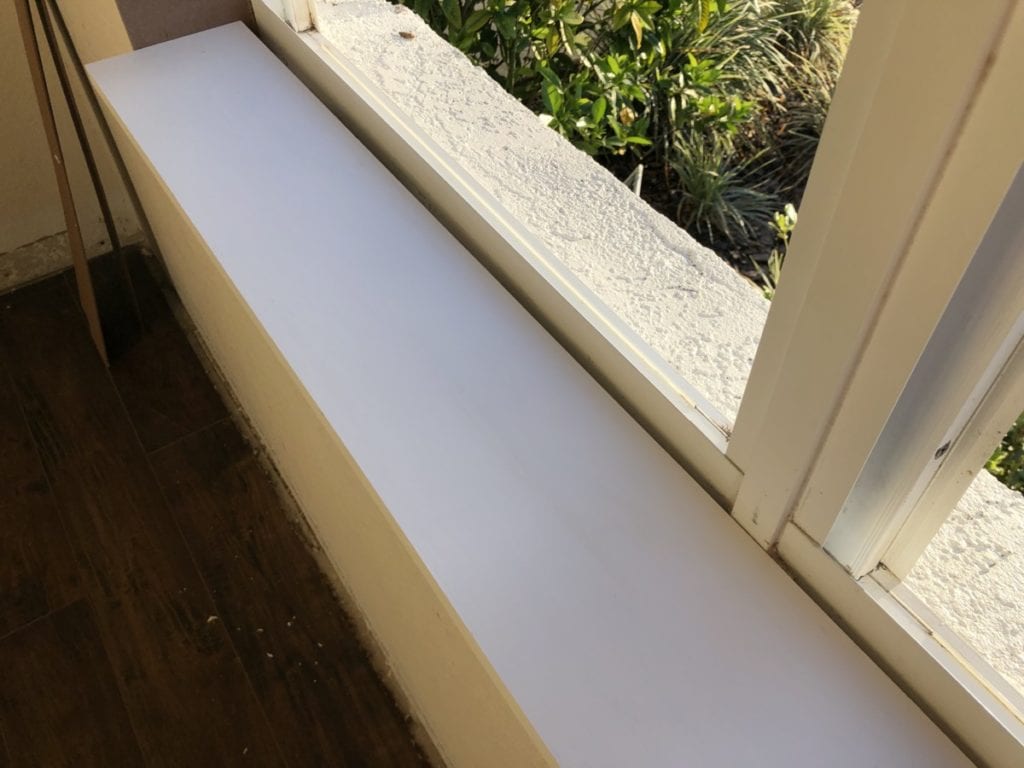 Ok, so I begin my cutting my window sill board to fit. Once fit I have a few other dimensions to work around. In this case the window itself was a double window and there was a center rail that cut right into the middle of my sill board. So while in place I transferred the dimensions to my board using a pencil. (Pay no attention to the look of absolute filth in the window. That was where the sill was and below is concrete and residue. All is hidden or cleaned up now. )
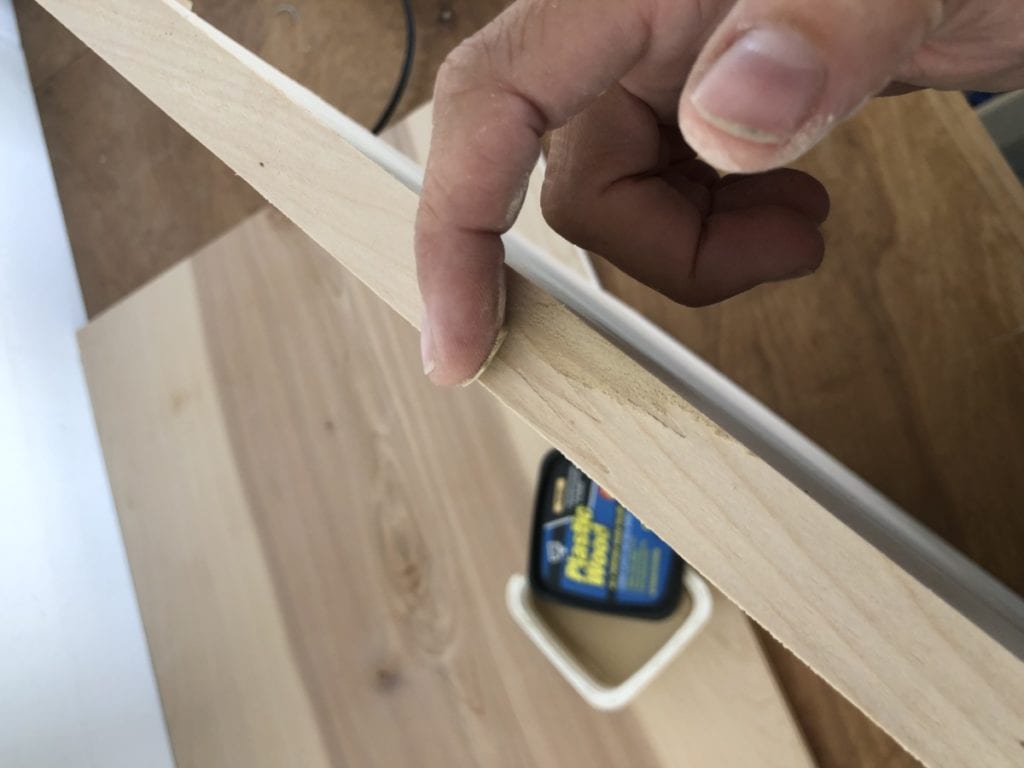
 Once the Plastic Wood is dry use a foam sanding block to level the surface. So long as you didn’t slather it on too heavily this should be a fairly quick and painless process. Then wipe it down thoroughly with a clean damp cloth.
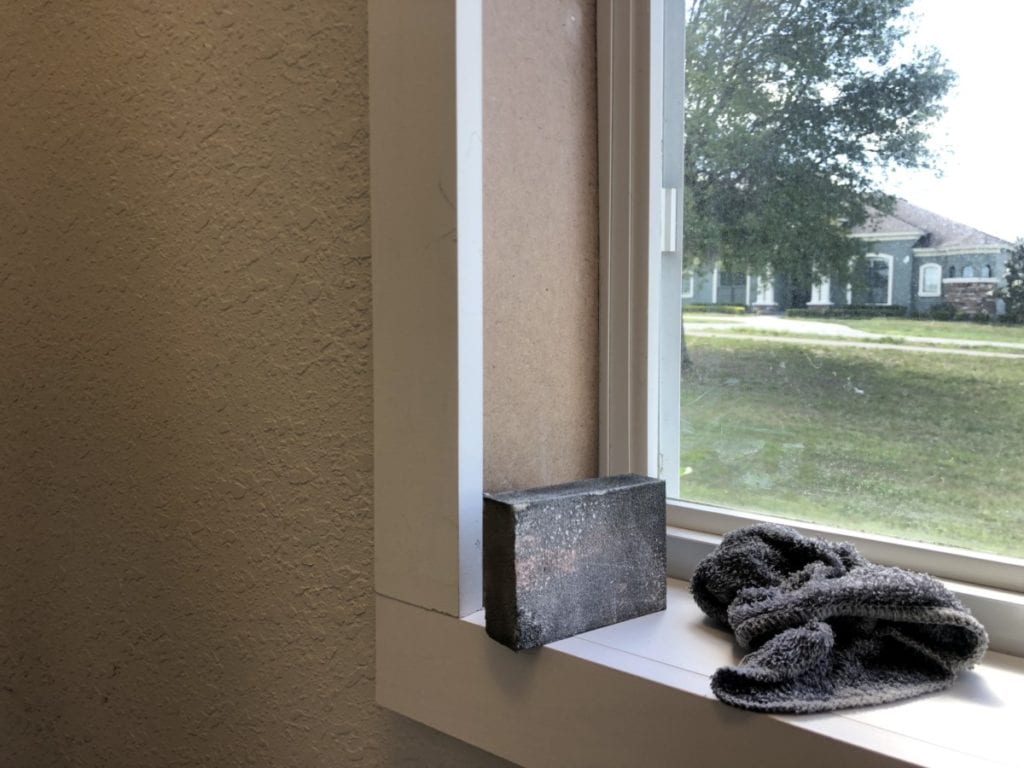
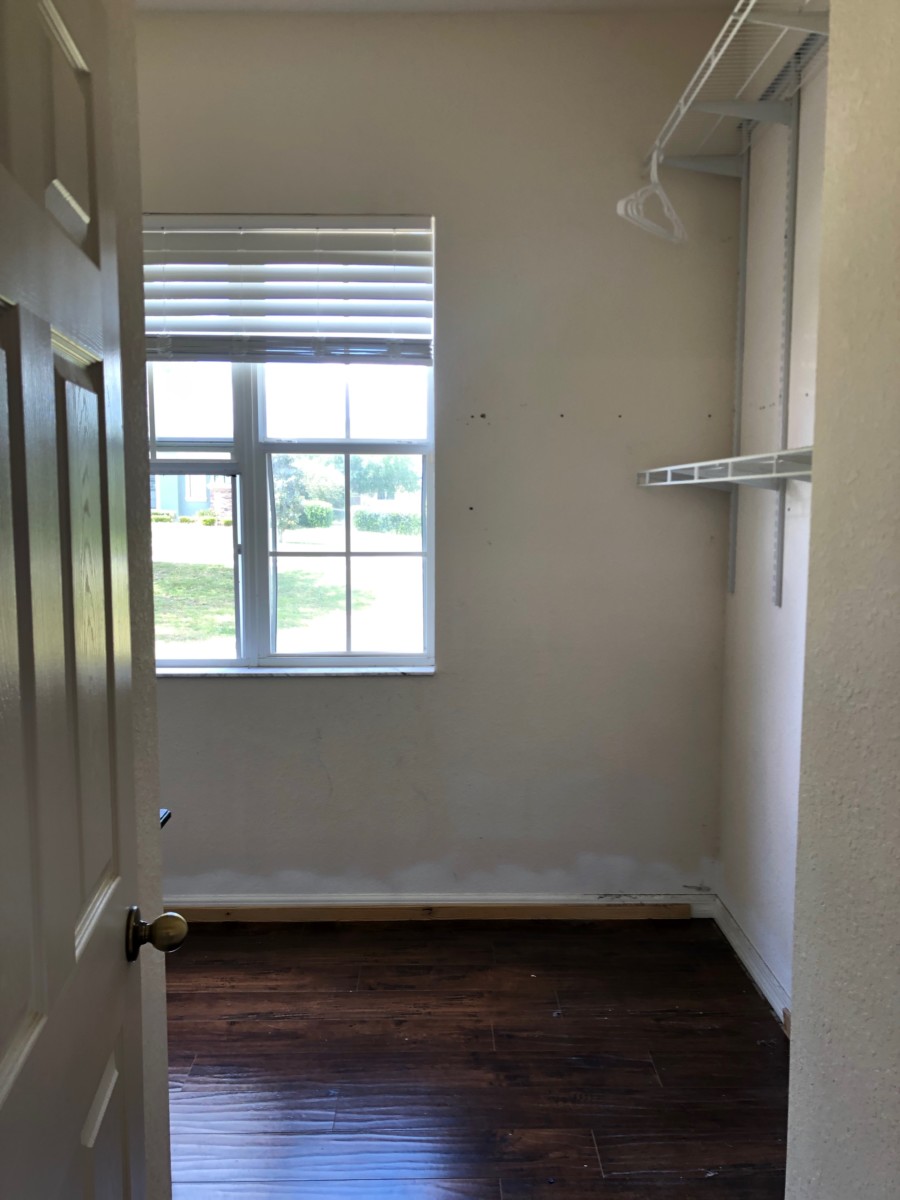
 In between coats of paint I took the opportunity to start preparing the rest of the closet for renovations. I wanted to get it down to “ground zero”. In order to do that I had a lot of holes to fill. I mean A LOT! So. I pulled out some Alex Plus Spackle and had them all filled in no time flat.
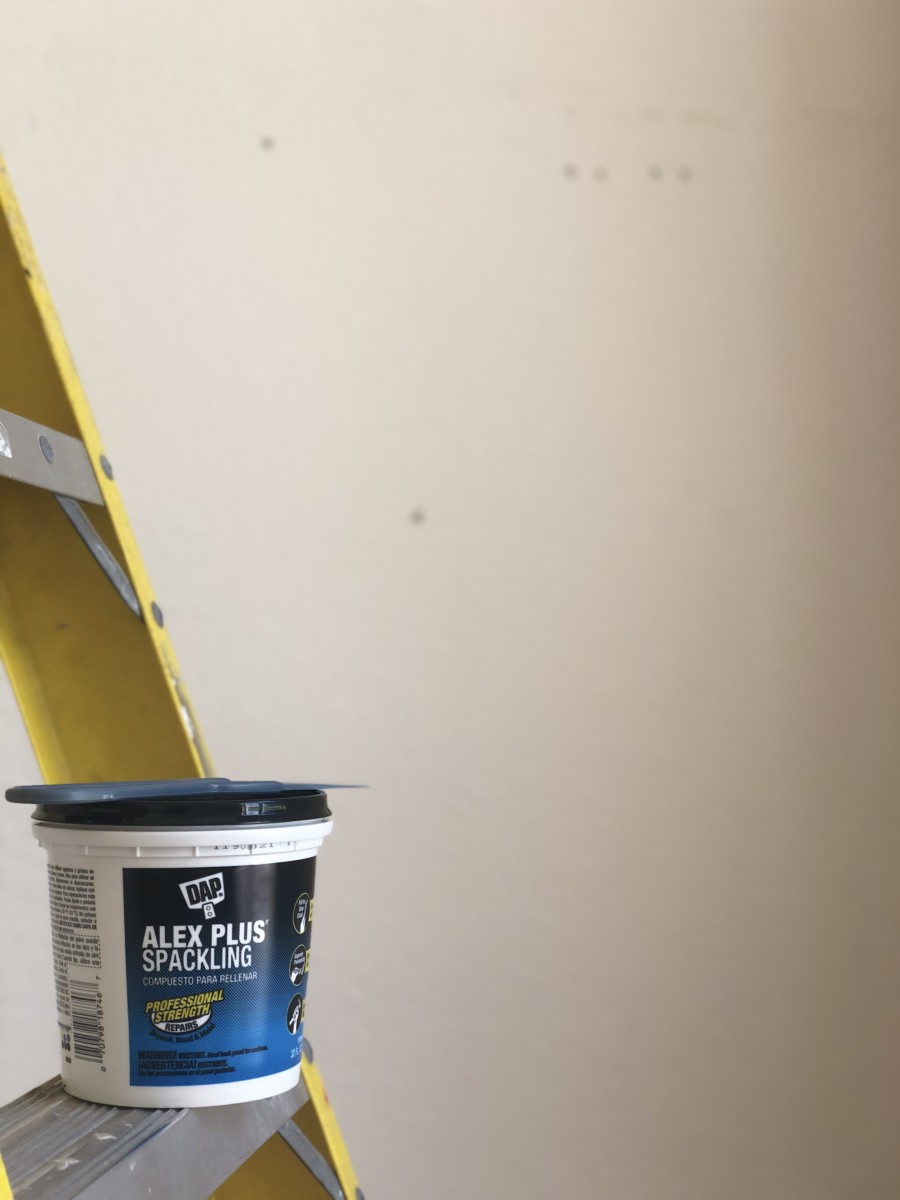
