• Blog
  • About
  • Press
  • Privacy

Let’s be social!

  • Skip to primary navigation
  • Skip to main content
  • Skip to primary sidebar
  • Skip to footer
Sawdust 2 Stitches

Sawdust 2 Stitches

  • Tutorials
    • Around the House
    • Organization
    • Wall Decor
    • Sewing
  • Makeovers
    • R.V.
    • Room Makeover
    • Furniture Makeover
    • Decor Makeover
  • Build Plans
    • Small Builds
    • Wall Decor
    • Dresser
    • Tables
    • Seating
    • Shelving
    • Hidden Compartment
  • Seasonal
    • Summer
    • Spring
    • Fall
    • Winter
  • Home Tours
    • First Home
    • Current Home
    • 70’s Ranch Home
  • Workshop

Blog

Paver Patio Makeover

May 27, 2014

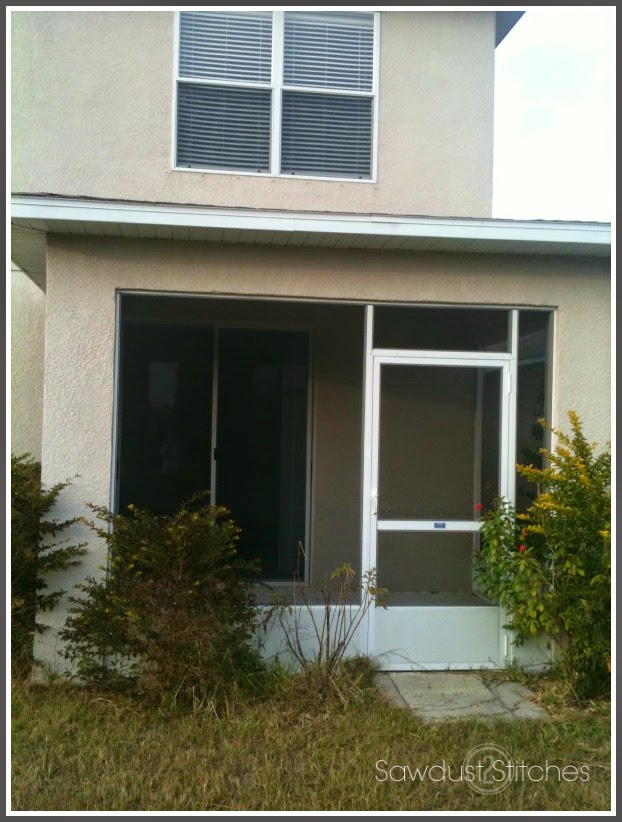
Have you wanted create a beautiful backyard patio,  but the cost was a hindrance?  Well,  I have been there, and this is what I did.

It’s no small secret that  I would prefer to work on INTERIOR home decor, BUT my Sister is a talented horticulture landscaper and  gave me the push I needed!

   Here was my  problem,  but it had potential.

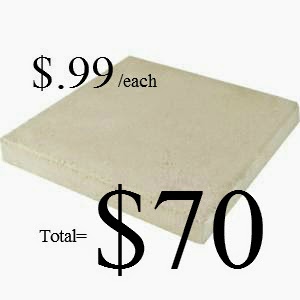
Let the brainstorming begin! I found that I kept gravitating towards this style stone:

 
Pretty sure the gazebo would take up my ENITRE back yard,  but I loved the look of the stones.
  
 This size stone paver was a  more realistic option. It would be more to scale with my size yard. However, I didn’t love the straight uniform lines.  I wanted my patio to have a little bit of variation.

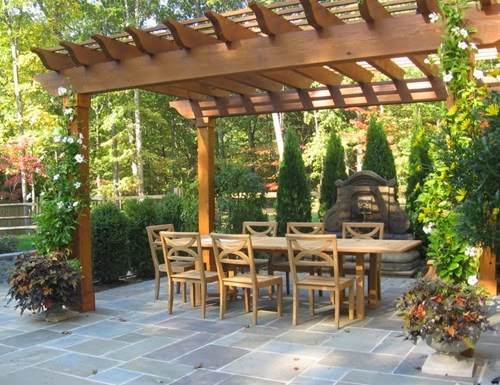
This idea seemed ideal,  the right size stone,  but it had staggered lines, perfect!  Next? Find the stones…

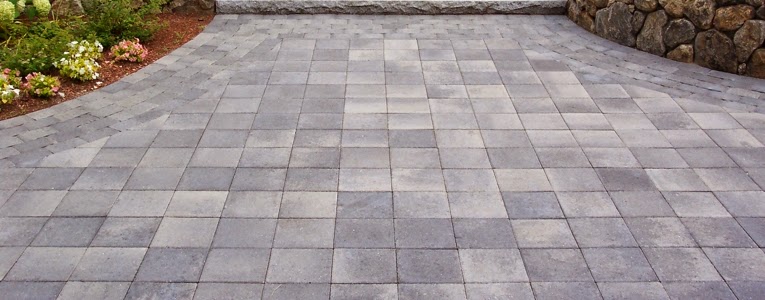
Well I found them alright…

I found some beautiful stone pavers that would be perfect.  Problem?  To complete a small  9’x8′ patio it was going to cost  $336 in stone alone!  Hmmm….  It was hard to justify spending nearly $5.00 per stone, when there were concrete pavers with the same dimension for only $0.99.

I  actually  walked right past these concrete pavers the first time. I had seen these bad boys in action and they always looked dirty to me.  They also had a brick red option, but that didn’t interest me at all.
After  brainstorming for a while I decided to try an idea out.  ” I wonder if I can stain these ?”


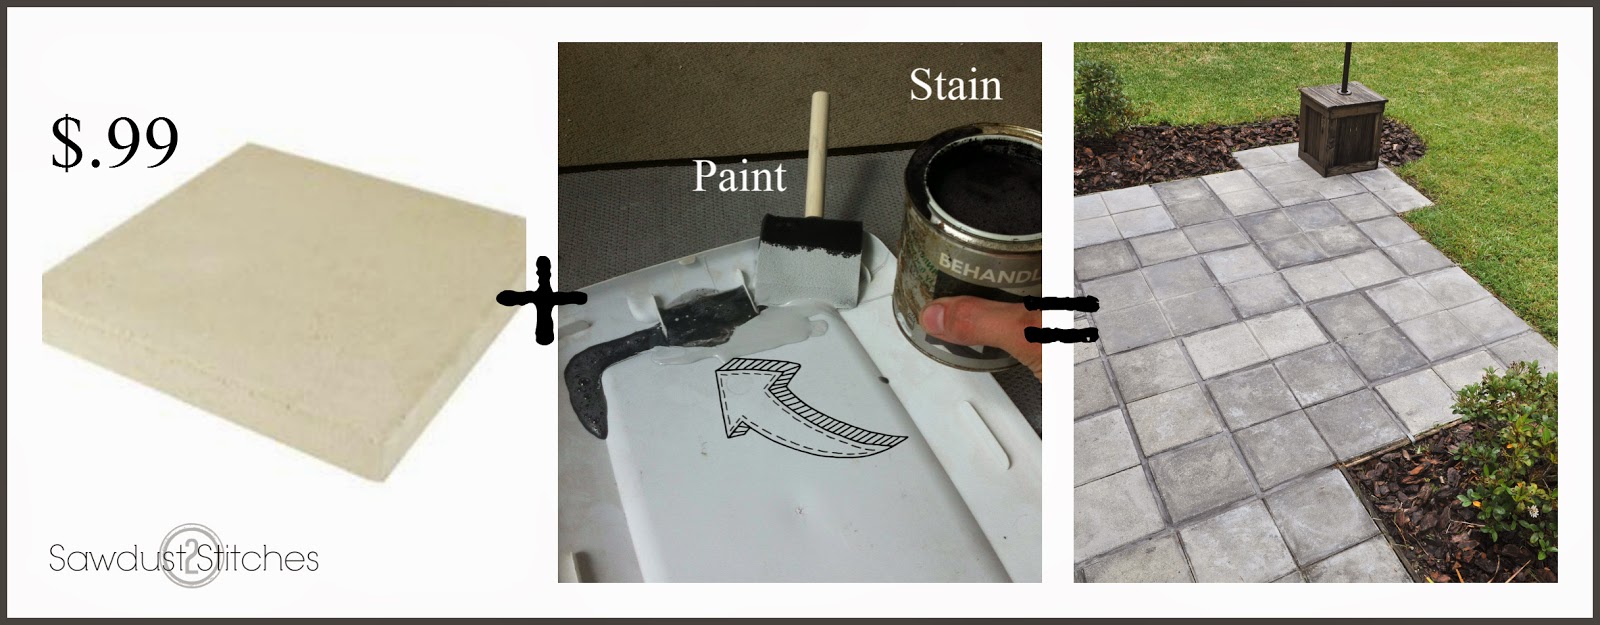
Turns out you can, happy day!

If you want to give it s a try ,  this is what I did :

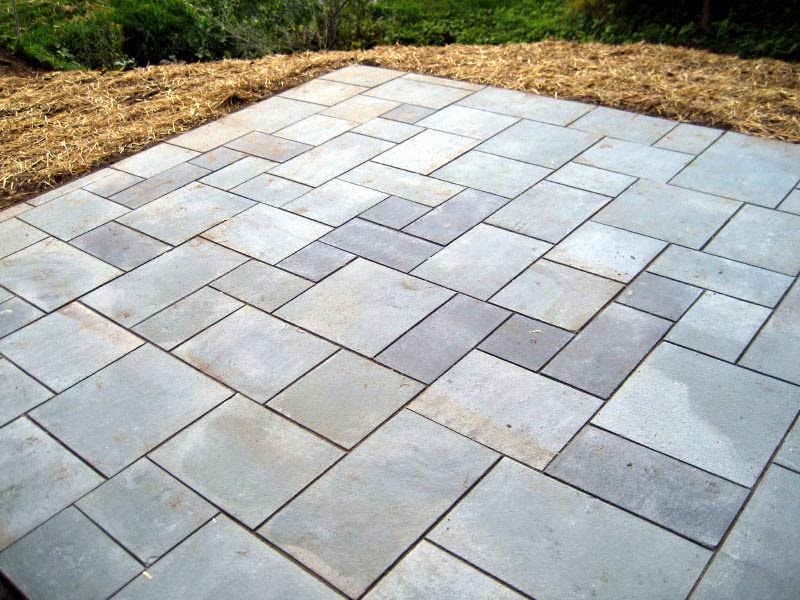
I started by configuring  what layout I wanted.  I  knew I did not want these to be laid out in perfect rows.  I wanted there to be a little bit of variation.  So, I cut out pieces of paper, and played around with different patterns.  ( I know it is hard to tell from the pictures,  but the gaps in my pavers  do have variations to create a pattern.
Once I had decided on the size and shape of my new patio  I got to work on staining/painting the pavers.
I would suggest,  dividing your pavers up,  for instance, I needed approximately 70 pavers,  so I divided them up into 7 piles of 10 pavers.
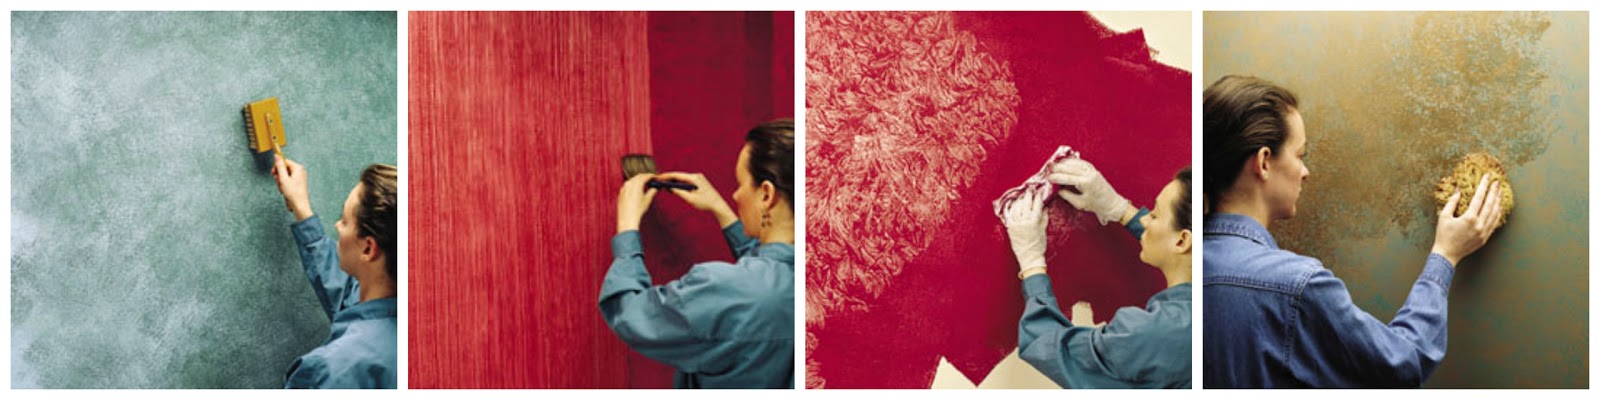
I painted/stained 10 at a time. I would do one full  set of ten in the same manner (COLOR, intensity, TECHNIQUE.) With the idea that   I would have a variety of stones.
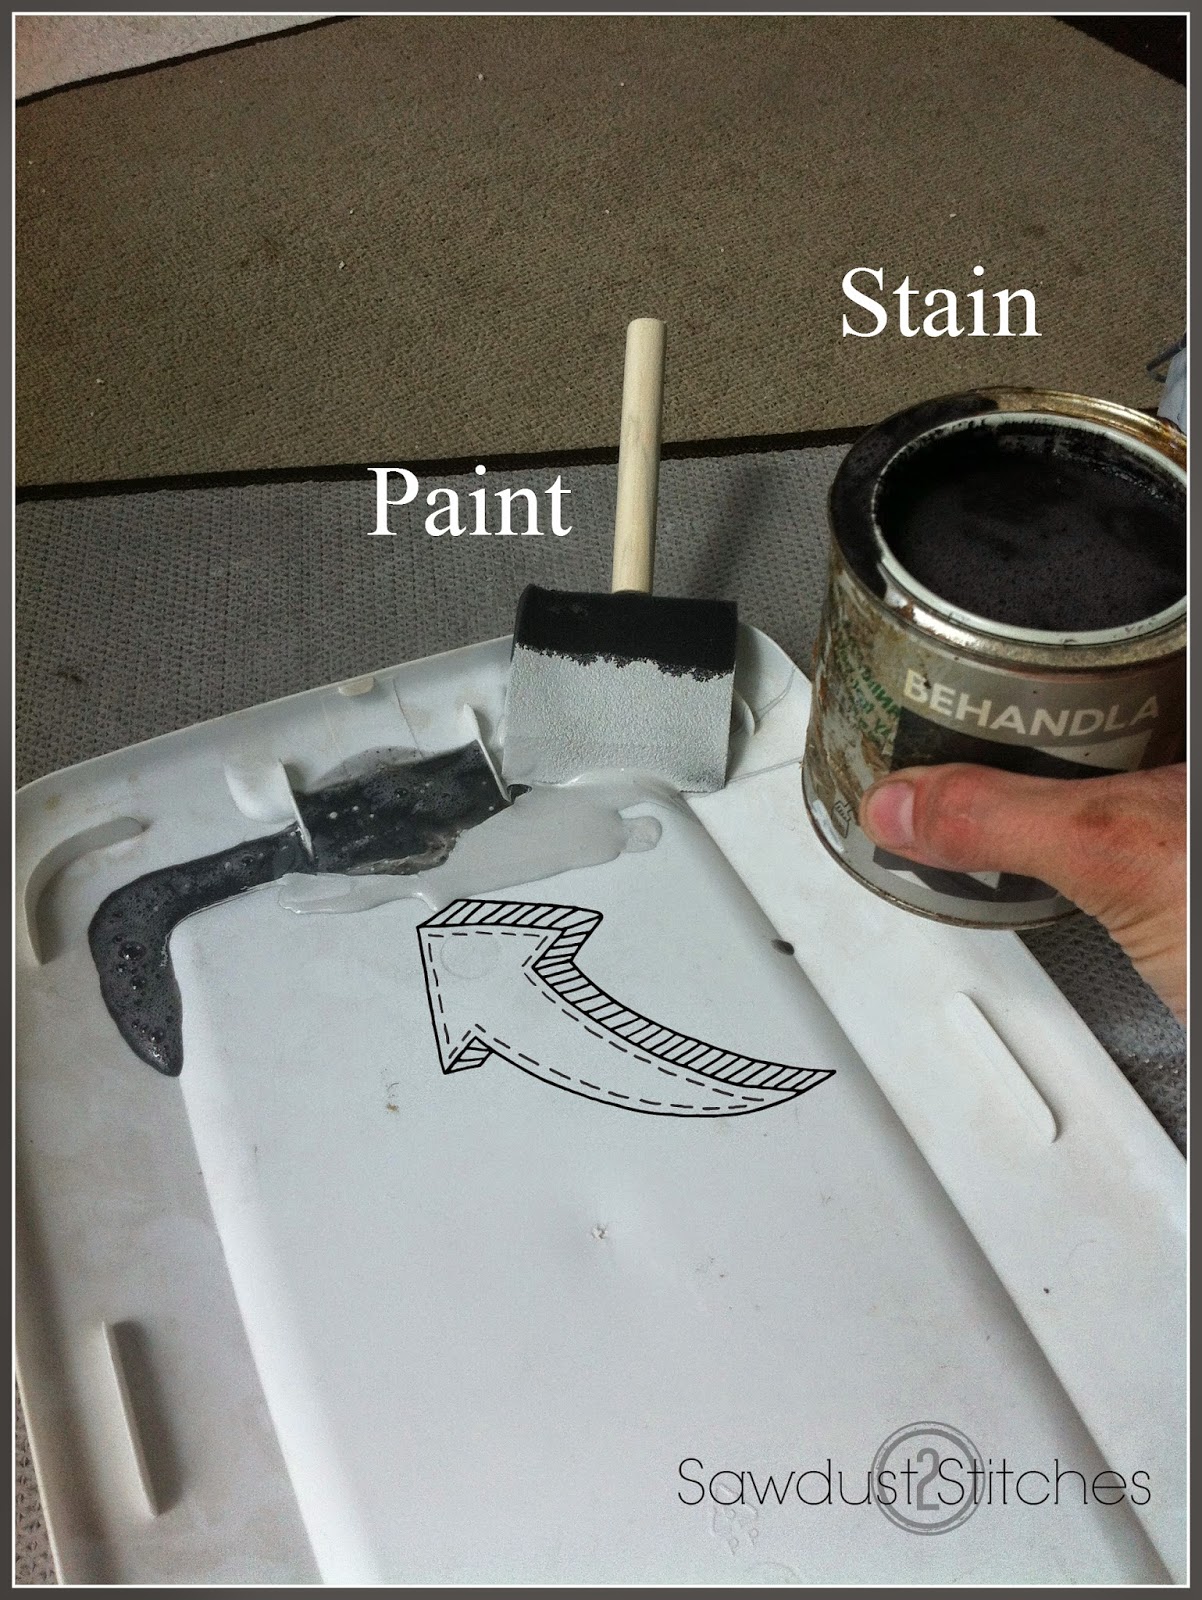
Color:
I used a variety of stains,  I used  3 different  color stains. ( Basically  any  that I had on hand.)  Some  pavers are all one stained color, others I layered with several colors. I also used some paint as well. I found that if you mix it with a little water it will act more like a stain.)

Technique:
  Think  late 80’s early 90’s  faux finishes.  For example using plastic bags, sea sponges,  thick bristle brushes. Using a variety of techniques I simply  went to  town on these concrete pavers.
 I wish I could say there was a trick to this,  but there really isn’t.
 Don’t be afraid to layers techniques and colors!  Biggest  mistake you can make is  covering the entire paver. You want the “stones” to  have a pattern on them, not  just be a flat color.
 The possibilities are endless!  Here are just a few possibilities to get you started.
 
Faux Finish Techniques
.
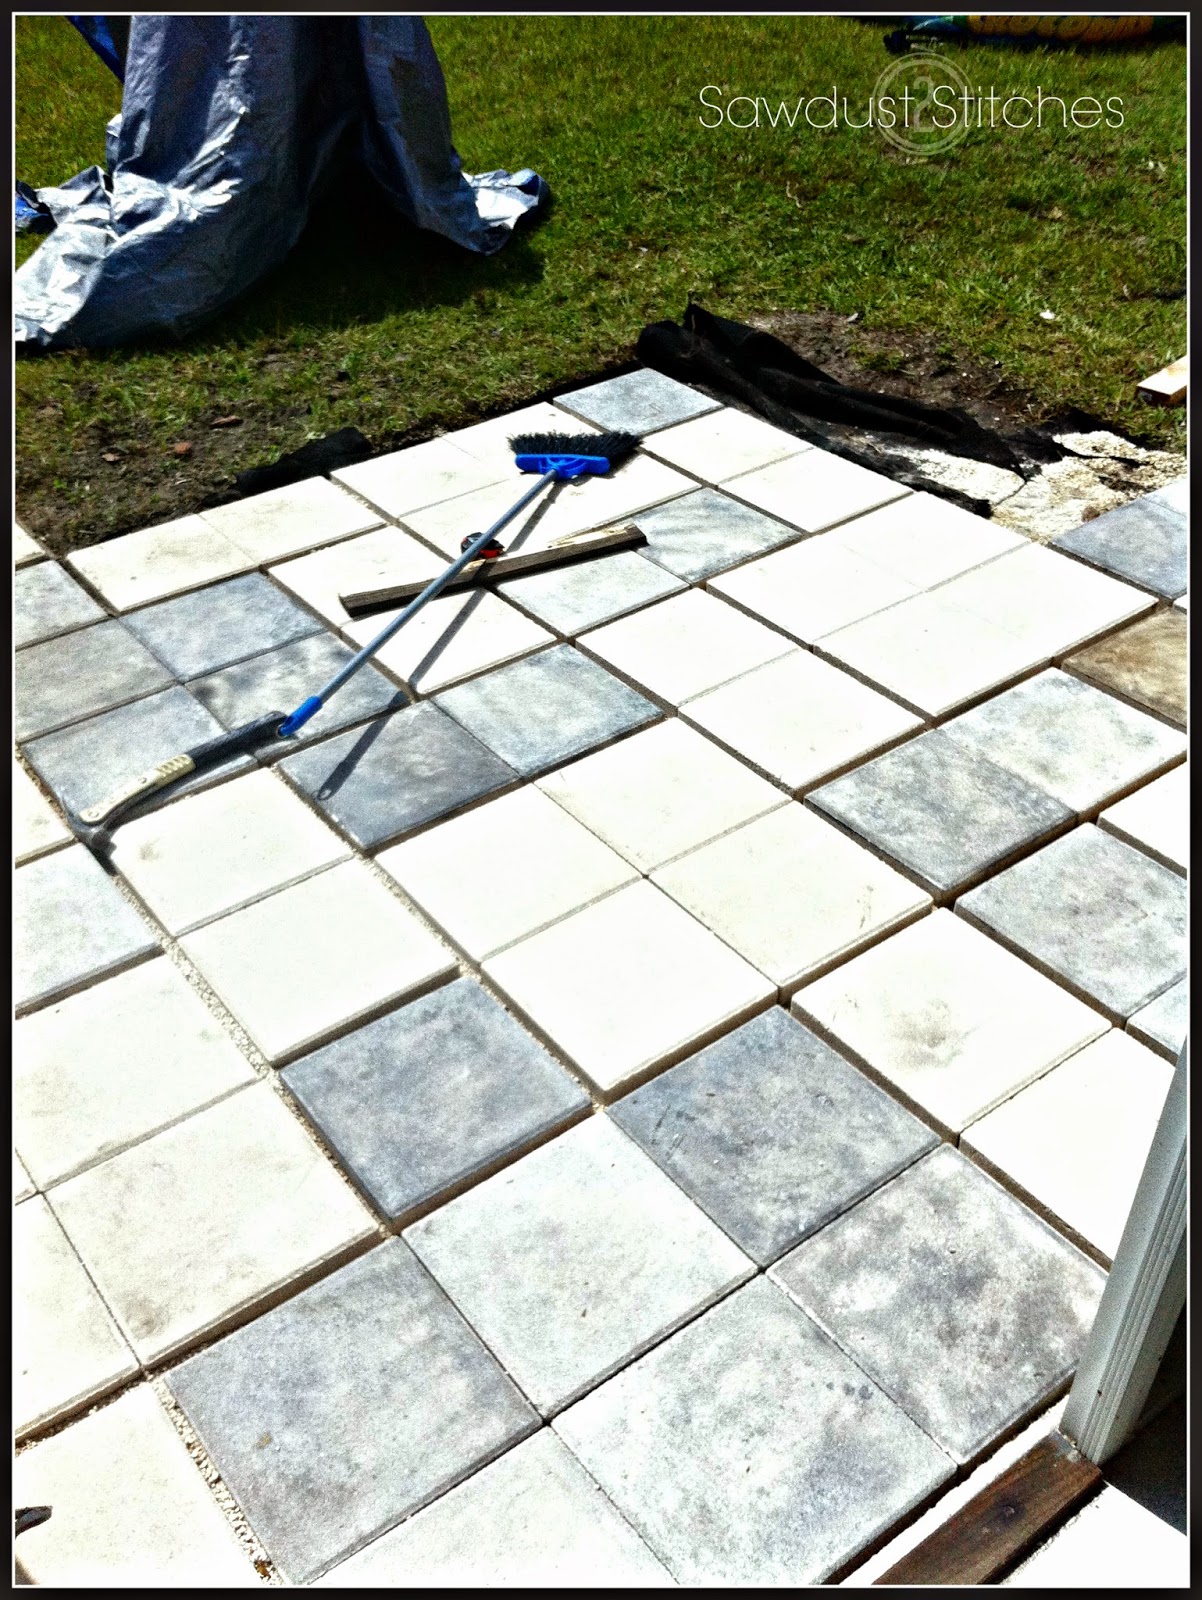
  (This picture doesn’t really do a great job showcasing the colors,  but you can definitely  see that there is a variety of colors.)

I wish I had taken more pictures of the actual process of laying the pavers, alas I did not.  So,  I am emphasizing the idea of a “paver makeover”
However, when laying my own patio,  I did reference a great tutorial I found over at “The Rodimels Family”   Make sure to check it out!

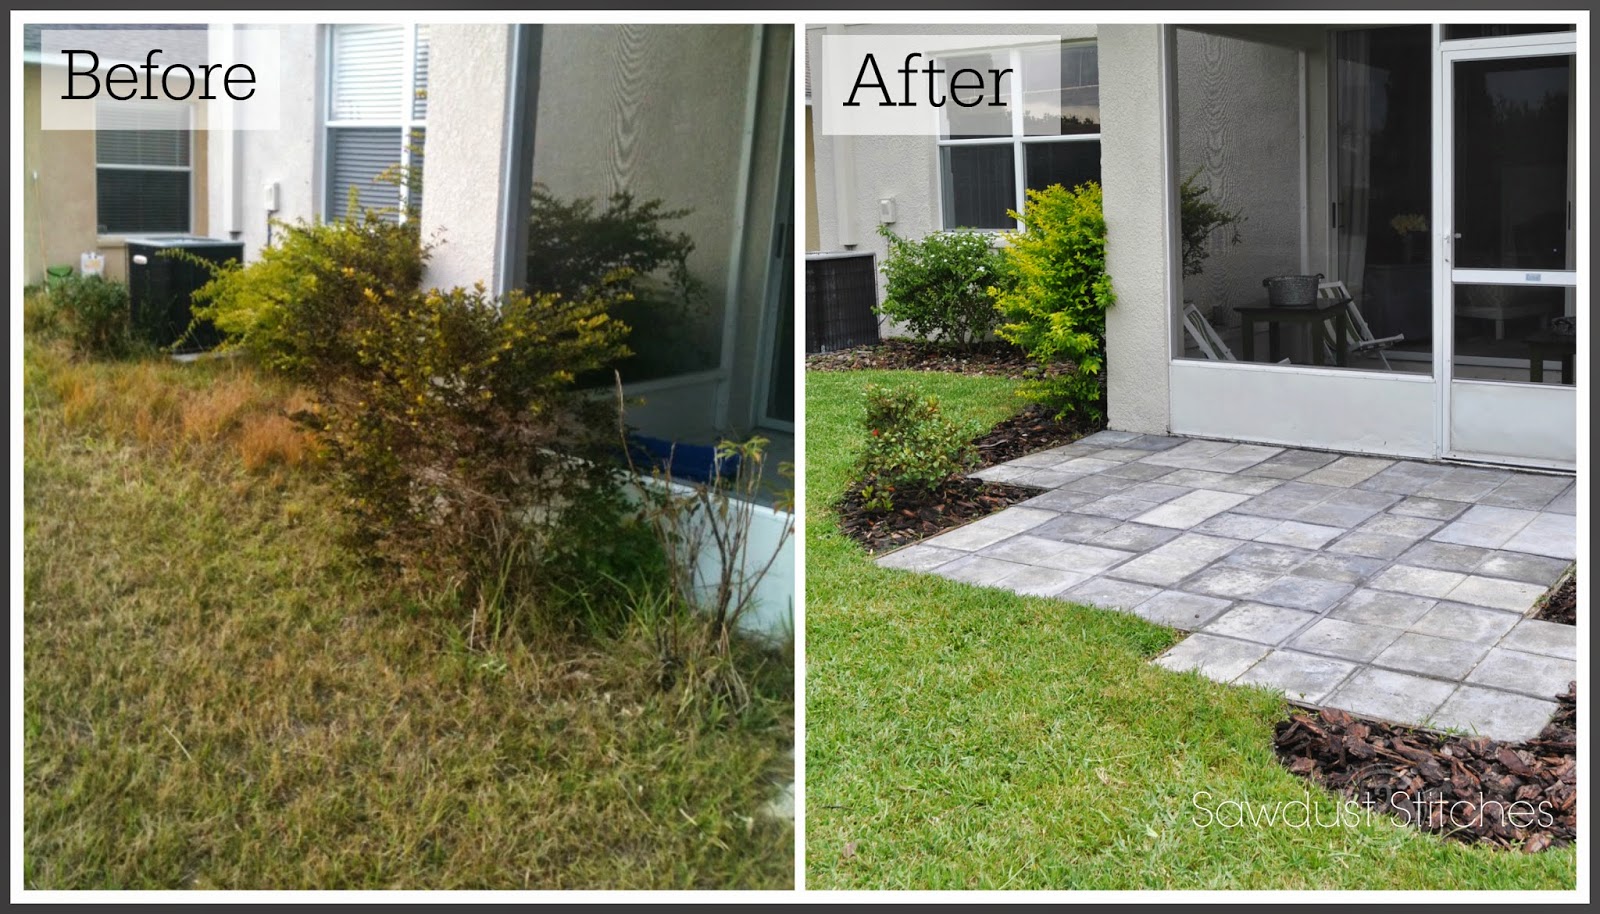
It’s coming along! (  I was using the hose to outline an idea for where the garden would be. )

Ultimately  I was very please with how  the stones and the patio turned out!  I was successfully able to create the look of a stone paver, for the cost of a concrete block.  Happy day!

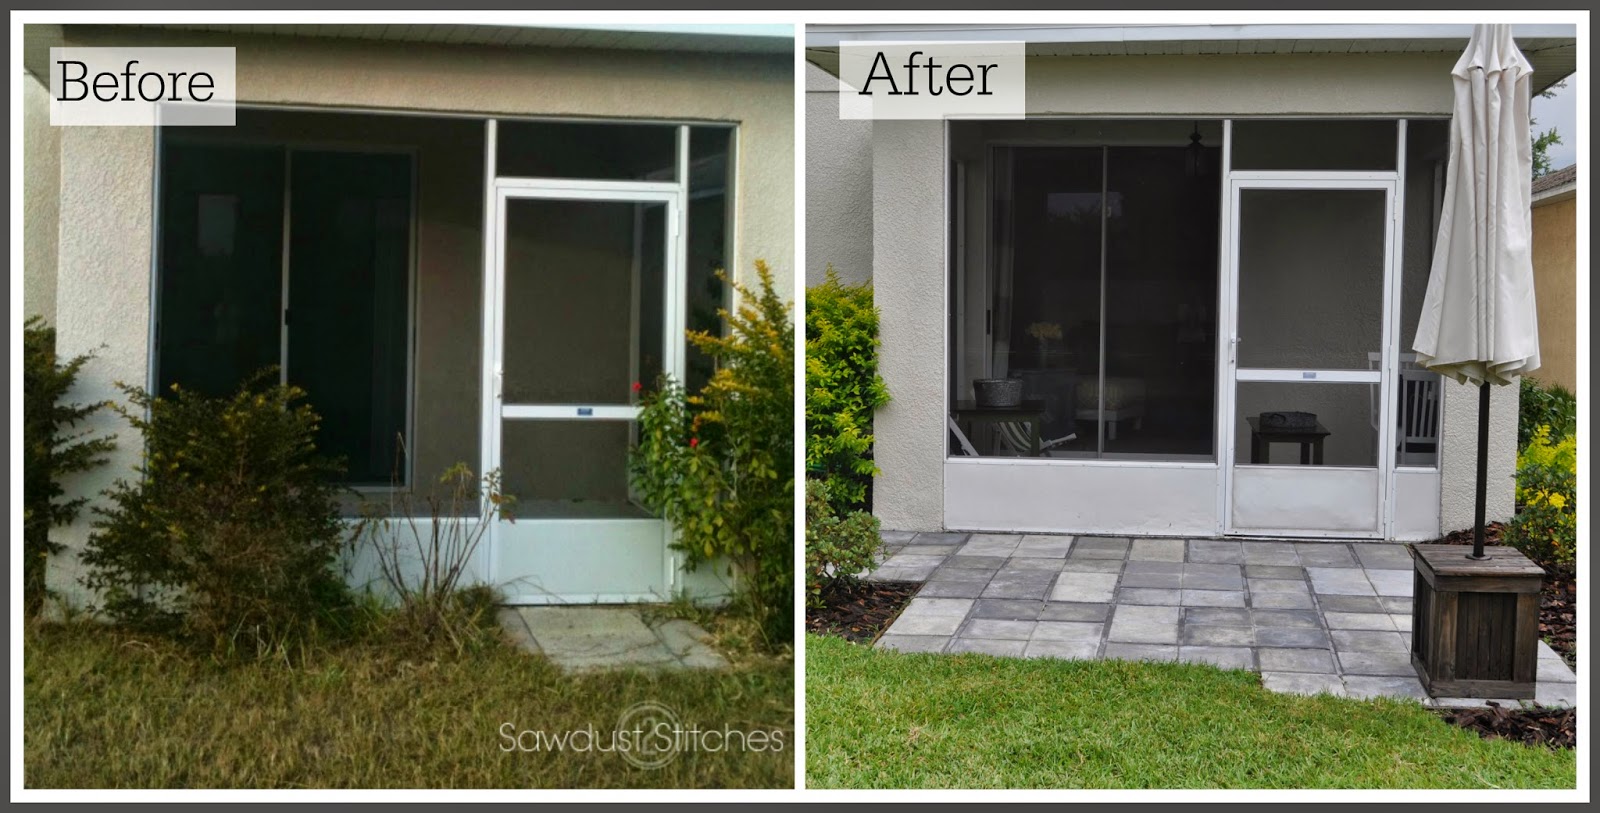
FYI:    These pictures were taken a 1.5 years after I stained them, and we live in Florida where it rains OFTEN. Suffice to say the stain seems to hold up pretty well!

If you are considering a patio revamp,  take a second look at the cheapy concrete pavers.  You would  be surprised at their potential!

Take luck,

Corey

Chair Repurposed

May 20, 2014

  I was cleaning out the garage, and was getting frustrated with all the random stuff  I had laying around.  Among all the “stuff” was a 4 old chairs.  I couldn’t bring myself to toss them,  but they were fairly unstable. Well,  luck would have it,  I needed some patio furniture. 

Supplies I used: 
   2 old/unwanted chairs
   (1) 2×3
   (7) 1×4’s
   (2) 1×3’s
   Paint
   Sandpaper
   Screws (Sizes varied)
   Nails (Sizes varied)
Tools I would suggest:
   Miter Saw
   Drill 
   Nail gun 
   Tape measure 
 
Here is what I did:

I started the process by dismantling the chairs. I only needed the “back” of  two chairs.

I secured a 2×3 to the front of the chair so that I could  fasten supports to the chair and create more stability.

I used 1×3’s to span from one chair to the other.  These can vary in length depending on your own tastes/needs.  ( My bench is about 5′ wide.)

Keep in mind the longer the bench,  the more supports you will need. ( See the center support in above picture.) Once the initial supports are in place, I  reinforced the 1×3’s with 1×4’s.  After, the 1×4’s  were in place I used a nail gun to secure them to the 1×3 and 2×3 supports.

I was not entirely  sure if I wanted the bench to have a back rest. In the end I decided I liked the look and it was a little more practical for my needs.  It also added to the stability to the bench as well.

All it needs now is a paint job!  Don’t forget the basics, sand, prime, paint and then repeat if necessary.

Look how pretty!  Who would have ever thought these were two old chairs destined for the dump.

After adding  a few homey touches I called it done! In a few weeks,  you will get to see where this guy ended up.  Stay tuned,  it’s gonna be good!

Take luck ,

Corey

Window Framed Mirror

May 9, 2014

http://sewingandsanding.blogspot.com/2014/05/window-framed-mirror.html

I have a garden tub, and it looks like there is SUPPOSED to be a window  above it. The tub looked like it was hidden in a cave.  There is not very much natural lighting in this bathroom, and the previous owners dark, ugly, puke, olive green was not helping the situation.
Even after a light paint job, it still was an awkward space to fill. I knew  I would be bathing kids in this tub,  so whatever I decided it needed to be kid proof, and splash proof.  I also wanted to lighten the room…

My go to answer when I’m stuck is a mirror.  I LOVE mirrors! ( and not in the narcissistic way.)  Mirrors,  can add to a room without taking away from it.  It can make spaces feel larger and bounces light. Basically if used correctly  they  can be a “neutral” for the space.   It can add to the space  but does not need take away from any other decorations. 

 Once I decided I wanted a mirror,  I got to work!  I knew I wanted a LARGE mirror, but  a mirror this size can be $$!  So, I found a better option…

*Logistics*
Tools Suggested:  
Miter Saw
Nail Gun    (you can use a hammer)
Table Saw  (or you can ask the helpful employees of your local hardware)

    Supplies Needed: 
(2) 12″ x 48″mirrors                =   $5.00 (x2)
(1) 4’x8′  1/2″ OSB or MDF    =   $9.00
(2) 1″x3″ Fir Stripping             =  $1.80 (x2)
(1) 1’x2′  Fir stripping              =  $1.00
Liquid Nails                            =  $2.00
(3) Lattice Strips                      =  $2.00
(2)  D rings                               = $2.00

Begin  by removing the mirrors from the cheap frames.  Be extremely  careful,  they are very breakable. ( I may or may not have learned that the hard way.) If you are superstitious,  I think I am up to about 21 years of bad luck.  Bummer.

First peel back all of the cardboard:

I then used a utility knife to cut along the edges. Once the perimeter is  cut,  pull the frame directly out/away from the mirror. ( I have found that is the easiest way to remove the frame.)

For the next step you will need your panel of OSB/MDF board (Whichever you prefer). It will need to be cut to 53’x29″.  Apply a liberal amount of Liquid Nails to the surface of the board. Then  using a old credit card or a piece of thick cardboard,  spread the glue out over the surface so that there are not any obvious lumps of glue.

After  glue is spread CAREFULLY  (I might have broken a mirror at this step too) take your mirrors and lay them on top of the glue.

While that was drying I started on the frame.  Using a miter saw I cut down the 1×3’s with 45 degree cuts on all ends.
Long point to long point 29″ (You will need two of these.)
Long point to long point  53″(You will need two of these.)

Again, using the liquid nails secure the 1×3’s around the perimeter of the mirrors. ( I also used a nail gun and tacked mine in place.) I do suggest reinforcing this in some way, either by nails or screws.

Next  I installed the “grid”.
You will need to cut:
(x1)    48″ lattice strip
(x4)    11.25″ lattice strips.
* These measurements are based on the mirrors  I purchased,  I would double check the measurements before cutting!*

Using the liquid nails I then  adhered the lattice strips like this:

 
(I used weights to weigh down the strips while it dried.)
Once the window grid is dry, you can add the edging.
Cuts: 
Lattice Strips:
(1)   53″ (45 degree angles on both ends,  having the distance between the 2 shortest points 53″)
(2)   29″ (45 degree angle on one end, and a straight cut on the other.  The distance between the short point and straight cut should be 29″)
1×2 :
(1)    53.5″
 I used a  brad nailer to secure the lattice strips and the 1×3 on the bottom. (The 1×3 creates a lip.)
 Lastly,  I installed “D Ring Hangers” on the back side. (This will be a fairly heavy mirror,  I suggest calculating where the studs will be THEN  install the “D rings”, so you can be sure to hang the mirror on studs.
 
 Now, all that is left it to make it your own!  Paint it, stain it, distress it,  whatever fits your fancy.
I painted mine a sea foam color and then I  distressed it. (Tutorial for distressing here) 

All DONE!  Now you can lay back and relax in your spa-like retreat…  Psych!  Now you get to see how disheveled you look while  bathing your kids, hooray!

Alas, it is beautiful, cheap, and gave me a solution to my cave like bathroom!

Take Luck,
    Corey 

Garage Storage

April 29, 2014

  Do you know what  I hate about cleaning my garage?   Well, I will tell you… it is  the “junk drawer” of my house. No matter how often I clean it, it always feels cluttered.
If I pick up something at a garage sale,  where does it go ?
 “In the garage.”
 I have 3 different strollers, that are used depending on the activity/number of kids with me,  all of which need to be readily accessible. Where do they go ?
“In the garage.”
Where do  I spend about 50% of my waking hours ?
“In the garage.”
So, for an OCD nut job it was fairly important to have it  clean and organized.
BUT, where do you put all the random stuff !?
My solution?  A really nifty storage solution!
Want to learn how to make one yourself ? …

 
 How to make a  “French Cleat” shelving system:
 
  Materials needed:
3/4″ Plywood  (not to be confused with OSB or composite)
3″ Screws
Hooks ( will vary according to project)
 
 Tools Recommended: 
Tablesaw
Drill
Countersink Drill Tip
Level/Laser Level
Miter Saw
We will begin by making the strips of wood  that will be mounted to the wall.

The plywood will need to be cut at 45 degree on one side.

There should be 3″ at the base. (So approximately  3 3/4″  including the 45 degree angle.)
Repeat this process as many time necessary for your project.  Also,  make a few extra feet,  you will need this for the “hangers”.

Next:  Mark where the studs will be,  I then  used a “countersink tip” so that the screw would sit  level with the board.

Next,  I used a laser level to map out where my first row would be.
Secure board to wall using a 2.5″ – 3″ screw. Make sure you are  hitting studs!

Using a laser level  map out the 2nd row. My rows are spaced out at 21″ apart.

Keep on truckin. Make as many rows as you want!  The possibilities are endless!

 To Make the Cleat Hangers:

Using  the same planks that were used on the wall,  cut 3.5″ sections.  Then rotate and cut 1.5″ off the sidee that has the 90 degree edge. (See picture above.)

The piece of wood with the 45 degree angle will need to   secured to the top of the “cleat hanger”. I  used a finish nailer,  but  when I install the hook I also put a screw to make it really sturdy.

(For the actual block of wood I used  a 1×4″  cut down to 7.5″)

Take the  1.5″ block that was cut off  from the 45 degree angle and secure it to the bottom  of your “cleat hanger”.

Once the board is assembled you can add hooks. The hooks I used  run about $1.50 a piece and can be found at most  hardware stores. Again, I made sure a screw went through  both the angled cleat board and the top 1×4. (This joint  will be holding a  majority of the weight.)

Then, hang them up !  I made quite a few of these,  planning on doubling them up where needed. I LOVE that these can be moved around to accommodate all of the random sized crap that was scattered all over the garage floor!

So neat, clean, and organized! My favorite part?  Totally customizable to any needs!
So once your garage is ship shape,   pop open a nice cold Diet Coke and stand back and admire your hard work!

Take Luck,
Corey

PVC Shelving

April 15, 2014

 Hey everyone,  I am very excited to be a Guest Blogger over at  “Remodelaholics“. They are featuring My pvc pipe shelf.  Make sure you head on over and check out the post and browse around.  It is full of amazing ideas and awesome tutorials.

Have an awesome day!

Corey


Want to see MY “Craft Room” ?

April 5, 2014

 Thanks to the wonderful world of Pinterest, I have been able find so many great organization ideas, and awesome inspiration for beautiful yet functional “Craft Rooms”….
Like these…
While the jars of color coordinating buttons, and hanging ribbon displays are beautiful, they didn’t seem very practical for my needs.
Allow me to introduce you to MY “Craft Room”.
http://sewingandsanding.blogspot.com/2014/04/want-to-see-my-craft-room.html#more

While I was VERY tempted to paint all the  benches to match, and go all “Corey” on it  (yes, I just used my name as a verb). Alas, I reigned in my own crazy and refrained.
  This is the one place I am completely okay with function trumping form.  It smells like sawdust, and spray paint, and I love it.

So you can have a reference of how far this room has come, here is  picture of the garage a few weeks after we moved in.  haha,  Look at that blue!  The original owners LOVED bright colors.

Slowly but surely  I was able to turn this space into EXACTLY what  I wanted/needed.

One thing I wanted was a freestanding island that I could work on projects from both sides… BUT I didn’t want to compromise  all the space in the garage.

Solution?  Hinges+Castors= Rotating Workbench

The other thing  I needed was access to the planer.  To use the planer it needs to have space on either side.  The moving bench allows the planer to be stored and still be easily accessible.  Only hang up was I needed to be able to access the top of the planer.

Solution?  More hinges.

This is my completely customized craft room, and I love it. It is one of my happy places.

French Cleat Storage
http://sewingandsanding.blogspot.com/2014/04/garage-storage.html
  • previous
  • Page 1
  • Interim pages omitted …
  • Page 38
  • Page 39
  • Page 40
  • Page 41
  • Page 42
  • Interim pages omitted …
  • Page 47
  • next

Primary Sidebar

  • Facebook
  • Instagram
  • Pinterest
  • Twitter
  • YouTube
IMG_9167 (1).jpg fd
DIY & Design

Meet Corey

Hi everyone, my name is Corey, and I have a problem. I can’t leave well enough alone… The best therapy usually involves a variety of power tools. So, in the few “spare” moments I am not entertaining my two beautiful, rambunctious, boys, I can typically be found hunched over a sewing machine and/or covered in sawdust. All in the efforts to create a perfect balance of aesthetics and practicality in our home.
read more

Join our mailing list!

DIY & design ideas - right in your inbox!

Featured

Stair Tread Makeover

Categories

  • 70's Ranch Home
  • Around the House
  • Build Plans
  • Crafts
  • Current Home
  • Decor Makeovers
  • Dresser
  • Exterior
  • Fall
  • First Home
  • Furniture Makeover
  • Hidden Compartment
  • Kitchen
  • Lighting
  • Makovers
  • Master Closet
  • Organization
  • R.V.
  • Room Makeovers
  • Seasonal
  • Seating
  • Sewing
  • Shelving
  • Small Builds
  • Smart Home
  • Spring
  • Summer
  • Tables
  • Tablescape
  • Tutorials
  • Uncategorized
  • Wall Art
  • Wall Decor
  • Winter
  • Workshop

Footer

Contact Me: Corey@Sawdust2Stitches.com

Latest ‘Grams

Follow on Instagram
2020 © Your Blog Name
theme by soleilflare
Enter your name and email and get the weekly newsletter... it's FREE!
Your information will *never* be shared or sold to a 3rd party.