• Blog
  • About
  • Press
  • Privacy

Let’s be social!

  • Skip to primary navigation
  • Skip to main content
  • Skip to primary sidebar
  • Skip to footer
Sawdust 2 Stitches

Sawdust 2 Stitches

  • Tutorials
    • Around the House
    • Organization
    • Wall Decor
    • Sewing
  • Makeovers
    • R.V.
    • Room Makeover
    • Furniture Makeover
    • Decor Makeover
  • Build Plans
    • Small Builds
    • Wall Decor
    • Dresser
    • Tables
    • Seating
    • Shelving
    • Hidden Compartment
  • Seasonal
    • Summer
    • Spring
    • Fall
    • Winter
  • Home Tours
    • First Home
    • Current Home
    • 70’s Ranch Home
  • Workshop

Window Framed Mirror

May 9, 2014

http://sewingandsanding.blogspot.com/2014/05/window-framed-mirror.html

I have a garden tub, and it looks like there is SUPPOSED to be a window  above it. The tub looked like it was hidden in a cave.  There is not very much natural lighting in this bathroom, and the previous owners dark, ugly, puke, olive green was not helping the situation.
Even after a light paint job, it still was an awkward space to fill. I knew  I would be bathing kids in this tub,  so whatever I decided it needed to be kid proof, and splash proof.  I also wanted to lighten the room…

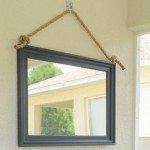
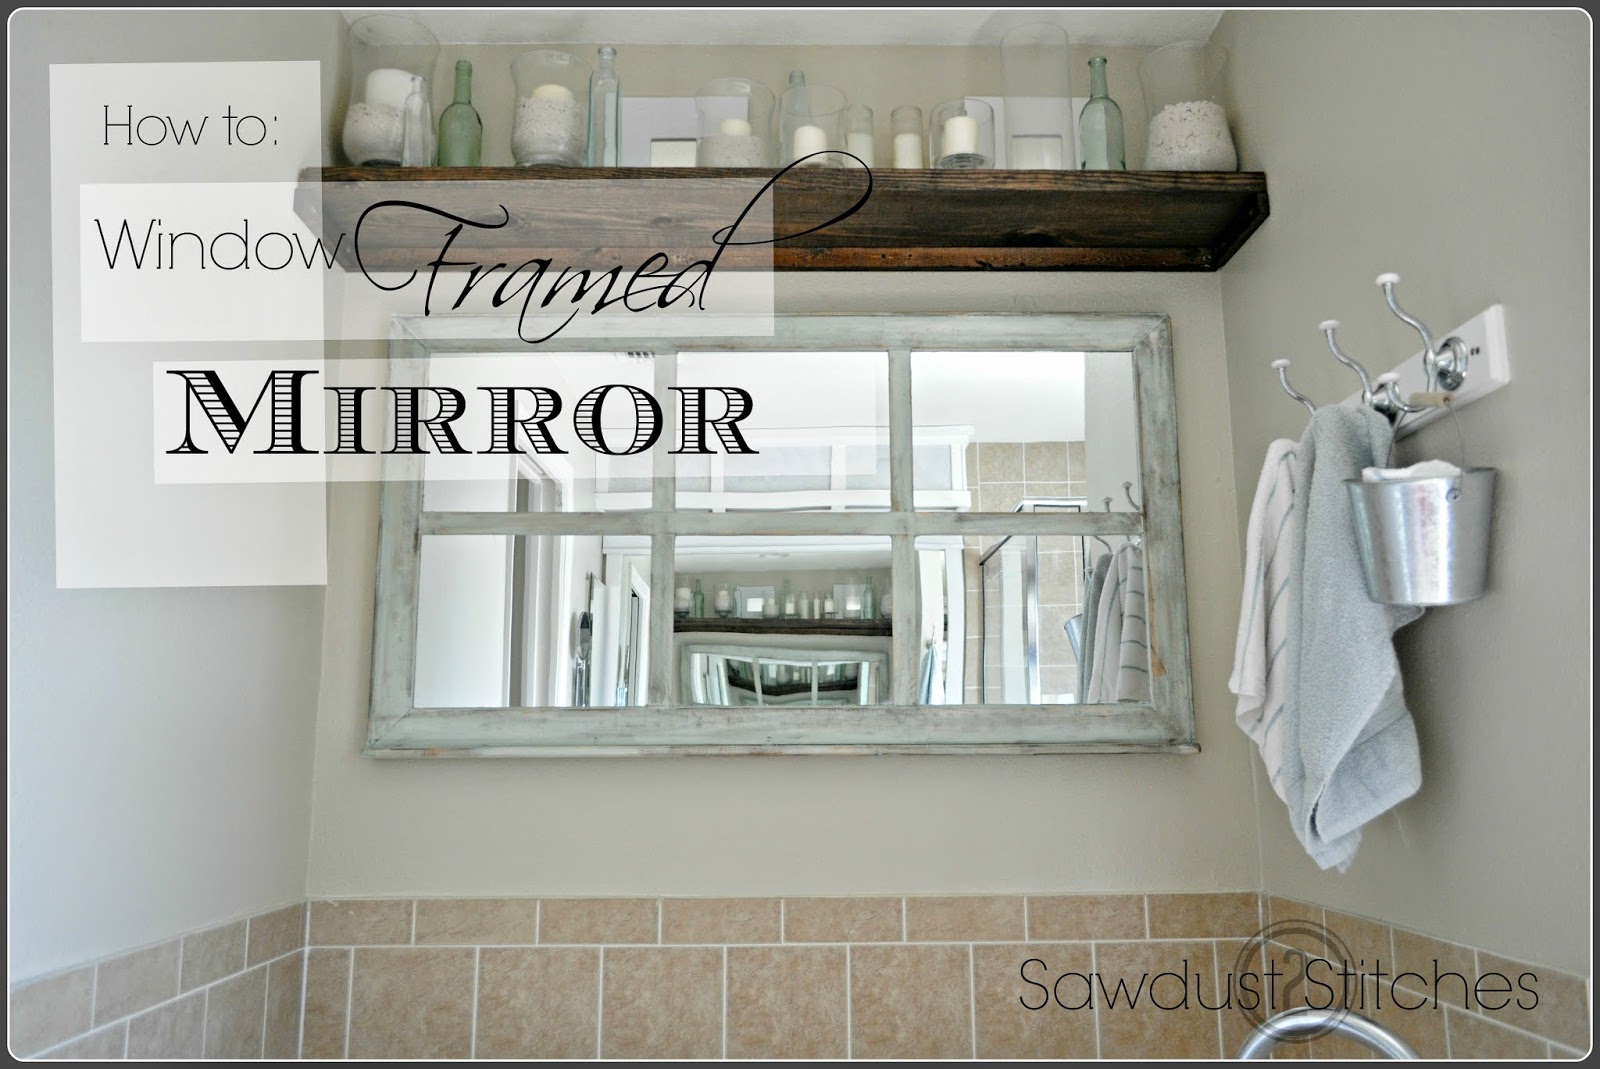
My go to answer when I’m stuck is a mirror.  I LOVE mirrors! ( and not in the narcissistic way.)  Mirrors,  can add to a room without taking away from it.  It can make spaces feel larger and bounces light. Basically if used correctly  they  can be a “neutral” for the space.   It can add to the space  but does not need take away from any other decorations. 
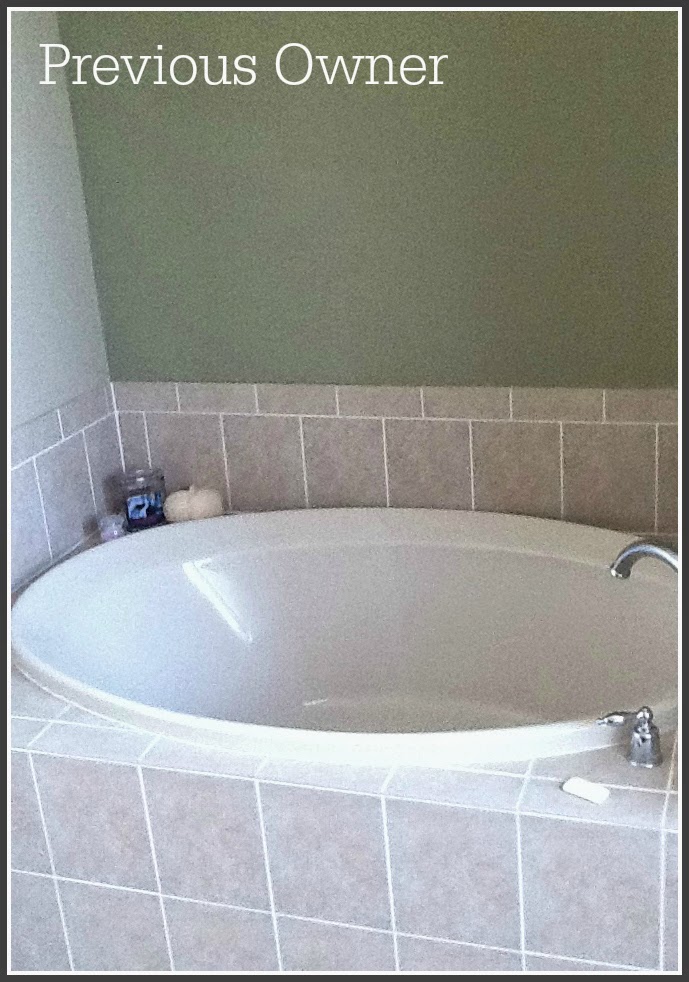
 Once I decided I wanted a mirror,  I got to work!  I knew I wanted a LARGE mirror, but  a mirror this size can be $$!  So, I found a better option…

*Logistics*
Tools Suggested:  
Miter Saw
Nail Gun    (you can use a hammer)
Table Saw  (or you can ask the helpful employees of your local hardware)

    Supplies Needed: 
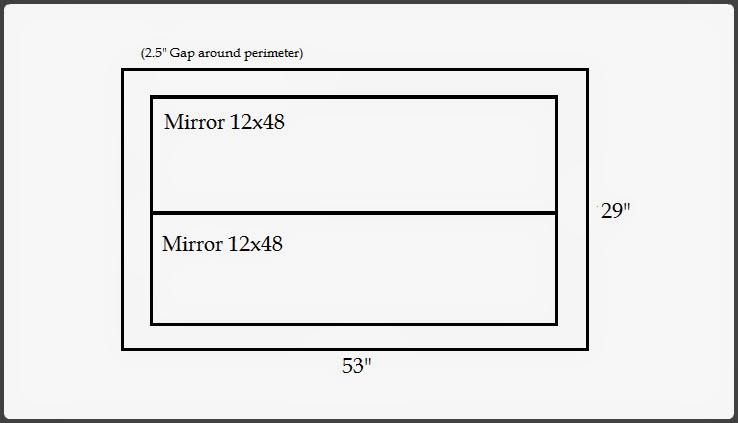
(2) 12″ x 48″mirrors                =   $5.00 (x2)
(1) 4’x8′  1/2″ OSB or MDF    =   $9.00
(2) 1″x3″ Fir Stripping             =  $1.80 (x2)
(1) 1’x2′  Fir stripping              =  $1.00
Liquid Nails                            =  $2.00
(3) Lattice Strips                      =  $2.00
(2)  D rings                               = $2.00

Begin  by removing the mirrors from the cheap frames.  Be extremely  careful,  they are very breakable. ( I may or may not have learned that the hard way.) If you are superstitious,  I think I am up to about 21 years of bad luck.  Bummer.

First peel back all of the cardboard:

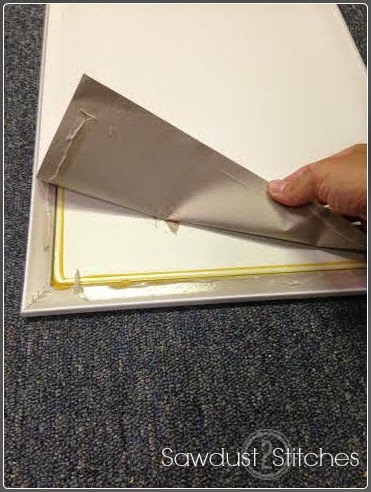
I then used a utility knife to cut along the edges. Once the perimeter is  cut,  pull the frame directly out/away from the mirror. ( I have found that is the easiest way to remove the frame.)

For the next step you will need your panel of OSB/MDF board (Whichever you prefer). It will need to be cut to 53’x29″.  Apply a liberal amount of Liquid Nails to the surface of the board. Then  using a old credit card or a piece of thick cardboard,  spread the glue out over the surface so that there are not any obvious lumps of glue.

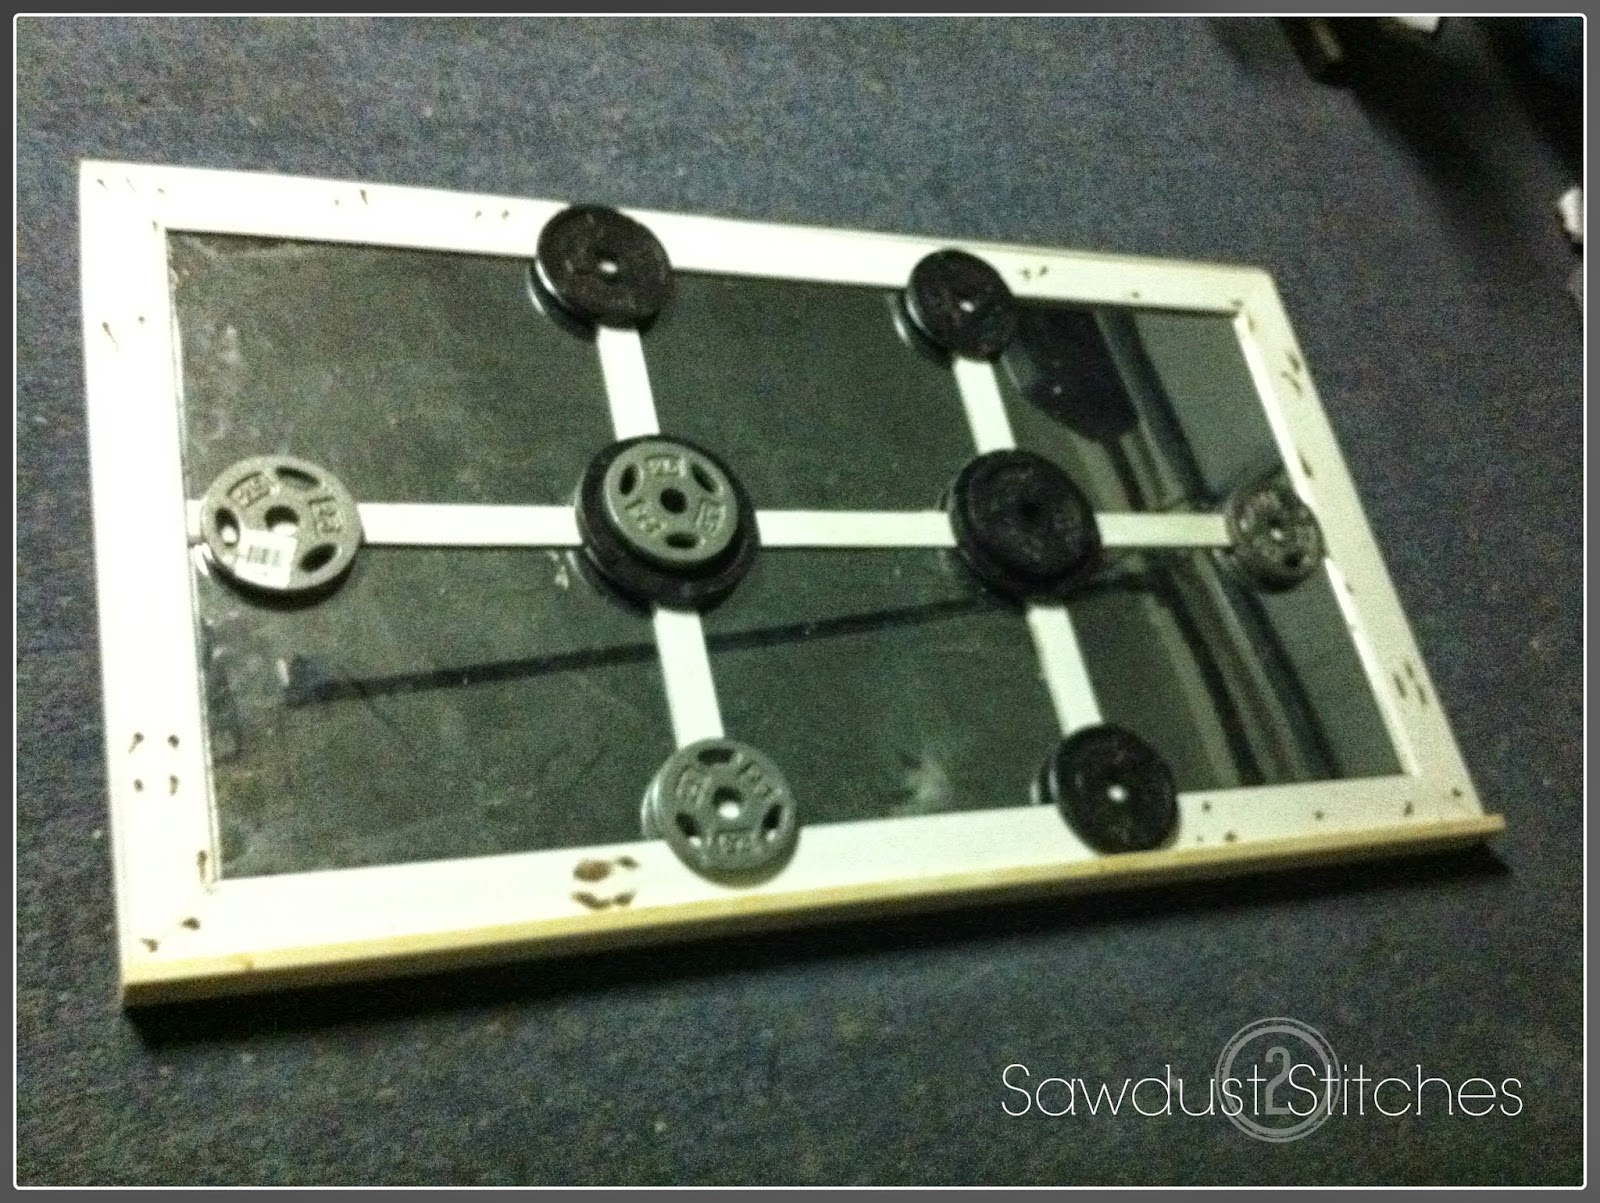
After  glue is spread CAREFULLY  (I might have broken a mirror at this step too) take your mirrors and lay them on top of the glue.

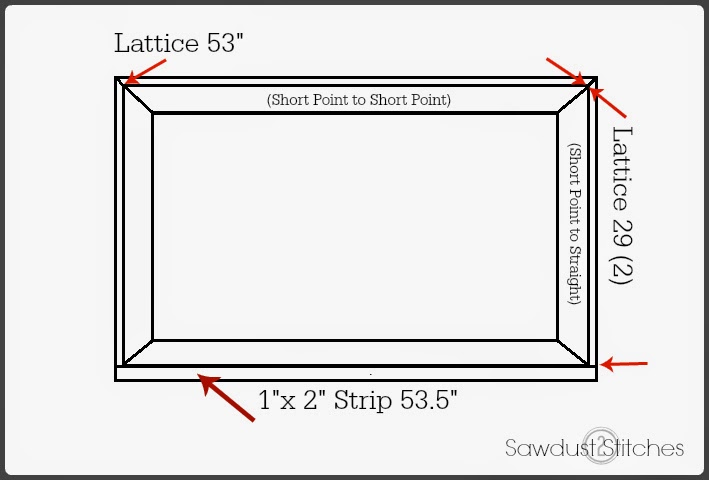
While that was drying I started on the frame.  Using a miter saw I cut down the 1×3’s with 45 degree cuts on all ends.
Long point to long point 29″ (You will need two of these.)
Long point to long point  53″(You will need two of these.)

Again, using the liquid nails secure the 1×3’s around the perimeter of the mirrors. ( I also used a nail gun and tacked mine in place.) I do suggest reinforcing this in some way, either by nails or screws.

Next  I installed the “grid”.
You will need to cut:
(x1)    48″ lattice strip
(x4)    11.25″ lattice strips.
* These measurements are based on the mirrors  I purchased,  I would double check the measurements before cutting!*

Using the liquid nails I then  adhered the lattice strips like this:

 
(I used weights to weigh down the strips while it dried.)
Once the window grid is dry, you can add the edging.
Cuts: 
Lattice Strips:
(1)   53″ (45 degree angles on both ends,  having the distance between the 2 shortest points 53″)
(2)   29″ (45 degree angle on one end, and a straight cut on the other.  The distance between the short point and straight cut should be 29″)
1×2 :
(1)    53.5″
 I used a  brad nailer to secure the lattice strips and the 1×3 on the bottom. (The 1×3 creates a lip.)
 Lastly,  I installed “D Ring Hangers” on the back side. (This will be a fairly heavy mirror,  I suggest calculating where the studs will be THEN  install the “D rings”, so you can be sure to hang the mirror on studs.
 
 Now, all that is left it to make it your own!  Paint it, stain it, distress it,  whatever fits your fancy.
I painted mine a sea foam color and then I  distressed it. (Tutorial for distressing here) 

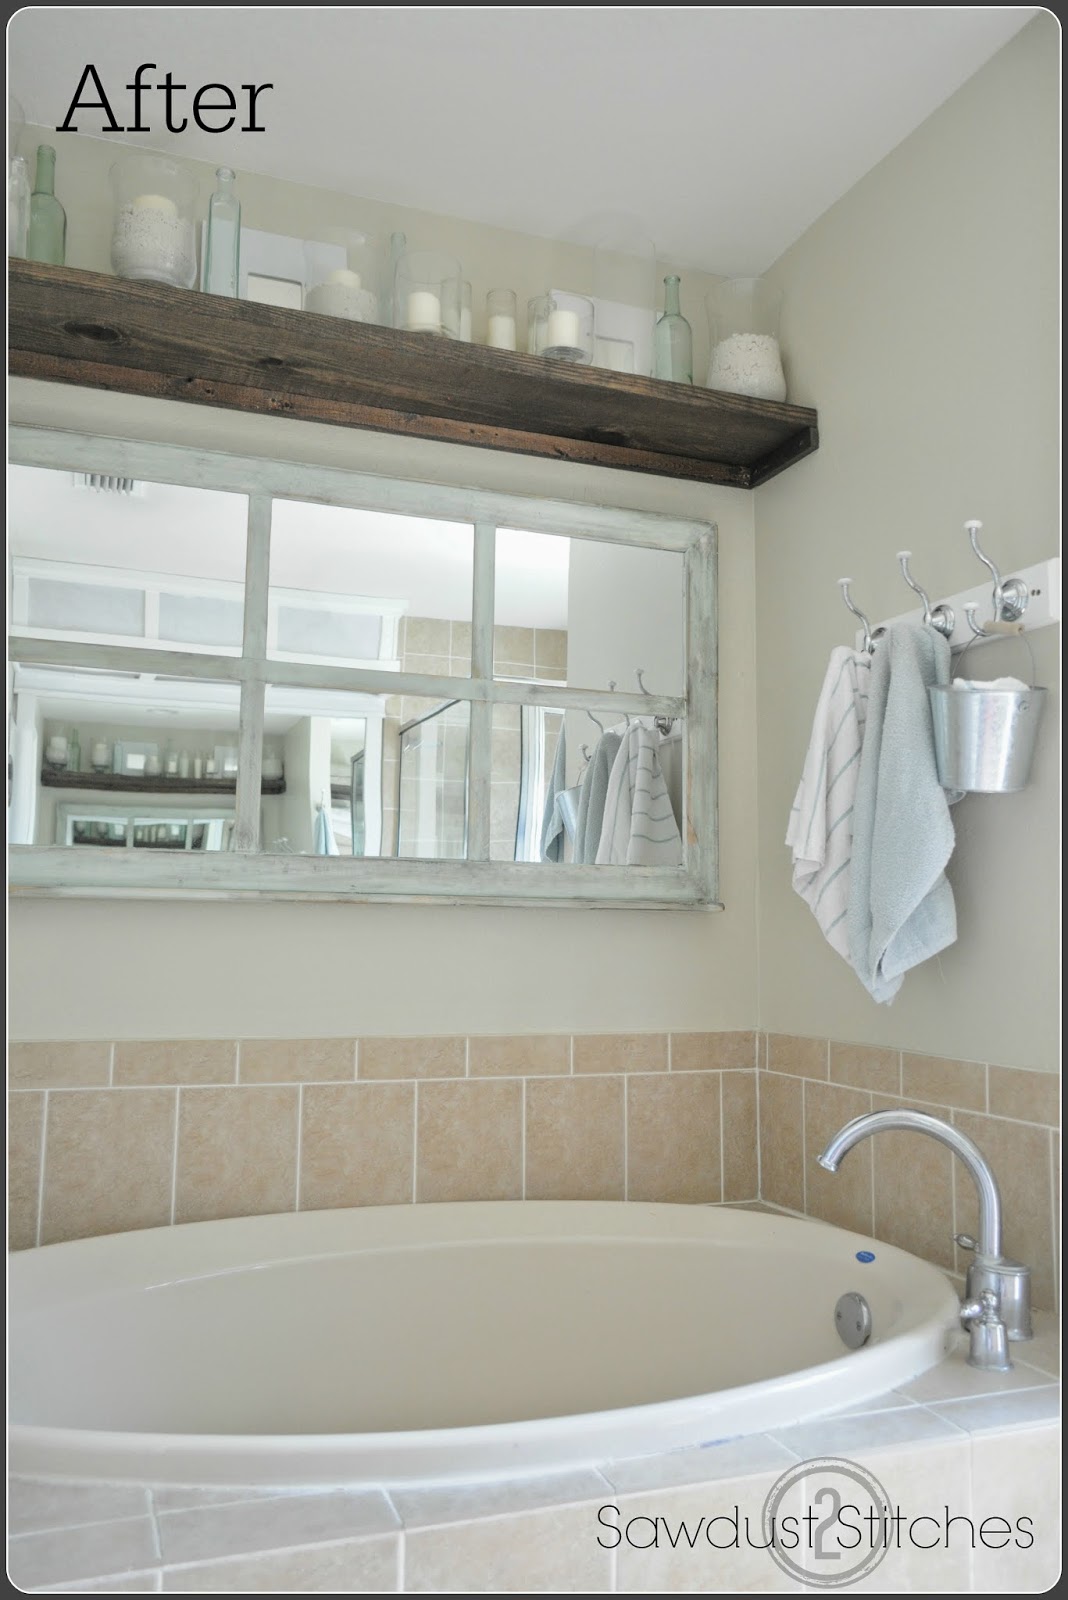
All DONE!  Now you can lay back and relax in your spa-like retreat…  Psych!  Now you get to see how disheveled you look while  bathing your kids, hooray!

Alas, it is beautiful, cheap, and gave me a solution to my cave like bathroom!

Take Luck,
    Corey 

Digiprove sealCopyright secured by Digiprove © 2015

More from my site

  • Nautical Mirror MakeoverNautical Mirror Makeover
  • How to: Faux Brick WallHow to: Faux Brick Wall
  • Fall Chalkboard SignFall Chalkboard Sign
  • Secret Compartment  Jewelry CaseSecret Compartment Jewelry Case
  • Complete Patio MakeoverComplete Patio Makeover
  • Faux Metal Vintage SignFaux Metal Vintage Sign

in Tutorials, Uncategorized # Mirrors, Paint, Wall Decor

you may also like
Back of Door Spice Rack
Pool Patio Design
How To: Exterior Door Makeover
Out-feed Assembly Workshop Table

Primary Sidebar

  • Facebook
  • Instagram
  • Pinterest
  • Twitter
  • YouTube
IMG_9167 (1).jpg fd

Popular Projects

  • How to: Faux Brick Wall
  • Cheap White Curtains
  • Ikea Cubbies into a Rustic Apothecary
  • Cabinet Transformed Into A Kitchen Island
  • R.V. Makeover
  • How to: R.V. Curtains
DIY & Design

Meet Corey

Hi everyone, my name is Corey, and I have a problem. I can’t leave well enough alone… The best therapy usually involves a variety of power tools. So, in the few “spare” moments I am not entertaining my two beautiful, rambunctious, boys, I can typically be found hunched over a sewing machine and/or covered in sawdust. All in the efforts to create a perfect balance of aesthetics and practicality in our home.
read more

Join our mailing list!

DIY & design ideas - right in your inbox!

Top Hits!

  • How to: Faux Brick Wall
  • Cheap White Curtains
  • Ikea Cubbies into a Rustic Apothecary

Featured

Back of Door Spice Rack

Categories

  • 70's Ranch Home
  • Around the House
  • Build Plans
  • Crafts
  • Current Home
  • Decor Makeovers
  • Dresser
  • Exterior
  • Fall
  • First Home
  • Furniture Makeover
  • Hidden Compartment
  • Kitchen
  • Lighting
  • Makovers
  • Master Closet
  • Organization
  • R.V.
  • Room Makeovers
  • Seasonal
  • Seating
  • Sewing
  • Shelving
  • Small Builds
  • Smart Home
  • Spring
  • Summer
  • Tables
  • Tablescape
  • Tutorials
  • Uncategorized
  • Wall Art
  • Wall Decor
  • Winter
  • Workshop

Footer

Contact Me: Corey@Sawdust2Stitches.com

Latest ‘Grams

Follow on Instagram
2020 © Your Blog Name
theme by soleilflare
Enter your name and email and get the weekly newsletter... it's FREE!
Your information will *never* be shared or sold to a 3rd party.