• Blog
  • About
  • Press
  • Privacy

Let’s be social!

  • Skip to primary navigation
  • Skip to main content
  • Skip to primary sidebar
  • Skip to footer
Sawdust 2 Stitches

Sawdust 2 Stitches

  • Tutorials
    • Around the House
    • Organization
    • Wall Decor
    • Sewing
  • Makeovers
    • R.V.
    • Room Makeover
    • Furniture Makeover
    • Decor Makeover
  • Build Plans
    • Small Builds
    • Wall Decor
    • Dresser
    • Tables
    • Seating
    • Shelving
    • Hidden Compartment
  • Seasonal
    • Summer
    • Spring
    • Fall
    • Winter
  • Home Tours
    • First Home
    • Current Home
    • 70’s Ranch Home
  • Workshop

Blog

Cheap and Easy Striped Coasters

July 18, 2014

coasters final pinterest

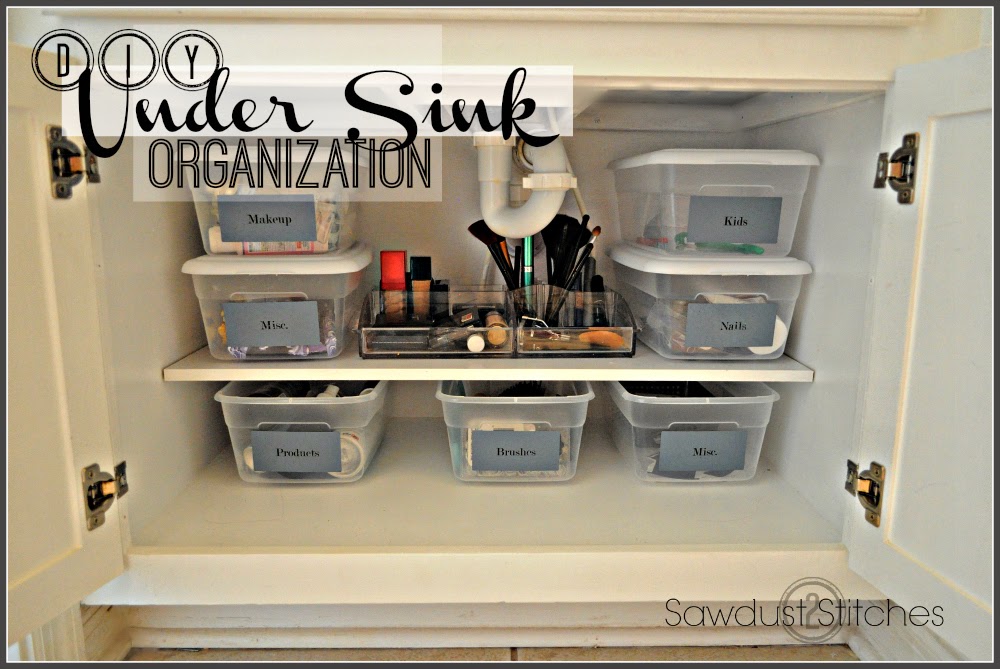
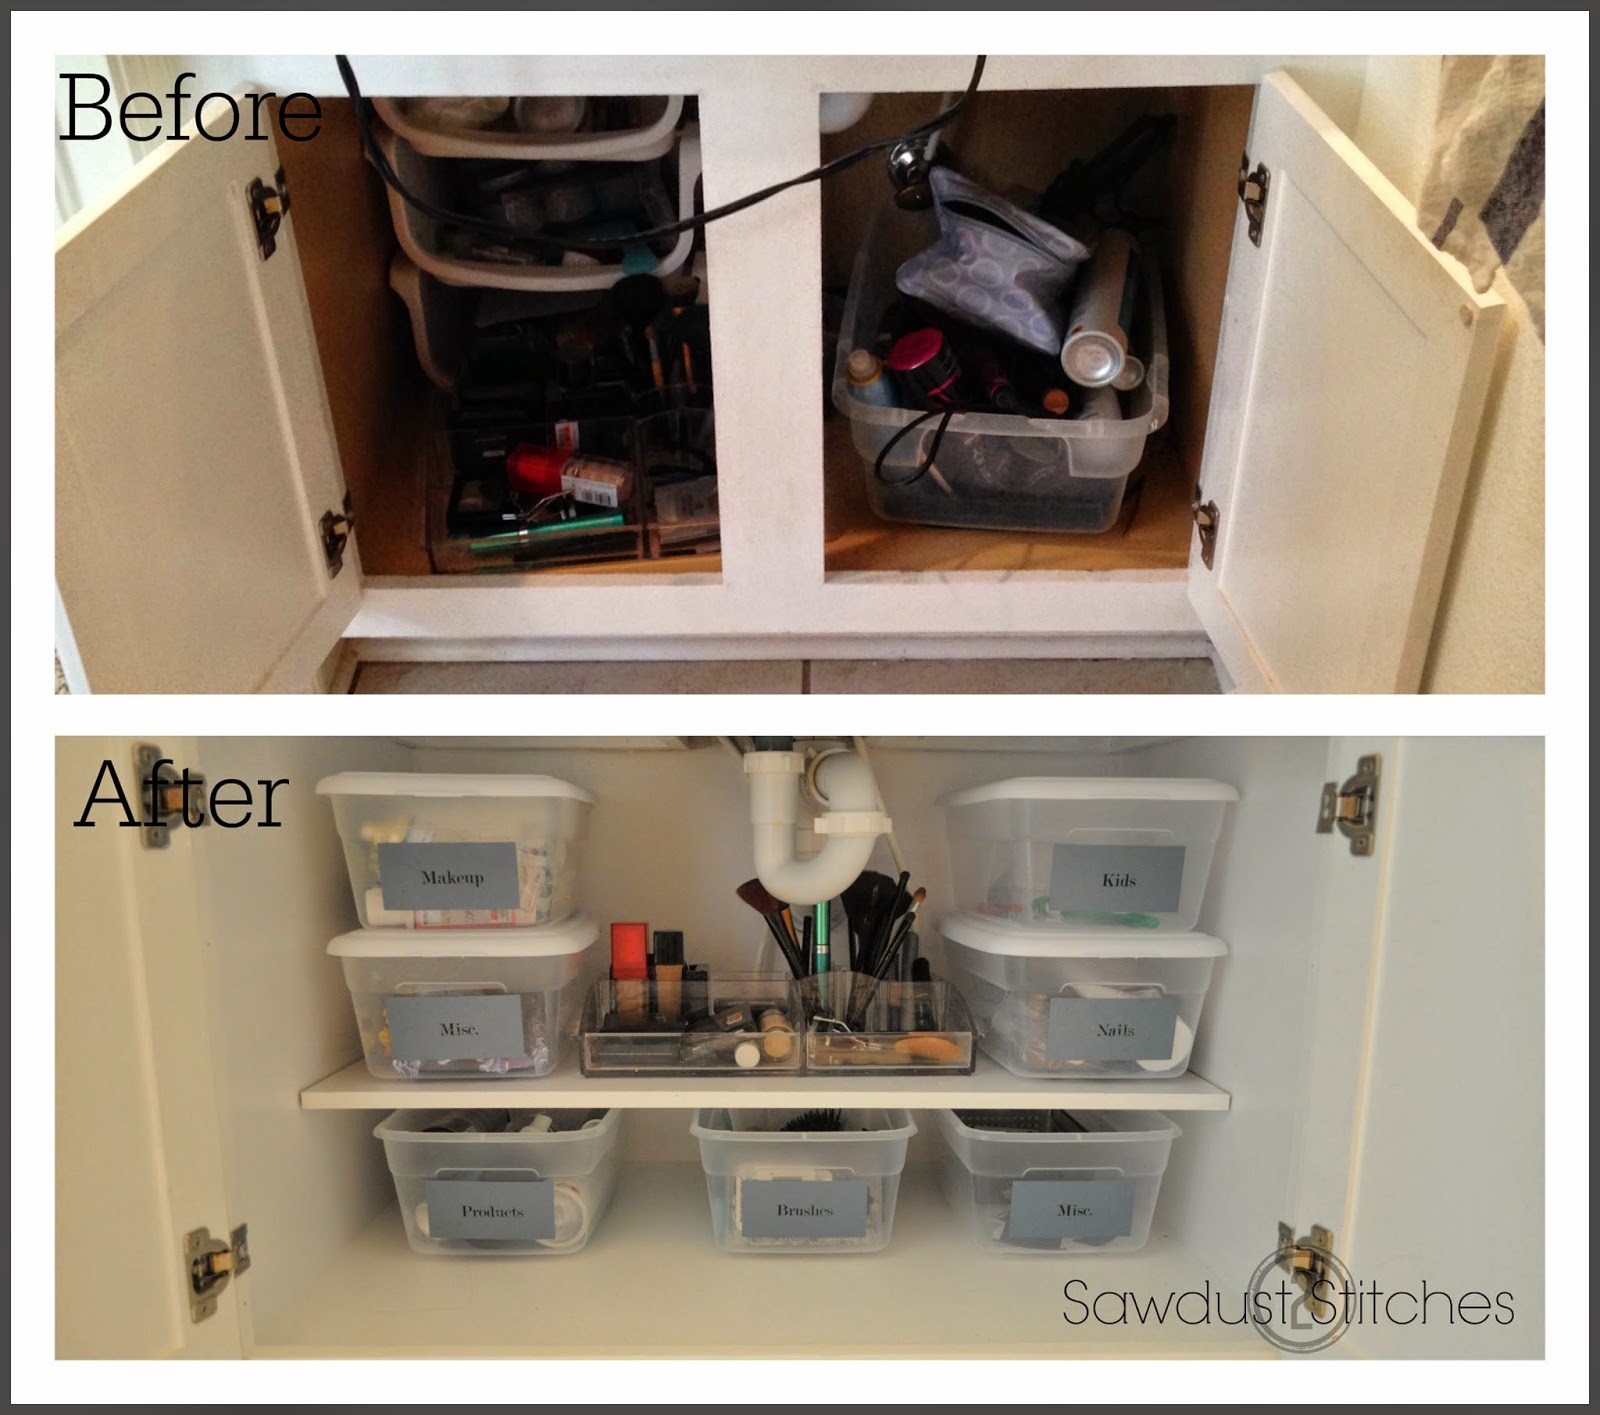
I tend to focus on a lot of big projects,  but sometimes it’s all about the small details.  So, today  I have an easy 1 hour project for all the afternoon crafters out there . Enjoy!

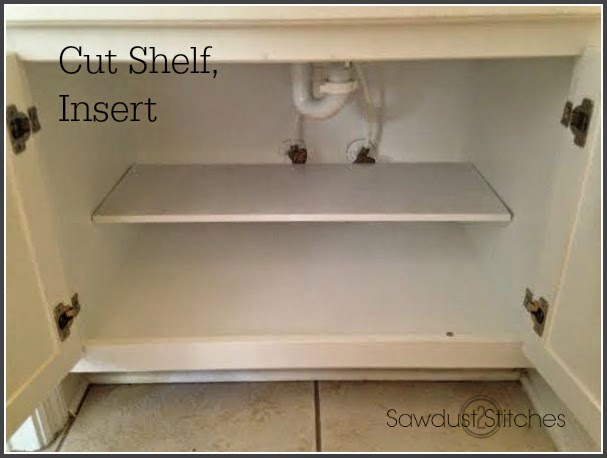
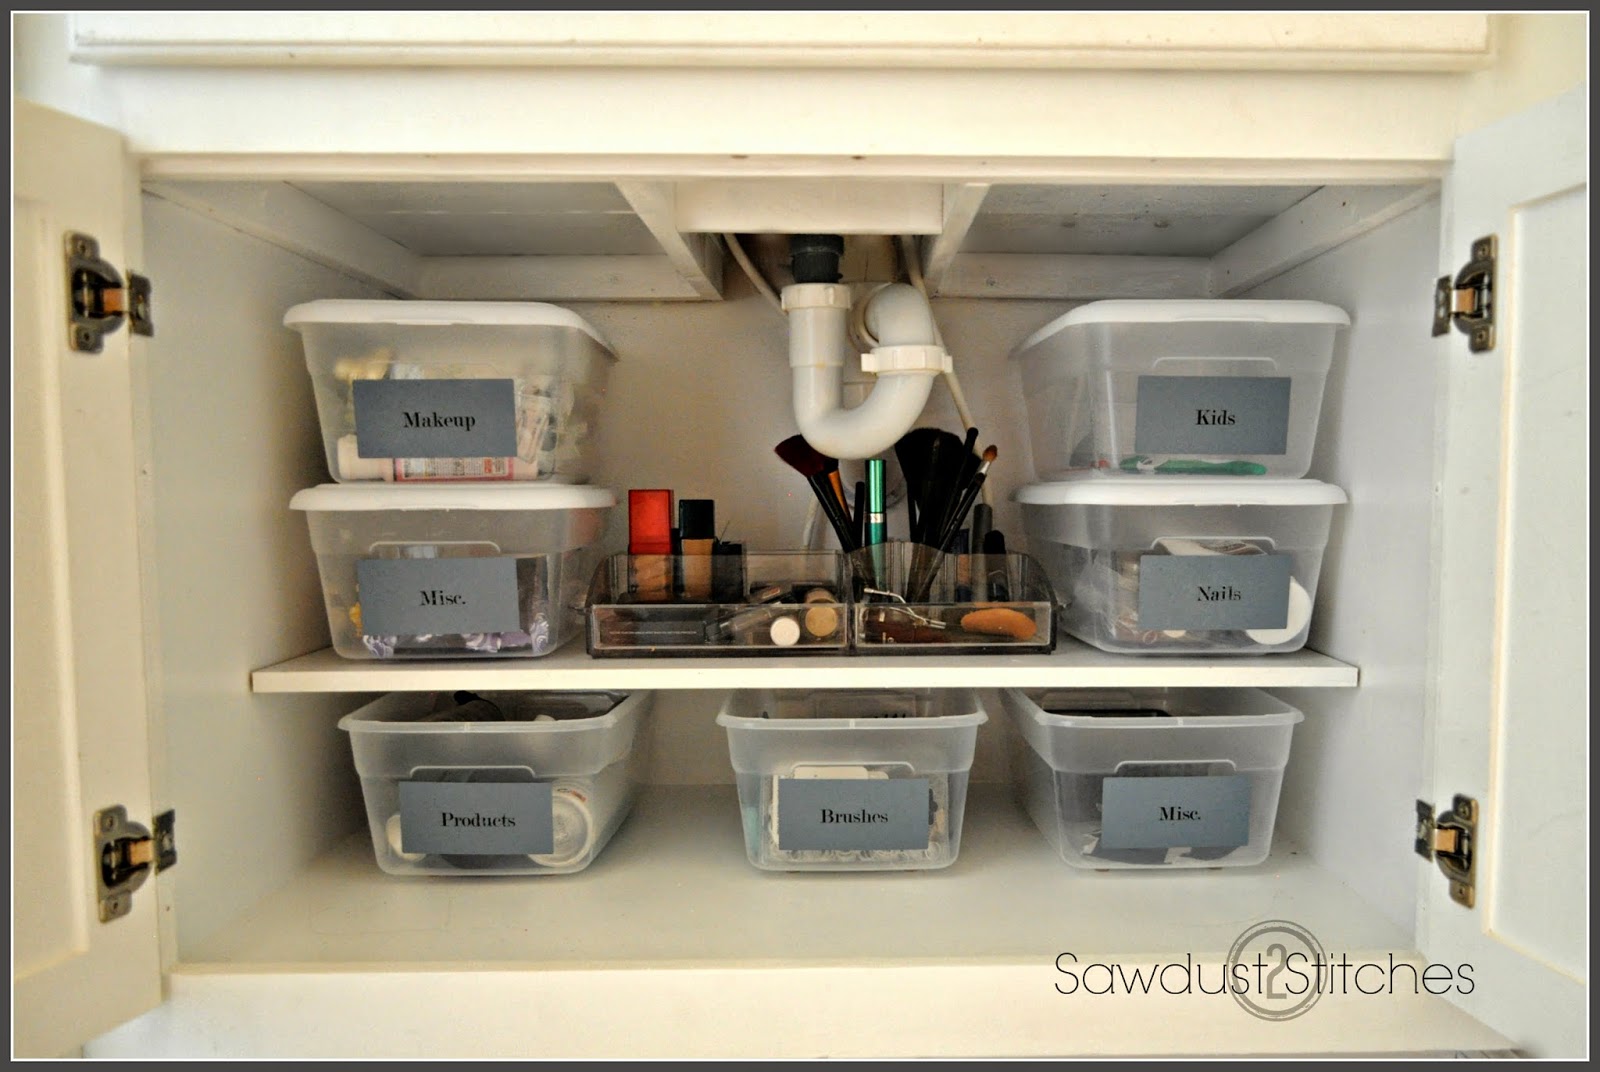
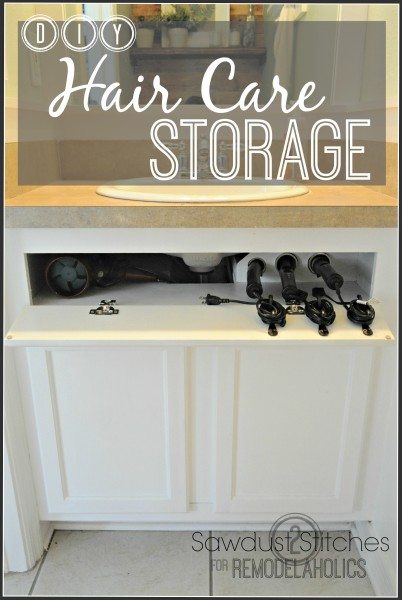
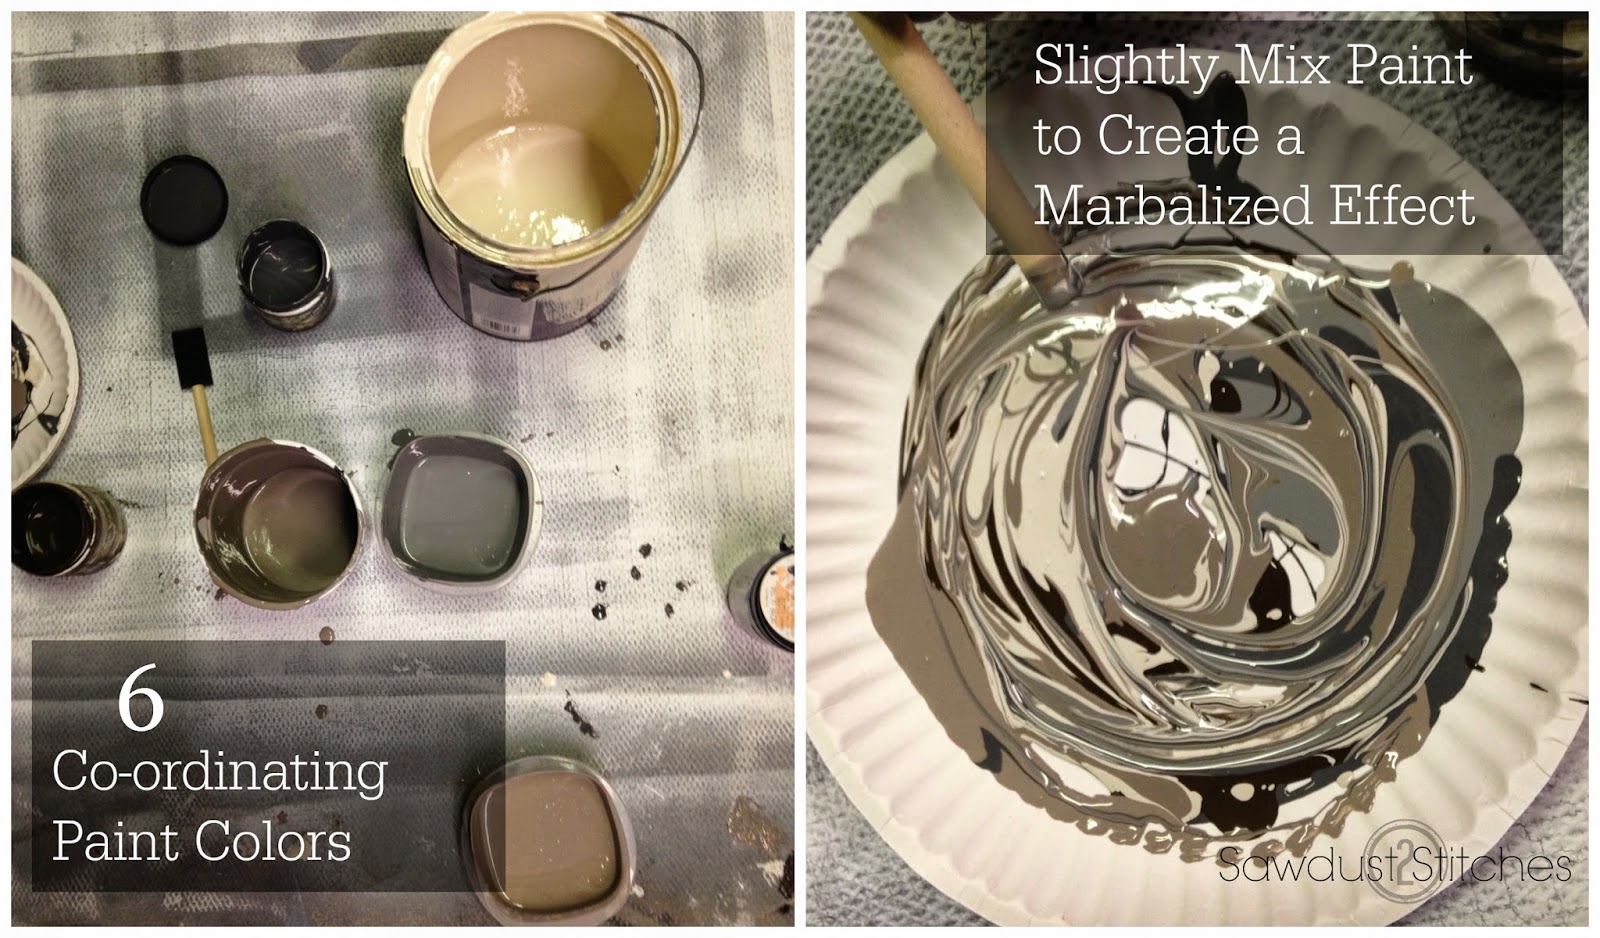
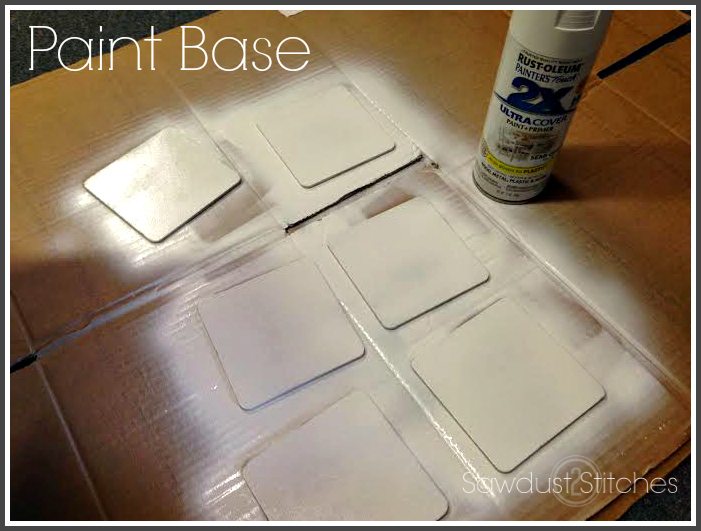
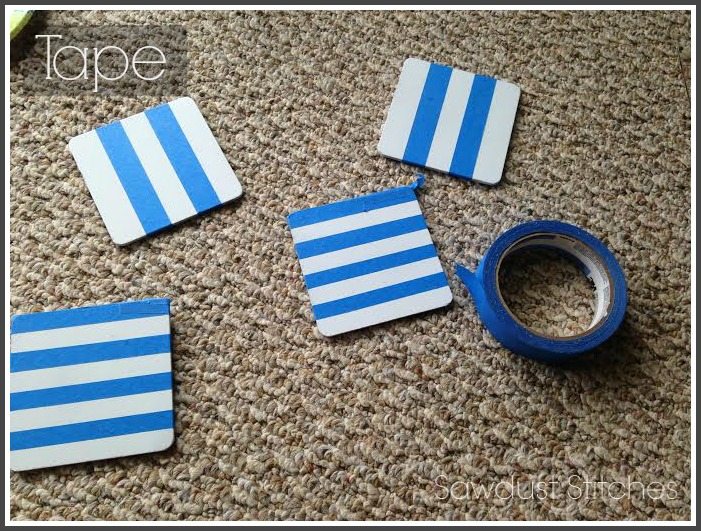
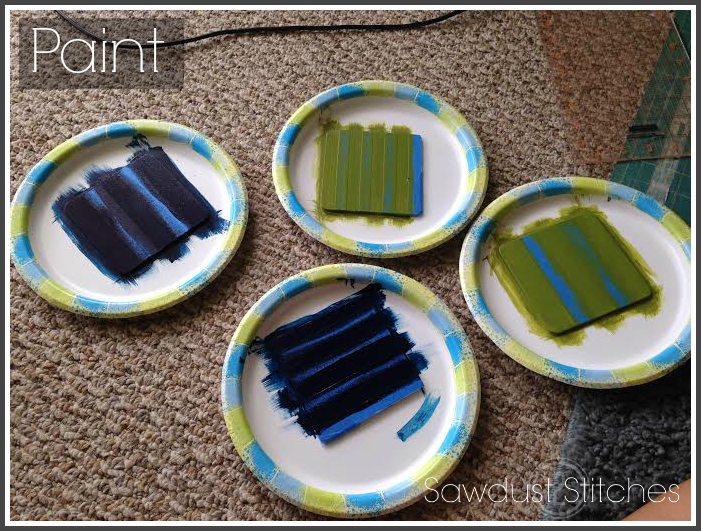
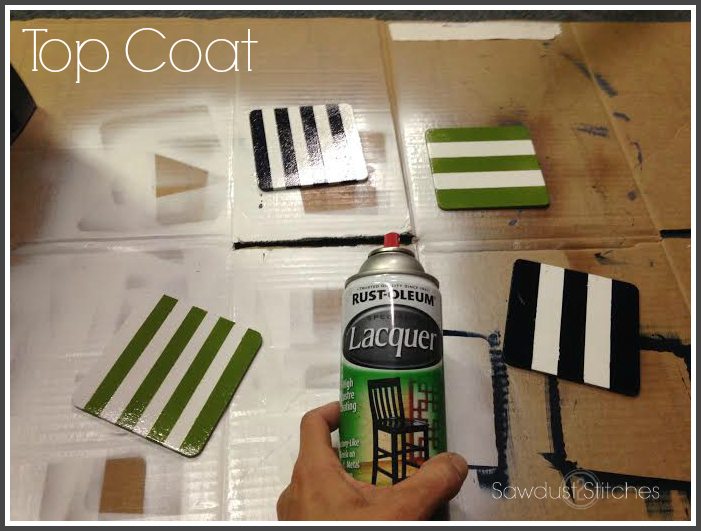
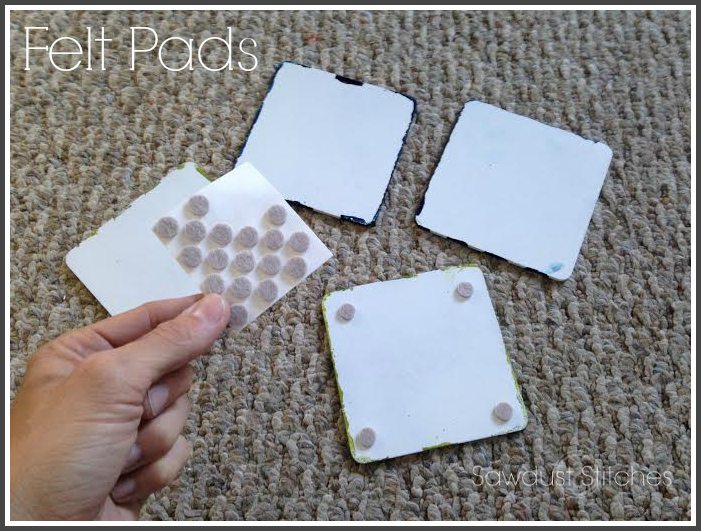
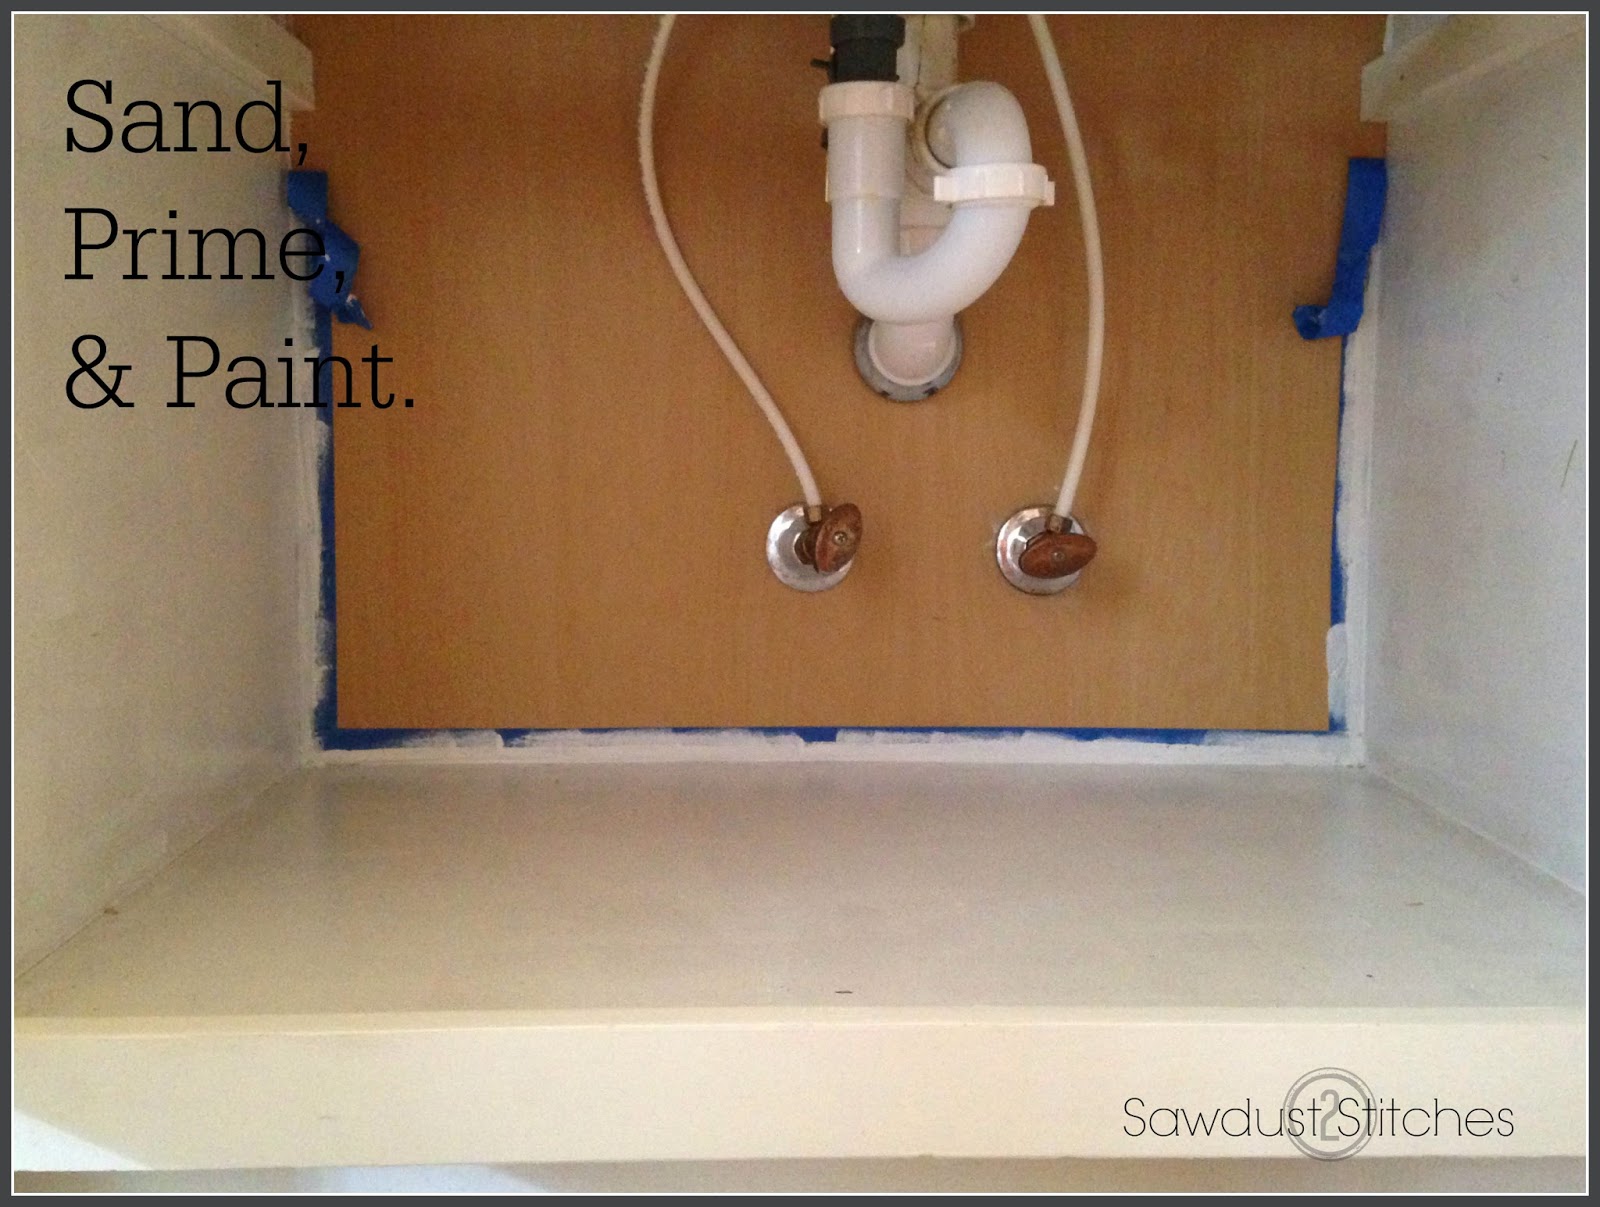
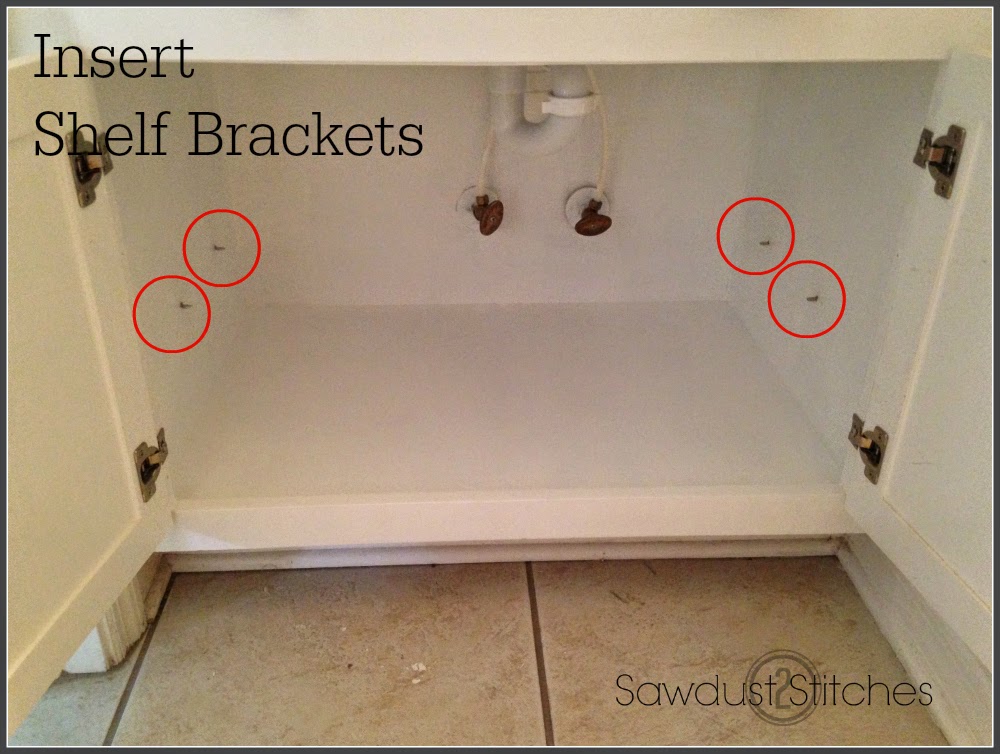
 I don’t want to insult your intelligence,  by  going into  a lot of detail.  The pictures are fairly  self explanatory.

coasters  plain ss

coasters primed ss

coasters paint ss

coasters tape ss

coasters  paint stripes ss

take off tapedawd

coasters laquer ss


coaster grippers ss


coasters displayed ss

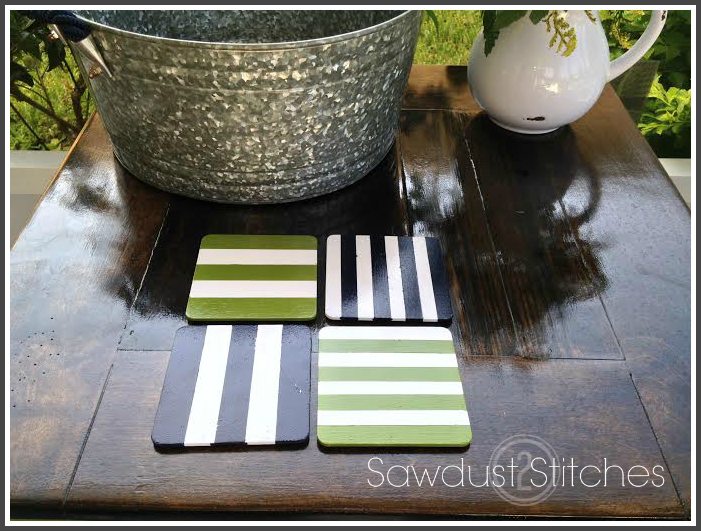
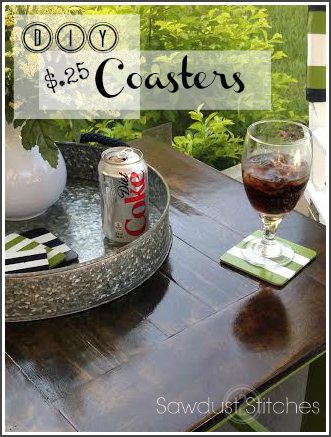
There you have it,  a  quick and easy project  that adds pizazz to any space.  I  have these sitting in my outdoor lanai area, and I think it  is the icing on the cake.  It’s all about the small details.

coasters green ss

coasters final ss  
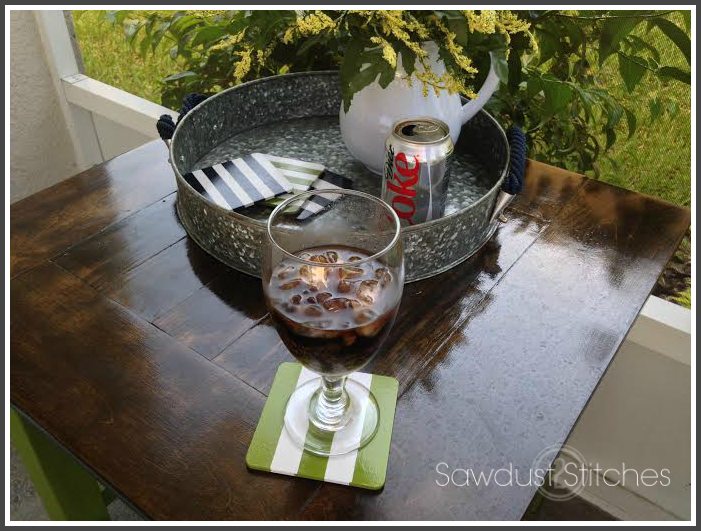
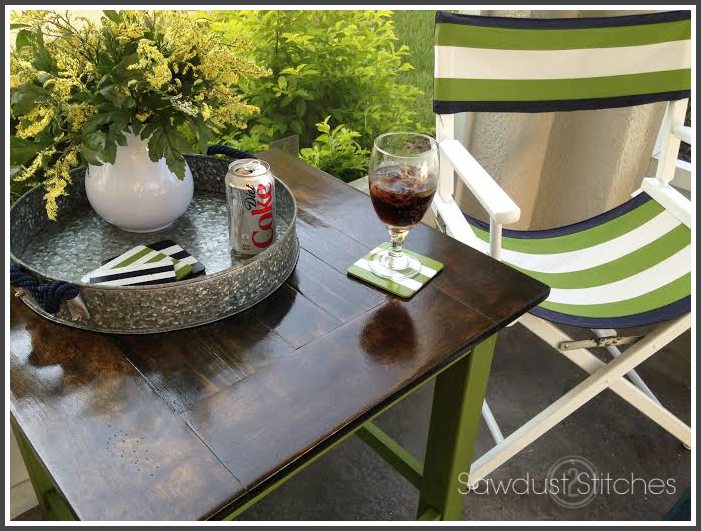
Doesn’t this  look so inviting ?

 Take Luck,

Corey

Tall Headboard

July 7, 2014

 Hey everyone,  today you can find me over at Remodelaholic.com !   I will be showing you  how you can make your very own Tall  Headboard!

Patio Table Makeover

June 24, 2014

rectangle  table after  title


  Supplies Suggested:

  • Old beat up table
  • 1×4’s
  •  Stain
  • Paint
  • Polyurethane
  • Wood Filler
  • Wood Glue

 Tools Needed:

  •  Sander (  I used a planer too)
  • Miter Saw
  • Nail  Gun


I found a random table sitting on the curb in our neighborhood.  I actually  drove right past it the first 2 days.   I couldn’t think of any great place to put it.  So I figured I would skip the step of storing it in my garage.

square before after

It was while I was working on my patio floor,  that it dawned on me,  I need a matching table to accompany this plain jane rectangle table.  *Light Bulb*.

before  after rectangle

* FYI- I am working on two different tables through this project,  so don’t be confused when  it shows a square table  then a rectangle table, and vis- versa.  The goal was to make these two Non-matching tables,  match.*

Prep:

I prepped by scuffing/sanding all surfaces.

Patio table sand

Priming:

I began by  taping off anything,  I did’t want painted.  Once taped,  I was ready to prime. ( I  am aware that there are many paints, that contain primer.  I am old school, and I  think that primer makes a difference.)

I am going to let you all in on a secret… SPRAY PRIMER.  I love it,  I do.  As much as I boast being frugal,  this is one item I think is worth it’s weight in gold.   It creates a perfect base,  with little or no streaks.  Yes, it is more expensive than by-the- gallon  primer, but like I said,  I love it.

prime base  patio table

Paint:

I realize this doesn’t follow the pictures,  but when I was making these,  I was still undecided as to there ending color.  SO I skipped to the next step. BUT for anyone who doesn’t struggle with  commitment to color,  I would strongly suggest painting now.

Wood Slat Top:

All the measurements will vary dependent on the size of table,  below is an example of what I did for the rectangle table.    I cut all the  boards so that it would have a border of 1×4’s and the center would be slats.  I calculated my wood pieces so that it would have 1.5″ over hang.  This is a personal preference.


patio table  topGlue it Down:

As a precaution I glued all my slats down,  I wanted to eliminate ANY gap under the board.  (These tables are intended to endure  outdoor humidity in Florida.  Small  crevices are gross here.)  Just slather on some glue, and  press all the boards in place firmly.

patio table wood glueNail er’ Down:

Once all the boards are in place,  I also tacked them in place with a nail gun.  I didn’t want those suckers going anywhere.

patio table ds

 Wood Filler:

No matter how perfect my measurements,  there are always annoying cracks.  Again,  since these are intended for outdoors,  I could not afford and places for water to permeate.  So, I filled all of them!  I filled them all twice.  I was not taking any chances.

wood filler  patio table

Stain:

Once the wood filler is  dried,  I then stained the top.  I used Jacobean by Minwax.

stain and paint  patio tableAll in the Details:

After the top was stained a dark brown,  the legs of the table looked VERY, VERY  green.  So, I used the technique that I explained here.   It helped considerably.  At this point I also added the trim piece you see directly  under the stained  table top.

antiqued patio tables

 Polyurethane:

Polyurethane  serves as  protection to stained surfaces, so I polyurethaned the crap out of those tables.  I think I did 4 coats ?   Just make sure you follow the directions on your choice of Polyurethane.  I always use  fine steel wool  in between  each coat.


polyurethane ss

Overall,  I think I  spent $4.00 on a paint sample from  Home Depot  (the green) and $4.00  on 1×4’s. The rest of the materials I  had on hand.   So,  $8.00?  I would count that as a win!


rectangle  table after

square table after

In conclusion,  if you have an  old table sitting around,  that  could use a little more than just paint ?  I would consider this option.  It creates a little more high-end look for  cheap.  Anotheradvantage to using this approach ?  You can easily make mis-matched tables look uniform!  No one would ever know that these tables aren’t originally part of a set. Booyah

Take Luck,

Corey

Hair Tool Storage

June 21, 2014


As many of you know,  I was recently asked if I would like to be a contributor with “Remodelaholic”. Well,  today is my  first official  post as a member of the team, and I am absolutely thrilled! I am pleased to present today’s  tutorial…

You can see how I  turned a  false front cabinet door, into something amazing! Head on over to Remodelaholics  to read more, and make sure to show them some love!
Corey

Under Sink Organization

June 19, 2014

I  don’t think I am alone in the fact that I am typically trying to pack lunches,  make breakfast,  dress kids, and at least ATTEMPT to look human.    Let’s face it,  morning itinerary is not conducive to “putting my face on”.  Especially, if I am running  up and down the stairs from my bathroom and then back down to the kitchen 18 different times. * I live in Florida, we sweat WHILE showering.  Running stadiums, doesn’t do us any favors.  So,  slowly the downstairs powder room,  became “my bathroom”.  It’s small, and I require A  LOT of stuff.

It was a cluttered mess,  and it was driving me crazy. Well, I finally decided to do something about it!
Tools Used:
Miter Saw
Drill
Paint Brush/4″ Roller
Materials  Needed: 
Shelf Supports 
3/4″ Screws
Primer
Paint to Match Cabinets 
3/4″ MDF or Plywood (Mine was 29″x11.5″)
Clear Shoe boxes (If desired)

Let’s get started:  After trying to fit different size boxes, totes, drawers, and bins,  I ultimately decided this space was awkward! Even when using bins, the usable space was limited due to the plumbing hardware and that STUPID divider.

 
 Well suffice to say , I eliminated said problem. Done.

I then sanded down any residual wood frays and glue, and it was ready for primer and paint. Easy.

The next problem I had to tackle,  is the board I  just cut out  of the cabinet,  hid the gap between the cabinet doors.  So,  I needed a filler.  I measured and cut a piece of  1/4″ oak.   Double checked that it fit, and then primed and painted ( I had a can of spray primer sitting next to me,  that’s why it’s gray.) I actually  painted these cabinets a while back.  (You can see the tutorial here.)  I simply  painted it the matching color. *If you are doing this to factory stained cabinets,  you can either use the board you  just  cut out,  OR you will need to match the finish on your new board.

It is then a simple task of fastening the new board to the back of the cabinet. I  pre-drilled  my holes, and then used 3/4″ wood screws.  (The length of screw will be dependent on the width of your boards and cabinets etc.)

Now,  when you shut the cabinets, there will not be a gap! * Something to keep in mind;  attach the board to door you would naturally open  second.  All that is left now, is to add a coat of paint. At this point you have created a large open space that is easier to access, and can easily store more…  I decided to take it a step further. I not only wanted it to be organized, but “pretty” as well.  So, while  I had the paint out  I repainted the inside of the cabinet.   I  used the same process I used  on  the “Decorative Kitchen Cabinet”.

It looked so clean and bright, I loved it!   I still wanted to add a shelf though.  I typically use totes, but I didn’t want to deal with the hassle of stacking and unstacking.  Who has time for that?  I used a very easy method that is typically seen in kitchen cabinets.  I used cabinet shelf  supports, they are very easy to use. Mark  the height and depth of your shelf and drill 4 holes, then  pop in these small  shelf supports, easy!

 Last thing you will need to do is install a shelf.  Begin by  measuring the width of the cabinet and determine how deep you would like your shelf.  Cut to the desired dimension,  then paint and prime.
Once the shelf is dry,  just pop that sucker in and you should be good to go!

Now, I am a little bit of an organization nut,  so I made my shelf to accommodate clear totes.  BUT  look at how pretty it looks!

So, when your kids are freaking out over who gets to use the  “blue bowl”, and you realize  that you were suppose to bake 2 dozen gluten free/dye free cupcakes… AT LEAST  you have a little piece of sanity.  When you are throwing on your mascara (only because if someone asks you ONE MORE TIME if you a “not feeling well?” when you don’t wear it… someone might get a sucker punch to the throat.) you can feel like there is a LITTLE bit of sanity in your life. So, take luck my friends. Go though the headache of organizing now,  to save your sanity later.  (That, and maybe save a few innocent “well-meaning”  folks their  larynxes.)  Take Luck, Corey

Want to learn how I did this ?  Sawdust 2 stitches top pic 3Check it out here!

Patio Floor Makeover

June 11, 2014

Here is the deal,  I live in Florida, and during the rainy season it obviously  rains, a lot.  After it rains, SOMEHOW  the patio floors always looks  dingy and dirty.  I have painted it several times, and each time it looks old and dirty with in a week.

      I was looking at the back yard,  and I had a “DUH”  moment. The concrete patio pavers!  I had painted/stained them, why couldn’t I do the same to the patio floor ?!  Eureka. I  grabbed some paint and stain, and this is what  I did:
 I   mixed up 6 different complimenting colors.  I then drizzled some of each color on paper plates.  I then swirled it around to create a marble look.  (Don’t over mix it or it could potentially turn  hideous  solid color.)
  I  used plastic bags and crinkled them up and just started “dabbing” away.
 It went  quicker than I imagined,  but was still tedious.

Once  I had finished dabbing the paint on,  I felt like it still looked incomplete.  I wanted something to  fill in the lighter patches.

  I  grabbed the stain, it was a thinner consistency and would fill in any holes and crevices  and create some visual texture.  I simply took a small amount of stain on a foam bush and lightly brushed it on and then quickly  wiped it back off with an old rag.
  I let mine dry a few days (it’s really  muggy here in Florida.)
 Really that’s all there is to it.  It is fairly simple, and really cheap project!  I didn’t spend a single cent on this floor revamp. ( I  had  all the materials on hand.)  I really love the way it turned out! The pictures don’t really do it justice.  Bonus, it hides the dirt perfectly.  Score!  Gotta love that!
 Take Luck,
 Corey
  • previous
  • Page 1
  • Interim pages omitted …
  • Page 37
  • Page 38
  • Page 39
  • Page 40
  • Page 41
  • Interim pages omitted …
  • Page 47
  • next

Primary Sidebar

  • Facebook
  • Instagram
  • Pinterest
  • Twitter
  • YouTube
IMG_9167 (1).jpg fd
DIY & Design

Meet Corey

Hi everyone, my name is Corey, and I have a problem. I can’t leave well enough alone… The best therapy usually involves a variety of power tools. So, in the few “spare” moments I am not entertaining my two beautiful, rambunctious, boys, I can typically be found hunched over a sewing machine and/or covered in sawdust. All in the efforts to create a perfect balance of aesthetics and practicality in our home.
read more

Join our mailing list!

DIY & design ideas - right in your inbox!

Featured

Stair Tread Makeover

Categories

  • 70's Ranch Home
  • Around the House
  • Build Plans
  • Crafts
  • Current Home
  • Decor Makeovers
  • Dresser
  • Exterior
  • Fall
  • First Home
  • Furniture Makeover
  • Hidden Compartment
  • Kitchen
  • Lighting
  • Makovers
  • Master Closet
  • Organization
  • R.V.
  • Room Makeovers
  • Seasonal
  • Seating
  • Sewing
  • Shelving
  • Small Builds
  • Smart Home
  • Spring
  • Summer
  • Tables
  • Tablescape
  • Tutorials
  • Uncategorized
  • Wall Art
  • Wall Decor
  • Winter
  • Workshop

Footer

Contact Me: Corey@Sawdust2Stitches.com

Latest ‘Grams

Follow on Instagram
2020 © Your Blog Name
theme by soleilflare
Enter your name and email and get the weekly newsletter... it's FREE!
Your information will *never* be shared or sold to a 3rd party.