I don’t think I am alone in the fact that I am typically trying to pack lunches, make breakfast, dress kids, and at least ATTEMPT to look human. Let’s face it, morning itinerary is not conducive to “putting my face on”. Especially, if I am running up and down the stairs from my bathroom and then back down to the kitchen 18 different times. * I live in Florida, we sweat WHILE showering. Running stadiums, doesn’t do us any favors. So, slowly the downstairs powder room, became “my bathroom”. It’s small, and I require A LOT of stuff.
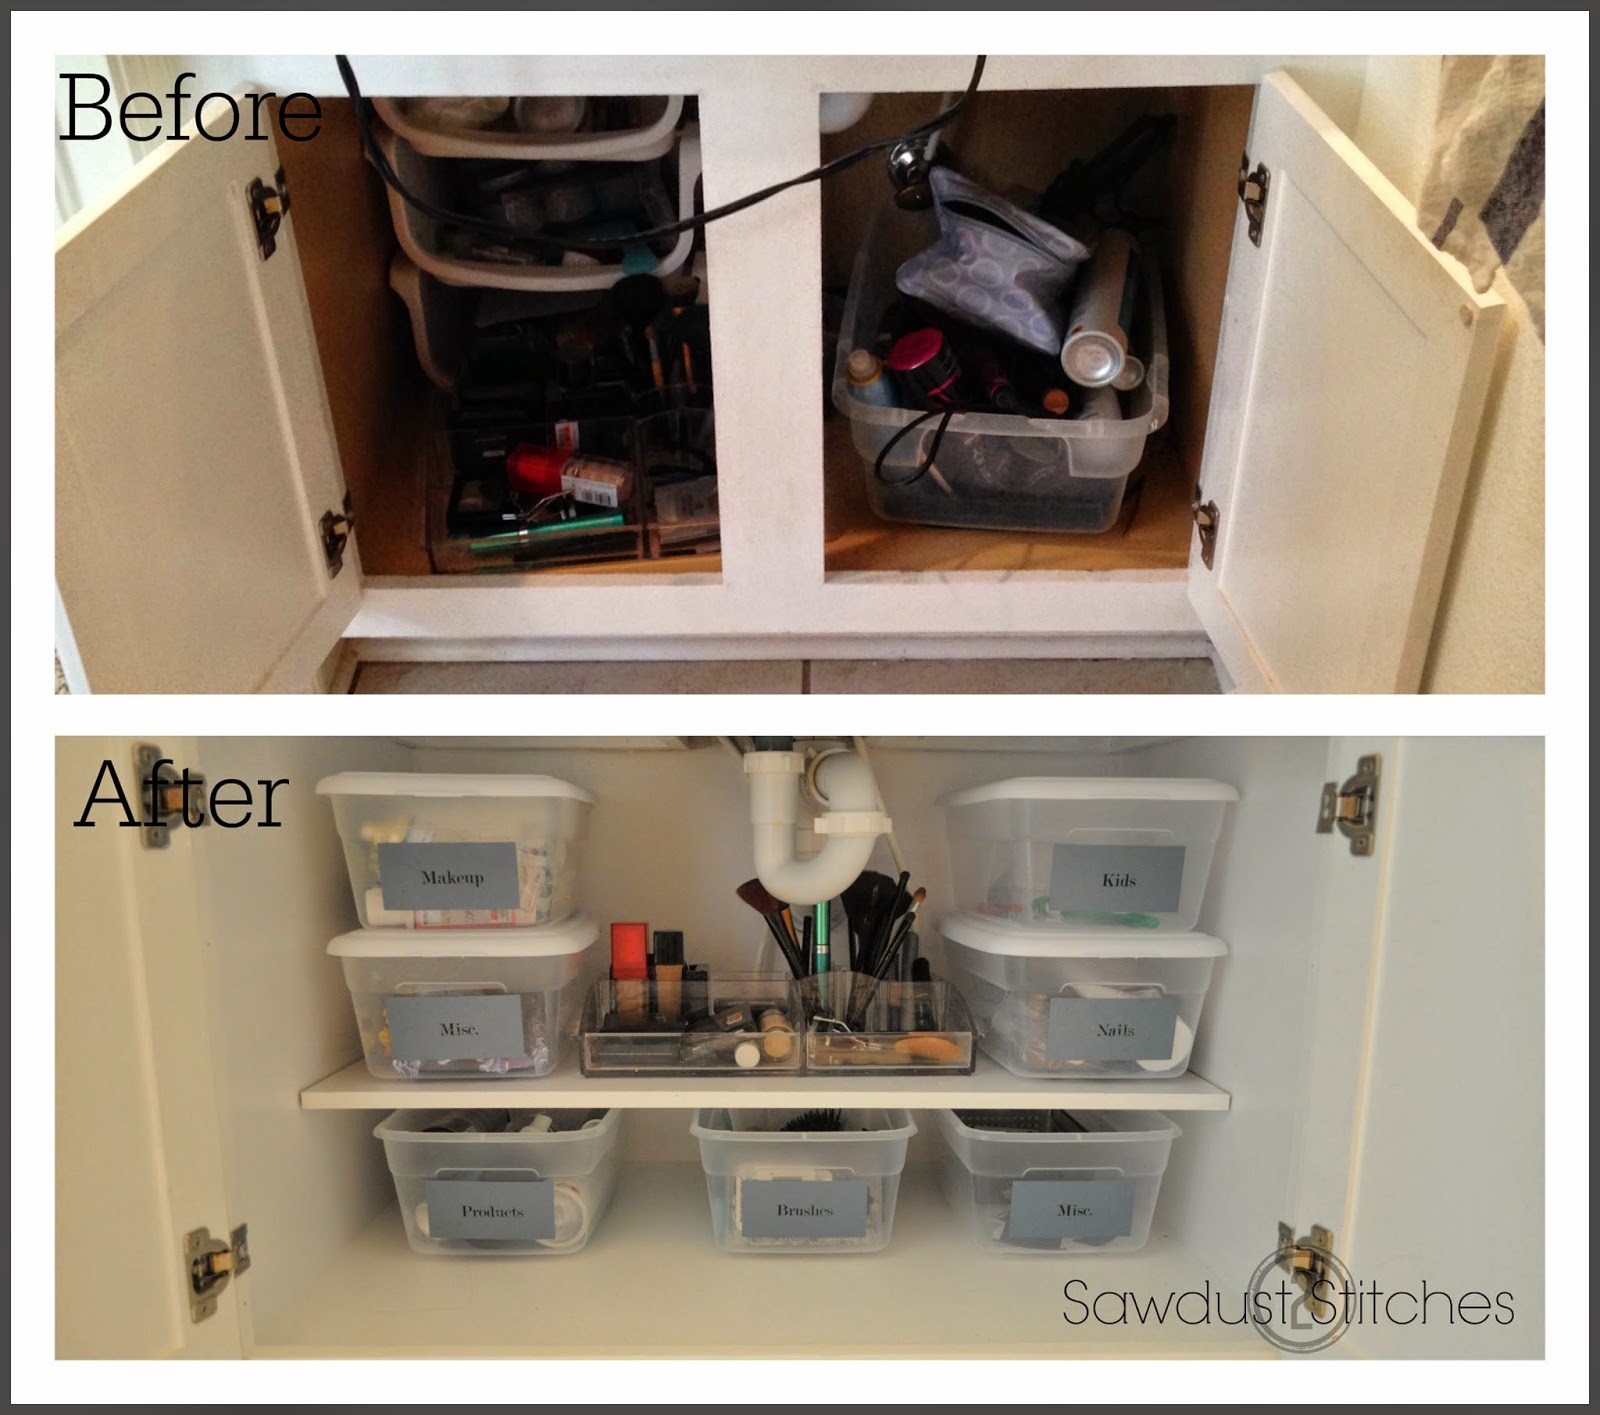
Let’s get started: After trying to fit different size boxes, totes, drawers, and bins, I ultimately decided this space was awkward! Even when using bins, the usable space was limited due to the plumbing hardware and that STUPID divider.

.jpg)
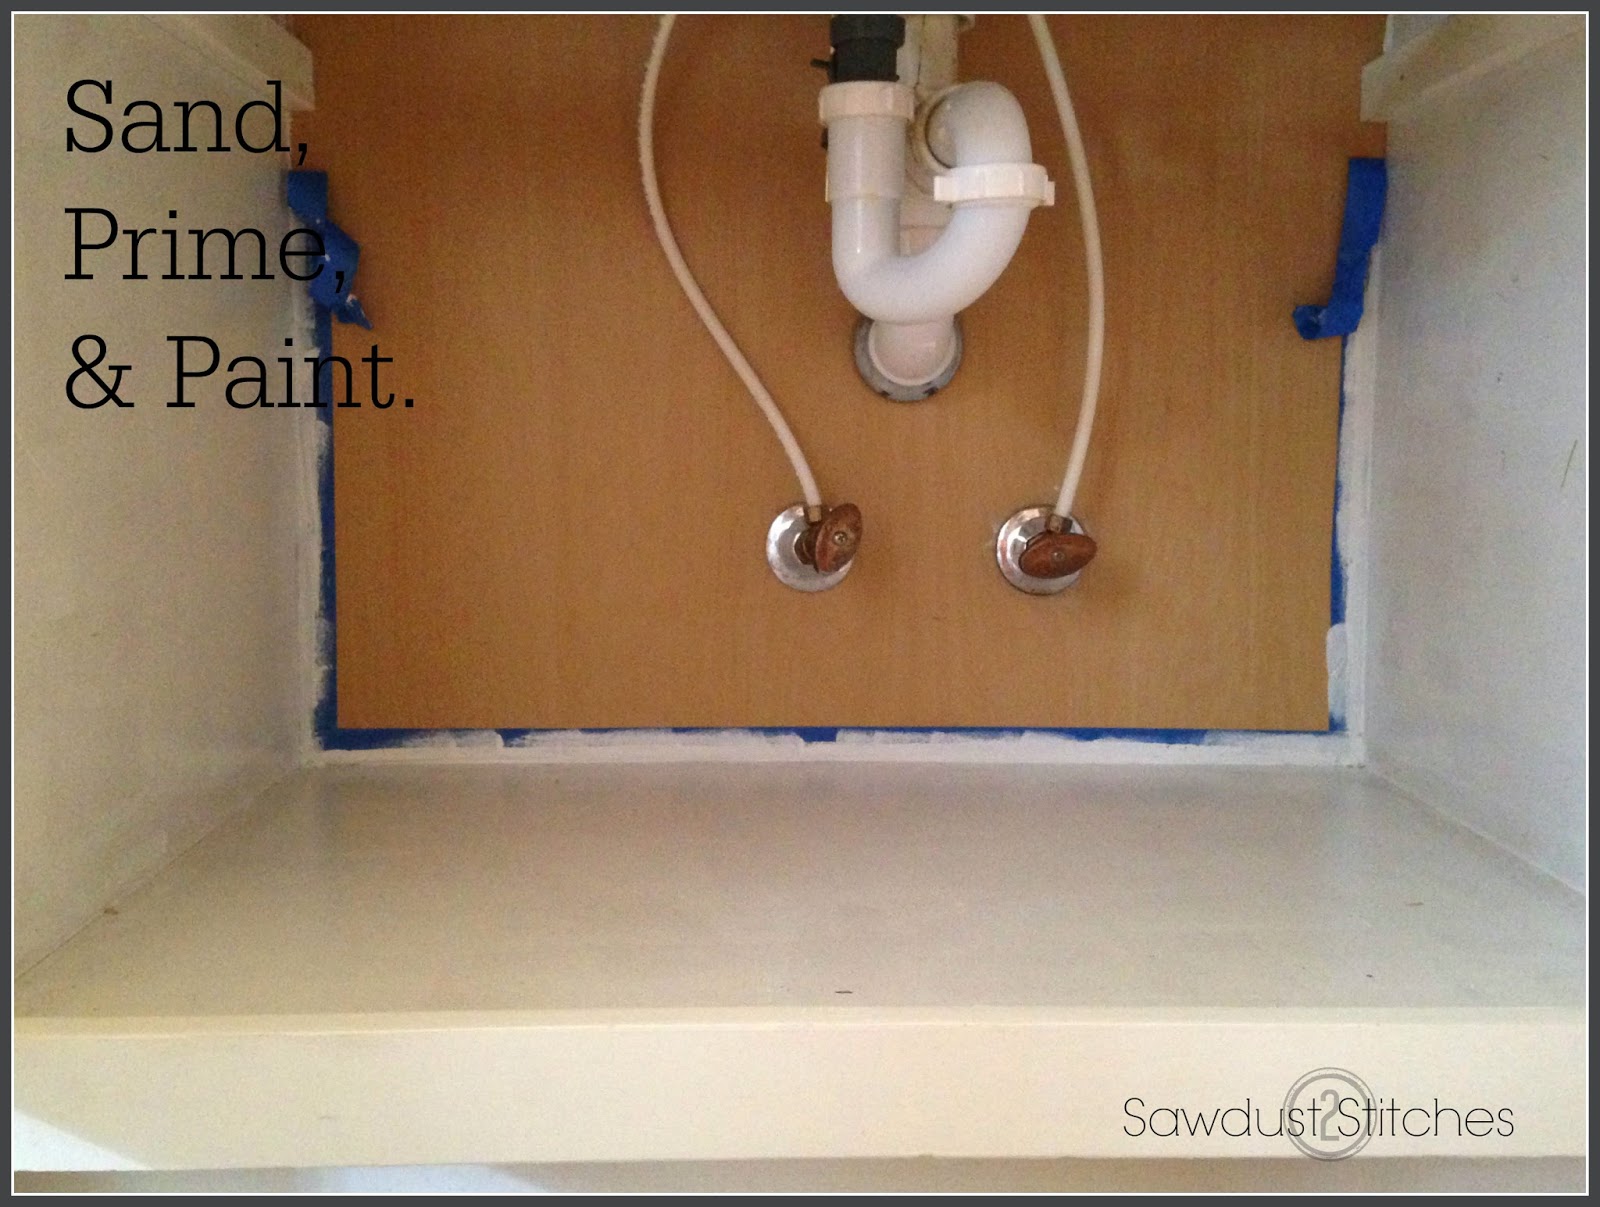
I then sanded down any residual wood frays and glue, and it was ready for primer and paint. Easy.

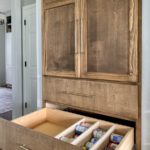
The next problem I had to tackle, is the board I just cut out of the cabinet, hid the gap between the cabinet doors. So, I needed a filler. I measured and cut a piece of 1/4″ oak. Double checked that it fit, and then primed and painted ( I had a can of spray primer sitting next to me, that’s why it’s gray.) I actually painted these cabinets a while back. (You can see the tutorial here.) I simply painted it the matching color. *If you are doing this to factory stained cabinets, you can either use the board you just cut out, OR you will need to match the finish on your new board.

It is then a simple task of fastening the new board to the back of the cabinet. I pre-drilled my holes, and then used 3/4″ wood screws. (The length of screw will be dependent on the width of your boards and cabinets etc.)

Now, when you shut the cabinets, there will not be a gap! * Something to keep in mind; attach the board to door you would naturally open second. All that is left now, is to add a coat of paint. At this point you have created a large open space that is easier to access, and can easily store more… I decided to take it a step further. I not only wanted it to be organized, but “pretty” as well. So, while I had the paint out I repainted the inside of the cabinet. I used the same process I used on the “Decorative Kitchen Cabinet”.
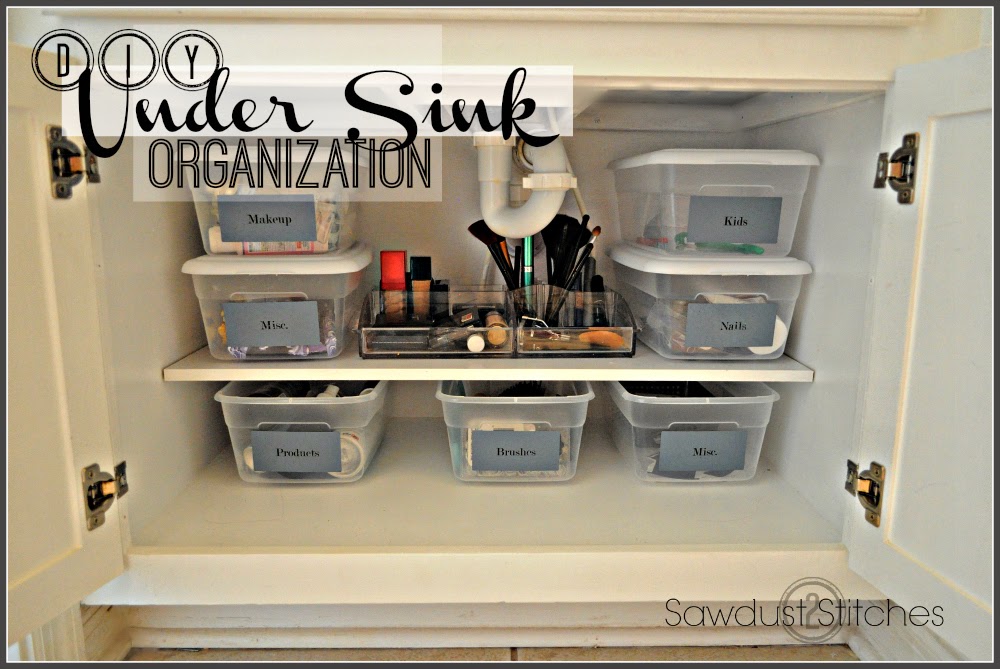
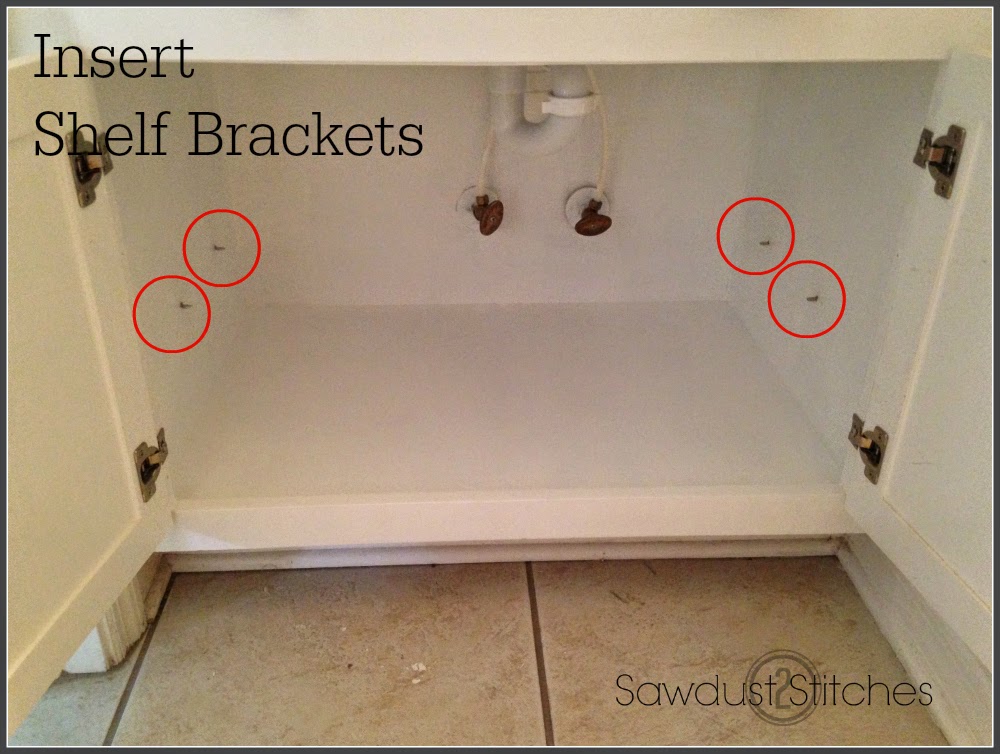
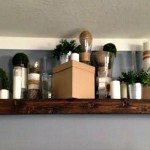
It looked so clean and bright, I loved it! I still wanted to add a shelf though. I typically use totes, but I didn’t want to deal with the hassle of stacking and unstacking. Who has time for that? I used a very easy method that is typically seen in kitchen cabinets. I used cabinet shelf supports, they are very easy to use. Mark the height and depth of your shelf and drill 4 holes, then pop in these small shelf supports, easy!

.jpg)
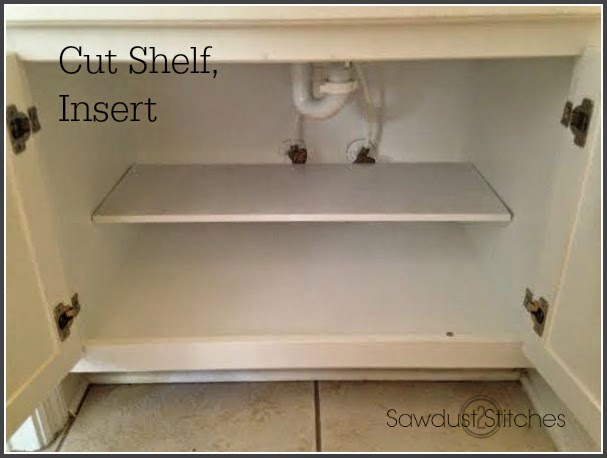
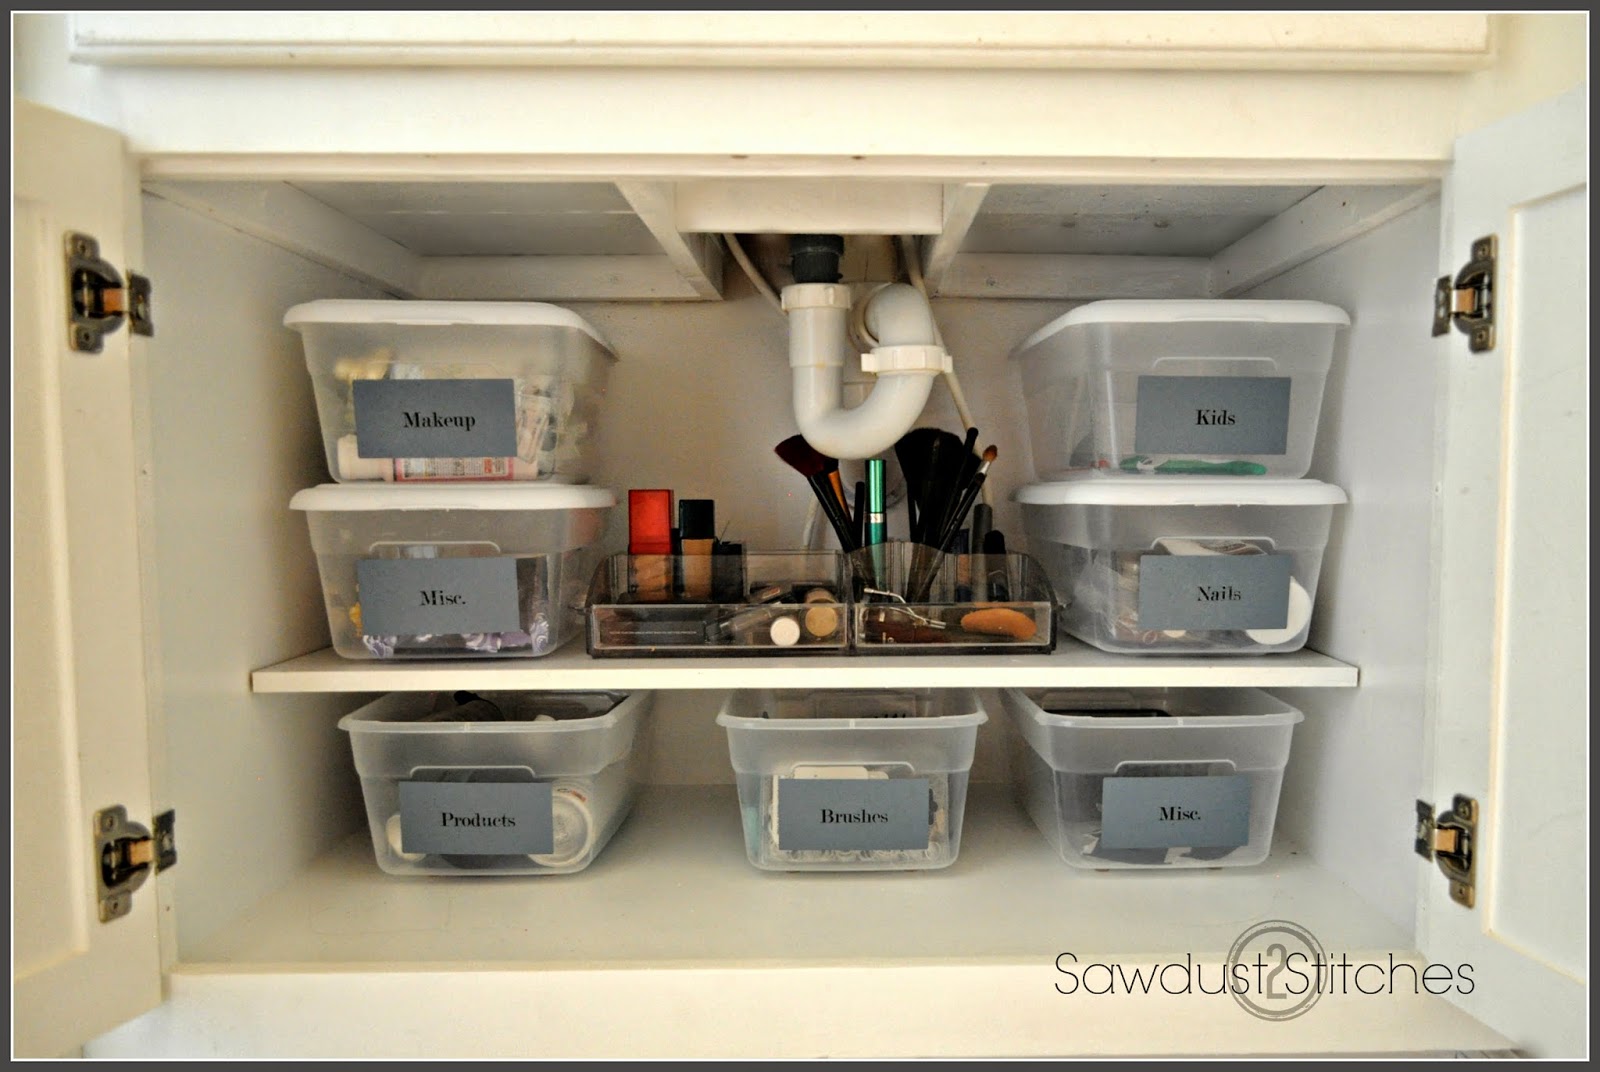
Now, I am a little bit of an organization nut, so I made my shelf to accommodate clear totes. BUT look at how pretty it looks!
So, when your kids are freaking out over who gets to use the “blue bowl”, and you realize that you were suppose to bake 2 dozen gluten free/dye free cupcakes… AT LEAST you have a little piece of sanity. When you are throwing on your mascara (only because if someone asks you ONE MORE TIME if you a “not feeling well?” when you don’t wear it… someone might get a sucker punch to the throat.) you can feel like there is a LITTLE bit of sanity in your life. So, take luck my friends. Go though the headache of organizing now, to save your sanity later. (That, and maybe save a few innocent “well-meaning” folks their larynxes.) Take Luck, Corey
Want to learn how I did this ? 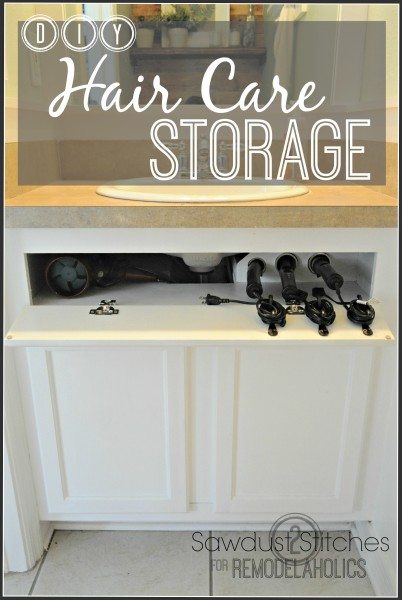 Check it out here!
 Copyright secured by Digiprove © 2015


Love this (along with your genius hair tool storage) … for years, whenever I’ve seen these shelf supporters in stores, I’ve bought ’em, so that I can add shelves to whatever I might like to, in the same way you did. But when a piece isn’t already drilled, I can be lazy and then I use kids’ cardboard building blocks to support a new shelf.
I found these blocks years ago in a catalog — they are about the size of standard bricks, and look like brightly painted bricks once folded and tucked into their final shape. When I didn’t want to see the primary color, I just covered in fabric or paper of my choosing. They are only about an inch in depth, so don’t take up much room. If you’ve got it to spare within a cabinet, I highly recommend! They are lightweight but VERY strong.
Meanwhile, a note of caution — keep an eye on your vanity top in the coming months and years, as that annoying center piece isn’t just for show. The vanity top may start to sag, so subtlely you don’t notice until one day — Yikes! You might consider placing two vertical supports inside the cabinet such that they don’t block easy access to your storage bins. This came to mind as I just realized my elderly mom’s extended counter top on her bathroom sink/vanity wasn’t strong enough to maintain its horizontal integrity, and has sunk enough in the middle to make opening the drawer in the cabinet more and more challenging.
Thanks for sharing your stuff!
Cardboard building blocks probably work just as well, and are probably considerably quicker! haha
Thanks for the words of caution, I will make sure I keep it in mind.
Thanks for reading!