• Blog
  • About
  • Press
  • Privacy

Let’s be social!

  • Skip to primary navigation
  • Skip to main content
  • Skip to primary sidebar
  • Skip to footer
Sawdust 2 Stitches

Sawdust 2 Stitches

  • Tutorials
    • Around the House
    • Organization
    • Wall Decor
    • Sewing
  • Makeovers
    • R.V.
    • Room Makeover
    • Furniture Makeover
    • Decor Makeover
  • Build Plans
    • Small Builds
    • Wall Decor
    • Dresser
    • Tables
    • Seating
    • Shelving
    • Hidden Compartment
  • Seasonal
    • Summer
    • Spring
    • Fall
    • Winter
  • Home Tours
    • First Home
    • Current Home
    • 70’s Ranch Home
  • Workshop

Blog

Holiday Chalkboard Signs

November 24, 2014

Sawdust2stitches Christmas Chalkboard Signs
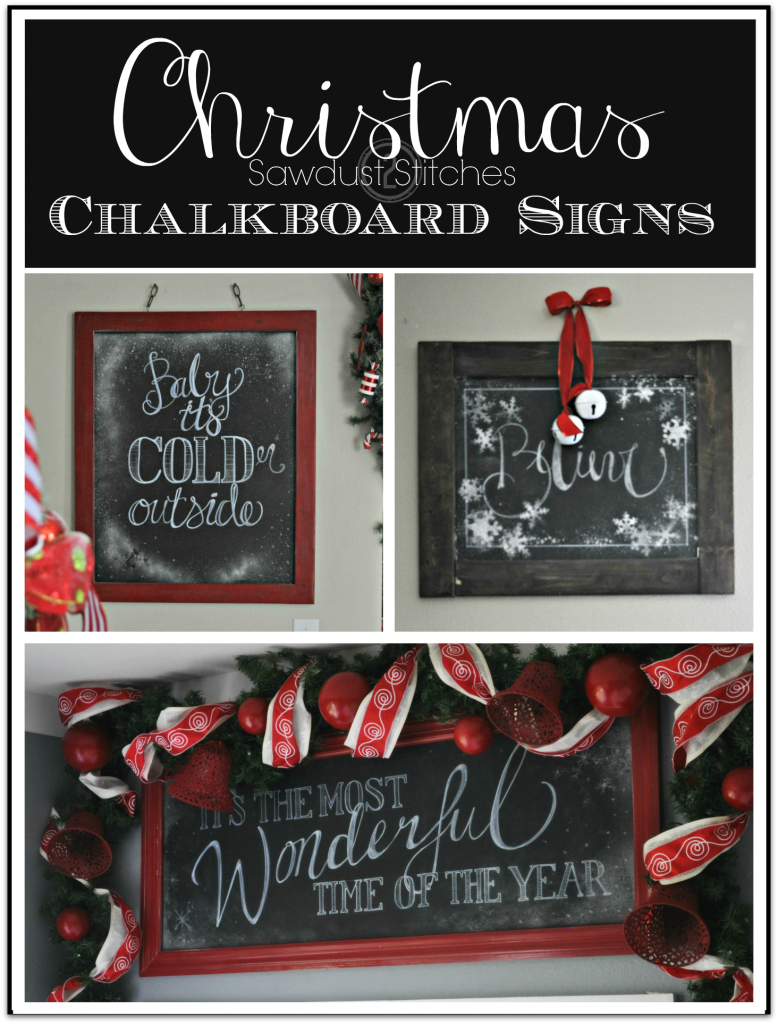
It is no small secret that I love chalkboard signs.  I love how versatile and customizable they are to  the changing seasons.  Holiday Season is no exception.   Here are this years  chalkboard updates! Complete with a bonus video documenting the process. Check it out!

sawdust2stitches holiday home tour  chalkboard sign

If you feel as though this is a little outside of your comfort zone, here is an easier option. sawdust2stitches holiday chalkboards
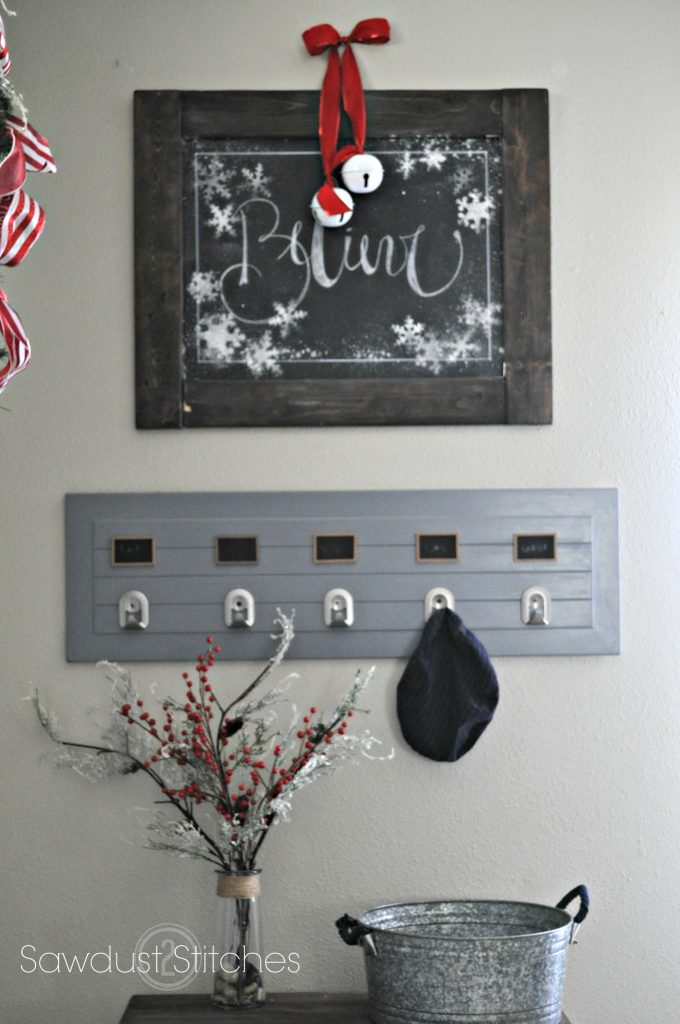
Honestly,  you only need to write one word.

Holiday Chalkboard signs  sawdust2stitches  believe ss 
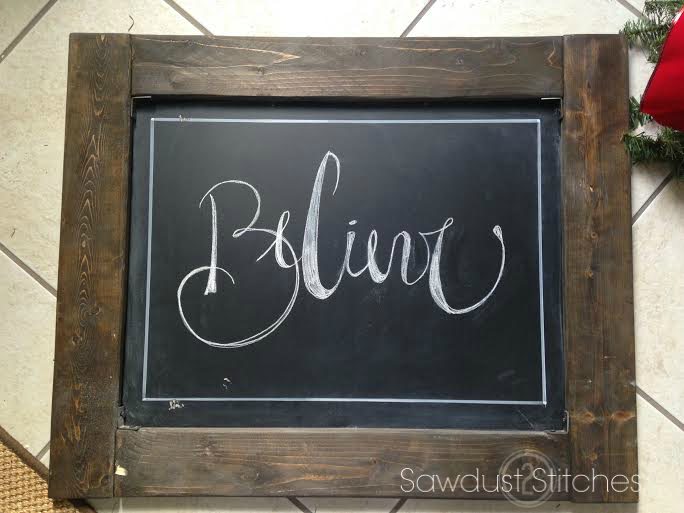
After  you write on  your chalkboard, you can use this trick to take your sign to the next level.

Using spray snow, and a stencil!  You can find spray snow at most stores that sell holiday decor.  I picked some spray snow up for $1.50.  I also found this stencil in the same section for only $1.00.

2178697  
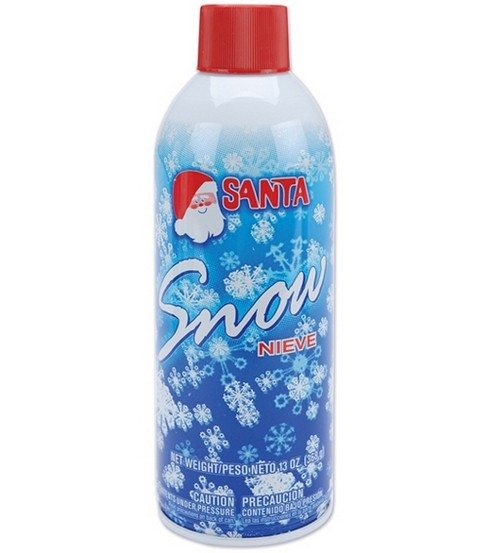
I just  placed the stencil on the chalkboard, and then dusted the stencil with spray snow,  which created a snowflake.

Sawdust 2 Stitches SNOWFLAKE STENCIL ss

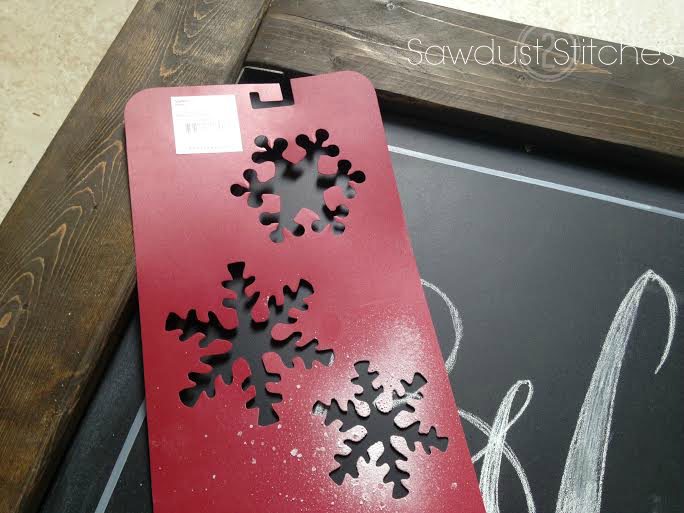
 I repeated this process several times, until I had filled a majority of the empty space! Ta-da!

believe chalkboard sign 
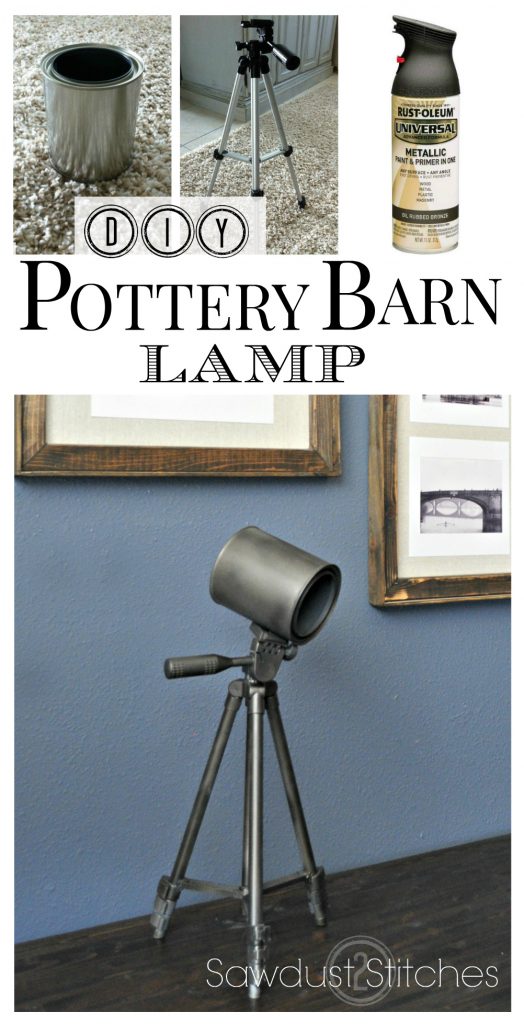
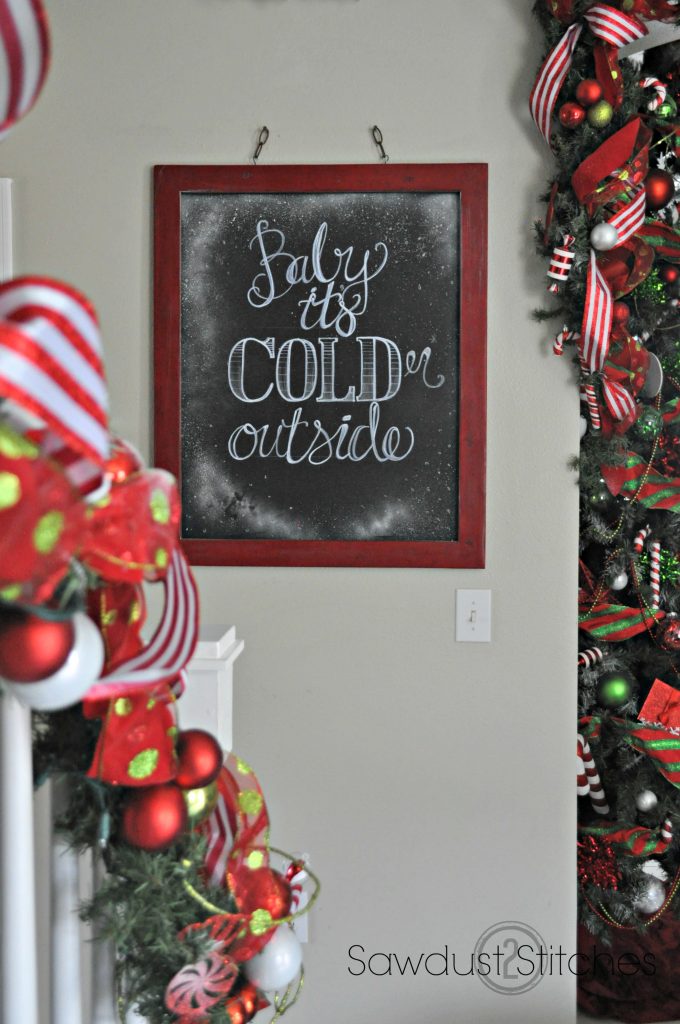
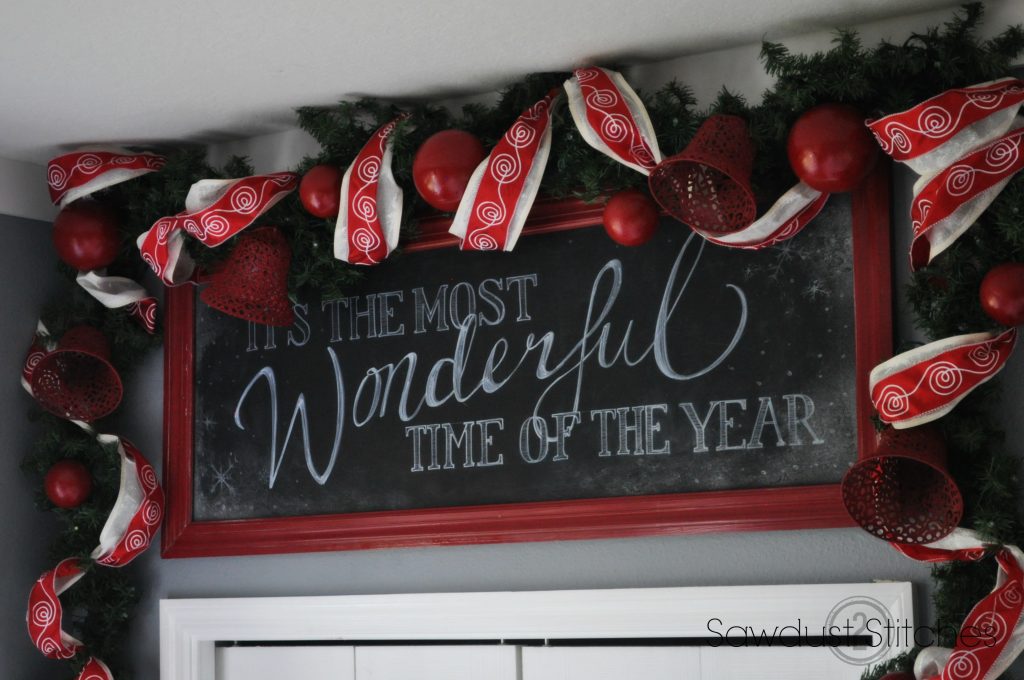
The last chalkboard sign I needed to update for the season was a large one in our kitchen. I had seen a  Pottery Barn sign I loved and used it as my point of inspiration.  If you feel a little overwhelmed at the idea of free handing, you are in luck!  The Yellow Bliss Road  created a free printable!  You can see it here.

sawdust2stitches holiday home

        I have a whole lot more Holiday  updates coming up soon, so stay tuned!

Corey


Spice Cabinet

November 19, 2014

The holidays are coming up,  which means a lot of baking, and cooking. Are you ready ?   Well,  kitchen  organization has been lacking a little…  Especially  my “baking” cabinet.  It needed a little bit of a facelift. 

Supplies  Used:
  •  (2) 1″x4″  Boards (8′)
  • Primer
  • Paint
  • 1 1/2″  FinishNails
  • Wood Glue
  • Glass Jars
  • Round Stickers
  • Black Primer
  • 1/4″ Paneling

 Tools Suggested

  •  Miter Saw
  • Sander
  • Paint Brushes
  • Nail Gun
  • Compressor

Spice Rack 

Step 1: Prep Boards

Cut boards, sand all the boards.

Cut List:

1″x 4″=
  • (2)    17  1/4″
  • (2)    22  1/2″
  • (3)   21″

Paneling=

  • 18 3/4  x  22 1/2″

Step 2: Assemble Frame

I first applied glue, and then reinforced with 2″ nails.  Make  sure to use a square when constructing the shelf.  Once constructed fill all holes with nail filler,  and then  sand.

Step 3:  Add Shelves

Add shelves using the dimensions depicted in the image below.  For good measure I used wood glue and reinforced with 1 1/2″ finish nails.

Sawdust2stitches spice rack shelves editd

Step 4: Attach Backing

Once  the shelf is constructed,  I then applied glue to the back, and then reinforced the paneling with 1/4″ nails.

Sawdust2stitches spice rack back paneling edited

Step 5: Finish

After the structure is completed, sand, prime and paint! ( I ended up distressing mine.)

sawdust2stitches spice rack prime edited d

Step 6: Add Spices

I used glass tilted jars,  I know you can purchase them at Ikea and Hobby Lobby.  If you have access to baby food jars that would be and awesome/cheaper alternative.

19625_PE104932_S3

I used  chalkboard stickers  for my jar labels.  When I originally  made this spice organizer,  chalkboard stickers were not readily  available.  If you have trouble locating  chalkboard stickers.  Consider this alternative.


c4bb4-photod2 This awesome spice rack is extremely  versatile!  It can either go on a counter top,  mounted to the wall , or like I did fit in the cabinet!  I love the way it looked.

sawdust2stitches spice cabinet makeover

sawdust 2 stitches spice rack on the counter

I liked it so much that  I added a  few more modifications.  Next on the agenda ?

 Measuring Spoon Rack

I used a 1×2″ board.  I then  pre-drilled holes.

sawdust2stitches measuring spoon edited I then painted the board and added the hooks.  All that was left, was to attach the board to the cabinet door.

Sawdsut2stitches measuring spoon hooks

Sawdust2stitches spice rack with measuring sppon organizer

  I even ended up  adding an extra shelf to the other door.  It is perfect for salt, pepper, and commonly used spices.

Sawdust2stitches spice cabinet 1

So there you have it folks,  an easy fix for the cluttered cupboard!

Under Bed Storage

November 7, 2014

Don’t get me wrong, I love our guest bedroom, and I love that  when we have company they have a place of their own.  BUT  every time I walk in there, I cringe a little.  The room gets used  maybe 2 or 3 times a year? But yet,  I am constantly  moving totes around in our garage trying to create a little more space for my  workshop. Well, I came up with a good compromise.   Check it out.

( Yes,  I know,   I am eliminating the box spring, and it probably is there for a reason.  But  let’s be honest this is a guest bed,  if we have guests  that stay  long enough to complain about poor back support, then they have probably been there too long anyways 🙂

Cut  List:

All 2×4’s
  • 20″         x  4
  • 16.5″      x  4
  • 13″         x  4
  • 77.5″      x   3
  • 60″         x  2
  • 57″          x 6

Tools Suggested:

  • Miter Saw
  • Drill
  • Pre-drill bit
  • Countersink Bit
  • Tape Measure
  • Eye Protection
  • Table Saw

Materials Used

  • (11 ) 2×4″ s
  • (2 sheets) 1/2″  OSB or Plywood
  • 2.5″ Screws
  • 3.5″ Screws
  • 1.5″ Screws

Step 1: Platform

Pre-drill, and counter sink all screws.  Evenly  space  the 57″ supports. It  is approximately 15.4″ centered.

Bed-Layout1deck sawdust2stitches

Step 2: Legs

Pre-drill, and fasten with 2.5″ screws. Remember that these will  need to be insets of two.  One set mimicking the plans below, and the other set will  mirror it. (See image for Step #3)

Step 3: Attach Legs

Notice the 2 different legs. Pre-drill, and attach legs to frame with 2.5″ screws.

Bed-Layout1 leg and deck

Step 4: Base

Pre-drill and fasten 60″ 2×4’s to the base of legs using 2.5″ screws.  Repeat on other side.  Lastly,  install brace (77.5″).  Center, and Pre-drill and secure with 3.5″  screws .


Bed-Layout1 jpeg sawdust2stitches

Step 5:  Add OSB

The OSB will need to be cut to accommodate  the 60″x 80.5″ platform.  It will require 2 sheets of standard 4’x8′  1/2″ plywood or OSB.  Secure OSB or plywood using the 1.5″screws.

All done!

Storage Bed Frame Sawdust2stitches

I ended up sewing a faux bed skirt in order to hide all the clutter.  Basically, I  finished/ hemmed the edges of 3 large fabric rectangles and sewed velcro to the top back edge, and then attached the reverse side of the velcro to the plywood using glue and industrial staples.  It makes it easy to remove for when I need to access the  storage, that and I hate bed skirts, they always are shifting.  Problem solved!

under bed storage velcro sawdust 2 stitches

 Ta-da!   Tons of storage with out giving up the guest room! Booyah.Under bed storage sawwdust2stitches

 Take Luck,

Corey

Kids Bench/Table

October 30, 2014

  I don’t  have a huge  kitchen, so I  have found it fairly important to  utilize  every  square inch.  Do you remember  the tutorial  about the conver-table ?  Well,  shortly  after making a table that was able to  serve multiple functions,  I decided I needed a  bench to match!  I really  wanted to have a kids  eating area,  so when we had company they  could sit at the “adult table”.  I had  looked into making  a cute little  table and chairs for the kiddos,  but like  I mentioned earlier,  I don’t have a huge kitchen.   What a conundrum !?

Challenge Accepted!

      Not only  do I have a tutorial  below,   but Ana White is a rockstar and  has  drafted  up the plans and they are available on her site! Don’t  have access to a tablesaw!? She has a solution for that!

Materials Used:

  • Wood Glue
  • 2.5″ Wood Screws
  • Wood Plugs
  • 2×8   (12′)
  • 2×10 (8′)
  • Shelf Support Bracket
  • Spray Paint


Tools Suggested:

  • Miter Saw
  • Table Saw
  • 18g Nail Gun
  • Drill
  • 3/8″ drill bit
  • Kreg Jig
  • Orbital Sander


Cut List:

2×8

4@  17″ (2 of which requires additional cuts)

2@  36″(1 of which requires additional cuts)

2×10

1@ 18.5″

2@ 17″

  Legs

Begin by taking 2 of the 2×8’s that are cut at 17″.   Using a tablesaw cut a notch out of the entire length of the 17″ board.   Then repeat the same process on the second board.

Bench Table 1 Sawdust 2 Stitches

Next take the 2×10  cut at 17″ and line it up the with 2×8 that  has the notch cut out.  Dab a little bit of glue in the joint and then for added precaution I  used 16 gauge 2″ finishing nails.

Bench Table 8 Sawdust2Stitches

Repeat the the same process on the other notched out board.

Bench Table 7 SAwdust2Stitches

For the next step on the legs,  use a Kreg Jig System and drill 3 holes  on the 2 remaining 2×8″ boards.  ( These will become the chair backs) Bench Table 6 Sawdust2Stitches

Again I used a little bit of wood glue on the joint and then reinforced with 2 1/2″  screws via the pocket holes.  I then repeated on the remaining leg.

Bench Table 11 Sawdust2Stitches

 To hide the pocket holes, I  use these awesome little guys!Bench Table 9 Sawdust2Stiches Just  use a dab of glue and use then to fill the pocket holes.

 The Top

For the top I used (2)  2×8’s.   This is where it gets a  little tricky.   Using a jigsaw  I cut out a 9″ section in the center of one of the boards.  I needed the slot to be 9 ” and 1 1/2′ deep.  ( The table top  board will eventually  will sit on this cut out.)  Bench Table 5 Sawdust2Stitches Using the  Kreg Jig again,  I drilled  pocket holes that would allow me to join both 2×8’s together. For added precaution I  used a little bit of wood glue on the seam.   I then  used 2 1/2″ screws to fasten the two boards together via the pocket holes. ( Again,  I used pocket hole plugs to hide the pocket holes.)

Bench Table 4 Sawdust2StitchesNow it is time to attach the legs to the top!

Bench Table 15 Sawdust2Stitches I wanted to conceal the screws as much as possible so I used “wood plugs”.  In order to use these I simply  used a drill bit  (determined by the size plug) in this case I  used a 3/8″  bit.  I  drilled only  partially through the board with this bit.  I then followed  up with a much smaller bit to pre- drill . ( This helps prevent the board from splitting.)  After the hole is pre-drilled  I  used 2 1/2″ wood screws to secure the leg to the top.  I then added a small amount of wood glue to the wood plugs and put them in the screw holes.

Bench Table collage  Sawdust2stitches   The last  part of the bench/ table is the “kids table top” in order to give the table top a more support I opted to use a heavy duty shelf support.  I didn’t want the hardware sticking out like a sore thumb so I used an “Oil rubbed bronze” spray paint to help it blend in a little better. Bench Table 16 Sawdust2StitchesAfter the  bracket had completely  dried  I installed it so that it would be centered.

Bench Table install bracket Sawdust2StitchesNow it’s time for the table top! Using the remaining 2×10″  I placed it in the previously  cut out notch, and then secured it to the bracket from the underside.

Bench Table top  Sawdust2Stitches

   I also  secured the table top on the topside.  Again,  I repeated the same steps as earlier.  I  partially drilled with a 3/8″  bit and then pre-drilled with a smaller bit.  Secured it in place with  2 1/2″ wood screws, followed with 3/8″ wood plugs. Bench Table 21 Sawdust2Stitches

Finish Work

That completes the structural aspect now,  on to the finish work.  Bust out the wood filler and fill any and all holes.  I  normally  apply a  small amount to the top of all the the wood plugs. It fills in all the small crannies and does a great  job camouflaging the wood plugs.

After the wood filler has completely dried,  I used an orbital  hand sander to smooth out the entire piece,  paying special attention to the areas where a wood plug was  used.

Now,  it is ready for  stain and or paint.  I opted for Minwax Jacobean stain and then  followed up with the “Satin Finish” polyurethane.

PicMonkey Collage polu

Mission Completed!

A space saving STURDY bench, that when flipped on its side, is an AWESOME  kids eating area, complete with two chairs and a table.  Booyah!

PicMonkey Collage sideways

Turn a cabinet into a Locker!

October 24, 2014

Hey All,

Today you can find me over at Remodelaholic, where I will be showing you how I took a boring media cabinet and turned it into a kids storage locker!  Head on over and check it out!


  Locker makeover Sawdust2stitches

Pottery Barn Lamp Knockoff

October 17, 2014


I love Pottery  Barn,  I just do. While I was perusing their catalog I came along a vintage style spotlight lamp.  Coincidentally  at the time I was also  trying to stage some shelves and was having a heck of a time finding something to fill a tall thin space.  LIGHT BULB…  I needed that  lamp!   Actually,  I didn’t need a lamp,  I just wanted it  because it looked awesome…  One thing led to another… the rest is history.

Pottery barn lamp pinterest   sawdust2stitches

Materials  Used

  • Old Tripod
  •  Metal Quart Size Paint Can
  •  Steel Wool
  •  Gray Spray Paint Primer
  •  Various Metallic Spray Paint
  • 1/4″ Bolt w/washer and nut

Tools Suggested

  • Drill
  • 1/4″ Drill Bit

  After  a little bit of brainstorming I  concluded that the Pottery Barn lamp was  essentially a metal can mounted on a tripod…  Lucky (unlucky?) for me,  my kids had been playing with my tripod a few months ago.  Needless to say, it needed to be replaced.   The  broken one would work perfectly for the lamp!  All  I needed now was a largemetal  can.  I had considered  metal  food cans,  but I really  didn’t want the metal ridges on it.  Then  it dawned on me,  they  sell  empty paint cans at Depot!  Perfection.

I began  by  scuffing up the paint can and the tripod as much as possible.  Steel wool  seemed to do the trick.  The idea is to simply scuff up the surface enough that the spray paint can properly adhere.

Next I used the 1/4″ drill bit and drilled a hole through  the paint can.

Sawdust2stitches spotlight lamp drill hole

Then  drill through  the tripod. (Basically anywhere that  is accessible and somewhat  level surface).

Spotlight  drill hole in tripod sawdust2stitches edit

After  the  holes are drilled,   I  used a 1/4″ bolt,  a washer and a  nut to connect the tripod to the paint can.

Spotlight Bolt sawdust2stitches edit  At this point  I took a  gray  primer and sprayed the entire structure.  I followed up by dusting  the entire thing with  several different metallic spray paints.  I  used a technique  very similar to the  one I used on this project.

For the place that I was going to put this,  I did not need to  have it be a functional lamp, BUT  honestly if you are  set on the idea of it being functional,  it is doable!  Ikea sells a cord light kit for $5.00 that could easily  be adapted to fit  your new lamp.hemma-cord-set__36078_PE126952_S4

 Ta-da!  There you have it a Pottery Barn-esque spotlight for a fraction of the cost!

Spotlight closeup Sawdust2stitches


spotlight on shelf sawdust2stitches

  • previous
  • Page 1
  • Interim pages omitted …
  • Page 34
  • Page 35
  • Page 36
  • Page 37
  • Page 38
  • Interim pages omitted …
  • Page 47
  • next

Primary Sidebar

  • Facebook
  • Instagram
  • Pinterest
  • Twitter
  • YouTube
IMG_9167 (1).jpg fd
DIY & Design

Meet Corey

Hi everyone, my name is Corey, and I have a problem. I can’t leave well enough alone… The best therapy usually involves a variety of power tools. So, in the few “spare” moments I am not entertaining my two beautiful, rambunctious, boys, I can typically be found hunched over a sewing machine and/or covered in sawdust. All in the efforts to create a perfect balance of aesthetics and practicality in our home.
read more

Join our mailing list!

DIY & design ideas - right in your inbox!

Featured

Stair Tread Makeover

Categories

  • 70's Ranch Home
  • Around the House
  • Build Plans
  • Crafts
  • Current Home
  • Decor Makeovers
  • Dresser
  • Exterior
  • Fall
  • First Home
  • Furniture Makeover
  • Hidden Compartment
  • Kitchen
  • Lighting
  • Makovers
  • Master Closet
  • Organization
  • R.V.
  • Room Makeovers
  • Seasonal
  • Seating
  • Sewing
  • Shelving
  • Small Builds
  • Smart Home
  • Spring
  • Summer
  • Tables
  • Tablescape
  • Tutorials
  • Uncategorized
  • Wall Art
  • Wall Decor
  • Winter
  • Workshop

Footer

Contact Me: Corey@Sawdust2Stitches.com

Latest ‘Grams

Follow on Instagram
2020 © Your Blog Name
theme by soleilflare
Enter your name and email and get the weekly newsletter... it's FREE!
Your information will *never* be shared or sold to a 3rd party.