• Blog
  • About
  • Press
  • Privacy

Let’s be social!

  • Skip to primary navigation
  • Skip to main content
  • Skip to primary sidebar
  • Skip to footer
Sawdust 2 Stitches

Sawdust 2 Stitches

  • Tutorials
    • Around the House
    • Organization
    • Wall Decor
    • Sewing
  • Makeovers
    • R.V.
    • Room Makeover
    • Furniture Makeover
    • Decor Makeover
  • Build Plans
    • Small Builds
    • Wall Decor
    • Dresser
    • Tables
    • Seating
    • Shelving
    • Hidden Compartment
  • Seasonal
    • Summer
    • Spring
    • Fall
    • Winter
  • Home Tours
    • First Home
    • Current Home
    • 70’s Ranch Home
  • Workshop

Suspended Shelving

September 18, 2013

Easy DIY shelving by Sawdust2stitches

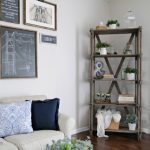
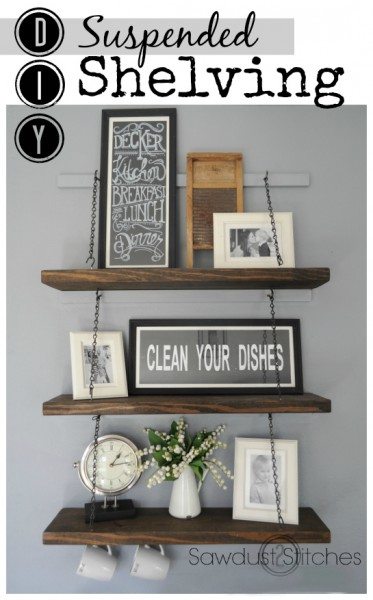
I originally  had a frame hanging in this space in the kitchen,  but I decided I  needed the picture elsewhere.  Which left me we with a very blank wall.  No good.  So  I went into the garage, and took inventory of what  I had.  I had a leftover 2×8 board from a previous project…  a few hours later, I had some stinkin’ awesome hanging shelves!


Materials Needed:
(1 )     2×8 @ wood plank 8′
(18)    2.5″ Screw in hooks
(2)      1×2″ wood boards 8′
6′ of small link chain
Stain
Spray Paint (Optional)

Tools Suggested:
Saw (Miter Saw)  Or you can easily have your boards cut at your hardware store.
Sander
Drill
Level
Tape measure

Cut List:
(3)  2×8″ @ 33″
(4)  1×2″ @ 33″
(6)  1′ sections of chain ( I just pried open links)

First  cut, sand and paint and or stain your 2×8’s and your 1×2’s.
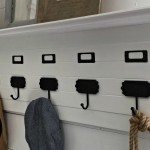
I chose to paint my 1×2’s the color of the wall in hopes it would blend in.  ( I think it worked fairly well.)  I stained my boards with Jacobean Minwax Stain. 
I also decided that  I didn’t want my hooks and chain to be silver toned,  so I used Rust-o-leum Oil Rubbed Bronze.

Once all your pieces are dry you can begin the installation proccess.

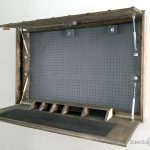
Using a pencil mark where  you would  like your shelf to begin and end.
Now locate the studs  within your “ideal” area. Once you have found them you will screw your 1×2″ board  into the studs, don’t forget to use a level. ( THIS DOES NOT NEED TO DECIDE WHERE THE CENTER OF THE SHELF WILL BE!) See the picture above.

 
   At this point,  I mounted all of  the 1×2’s.   I  did my spacing 14.5″ from the bottom of one support, to the bottom of the next.
  If you are doing 3 shelves, you will need 4 supports.  There will be one board that will not have a shelf resting on it.  It will be needed to support the hooks for the top shelf.

Once the 1×2’s are secured,  you can put in your hooks.  I would suggest pre-drilling a hole.  It would take quite a bit of work without it.  I chose to put mine 5.5″ in from each end.

Once you have screwed in the hooks,  you can repeat the process on the planks. Again, measure in 5.5″ to find the hook placement.

Next you will need to have 6 separate 1′ sections of chain.  I don’t have cutters,  I just  pried them apart.
You will  loop one end of your chain onto the hook mounted to the wall.  The other end will loop onto the hook secured to your shelf plank.  Rest the back of the shelf on the wall mounted board.

For good measure  I would suggest screwing the shelf to the wall mounted board.  (Just drill through the top of the shelf plank, down into the 1×2″.)

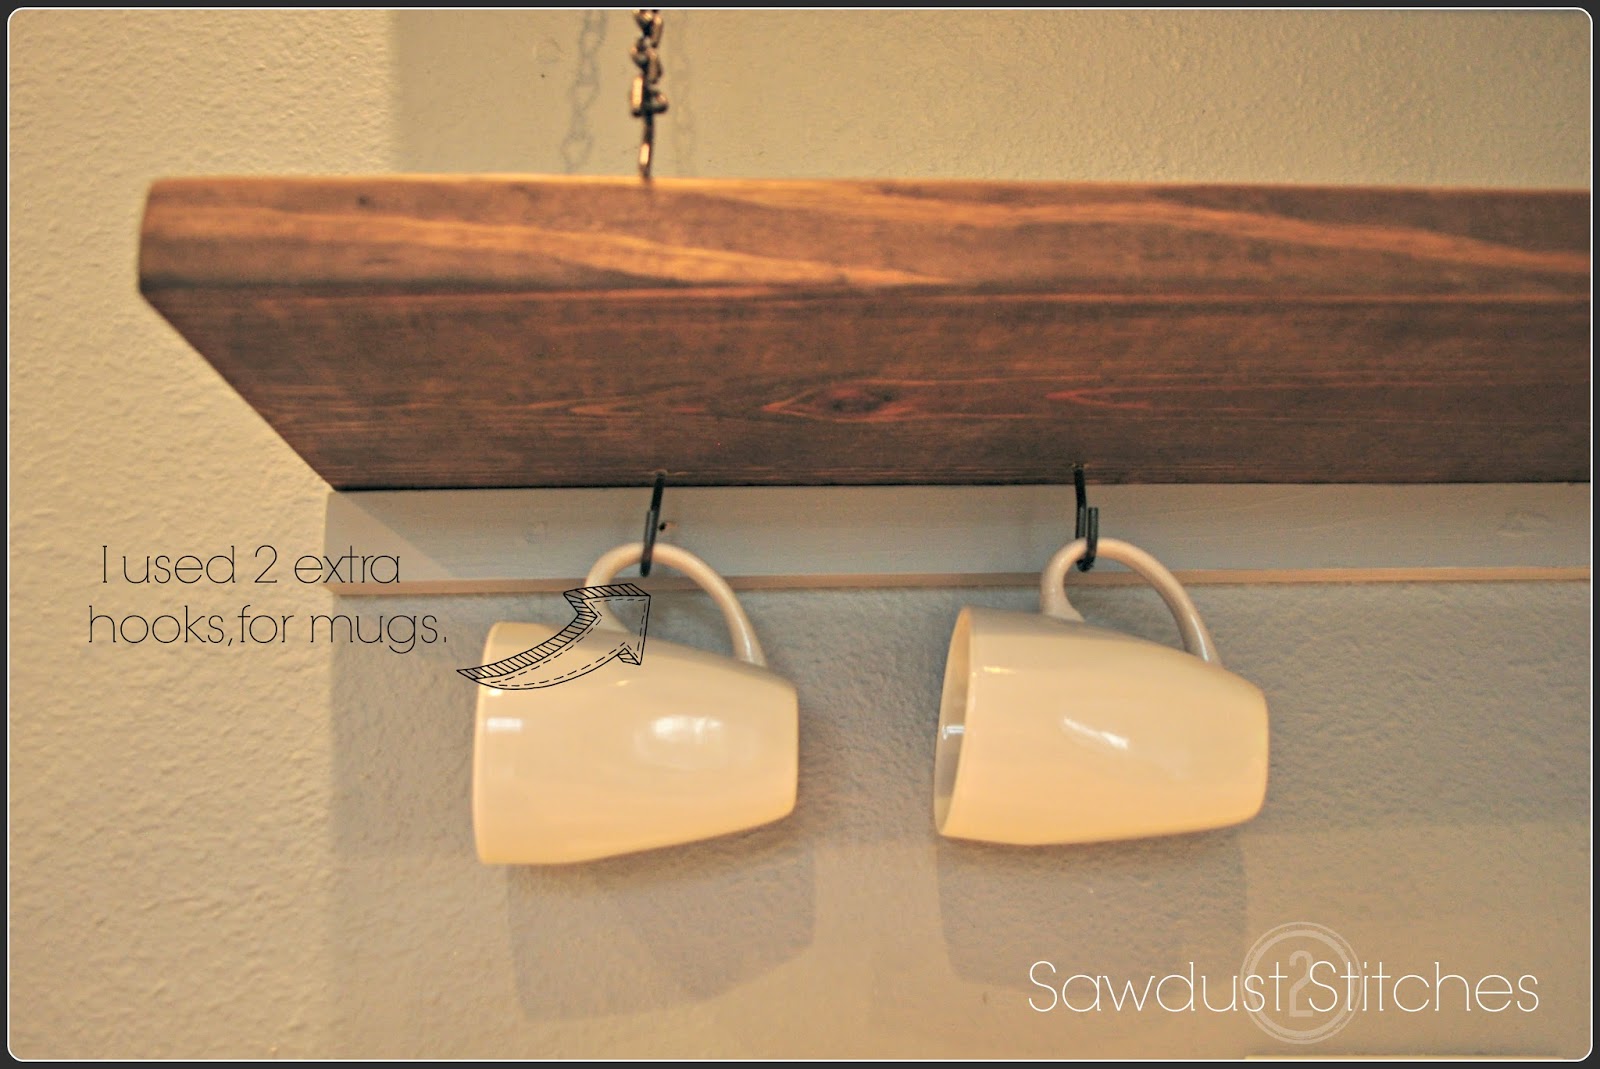
As an after thought, I took  2 spare hooks, and mounted them under a shelf  to be used as mug hooks. It just adds a little somthin’, somethin’,  don’t you think  !?

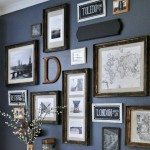
Lastly, add decor, then stand back and admire your awesome, new, cheap shelves!

Corey

Digiprove sealCopyright secured by Digiprove © 2015

More from my site

  • Rustic Farmhouse Book ShelfRustic Farmhouse Book Shelf
  • Fall Chalkboard SignFall Chalkboard Sign
  • Pottery Barn Inspired Entry OrganizerPottery Barn Inspired Entry Organizer
  • Secret Compartment MirrorSecret Compartment Mirror
  • DIY Rustic FramesDIY Rustic Frames
  • That is PVC ?That is PVC ?

in Build Plans, Kitchen, Organization, Uncategorized # Shelving, Stain, Wall Decor

you may also like
Back of Door Spice Rack
Pool Patio Design
How To: Exterior Door Makeover
Out-feed Assembly Workshop Table

Primary Sidebar

  • Facebook
  • Instagram
  • Pinterest
  • Twitter
  • YouTube
IMG_9167 (1).jpg fd

Popular Projects

  • How to: Faux Brick Wall
  • Cheap White Curtains
  • Ikea Cubbies into a Rustic Apothecary
  • Cabinet Transformed Into A Kitchen Island
  • R.V. Makeover
  • How to: R.V. Curtains
DIY & Design

Meet Corey

Hi everyone, my name is Corey, and I have a problem. I can’t leave well enough alone… The best therapy usually involves a variety of power tools. So, in the few “spare” moments I am not entertaining my two beautiful, rambunctious, boys, I can typically be found hunched over a sewing machine and/or covered in sawdust. All in the efforts to create a perfect balance of aesthetics and practicality in our home.
read more

Join our mailing list!

DIY & design ideas - right in your inbox!

Top Hits!

  • How to: Faux Brick Wall
  • Cheap White Curtains
  • Ikea Cubbies into a Rustic Apothecary

Featured

Back of Door Spice Rack

Categories

  • 70's Ranch Home
  • Around the House
  • Build Plans
  • Crafts
  • Current Home
  • Decor Makeovers
  • Dresser
  • Exterior
  • Fall
  • First Home
  • Furniture Makeover
  • Hidden Compartment
  • Kitchen
  • Lighting
  • Makovers
  • Master Closet
  • Organization
  • R.V.
  • Room Makeovers
  • Seasonal
  • Seating
  • Sewing
  • Shelving
  • Small Builds
  • Smart Home
  • Spring
  • Summer
  • Tables
  • Tablescape
  • Tutorials
  • Uncategorized
  • Wall Art
  • Wall Decor
  • Winter
  • Workshop

Footer

Contact Me: Corey@Sawdust2Stitches.com

Latest ‘Grams

Follow on Instagram
2020 © Your Blog Name
theme by soleilflare
Enter your name and email and get the weekly newsletter... it's FREE!
Your information will *never* be shared or sold to a 3rd party.