Sponsored by DAP*
This post does contain affiliate links *
The very last rooms in our house to get any attention were the bathrooms. I wasn’t ready to take on a major overhaul and I knew that re-tiling would just entail a lot of dust and mess. I just was not emotionally prepared for that kind of commitment. The more I thought about it, the more I realized, there is no reason I can’t just work with what I have! (You can read all about the process picking this color palette and design process here.)
Today I am going to show you some quick fixes that won’t break the bank! It is by working with great products and partners like DAP that I can bring you these awesome makeovers! So let’s get started.
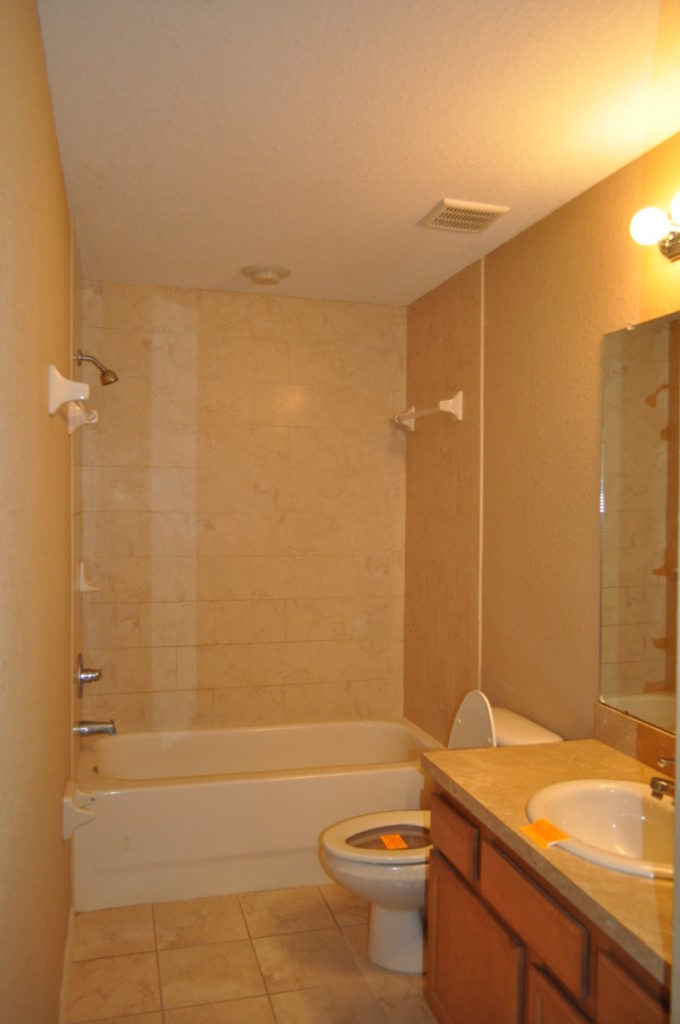
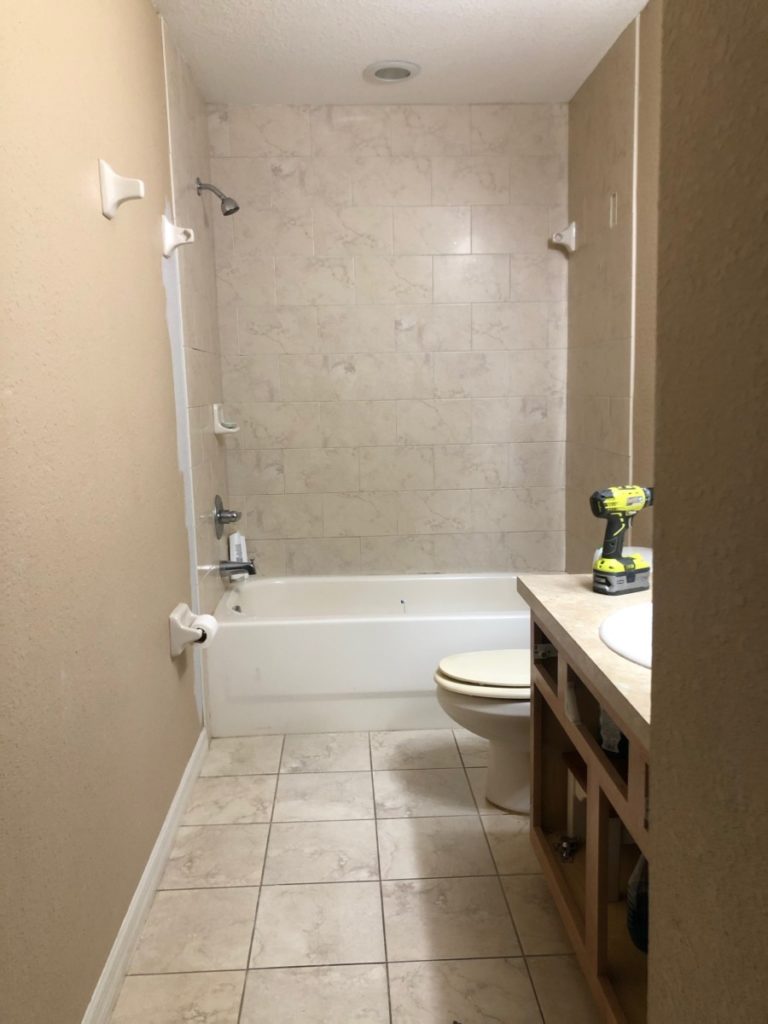
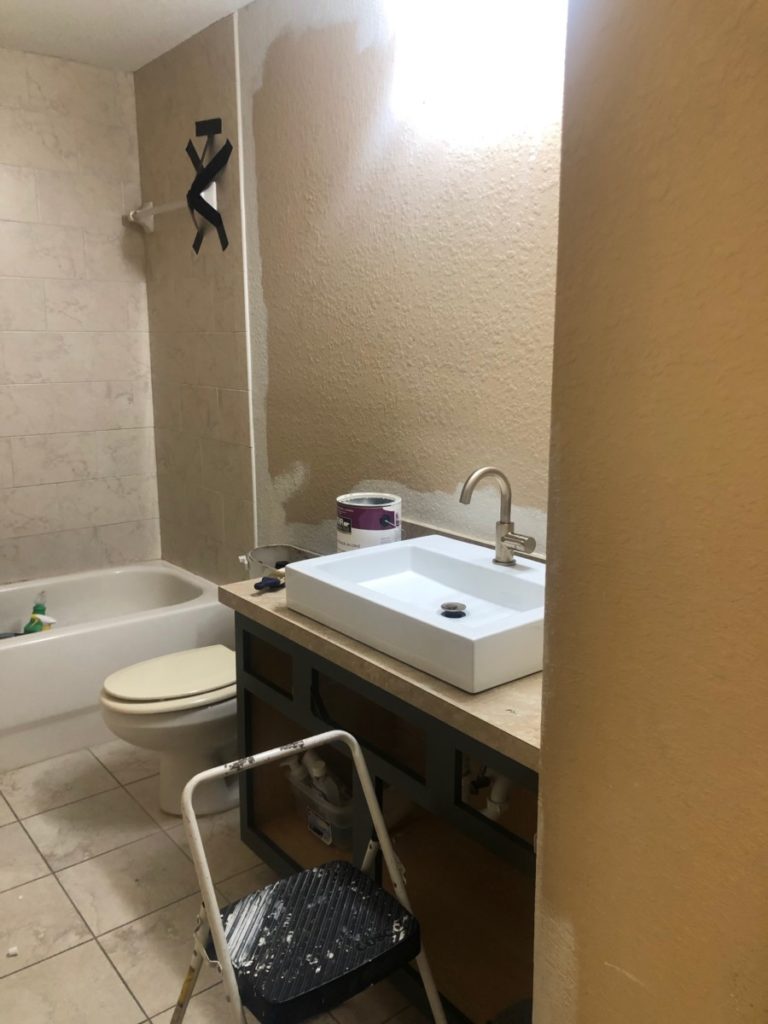
I found this gem of a photo from the day we first toured the house. It was your basic builder grade bathroom. Which was fine for 4 years, but let me show you what you can do in as little as a weekend!
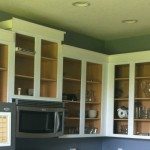
Cabinet Update
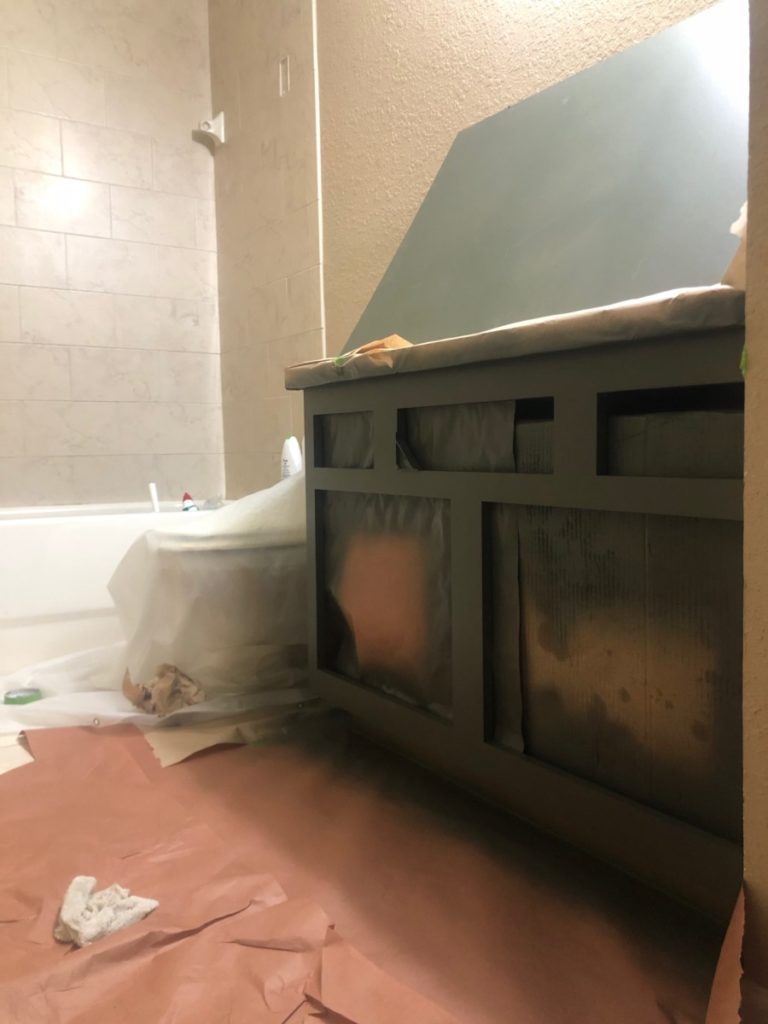
I attacked this project the same way I did my previous bathroom. I removed the cabinet doors and prepped the cabinet for paint. If you would like more information regarding painting cabinets, you can check out my post here.
I used the same color scheme that I did in the guest bathroom as well. I literally moved from one bathroom to the next and it made the process go by so quickly! I had everything out, and honestly if you are considering giving two bathrooms a makeover I would knock them both out at once!
Sink Replacement
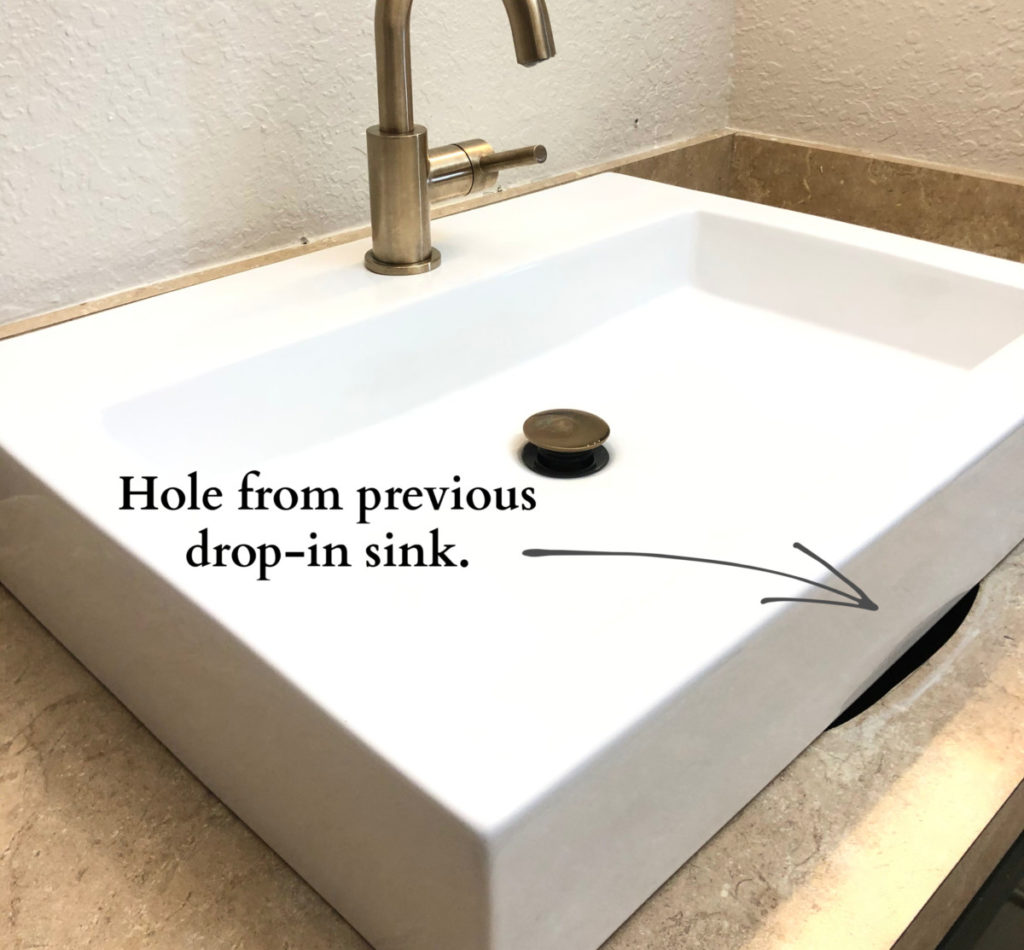
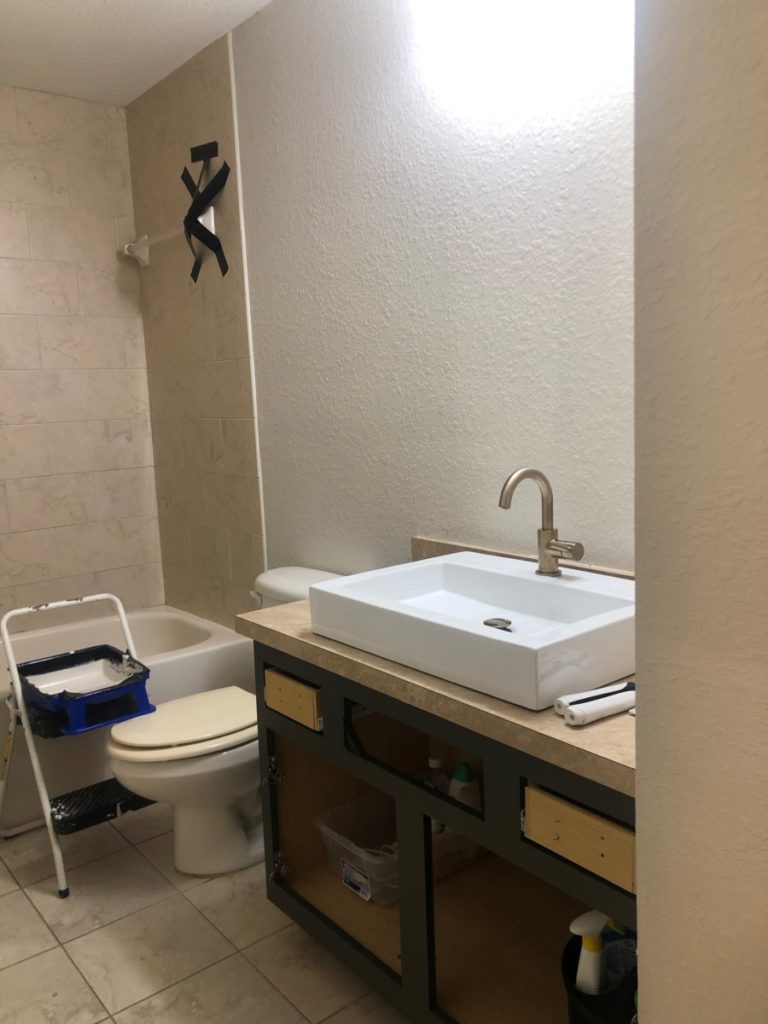
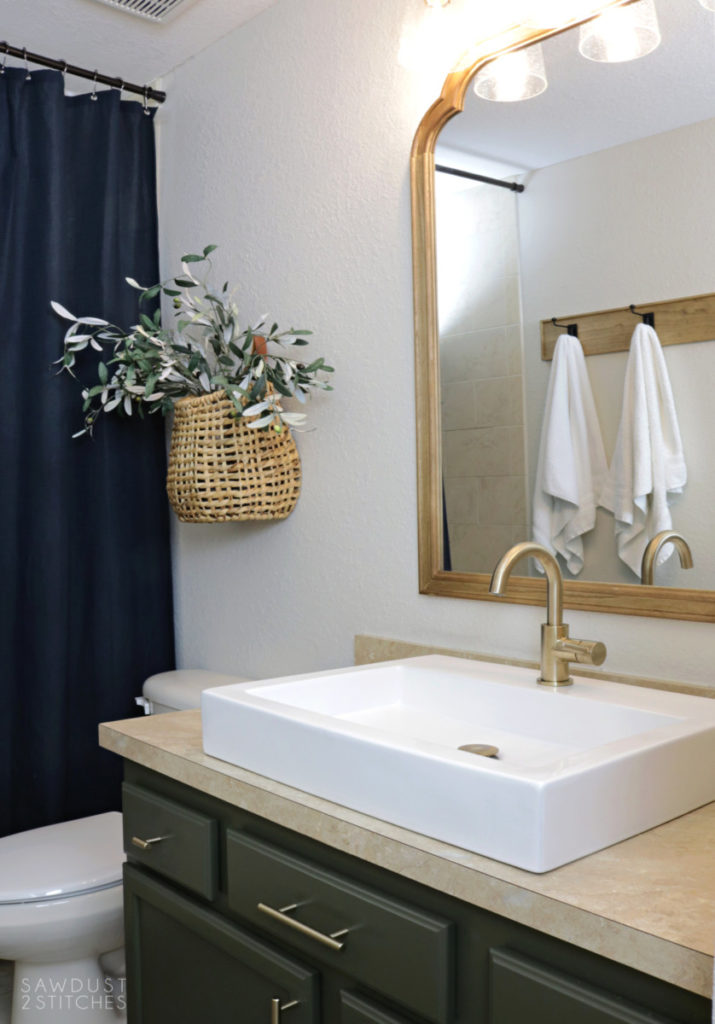
When it comes to “bang for your buck” in a room makeover, paint is hands down your best option. It just is. It is moderately priced and can change the entire look of a room. Bathrooms have a bad rep for being an $$$ makeover, but I think there is a happy medium. I was determined to work with the existing countertops, tile, showers and toilets. HOWEVER, I didn’t invest in a new sink. A sink and new faucet is a simple change that can completely update the entire look of a bathroom.
Like I said I did not want to replace the existing countertops, so it was simply an issue of finding a sink that would cover the hole from the builder grade drop in sinks.
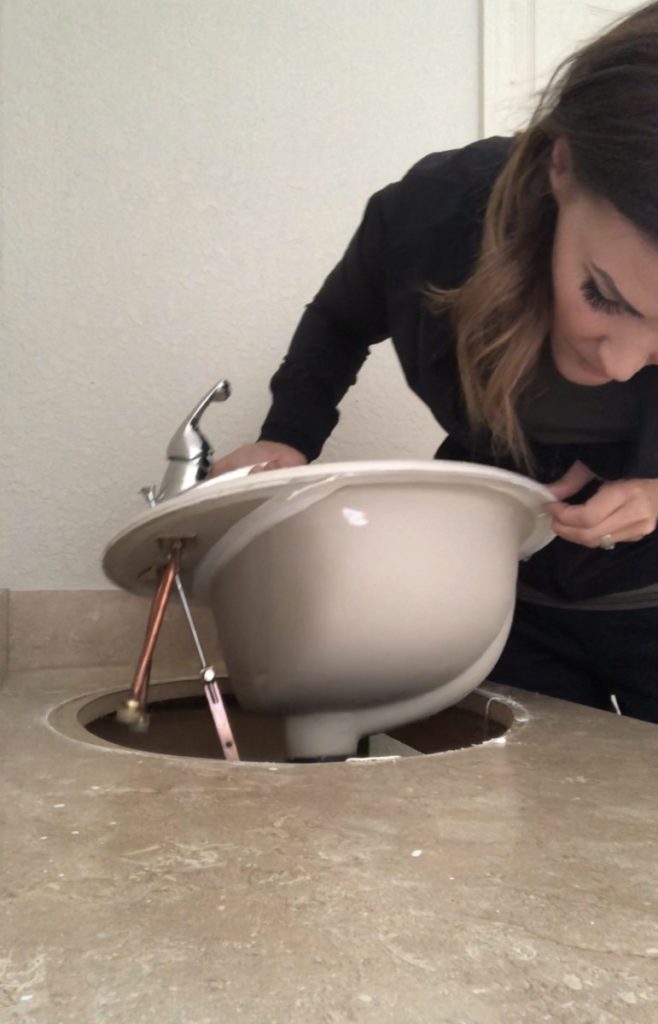
I am still learning the ropes when it comes to plumbing and I did enlist the help of my husband to help walk me through the process. I am not an authority on the field, but I will say there are plenty of pro’s out there with detailed tutorials.
Sink affiliate link:
- Basin Porcelain Sink– Amazon
- Brass Single Hole Faucet- Amazon (Not exact but close.)
One thing I do know well, and that is caulk and silicone. In order to make this bathroom ready, we do need to water-proof the seam around the perimeter where the sink meets the countertop.
When sealing an area that will be subject to water I would highly recommend a silicone based sealer as opposed to a latex. Think of it like oil vs. latex paint. Oil is a little more heavy duty, and it is also a little messier to clean up.
So when using silicone I like to use a the DAP Pro-Caulk tool kit. It came with all the tools necessary t o get the job done, with out the sticky fingers
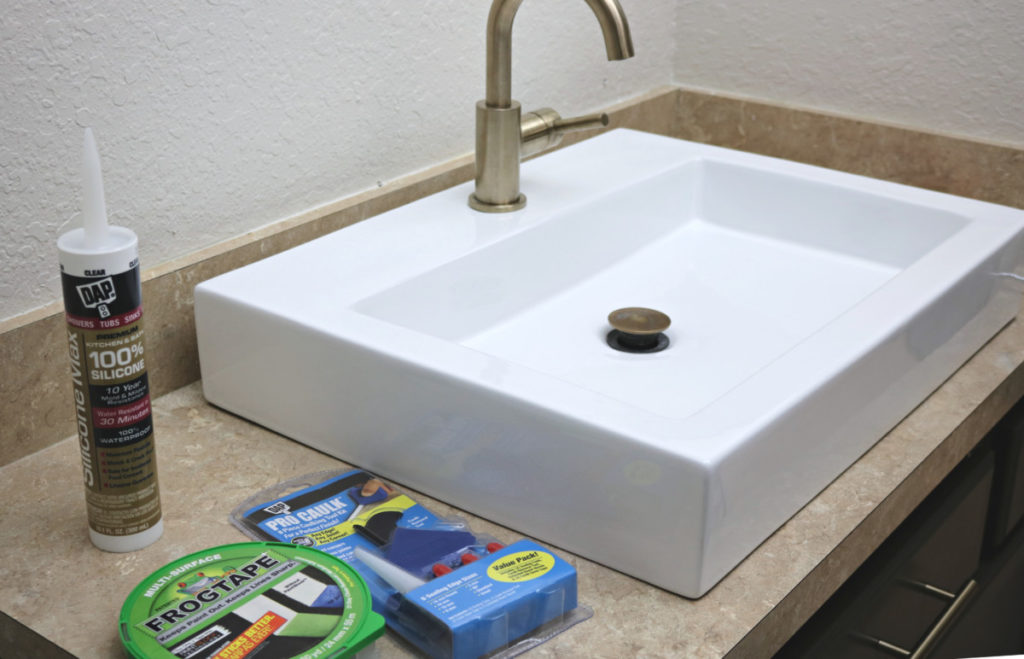
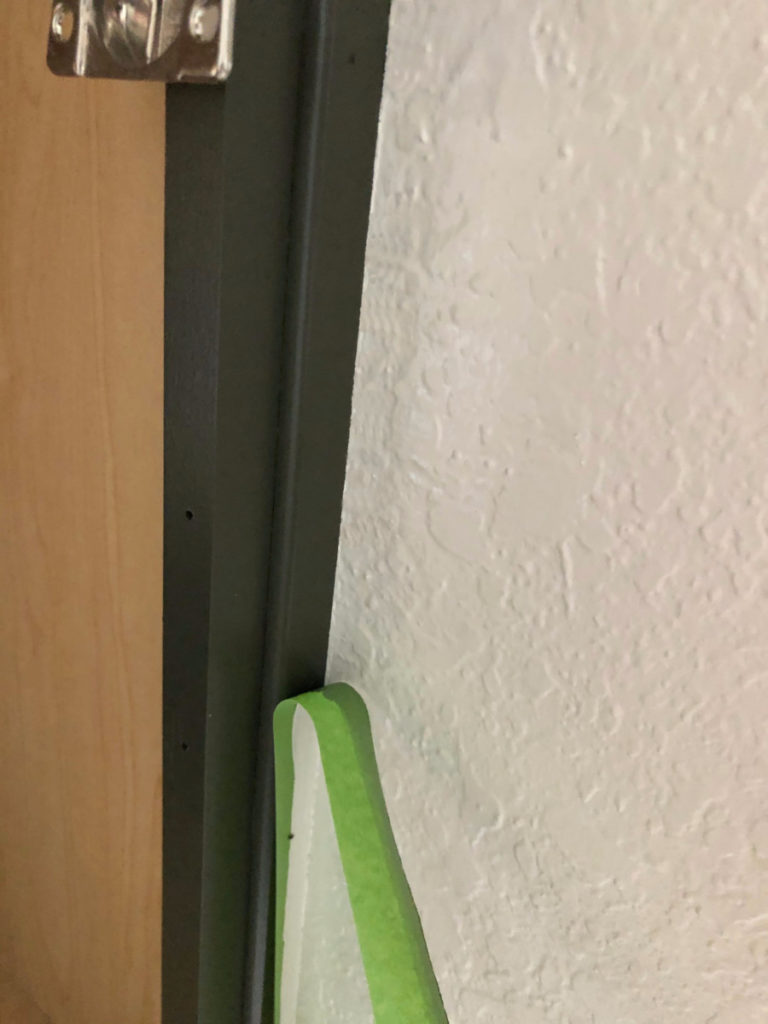
If you are new to caulking here is a trick that will help you in the process. You can use this Frogtape trick. You simply use painters tape the same way you would if paining a wall, you use tape to create a straight edge that will also protect the rest of the surface from the paint/silicone/caulk. It gives you some leniency in your application and creates a perfect line!
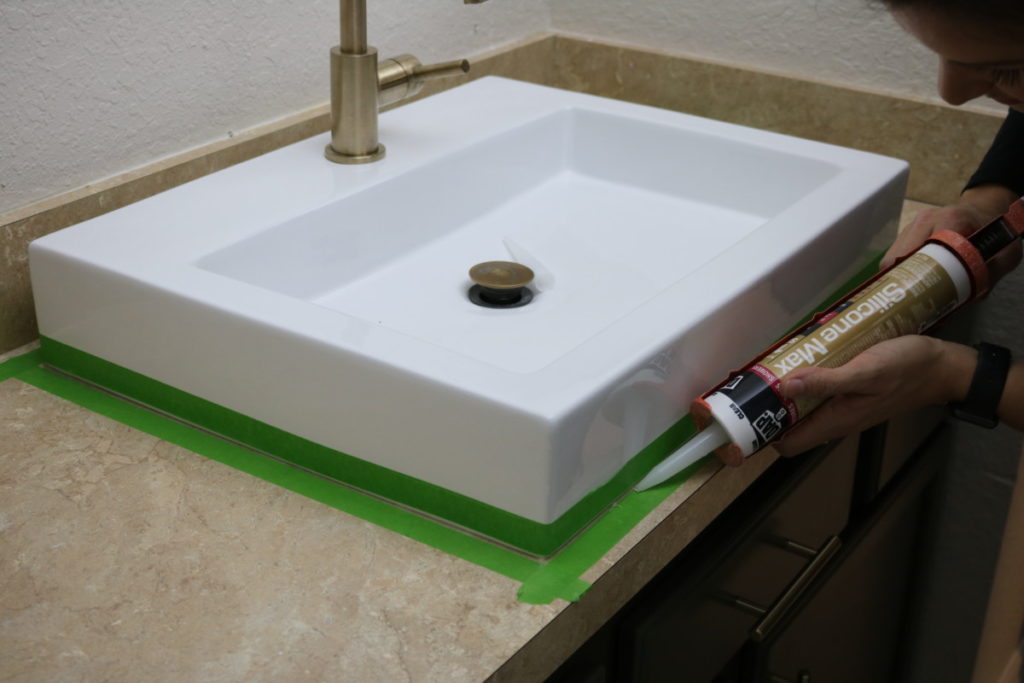
After the caulk/silicone is applied use your preferred corner tool in the Caulking Tool Kit to achieve the perfect finish. Simply slide the corner along the applied bead of caulk to create a perfect uniform seam. Immediately after smoothing out the silicone remove the painters tape. Failing to do so can result in the silicone curing to the tape.

Upgrade Towel Bars
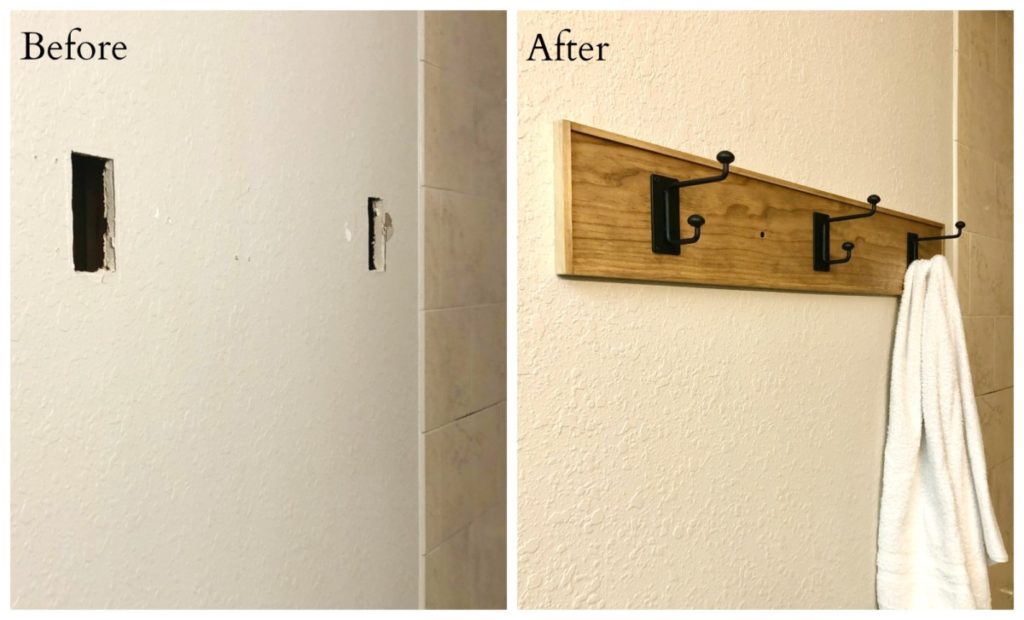
More than anything this bathroom makeover was just a series of covering up or repairing holes! I already tackled the sink hole, now onto the partial hole created from little boys that shall not be named using the towel rack as a pull-up bar. Fortunately, this was an easy fix.
Just a few dollops of DYNAGRIP and we were back in business.
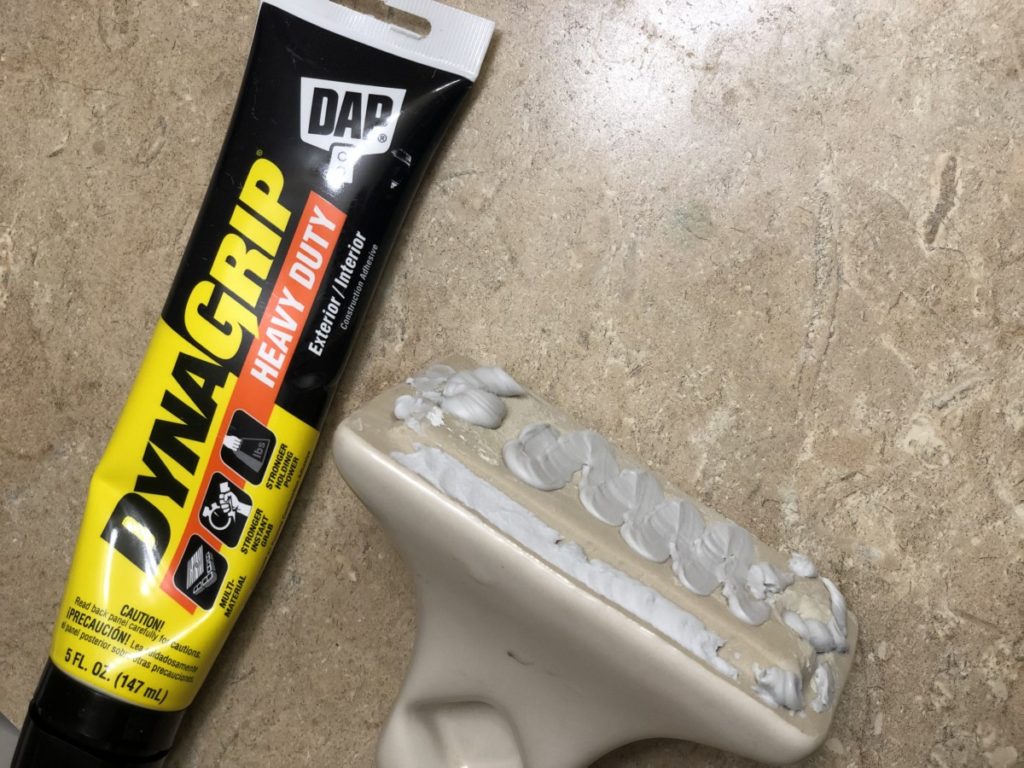
I just braced it up with some duct tape while it cured.
Paint
While all my adhesives were curing I finished up painting all the walls. For the walls I used the same color as the recently renovated guest bathroom.
This was actually a makeover that took me less than 24 hours to complete. Mind blowing right? Like I said, most of it was just covering holes and paint. In order to get everything painted that quickly I enlisted my Fuji-Spray Semi-Pro sprayer, and when painting the walls. FROGTAPE! A good painters tape can cut your labor time considerably, and for some one that has orange peel knock-down walls, having a straight line is no small feat!
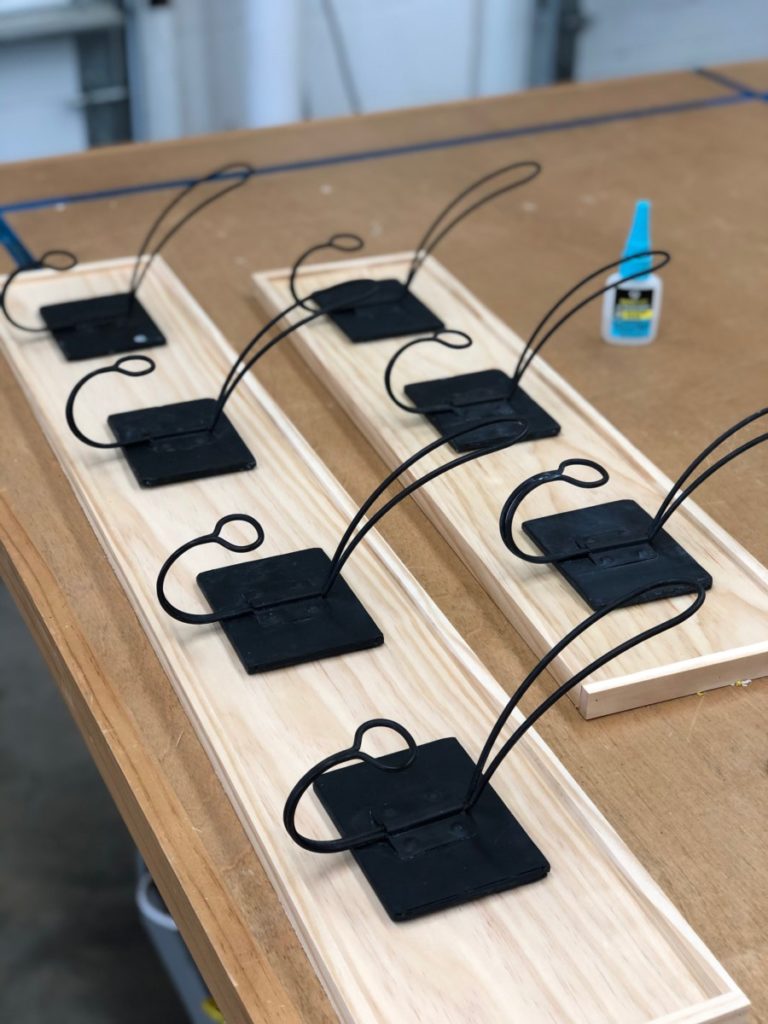
Custom Towel Rack
Everything was coming along quickly, and I was actually in a time crunch… but I kept getting distracted by the other builder grade towel bar. The one in the shower didn’t bother me much. It was a sensible option in the shower and would rarely be seen.
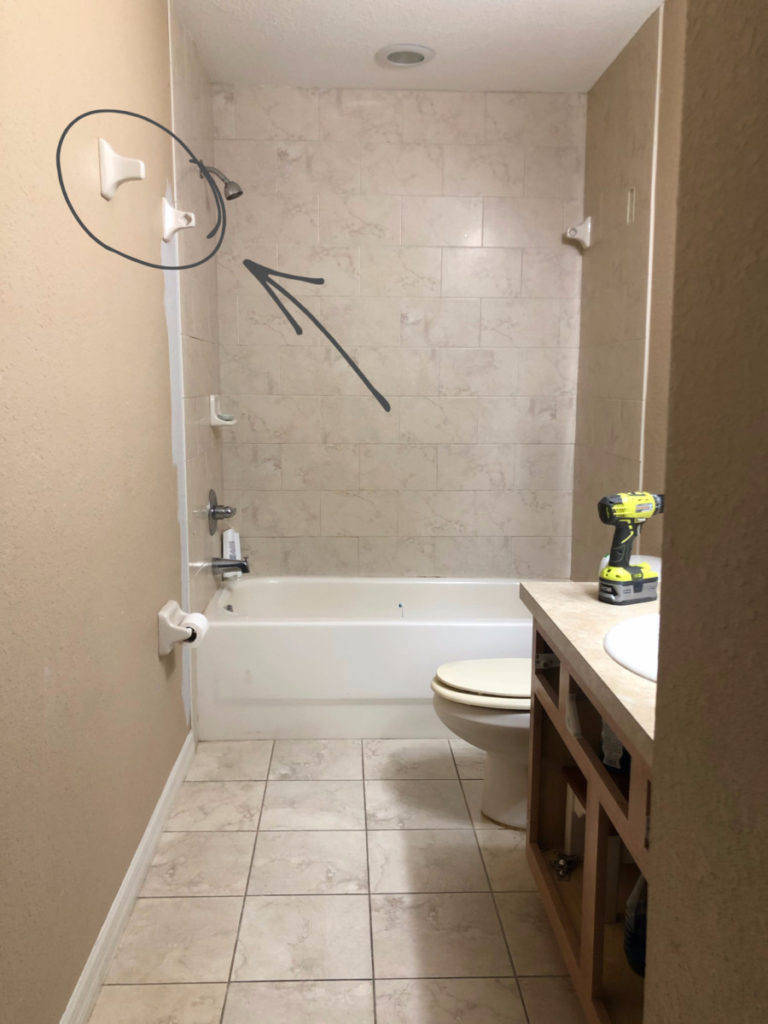
However, the one at eye-level was bugging me… so what did I do? I created two new holes to cover!

Remember how I said I was trying to complete this project in less than 24 hours?! Well you might think I am crazy for trying to create a custom towel rack as opposed to simply installing new hooks, but in reality this was a very quick fix opposed to patching the drywall and then adding hooks.
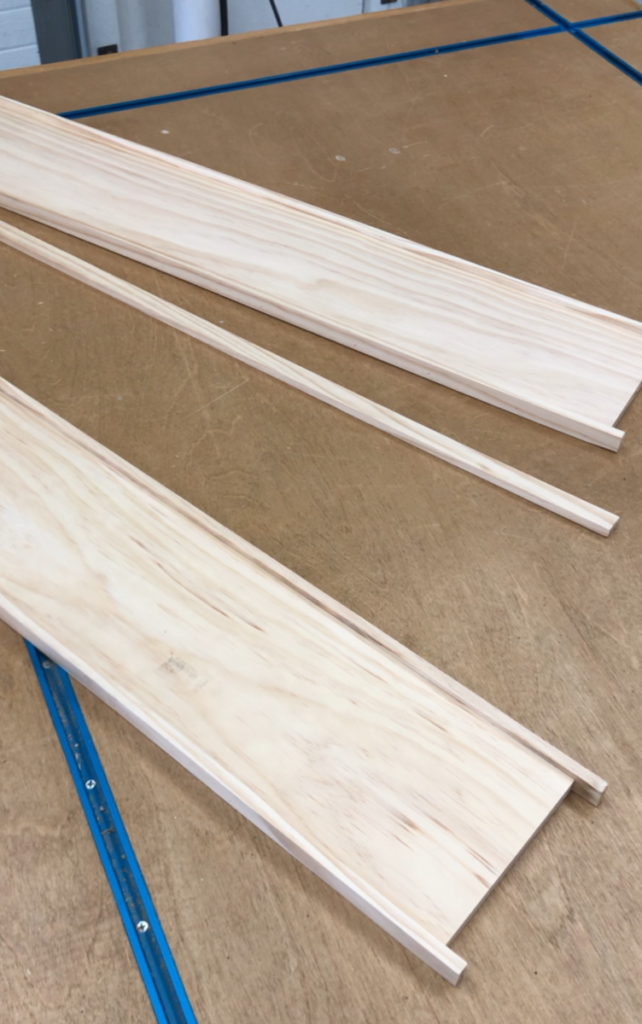
So I ran to the shop and whipped together a towel bar that would add character, and cover the holes. Win-Win!
I used a 1/2″ x 6″ pine board, and a 1/2″ x 1 1/4″ board to create the base for my towel rack. ( I personally wanted the profile to be low, so I ripped the 1 1/2″ board in half, so that it would only be 1/2″x 3/4″.)
I cut the 1/2″ board to the dimensions needed to cover my holes. I then used DAP RapidFuse to glue the (smaller) ripped down board to both of the long edges of the board.
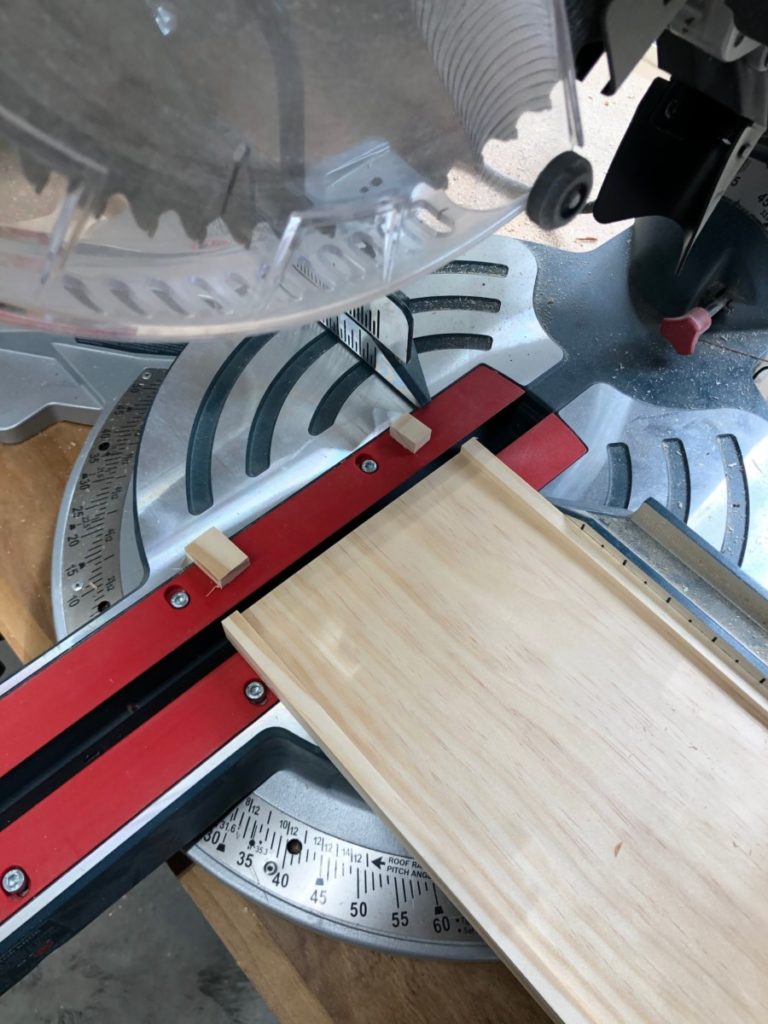
When adding my border pieces I intentionally made them too long. I did this so that I could simply shave off the end using a miter saw. By doing this it eliminated the need for precise measurements.

See perfectly flush!
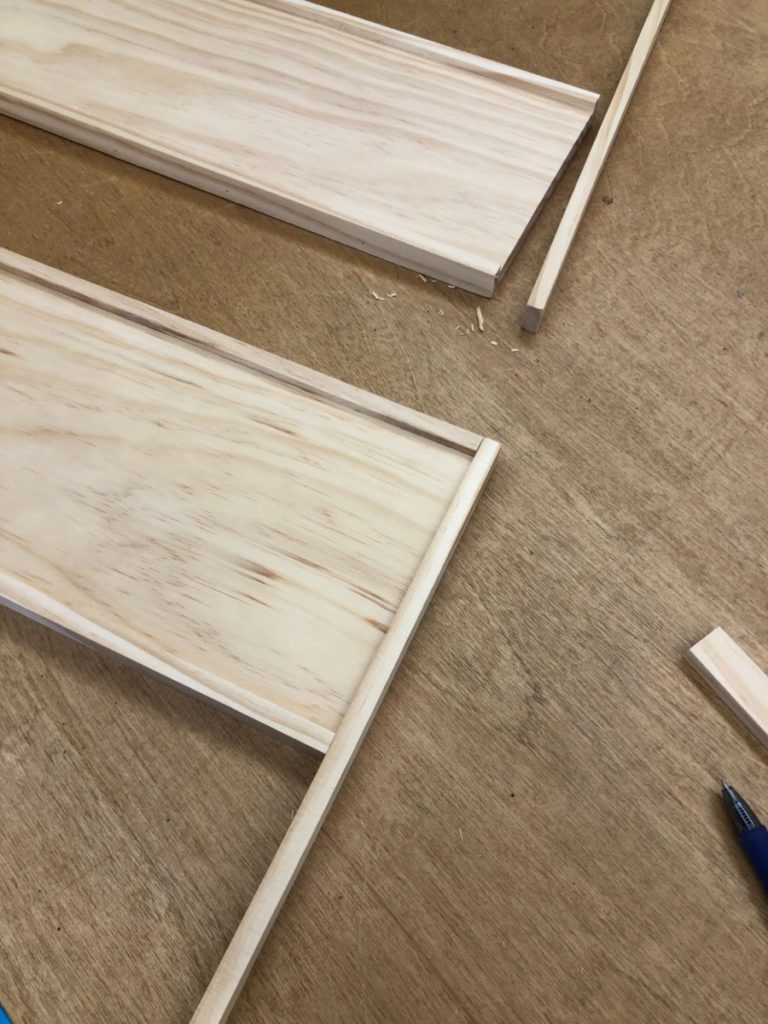
Lastly, I needed to add the end cap. You can measure the end and transfer the dimensions OR you can hold the trim piece in place, mark and then cut before gluing in place. I timed it, and this whole process took less than 5 minutes!
I slapped on some Early American stain by Minwax and set it in front of a fan to dry so that I could add poly, and hooks.
I used 2 1/2″ screws to secure the new towel rack to the wall. Mark the locations of your studs and drive a screw through the new plate and into the stud behind it. (When at all possible I try to hide the placement of the screw behind the hooks. I just install the hooks after I install the base plate.)
Finishing Touches
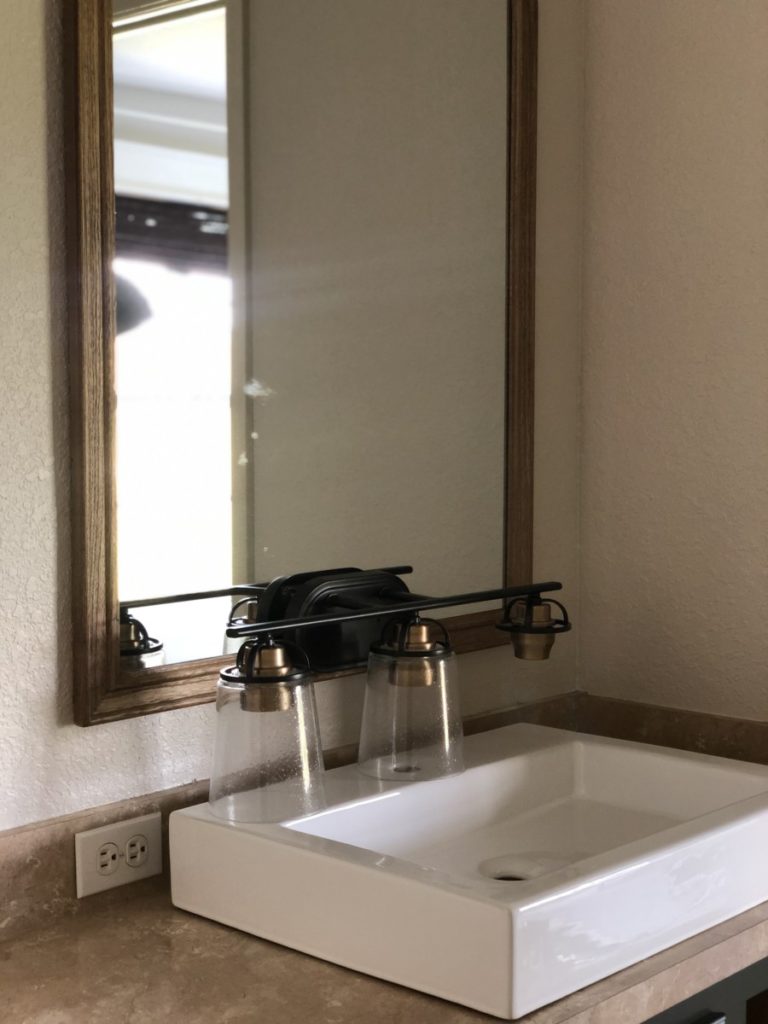
After everything was painted and holes covered it was down to the finishing touches. If you are familiar with my guest bathroom makeover you know I went back and forth in regards to light fixture multiple times. Well, I couldn’t use both of the lights in the other bathroom so I decided to use the leftover in the boys bathroom.
- Two Tone Light Fixture– The Home Depot
I also opted for the same mirrors used in the guest bathroom makeover as well.
- Threshold French Country Mirror– Target
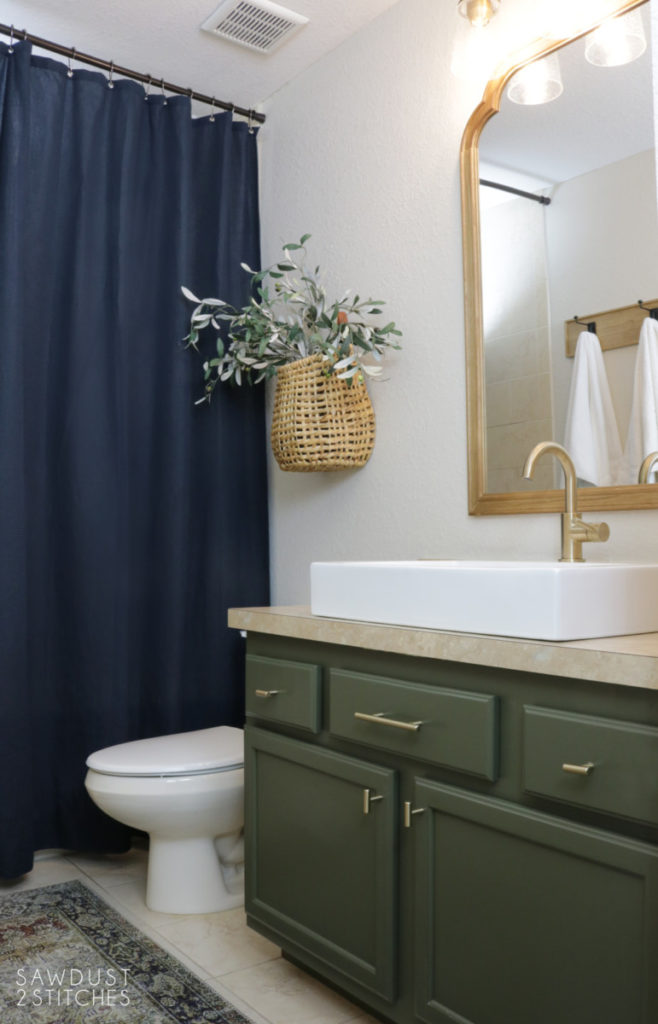
I just added a few last touches including an extra long shower curtain to give the room some height, added a rug runner to tie my colors together, and a “fishing basket” filled with olives to complete the space!
So without further ado. The kids 24 hour bathroom makeover!
Sources
Sources
- Two Tone Light Fixture– The Home Depot
- Threshold French Country Mirror– Target
- Bar Drawer Pull- Home Depot
- Vintage Olive Rug Runner– Amazon
- Basin Porcelain Sink– Amazon
- Extra Long Shower Curtain– Amazon
- Brass Single-Hole Faucet- Amazon (Not exact but close.)
Tools
- Fuji Spray Semi-Pro 2 – Amazon
- DAP Caulk Pro Kit- Amazon


It all looks so beautiful. I love the color palette!
Appealing information! Sounds Good.
I love the update! The color scheme is classic. The cabinet update and sink alone made a huge difference.