This post is sponsored by The Home Depot*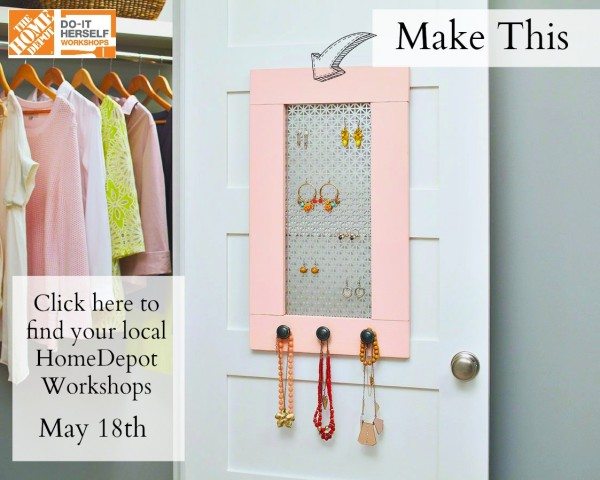 On Thursday, May 18th, the Mother’s Day Jewelry Organizer will be the feature of the DIH Workshops available at Home Depots across nation wide. So how about it, do you want to learn to make your own?! Click HERE to register for the class!
Jewelry Organizer
WHERE: THE HOME DEPOT
WHAT: DO-IT-HERSELF WORKSHOP
WHEN: THURSDAY, MAY 18, 2017
TIME: 6:30PM – 8:00PM
CLICK HERE TO REGISTER.
Have you ever attended to a workshop? If you have that’s awesome! (They would love to know what you thought of your experience.) If you haven’t been yet, you are in for a real treat! Here is a basic rundown of some of the awesome resources they offer. They have three different types of classes. —Do-it-Yourself (DIY), Do-it-Herself (DIH), and Kids—geared toward all ages and experience levels. The workshops are held at every store, and offer a variety of topics ranging from home repair to tool instruction, and even building home decor projects!! Not to mention they’re a great place to work on your skills and meet new friends who love to DIY!

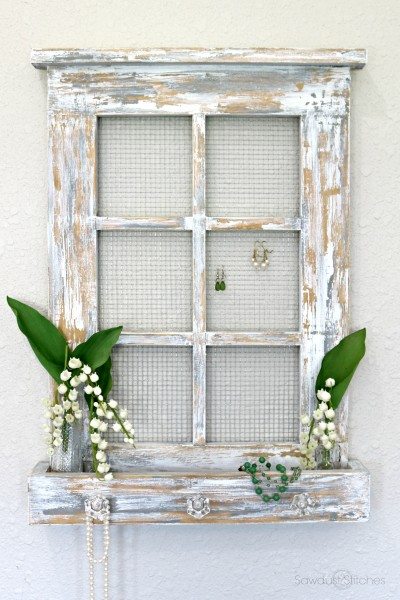
Seriously, this months project is absolutely adorable as-is but I, along with a few other blogger friends were challenged to make one with our own creative twists! So without further ado, here is my customized Jewelry Organizer.
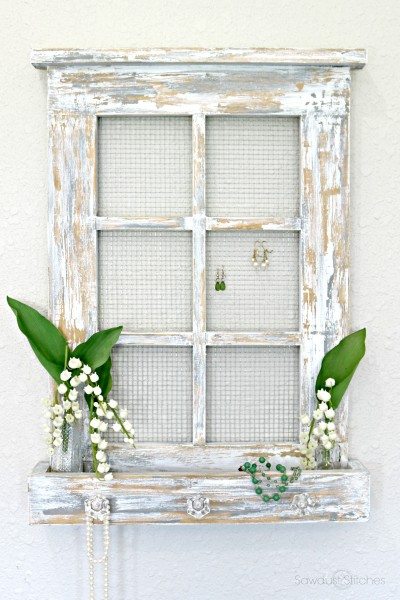
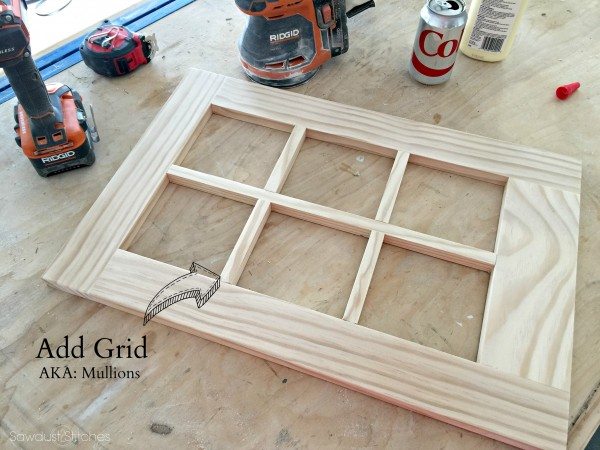
I used the same basic structure as The Home Depot’s example. However, I wanted to give it a shabby chic twist, so I decided to make it look like a window. I started by adding a grid/mullions. You can purchase 3/4″ wooden dowels, or you can simply rip them down yourself on a table saw. It was then a case of using pocket holes and/or glue to secure them in place.

I had originally planned on stopping there, but then I had an epiphany. “What is a cottage window without a window box ?!” Simply not as cute, that’s what! So I quickly constructed a shallow box, using 1″x 2″ board as the base, and a 1″x 3″ board to construct the sides.

Again, I planned on stopping there, but then I decided it looked a little bottom heavy, so I added a piece 1’x 3″ trim to the top to give it some craftsman flare.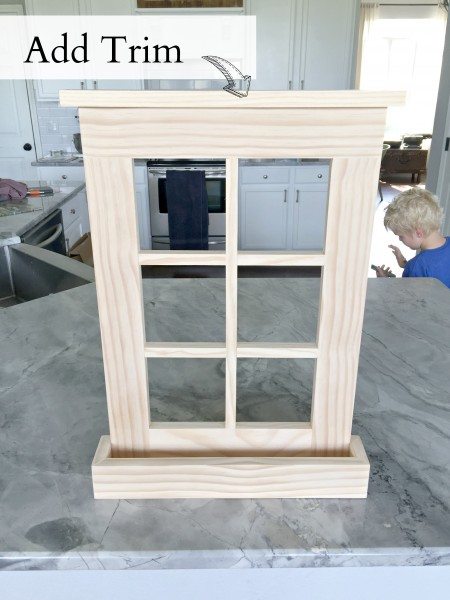
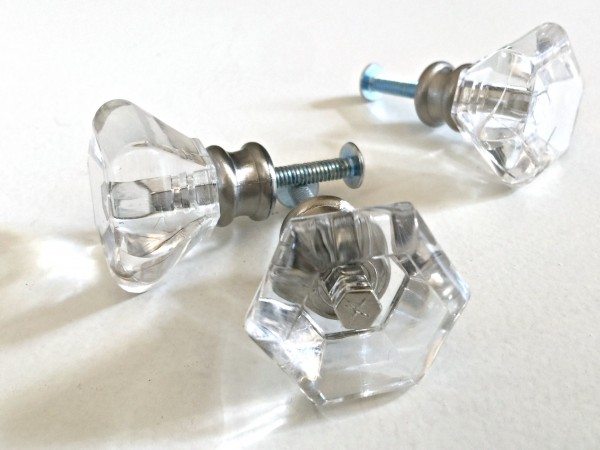
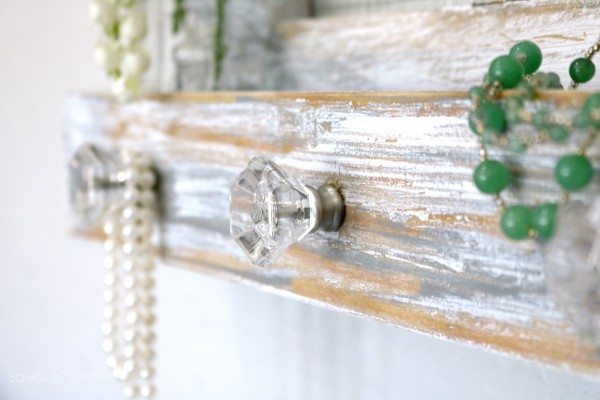
I love the metal backing that The Home Depot used on their example, but I wanted to take a little more rustic approach. I used some 1/4″ wire mesh as an alternative. (I found mine in the garden/fencing section of my Home Depot.  Last thing I needed to do before moving on to the the paint/finish, was selecting my knobs, and then drilling holes to accommodate them. I opted for these “glass” cuties. I wanted to enhance the shabby chic look, with out taking away from the cool paint finish. These little knobs were exactly what it needed!
It was ready for paint, I decided to use my trusty layered chippy paint finish. If you want to learn how you can create this look, you can reference this tutorial.
That’s all there is too it! Here are a few more shots, just because it is so dang pretty!


There you have it folks, my take on The Home Depot’s Mother’s Day Jewelry Organizer.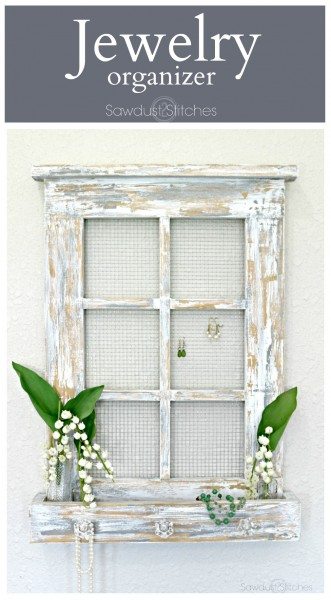
I love being able to see the creativity of my blog friends on these projects too, so check out their versions by clicking on their links below.
And don’t forget to register for the free class to learn how to make your own by clicking HERE.
Take Luck,
Corey
 Copyright secured by Digiprove © 2017


I love this so much! It looks so cute!
Your window jewelry organizer is adorable! I love the little box shelf at the bottom too! Great job!
CUTE with the window twist on it!
TOO, too cute………..
I love their workshops, but it is disappointing when you are unable to attend, and you cant find the project plans ANYWHERE. I like that the plans are so detailed, with the exact cuts/measurements, etc.
I love the updates that you did to your project tho… 🙂