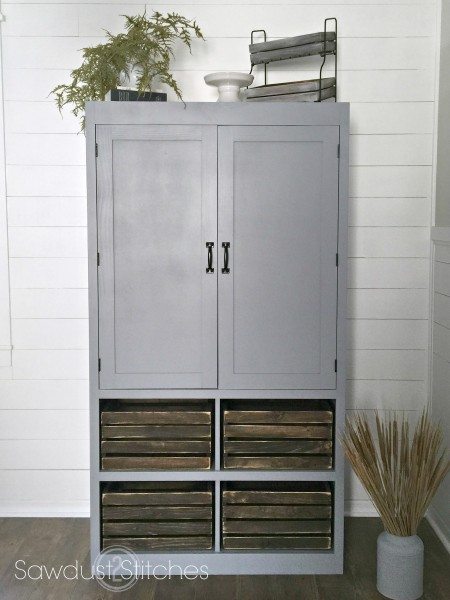
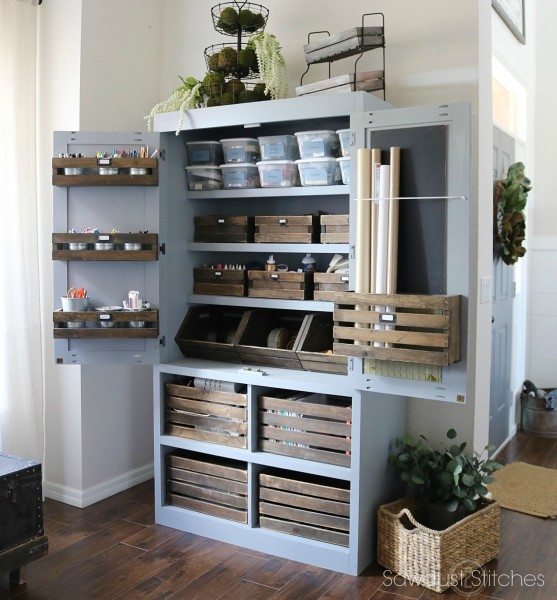
Hey all you sports fans, I have got a good one for you today! The great folks over at Crates and Pallets extended a challenge of sorts. They wanted to see how I could organize a kitchen using their assortment of their crates. “Challenge Accepted!”

Tools Suggested:
- Table Saw
- Miter Saw
- Drill
- Kreg Jig
- Sander
- Finish Nailer
Shopping List:
- (x2) 4×8′ 3/4″ PureBond Plywood
- (x1) 4×8′ 1/4″ MDF Panel
- (x3) 1×3″ Board
- (x1) 1×4″ Board
- (x5) 1×2″ Board
- (x6) Non-Mortise Butt Hinges for 3/4″
- (x 2) Handles
- Double Magnetic Catch
- 1 1/2″ Kreg Screws
- 2″- 16 Gauge Nails
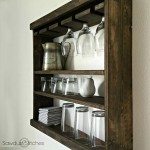
- (x9)- Small Crates
- (x4)- Large Crates
- (x4)- Half Wall Shelf
- (x1)- Wall Shelf
- (x3)- Vegetable Crates

Cut List(s)
Base Unit-
(3/4″ PureBond Plywood )
- (4) @ 19″x 40″
- (3) @ 9 1/4″ x 40″
- (2) @ 19″ x 75 1/2″
- (2) @ 19″ x 13″
Face Frame –
- 1×4″ Board = (x2) @ 38 1/2″
- 1×2″ Board = (x2) @ 75 1/2″
- 1×2″ Board = (x2) @ 38 1/2″
- 1×2″ Board = (x3) @ 40″ (Interior Shelf Support)
Doors-
- 1×3″ Board = (x4) @ 41″
- 1/4″ Paneling = (x2) @ 14 1/2″ x 35 1/2″
- 1×3″ Board = (x4) @ 14″ (if you are using pocket holes) *Hold off on cutting until you determine what style door you are making.*
Back –
- 1/4″ MDF Paneling = @ 41 1/2 x 72 3/4″
Let’s Get Building
Base-
Let’s start with the bones on this bad boy. When putting together a cabinet, I prefer to use Kreg Jig Pocket Holes. They are strong, and easy to conceal.
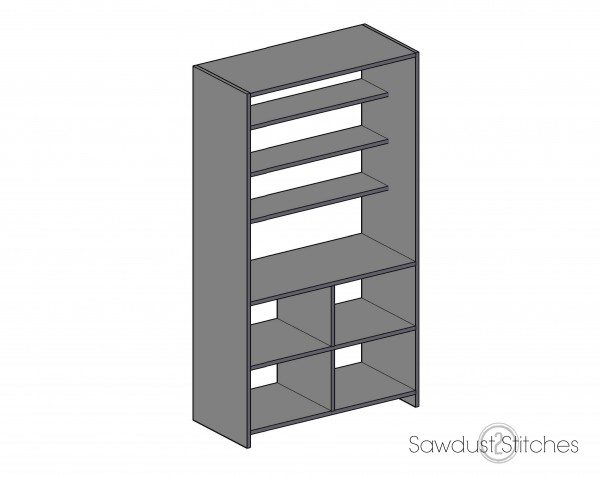
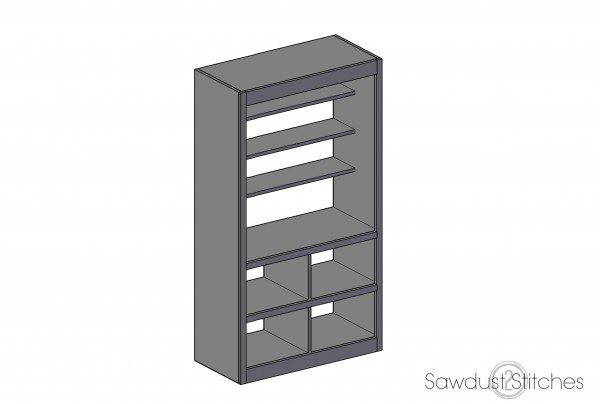
I assemble my base unit when it is laying on the floor. Begin by securing the sides ( 19″x 75 1/2″)” to the top and bottom shelf (19″x 40″). Then add subsequent shelves (19″x 40″), followed by the dividers (19″ x 13″).
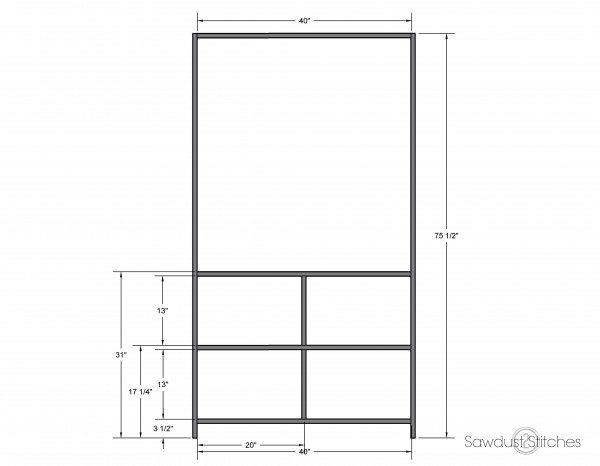
Alright, moving on! Time to add the upper shelves (9 1/4″ x 40″) , again I use Kreg Jig Pocket Holes to secure them. 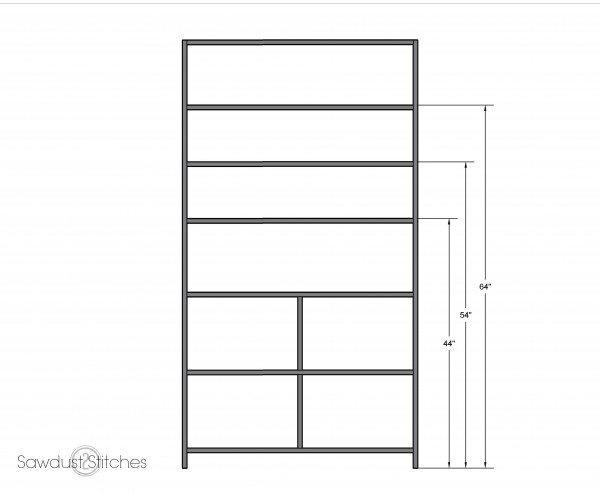
It should be looking a little something like this…
Face Frame-
Next up is the face frame! Again, I use pocket holes to create the face frame.
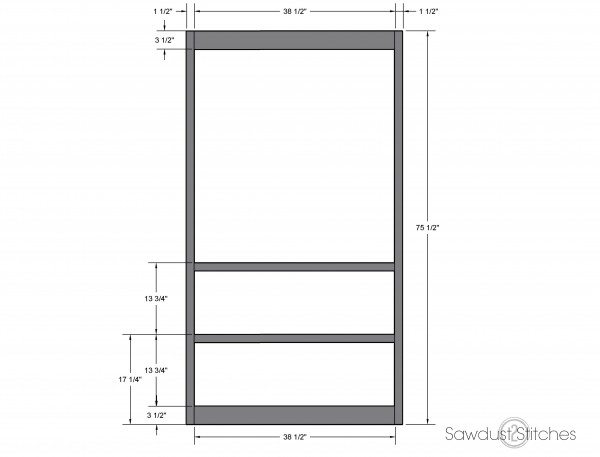
Once the face frame is assembled, you are ready to attach it to the base unit. I use wood glue and reinforce using 16 gauge 2″ finish nails.
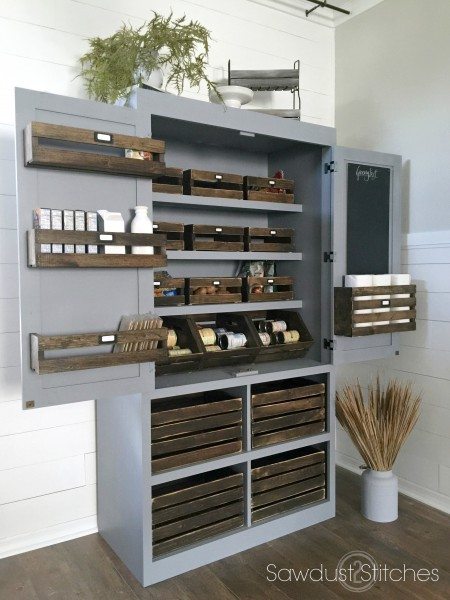
At this point I attached front shelf supports to the upper 3 shelves. (1×2″ Board = (x3) @ 40″). Again, I applied wood glue and reinforced with 16 gauge 2″ finish nails.
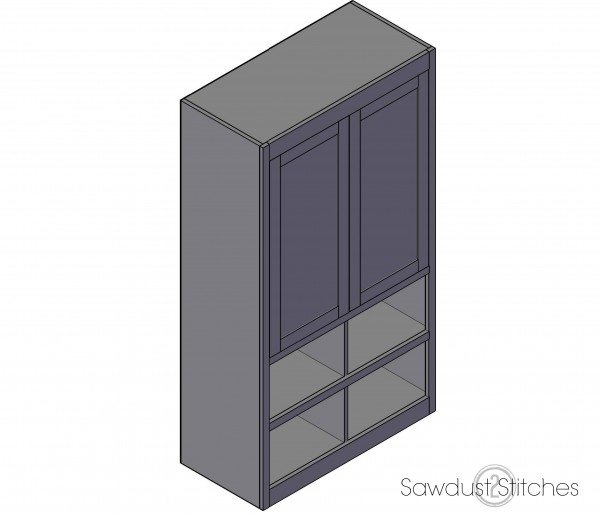
I chose to add the backing at this point. I find it helps keep everything square, although I know many builders prefer to leave it off when adding the doors, because it allows for easier access to the hinges. It is all personal preference.
Doors-
Next is time for the doors!
I opted for a basic shaker style door. I am going to direct you to the talented Jill from “The Rozy Home” she has an excellent tutorial. (One of these days I will document the process, but until then, she does a lovely job 😉
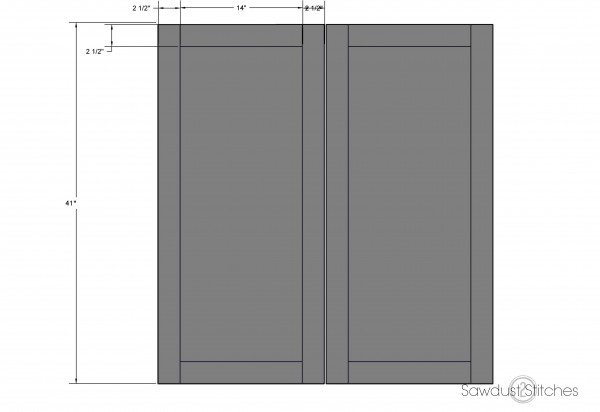
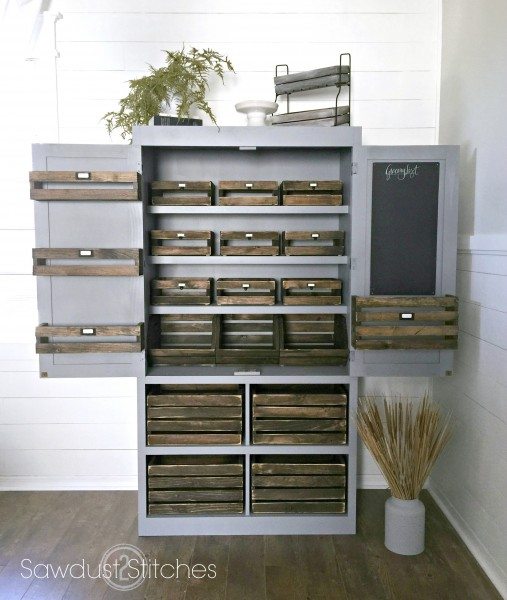
Next? Install those suckers! I used a non-mortise, full inset, for 3/4″ door. I had a tough time tracking them down, but I was able to order them online. You can find them here. (Affiliate Link) I wanted these doors to be able to easily handle the weight of the crate shelves plus anything I would be storing in them. So I used 3 on each side for a total of 6.
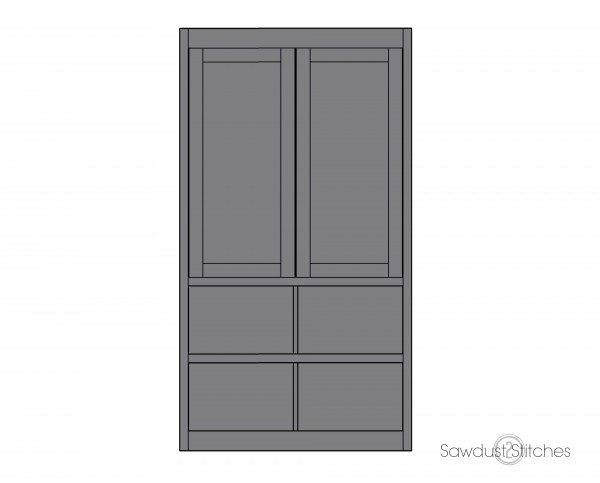
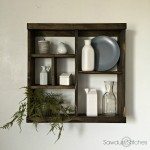
Last but not least it is time to paint and add the hardware and crates. These crates are available online at Crates and Pallet, and a number of Home Depot locations.
They do come unfinished and ready to paint or stain. In my case I opted for the two tone look and decided to stain all of my crates I used Jacobean stain by Minwax on the crates. For the pantry unit I used Dustblu by Sherwin Williams.
… and there you have it folks, another blend of form and function!
Take Luck,
Corey
 Copyright secured by Digiprove © 2015-2016


Somewhere (definitely in a small NY apartment) someone is wishing Santa would have delivered this awesome piece! Inspiring! Merry Christmas! 🙂
I freaking LOVE this!!! You are amazingly talented!
When you attached the shelvs with the kreg did you put the holes on the bottom or top? How did you hide the holes?
I put them on the bottom so that they wouldn’t be visible. Thanks for reading!
Do you have a link for the plans of this wonderful pantry cupboard? Whenever I try to print, it makes cuts of the pages and cuts things out. Would love to be able to print the plans.
Thanks,
Beverly New
I am sorry I don’t have them in a PDF format! I promise it is on my New Years Resolution to get things a little more user friendly!
Regarding the shaker doors: Cut your door top/bottom 1x3s at 15″ NOT 14″ if you plan to use the tongue and groove method linked via The Rozy Home website. You’ll need an extra half inch of room on each side of the top/bottom 1x3s to slide into the side boards. Sadly, I cut my boards before reading the door directions, so I used pocket hole screws instead to preserve the required length to cover the face of the pantry. I’ll try the tongue/groove method next time!
Otherwise, a solid plan, and looks great! Thanks for sharing!
Thank you so much for pointing that out! I will make adjustments in my plans. So sorry I didn’t catch that!
This would be PERFECT for my no-pantry kitchen! When I moved and downsized 2 years ago, I gave up an amazing walk-in pantry with room for everything. Now I have no pantry at all. I think this would be ideal. I am saving it!
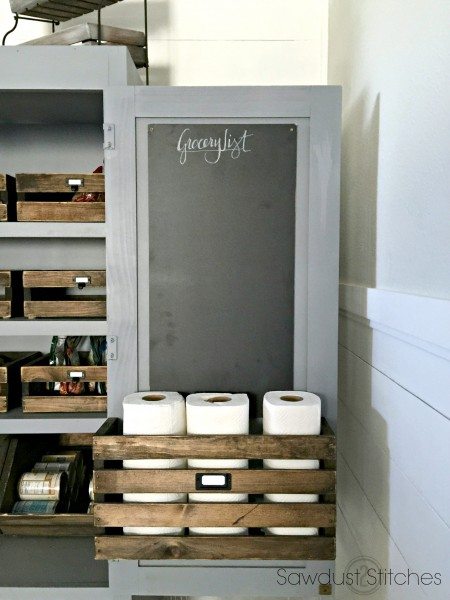
Building this right now! Love it so much! Quick question – how do you attach the crates to the doors? Thanks!
Oh great! When I got the crates, they had keyholes cut into them ! 🙂