This post is sponsored by DAP.
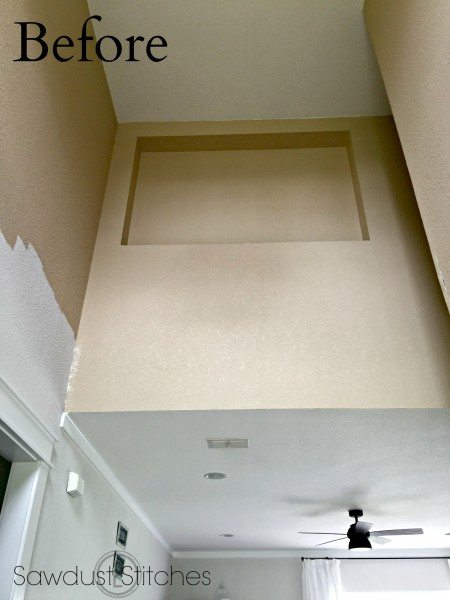
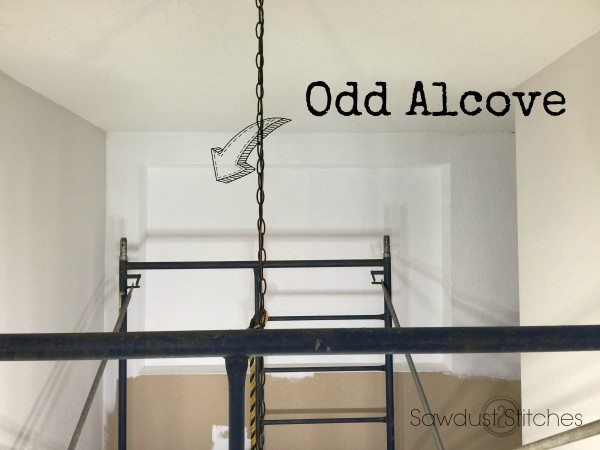
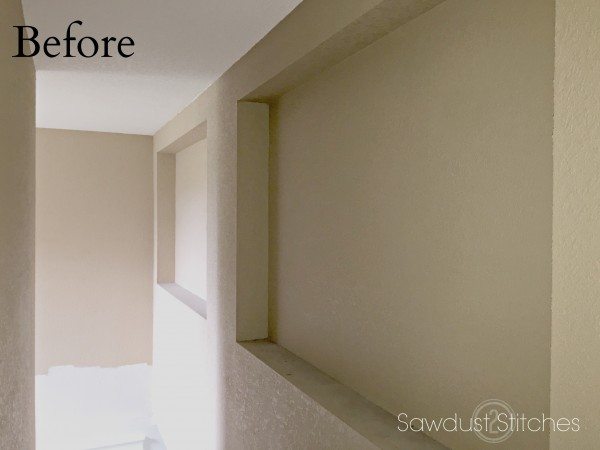
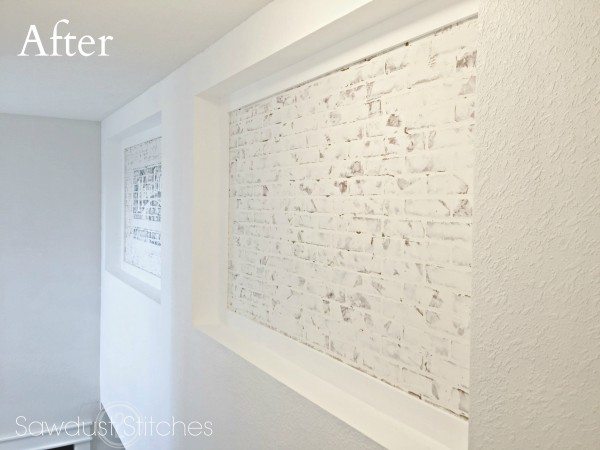
Hey there sports fans, I am back and I am pumped! Want to know why?! I have finally crossed off one of my most daunting home improvement projects. You know the type I am talking about ? They are those projects that you regularly convince yourself that they don’t really need to be done? I can relate, I had talked myself out of my personal Goliath Project on a daily basis, but was always brought back to reality every time I answered the door. You see, my daunting task was my two story entry. It was tall, had odd alcoves, it was tall, it was an atrocious shade of a used band-aid, and it was tall, did I mention it was tall?
Well, I DID it, I tackled my hurdle and I would definitely consider it a WIN! So without further ado, I am excited to share all the pretty and not so pretty details of the project.
For this project I teamed up with the great folks over at DAP. I have used DAP products for years, and I would never recommend a product that I would not personally use. All opinions shared are expressly my own.
Supplies Used:
- Faux Brick Panels (Home Depot)
- 1″ x 4″ Boards (or trim if desired)
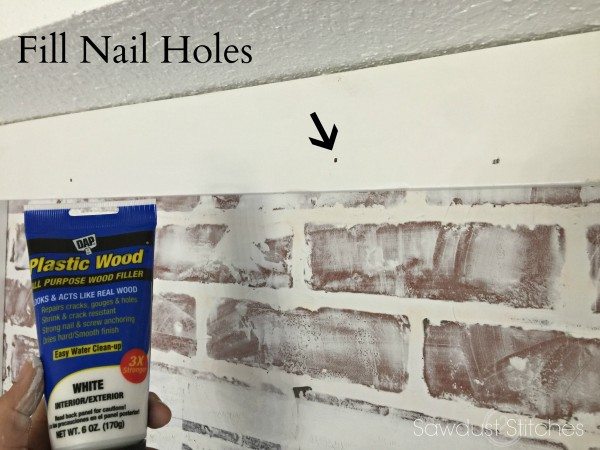
- DAP Plastic Wood Filler
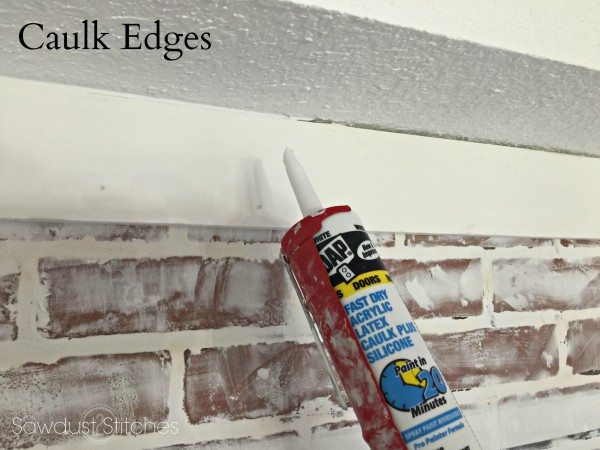
- DAP 20 min. Paintable Caulk
- DAP “Spackling Paste” (Make sure you read the whole tutorial before purchasing.)
- Paint
Tools Suggested:
- Table Saw
- Nailer
- 2″ Finish Nails
- Spackle Paddle/Knife
Disclosure: Some of the links provided are affiliate links. By purchasing through these links it supports this site and helps keep content free. You can read more about how we do this with no extra cost to you.
If you remember a while back I did a faux brick wall in my kitchen, it turned out beautiful and I love everything about it. It added so much personality and I knew that it could add some character to my odd alcoves.
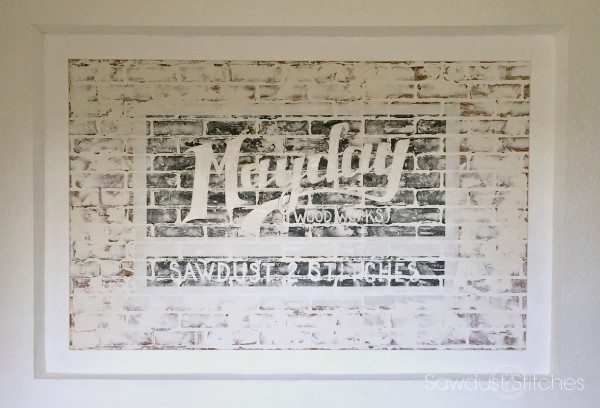
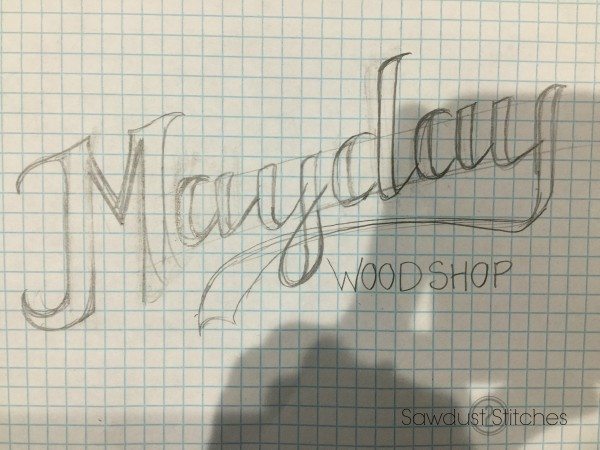
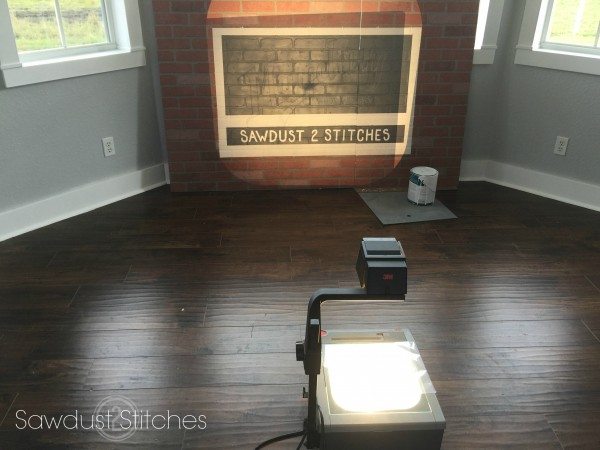
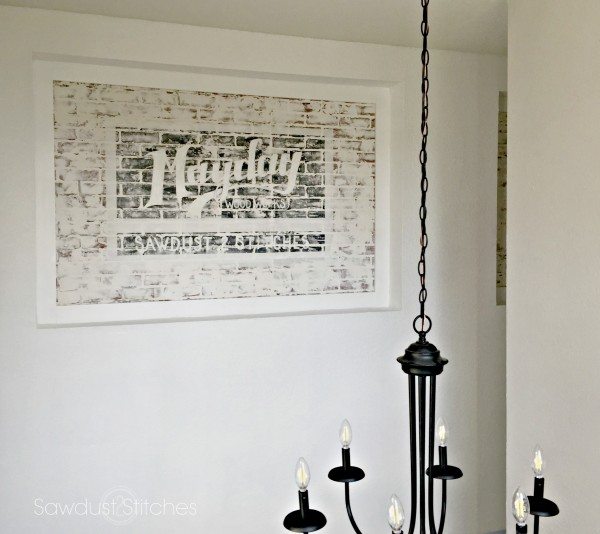
Let’s get started, I began by sketching up the text I wanted to have featured on my wall. I am lucky enough to have a sweet neighbor that owns a screen projector! Once, I had worked out all the kinks, I traced the image onto a transparency sheet. (OR in my case I was fresh out of transparency sheets, so I had to work with what I had. In this case a gallon size ziploc bag. Ha) Moving on.
 Before I could begin transferring the image, I needed to first add my background color blocks. I ran a few trial runs to test different color combos. I ultimately decided on the gray background with white lettering.
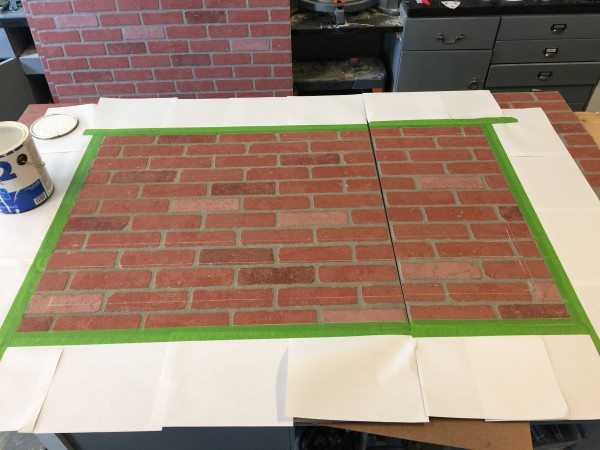
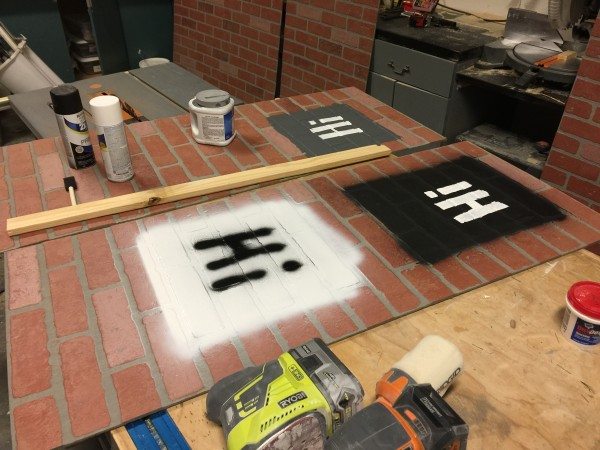 Once I had my colors selected, I taped off the entire bottom layer so that I could easily paint it. In this case the base/outline would be white. During this process I was consulting my original design and making sure my blocks were to scale. (If that idea freaks you out, you can always use the projector to create your outline.)
Side Note: I used white and gray primer when painting on my designs. It is not entirely necessary, but if you you use a paint I suggest giving it plenty of time to cure. After all, you will be SCRAPING the panel with with a spackling knife.
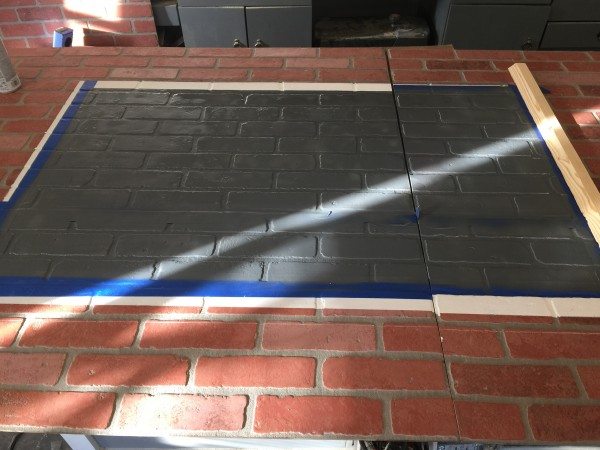
 Once the bottom layer of white was painted and completely dried, I then taped off the gray section and proceeded to paint the taped off area. Again, I played it safe and used a gray primer. (Available in a spray can)
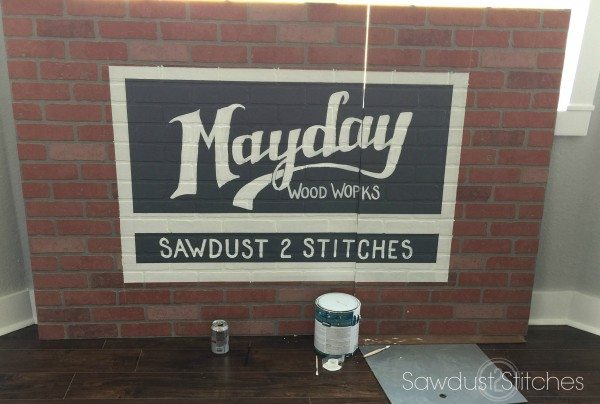
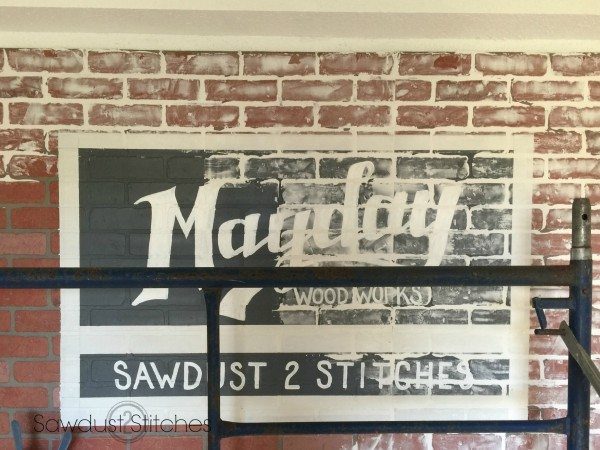
Once the gray primer/paint was completely dried I was able to remove the tape to reveal this beauty! It’s now time to add the pretty details! 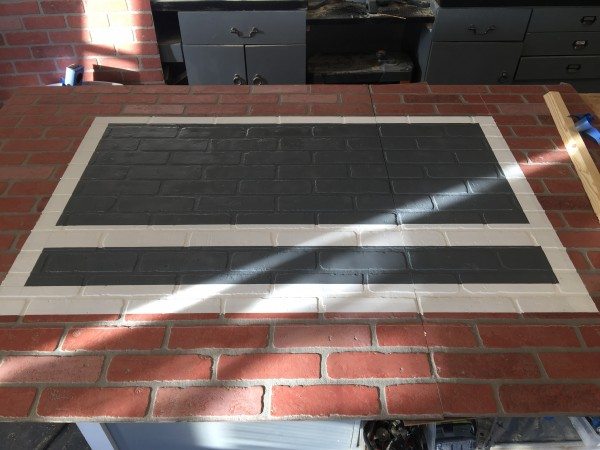 I set it up in front of the projector and got to work! I used a pencil to lightly trace/transfer the projected design on to the brick wall.
After the design was traced, I proceeded to fill in the design with paint. I did this portion with a basic art paint brushes.
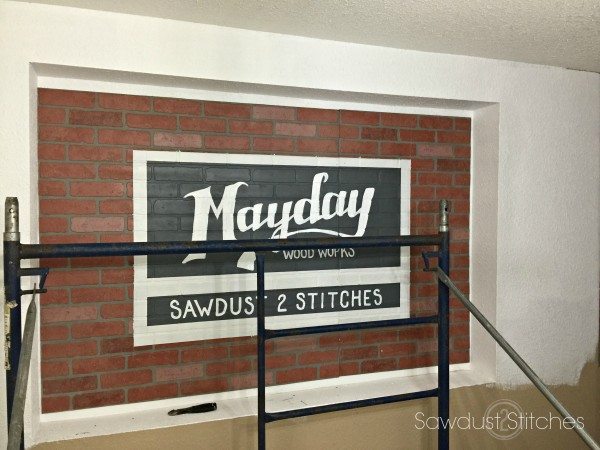
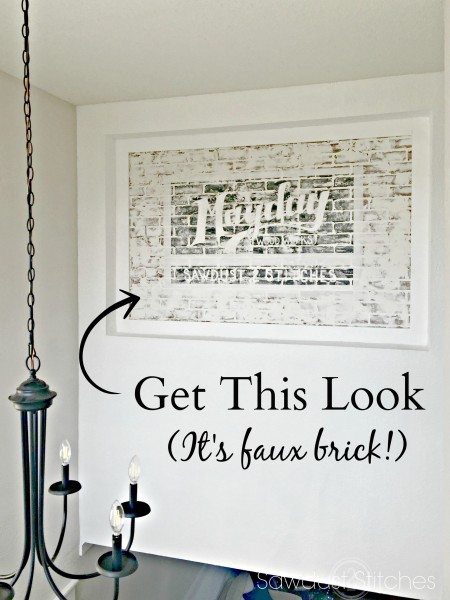
Now we are firing on all cylinders! Once the design is finished, we are ready to install this bad boy! It is really a straight forward task. I just tacked mine in place using a finish nailer. If you want more details on the install process, you can read more details about my Kitchen Brick Wall, or you can check out what “Sawdust Girl” did. Honestly, she pretty much rocks the faux brick wall’s world! You should definitely check out both of her wall tutorials, you can find them here, and here.
Learn From My Trial Runs:
Once the panels are secured we are ready to roll! Or so I thought. During this process I was able to try a few different products and figure out which one worked best for this purpose.
First I tried DAP’s ” Crack Shot”. I am not going to lie, this stuff was AH-MAZING! It went on smooth, like butta’. It also dried quick without any shrinking. HOWEVER, to my horror, as it was drying I started to see faint tinge of pink to the spackle that had once been white. Once it was completely dried, all of my grout lines had turned pink!? That wasn’t right. After a little bit of research I think I found the source of the “pinkness”. Like I said I love working with “Crack Shot” but it seems that it has an active ingredient in the “Crack Shot” that caused a small chemical reaction with my brick panel. After comparing active ingredients, I think I figured out that it was having a funny reaction with the Ethylene Glycol. So I looked at other wall spackles, and found just the ticket! I needed DAP Spackling Paste, (The one in the green tub is what I used, and it has my stamp of approval!)
Once I had the right product, I was crackin’ on!
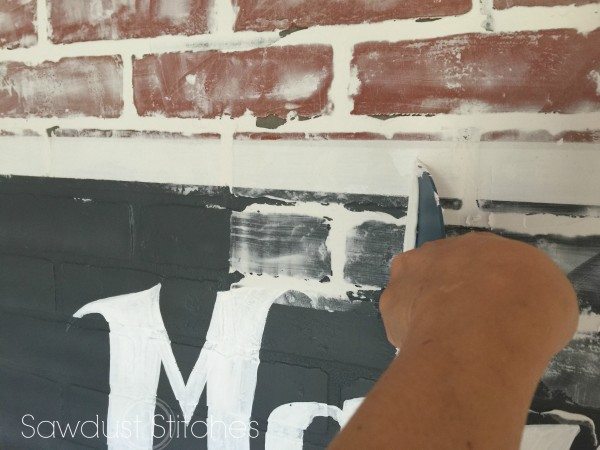
I know this part might seem scary, but I promise it is not. A little messy? Yes. But Scary? No.
Honestly, there isn’t much to it, just smear it on, and scrap it of until you get the look you are going for.
Here are some short clips to show just how easy it it!
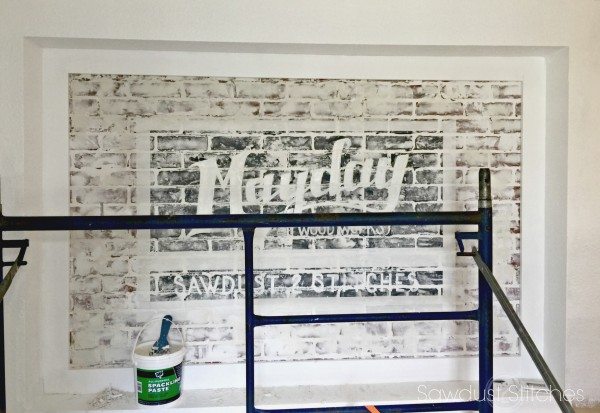
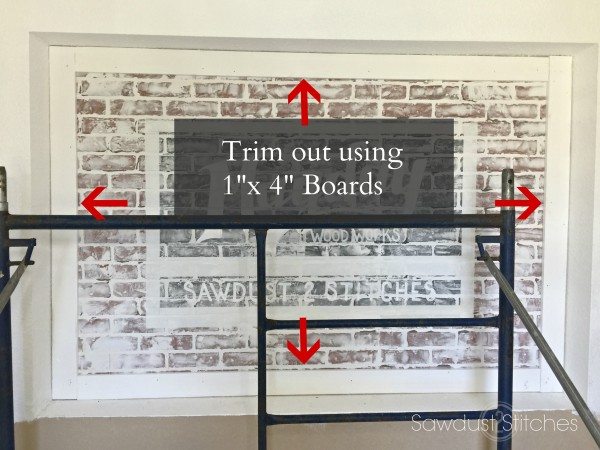
Once the spackle was dry I was ready trim this sucker out! This isn’t entirely necessary, BUT when considering the dimensions of my alcoves in particular, it made sense to leave a gap around the perimeter , because I would only require one panel per alcove. PLUS, I wanted to trim it out anyways, so it was a win-win.
To trim out the alcove I used 1″x4″ primed finger board. It comes primed white, which eliminates a step, and they are actually cheaper than select pine boards. BONUS!
To install, I again relied on a finish nailer with 2″ nails to attach the boards to the wall.
 Once the trim boards are installed I was ready to fill all the nail holes in preparation to paint.
 If you have never used caulk you are in for a real treat. Caulk can basically work miracles. It can hide almost any unsightly gap, and make your trim look flawless. Moral of the story? When in doubt; caulk.
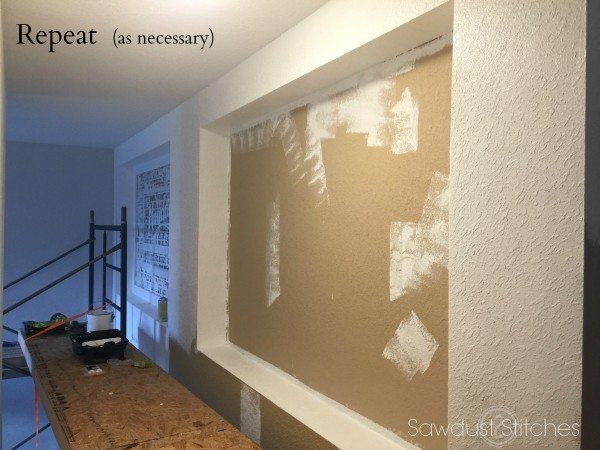
 I had not one, but two of these alcoves. So repeated the above steps again.

There you have it folks, a great way to add character and interest to any place in your home! Thanks for tuning in.
Take Luck,
Corey
 Copyright secured by Digiprove © 2016


Love!!!
I consider myself crafty and creative, but this is a HOME RUN, TOUCHDOWN and a THREE POINTER all in ONE! Love the graphics! You are one talented woman!
Awesome. I have always wanted to do this.
Fabulous, this is something I have been considering doing in my master bedroom, you may have just given me the push I need. I don’t know if that is good or bad haha, but after the holidays I’m going to get started.
I’m prepping the walls in the guest bath now to paint and I think I will do one wall in there to get started learning the technique before starting the big wall in the master bedroom, and the old world brick wall style in the guest bath will look great
Thank you for this tutorial it really does help. Wish me luck.
Stunning! You turned a “Huh?!?!” (what is with the alcoves anyway!?) into a plus!
Now I miss my alcoves in my house I just sold. Darn it, always a day late and a dollar short. Looks great.
Love it
Curious what you did to fix the areas that turned pink, had the same thing happen on our faux brick.
Oh no, what kind of spackle did you use? When mine turned pink I had to use a metal spatula to scrap out the majority of it, and then I had to start again. I am sorry that it is happening to you. I didn’t have any problems after I switched spackles.
We were using regular Dap spackling paste above our kitchen cabinets which turned out awesome but then ran out after getting to our backsplash area below the cabinets so my husband told me to just use some Dap drydex that he already had (the “goes on pink and dries white” kind) but after drying for days it still had a pink tinge in the majority of the cracks even though the bricks dried white 🙁 Scraped most of it out and redid it with the regular stuff which looked good until it dried and the light pink showed back up in some spots, though a lot lighter than it was before. Can’t figure out why it showed back up but gonna try to scrape and redo it one more time lol.
Genius! I love this idea (with or without the graphics) as a kitchen backsplash, although I would probably want to top it with some sort of water-resistant seal in a matte finish for easy clean up.