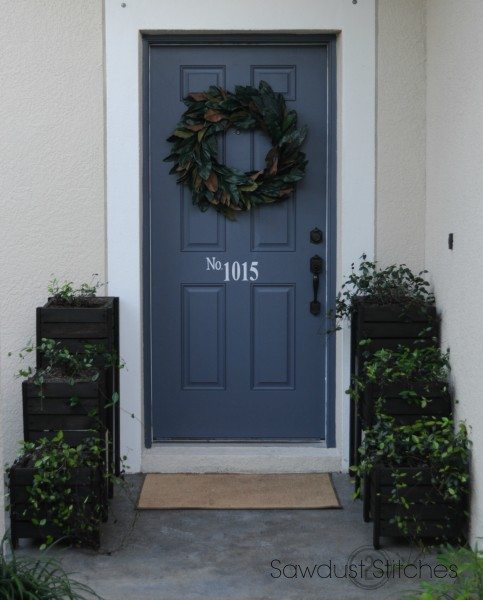
 When we first moved into our house, I was at a loss with what to do with our front entry. It was too small to put any thing large, but big enough that it looked funny with out SOMETHING?!
I was stubborn and thought surely I can fit in some seating… Yeah, that was a bust. As a result I ended up with a lot of scrap 1×3’s. Well, ‘When life gives you lemons… stick em’ down your shirt and make your boobs look bigger.” or… take the scrap and build it into these awesome planters!
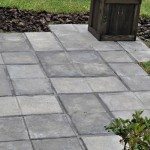
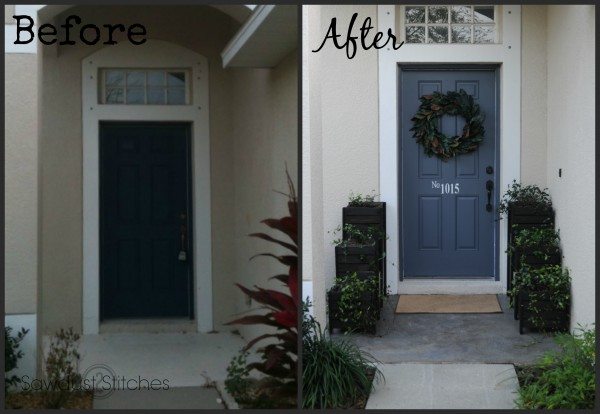 If you want to learn more about the floor transformation, you can see how I did it here: Patio Floor Makeover
Materials Used:
- 1×3″ s
- 1×2″
- Heavy Duty Landscaping Material
- Exterior Use Stain
- 1 1/4″ Wood Screws
- Weather resistant Wood Glue
Tools Suggested:
- Miter Saw
- Drill
- 1/8″ Drill Bit
- Level
- Staple Gun
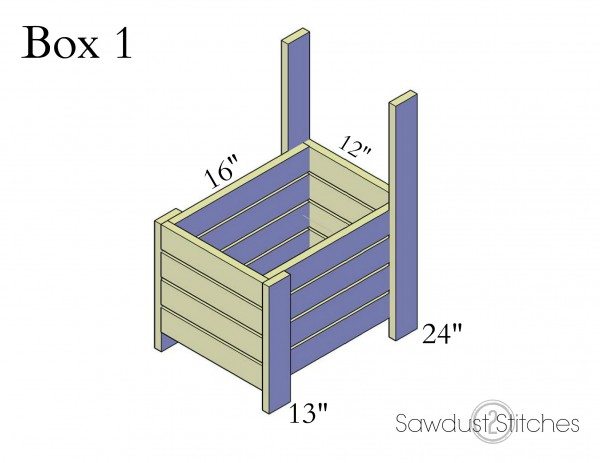
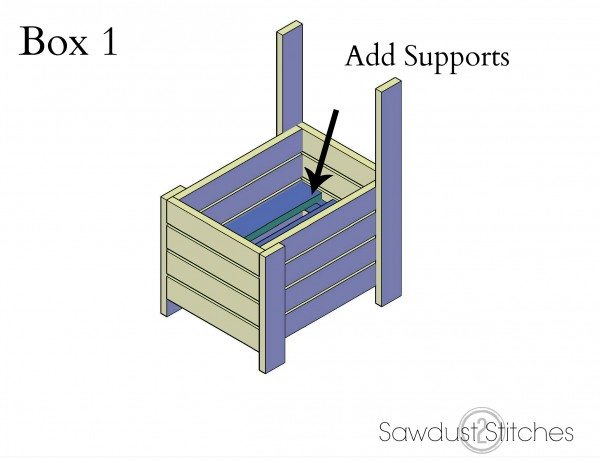
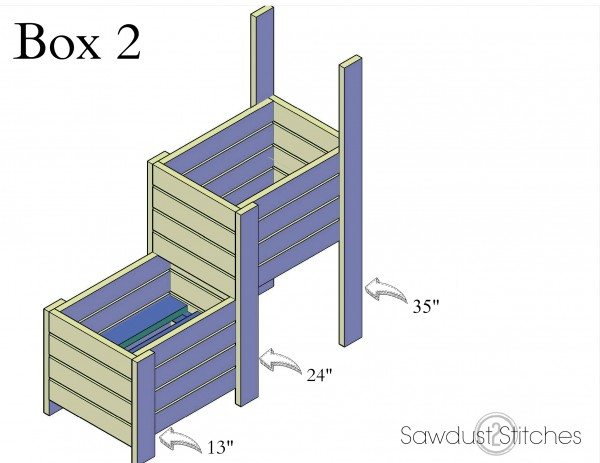
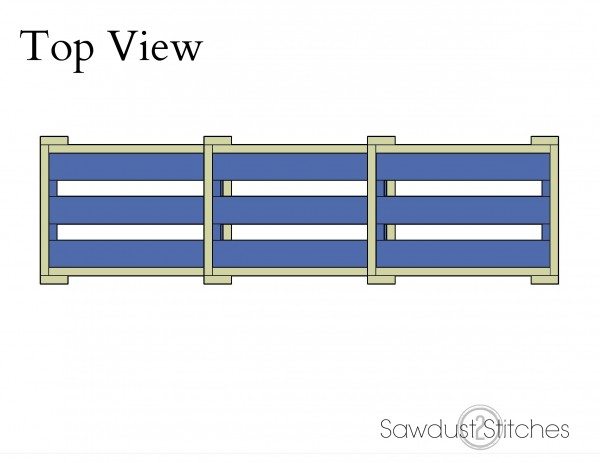
Cut List: ( For ONE tiered planter)
1×3″ Boards
- 33 @ 16″
- 24 @ 12″
- 2 @ 13″
- 2 @ 24″
- 4 @ 35″
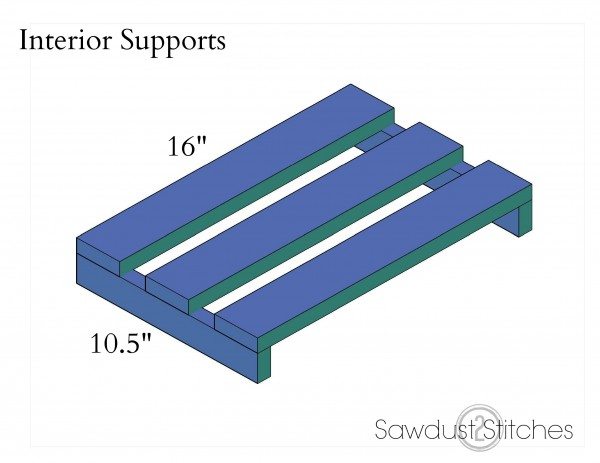
1×2″Board
- 6 @ 10.5″
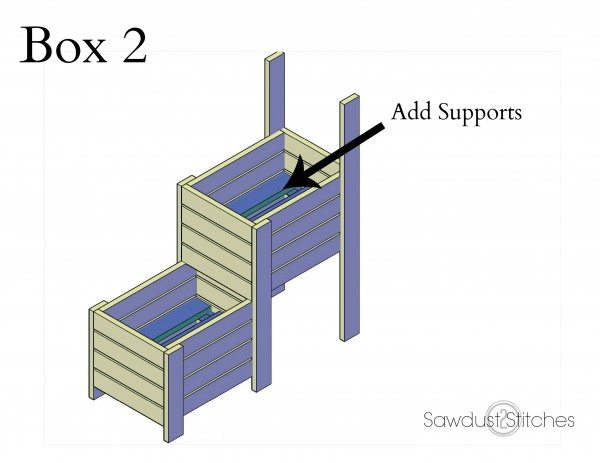
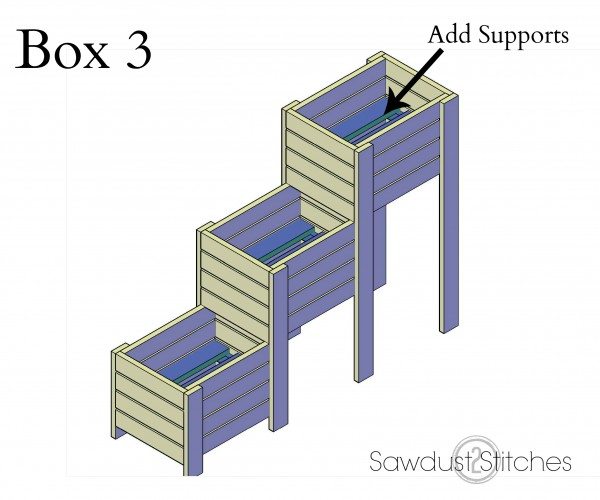
To speed up the assembly process, cut all boards, sand and if desired stain all boards. Once dry, you can begin the assembly process. When assembling , I would strongly suggest pre-drilling all joints for screws, to avoid the wood splitting. If you prefer using a nail gun, use 2″ nails and as an added precaution use a weatherproof wood glue.
 To line the planters, I used a heavy duty landscaping material. I would guess you could use another form of material, but that is what I used.
Cut 3 rectangles approximately 22″x 27″, push the material into the individual planter boxes. Make sure the material covers the bottom and the interior sides of the planter. Then use a heavy duty stapler to staple the material so that it stays in place .
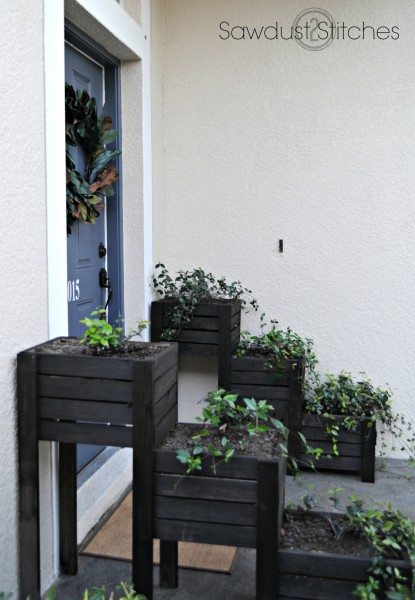
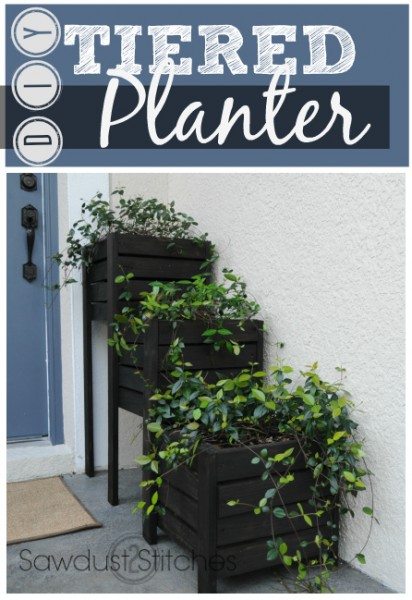
Then fill er’ up! Soil, plants, water, sun, you know the routine!
Take Luck,
Corey
 Copyright secured by Digiprove © 2015


OH wow! LOVE the difference! Not to mention, your tutorial is fabulous. I’m just racking my brain now to figure out where I can put a few at my house 🙂
I just love these!!!! Once again, you rocked it!
Love these, thinking I will put a small tomato cage in the top ones so Ivy can grow up. Use it at Christmas time as a decoration/tree. Thank you for the pictures and the idea.
Can you share what stain brand/color you used for this project? It’s very pretty!
Thanks, it is Jacobean by Minwax!
Love it! You’re amazing!
I will take suggestion for a little projet in my very little balcony. Thanks!!
What a great idea and plans! I plan on using it to hold plastic planters that will fit inside. I think landscape fabric will dry out the soil too quickly in my neck of the woods.