Hey there, make sure you join me on Instagram and Facebook to keep up with our most recent projects and sneak peeks!
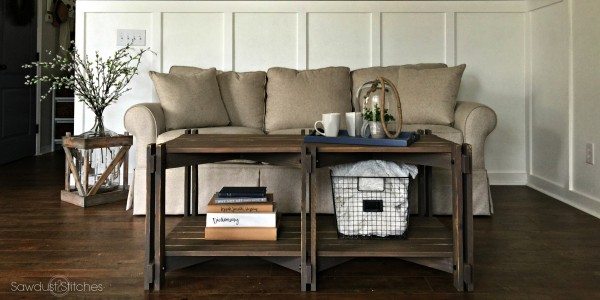
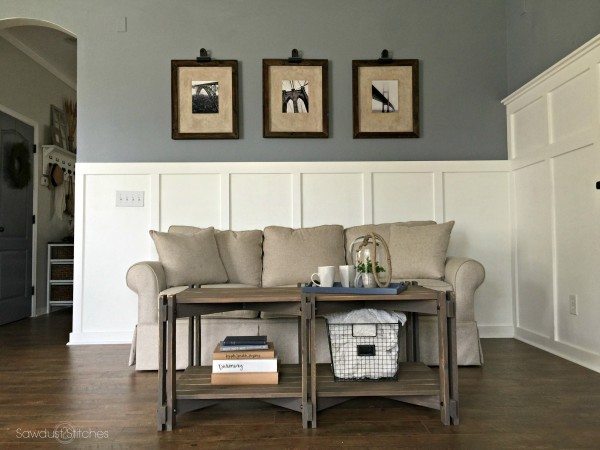
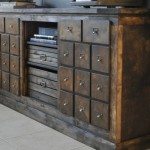
Today I am super excited to bring you some brand spankin’ new build plans! Today I will be showing you how to build a Arhaus inspired Rustic Farmhouse Coffee Table.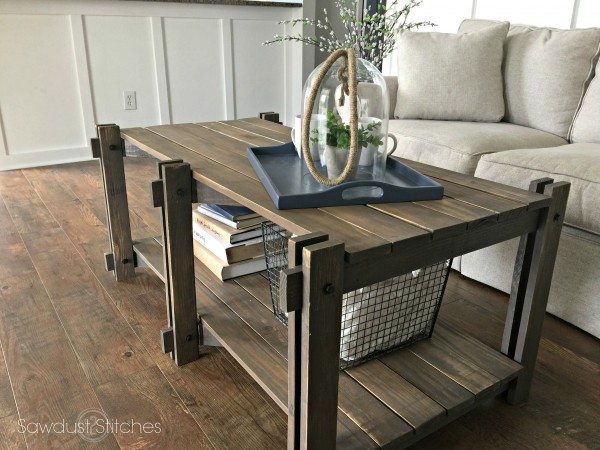
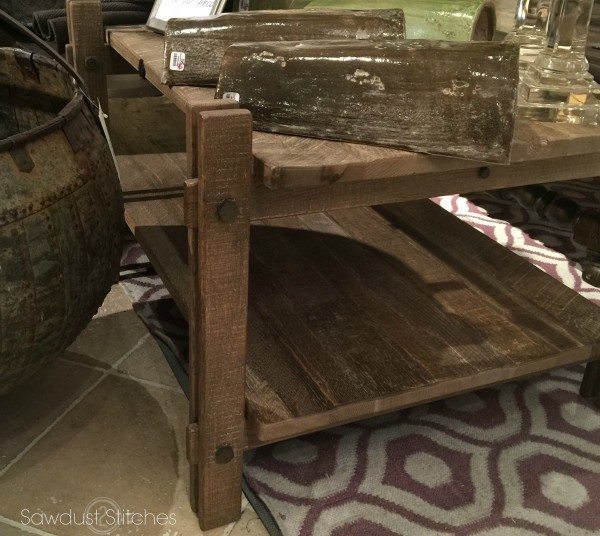
Recently, I have been seeing a lot of pipe shelves and I love the concept of boards/planks spanning over the vertical pipe frames. So I got to thinking… I wanted to created the same concept using wood. Then one fateful day I came across an shelf that did just that! Arhaus has a discontinued line that embodied what my brain was trying to put together! (So stay tuned for accompanying pieces, because I have big plans!)
I’m excited to be teaming up with the great folks over at HomeRight on this project! It is through great companies like HomeRight and affiliate links that I can continue to provide all these tutorials at zero additional cost to my readers! So a big thank you to them! (More info. available here.) Make sure you enter to win your very own paint tent at the end of the post!![]()
Rustic Farmhouse Coffee Table
Supplies Used:
- (11 ) 1″x 3″ Boards
- (6 ) 1″x 4″ Boards
- (24) 3/4″ x 5/16″Hex Bolts (Optional)
- (24) 5/16″ Washers
- Spray Paint (Optional)
- Stain and/or Paint
- Wood Glue
- 1 1/2″ Finish Nails
- 1 1/4″ Wood Screws
Tools Suggested:
- Drill
- Drill Bit
- Miter Saw
- Nail Gun
- Home Right Spray Tent
- Home Right Finish Max Sprayer
Disclosure: Some of the links provided are affiliate links. By purchasing through these links it supports this site and helps keep content free. You can read more about how we do this with no extra cost to you.
Step 1.
Cut List:
1″x 3″=
- (6) @ 28″
- (20) @ 21″
- (4) @ 20 1/2″
- (16) @ 14 1/4″ with 45 degree angles (See Step 3. for more details)
1″x 4″=
- (12) @ 48″
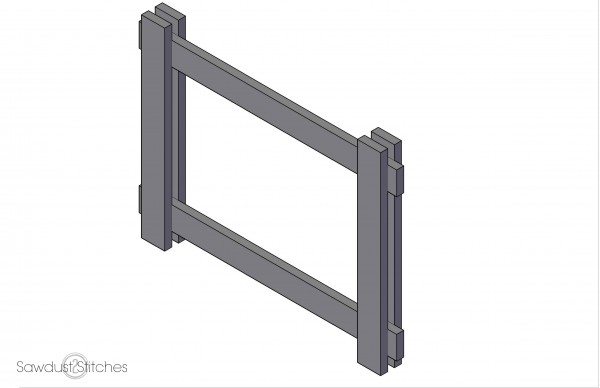
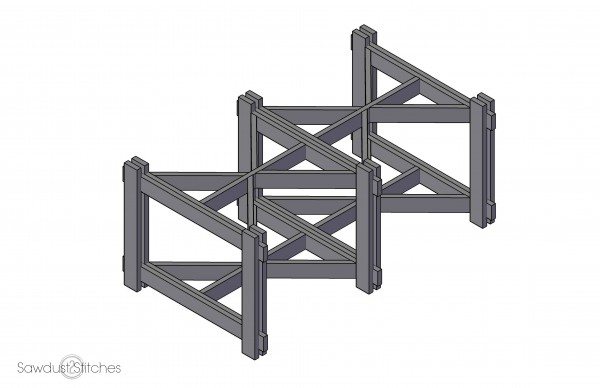
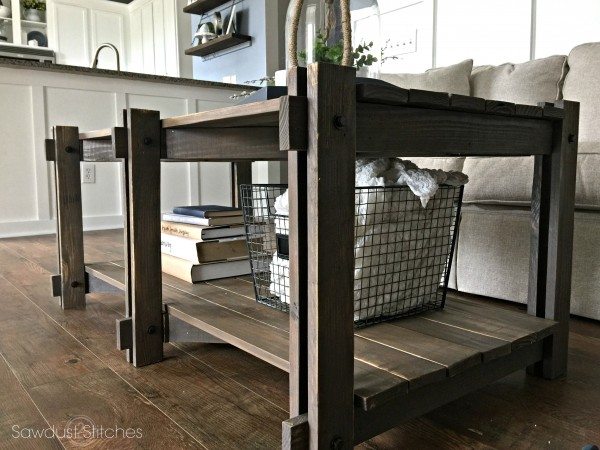
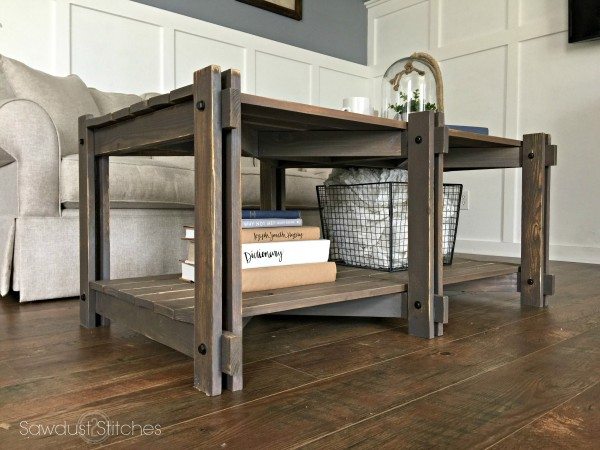
Step 2. Assemble Legs
Sandwich the 28″ horizontal supports in-between the 21″ legs. Use the diagram below to reference the correct spacing. Use wood glue to secure and reinforce with 1 1/2″ finish nails. Repeat, and repeat. (You will need three of these.)

Step 3. Assemble “X” Supports
Assembling these are much easier than they look. Use wood glue and and finish nails to secure all boards. When attaching the angle cut boards, first add glue, and then “toenail” it in place. (Essentially nail it at an angle.) Then repeat, and repeat again, and again… You are gonna need four of these suckers. 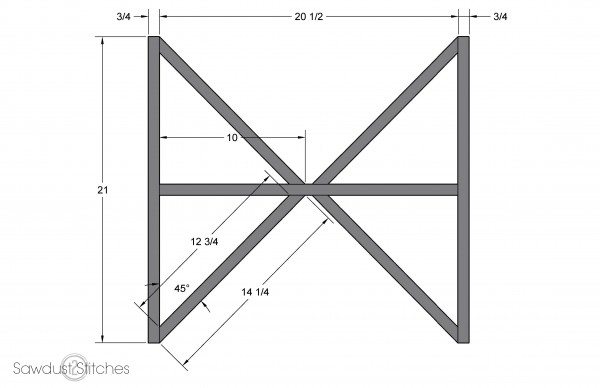
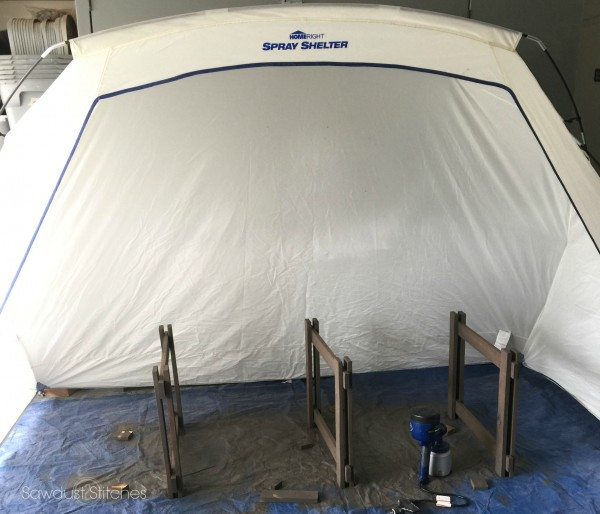
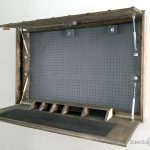
Step 4. Spray Stain
Time to add the finish. For this project I knew I wanted it to be stained, but really did not feel like getting in the all nooks and crannies of this build… and let’s face it, I am a touch impatient. So I pulled out my trusty sprayer, and went to town. (Yes, you can use stain in a sprayer!) I just popped up my HomeRight Spray Shelter and was good to go. Honestly, if you are at all a do-it-yourselfer this spray tent is ideal. It is big enough to fit large projects but small enough to fit in a garage!

Step 5. Assemble Table
When adding the “X” supports to the legs, I first applied glue, and then used 1 1/4″ wood screws ensure the “X” supports are securely attached to the legs.
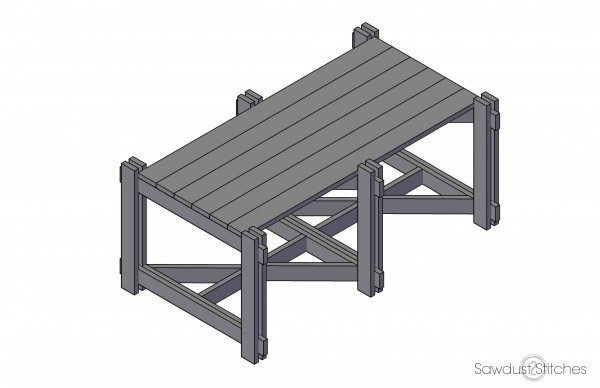
Step 6. Add Planks
Last step of the build is to add the planks. There will be a total of (6) boards on top , and (6) boards on the bottom. Secure with wood glue, and reinforce with 1 1/2″ finish nails.
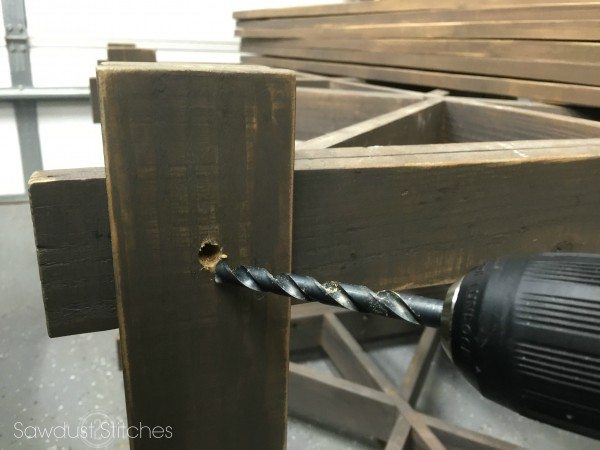
Step 7. Add Hardware (optional)
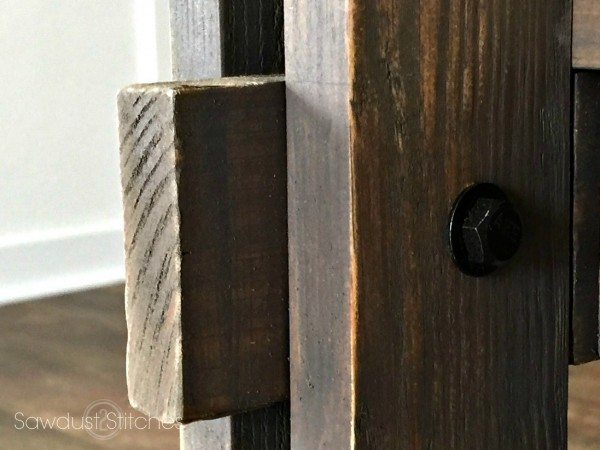
If you would like to add a little more character to this table, then try adding some hardware! I used 3/4″ hex bolts, and added washers to bulk up their appearance. I simply drilled 5/16″ holes through the center of the posts.
Before adding the bolts I decided to use spray paint to customize the color.(Pictured: Rust-oleum Soft Iron) When inserting the bolts, I added a small dab of glue to the inside of the drilled hole. ( I wanted to make sure that the bolts didn’t mysteriously go missing.)
Ta-da. There you have it. A gorgeous piece that is completely functional and totally unique! Stay tuned for coordinating pieces! 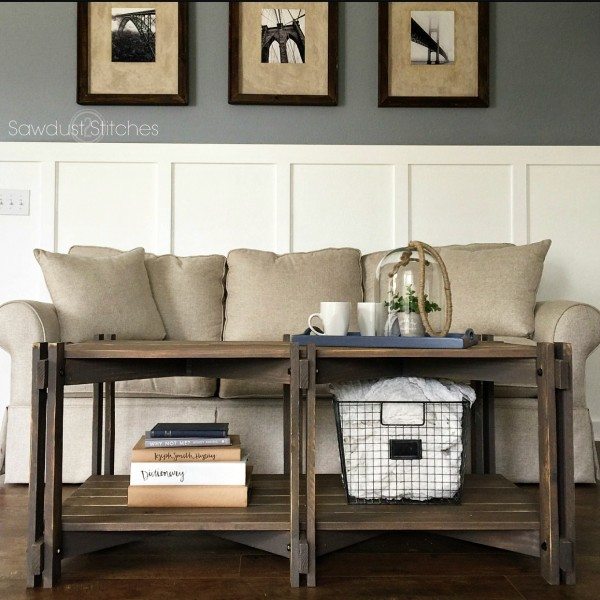
For sneak peeks of my upcoming projects be sure to follow me on Facebook and Instagram. You can also, follow me on Pinterest to get tons of projects plans from all around the web!
 Take Luck,
Corey
a Rafflecopter giveaway
 Copyright secured by Digiprove © 2016


Oh boy, oh boy do I love that coffee table. I love rustic and this is just perfect.
Y did an incredible job.
Good Luck EVERYONE
Awesome table! Just…awesome.
I love this table! Gorgeous! I would love winning these prizes too, up my furniture game!
You make me think I might just be able to do this myself 😉
Whatever is the cheapest! 🙂 It depends on the project, because I am usually trying to create on a small budget for the readers sake I try and use cheaper materials. Pine is usually my go to.
This looks great!
Quick question, should I have (20) of the 1″x3″ @ 21″? Or are the X supports attached directly to the single frame?
Thanks! Can’t wait to start on this project!
YES! I am so sorry, I had a typo! Thanks so much.
I love it! What is the stain color?